Table of Contents
Advertisement
Advertisement
Table of Contents

Related Manuals for Toro Flex-Force Power System 39901


Summary of Contents for Toro Flex-Force Power System 39901
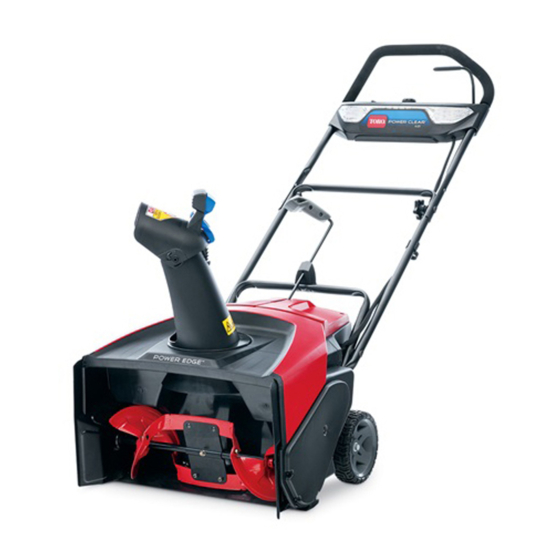
- Page 1 Form No. 3414-279 Rev E Flex-Force Power System ™ MAX Snowthrower Model No. 39901—Serial No. 319000001 and Up Model No. 39901T—Serial No. 319000001 and Up Model No. 39902—Serial No. 319000001 and Up *3414-279* E Register at www.Toro.com. Original Instructions (EN)
- Page 2 Whenever you need service, genuine Toro parts, or additional information, contact an Authorized Service Dealer or Toro Customer Service and have the model and serial numbers of your product ready. Figure 1 identifies the location of the model and serial numbers on the product.
- Page 3 Do not use non-rechargeable batteries. I. Training Charge the battery pack with only the battery charger specified by Toro. A charger suitable for The operator of the machine is responsible for 1 type of battery pack may create a risk of fire any accidents or hazards occurring to others or when used with another battery pack.
- Page 4 Do not heat the tool to remove the clog. battery pack above 68°C (154°F) or incinerate it. Replace the battery pack with a genuine Toro Stop the machine and remove the electric-start battery pack only; using another type of battery button before loading the machine for hauling.
-
Page 5: Safety And Instructional Decals
Safety and Instructional Decals Safety decals and instructions are easily visible to the operator and are located near any area of potential danger. Replace any decal that is damaged or missing. decal137-2257 137-2257 1. Warning—read the Operator’s Manual. 3. Thrown object hazard—keep bystanders away. 2. - Page 6 decal137-9456 137-9456 decal138-6697 138-6697 1. Read the Operator’s 3. Do not expose to rain. Manual. 2. Keep away from open fire or flames. decal114-9034 114-9034 decal137-9455 137-9455 1. Read the Operator’s 3. Do not expose to rain. Manual. decal114-9035 114-9035 2.
- Page 7 Setup Loose Parts Use the chart below to verify that all parts have been shipped. Procedure Description Qty. – No parts required Mount the battery charger (optional). – No parts required Unfold the handle. Chute deflector Install the chute deflector. Chute-control rod Install the chute-control rod.
-
Page 8: Unfolding The Handle
Move the lower handle into place and install the lower handle knobs as shown in Figure Note: You may use a wrench on the hex on the outside of the knob to tighten the knob. Unfolding the Handle Important: Tighten the knobs until the handlebar touches the side plate with no gap. - Page 9 Installing the Chute Deflector Parts needed for this procedure: Chute deflector Procedure g316999 Figure 6...
-
Page 10: Installing The Chute-Control Rod
Product Overview Installing the Chute-Control Parts needed for this procedure: Chute-control rod Procedure Ensure that the chute is facing forward (Figure With the handle facing forward, install the chute-control rod into the guide and push it down until it snaps into place (Figure g318456 Figure 8... -
Page 11: Operation
Starting the Machine Operation Ensure that the battery pack is installed in the machine; refer to Installing the Battery Pack Installing the Battery Pack (page 11). Make sure that the vents on the battery are clear Insert the electric-start button into the electric of any dust and debris. -
Page 12: Charging The Battery Pack
Charging the Battery Pack Important: The battery pack is not fully charged when you purchase it. Before using the machine for the first time, place the battery pack in the charger and charge it until the LED display indicates the battery pack is fully charged. Read all safety precautions. -
Page 13: Adjusting The Discharge Chute And Chute Deflector
Adjusting the Discharge Chute and Chute Deflector To adjust the discharge chute, move the handle on the chute-control rod in the direction that you wish to direct the snow stream. To adjust the chute deflector (and therefore the height of the snow stream), squeeze the trigger and raise or lower the chute deflector (Figure 15). -
Page 14: Clearing A Clogged Discharge Chute
Clearing a Clogged Operating Tips Discharge Chute WARNING The rotor can throw stones, toys, and other WARNING foreign objects and cause serious personal Contacting a rotating rotor with your hands injury to you or bystanders. inside the discharge chute could cause •... -
Page 15: Maintenance
Call2Recycle seal, please contact your local municipality for more information on how to responsibly recycle the battery. If you are located outside of the US and Canada, please contact your authorized Toro distributor. g248009 Figure 16... -
Page 16: Troubleshooting
Troubleshooting Perform only the steps described in these instructions. All further inspection, maintenance, and repair work must be performed by an authorized service center or a similarly qualified specialist if you cannot solve the problem yourself. Problem Possible Cause Corrective Action The machine does not start. - Page 17 Notes:...
- Page 18 Notes:...
- Page 19 While the exposure from Toro products may be negligible or well within the “no significant risk” range, out of an abundance of caution, Toro has elected to provide the Prop 65 warnings. Moreover, if Toro does not provide these warnings, it could be sued by the State of California or by private parties seeking to enforce Prop 65 and subject to substantial penalties.
Need help?
Do you have a question about the Flex-Force Power System 39901 and is the answer not in the manual?
Questions and answers