Huawei SUN2000L User Manual
Hide thumbs
Also See for SUN2000L:
- User manual (151 pages) ,
- User manual (99 pages) ,
- User manual (135 pages)

Related Manuals for Huawei SUN2000L


Summary of Contents for Huawei SUN2000L
- Page 1 SUN2000L-(2KTL-5KTL) User Manual Issue Date 2020-03-19 HUAWEI TECHNOLOGIES CO., LTD.
- Page 2 Notice The purchased products, services and features are stipulated by the contract made between Huawei and the customer. All or part of the products, services and features described in this document may not be within the purchase scope or the usage scope. Unless otherwise specified in the contract, all statements, information, and recommendations in this document are provided "AS IS"...
-
Page 3: About This Document
This document describes the SUN2000L-(2KTL-5KTL) in terms of its installation, electrical connections, commissioning, maintenance, and troubleshooting. SUN2000L-(2KTL-5KTL) is abbreviated as SUN2000L. Before installing and operating the SUN2000L, ensure that you are familiar with the features, functions, and safety precautions provided in this document. - Page 4 Smart Power Sensor that uses the DLT645 communication protocol is unavailable. Issue 03 (2018-03-28) Upgraded the FusionHome app to 2.1.11.217. Issue 02 (2017-12-12) Upgraded the FusionHome app to 2.1.11.201. Issue 01 (2017-09-27) This issue is used for first office application (FOA). Issue 06 (2020-03-19) Copyright © Huawei Technologies Co., Ltd.
-
Page 5: Table Of Contents
4.4 Installing the Mounting Bracket ..........................24 4.4.1 Wall-Mounted Installation ............................25 4.4.2 Support-mounted Installation ..........................27 4.5 Installing the SUN2000L ............................29 4.6 Installing the WLAN Antenna ............................ 33 5 Electrical Connections ........................ 34 5.1 Preparing Cables ................................. 34 5.2 Installing the PE Cable ............................... - Page 6 6.4 Powering Off the System ............................61 7 System Maintenance........................62 7.1 Routine Maintenance ..............................62 7.2 Troubleshooting ................................63 8 Handling the SUN2000L ......................70 8.1 Removing the SUN2000L ............................70 8.2 Packing the SUN2000L .............................. 70 8.3 Disposing of the SUN2000L............................70 9 Technical Specifications ......................
-
Page 7: Safety Information
The "NOTICE", "CAUTION", "WARNING", and "DANGER" statements in this document do not cover all the safety instructions. They are only supplements to the safety instructions. Huawei will not be liable for any consequence caused by the violation of general safety requirements or design, production, and usage safety standards. -
Page 8: Personnel Requirements
Do not touch the energized equipment, as the enclosure is hot. 1.2 Personnel Requirements Personnel who plan to install or maintain Huawei equipment must receive thorough training, understand all necessary safety precautions, and be able to correctly perform all operations. -
Page 9: Electrical Safety
Before making electrical connections, switch off the disconnector on the upstream device to cut off the power supply if people may contact energized components. Issue 06 (2020-03-19) Copyright © Huawei Technologies Co., Ltd. -
Page 10: Installation Environment Requirements
Ensure that the ladder is securely positioned. The recommended angle for a ladder against the floor is 75 degrees, as shown in the following figure. An angle rule can be used to measure the angle. Issue 06 (2020-03-19) Copyright © Huawei Technologies Co., Ltd. -
Page 11: Commissioning
When the equipment is powered on for the first time, ensure that professional personnel set parameters correctly. Incorrect settings may result in inconsistency with local certification and affect the normal operation of the equipment. Issue 06 (2020-03-19) Copyright © Huawei Technologies Co., Ltd. -
Page 12: Maintenance And Replacement
If the equipment is faulty, contact your dealer. The equipment can be powered on only after all faults are rectified. Failing to do so may escalate faults or damage the equipment. Issue 06 (2020-03-19) Copyright © Huawei Technologies Co., Ltd. -
Page 13: Product Overview
Product Overview 2.1 Product Introduction Function The SUN2000L is a single-phase grid-tied PV string inverter that converts the DC power generated by PV strings into AC power and feeds the electricity into the power grid. Models This document involves the following product models: ... - Page 14 (K) Alarm beacon (L) Residential load Supported Power Grid The power grids supported by the SUN2000L include TN-S, TN-C, TN-C-S, and TT. In a TT power grid, the N-PE voltage should be lower than 30 V. Issue 06 (2020-03-19) Copyright © Huawei Technologies Co., Ltd.
-
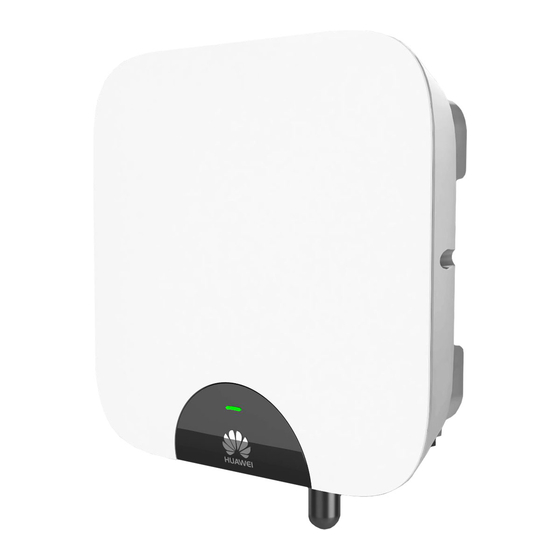
Page 15: Appearance
SUN2000L-(2KTL-5KTL) User Manual 2 Product Overview Figure 2-3 Power grid types 2.2 Appearance Front View Figure 2-4 Front view Issue 06 (2020-03-19) Copyright © Huawei Technologies Co., Ltd. - Page 16 SUN2000L is in Low Power Consumption mode. Low Power Consumption mode means that the monitoring system of the SUN2000L is hibernating. The SUN2000L is Steady red Steady red faulty. Communicat LED 3 Issue 06 (2020-03-19) Copyright © Huawei Technologies Co., Ltd.
- Page 17 Blinking green at long intervals (on for 1s and then The mobile phone is off for 1s) connected to the SUN2000L. No communication Rear View Figure 2-5 Rear view (1) Mounting plate (2) Mounting bracket (3) Heat sink Issue 06 (2020-03-19) Copyright © Huawei Technologies Co., Ltd.
- Page 18 Figure 2-6 Bottom view Component Silk Screen DC switch DC SWITCH DC input terminal PV+/PV– Battery terminal BAT+/BAT– COM port AC output port Ventilation valve Antenna port Alarm port ALARM Ground point Issue 06 (2020-03-19) Copyright © Huawei Technologies Co., Ltd.
- Page 19 SUN2000L-(2KTL-5KTL) User Manual 2 Product Overview Dimensions Figure 2-7 Enclosure dimensions Figure 2-8 Mounting bracket dimensions Issue 06 (2020-03-19) Copyright © Huawei Technologies Co., Ltd.
-
Page 20: Label Descriptions
SUN2000L. Grounding Indicates the position for connecting the protective earthing (PE) cable. Operation warning Do not remove the connector or antenna when the SUN2000L is running. Issue 06 (2020-03-19) Copyright © Huawei Technologies Co., Ltd. - Page 21 QR code for SUN2000L Scan the QR code to WLAN connection connect to Huawei SUN2000L WLAN network (Android) or obtain the WLAN password (iOS). The labels are for reference only. Issue 06 (2020-03-19) Copyright © Huawei Technologies Co., Ltd.
-
Page 22: Working Principles
Surge protection is supported on both the DC and AC sides. The SUN2000L has a reserved battery port to connect to batteries, which are used to store the surplus power produced by PV strings and not required by residential loads. The power stored in batteries can be exported to the power grid based on the load condition to meet peak and valley power consumption requirements and maximize the benefits. - Page 23 SUN2000L-(2KTL-5KTL) User Manual 2 Product Overview Figure 2-10 Conceptual diagram Working Modes Figure 2-11 Working modes Issue 06 (2020-03-19) Copyright © Huawei Technologies Co., Ltd.
- Page 24 Operating In Operating mode: The SUN2000L converts DC power from PV strings into AC power and feeds the energy to the power grid. The SUN2000L tracks the maximum power point to maximize the PV string output.
-
Page 25: Storage
Keep the storage temperature at –40° C to +70° C and the humidity at 5%–95% RH. The SUN2000L should be stored in a clean and dry place and be protected from dust and water vapor corrosion. A maximum of 10 SUN2000Ls can be stacked. To avoid personal injury or device damage, stack SUN2000Ls with caution to prevent them from falling over. -
Page 26: System Installation
Before unpacking the SUN2000L, check the outer packing materials for damage, such as holes and cracks, and check the SUN2000L model. If any damage is found or the SUN2000L model is not what you requested, do not unpack the product and contact your supplier as soon as possible. -
Page 27: Tools And Instruments
Rubber mallet Utility knife Cable cutter Crimping tool (model: Open-end wrench (model: Cable tie UTXTC0005/H4TC0003; H4TW0001; manufacturer: manufacturer: Amphenol) Amphenol) Vacuum cleaner Multimeter (DC voltage Marker measurement range ≥ 600 V DC) Issue 06 (2020-03-19) Copyright © Huawei Technologies Co., Ltd. -
Page 28: Determining The Installation Position
The SUN2000L is protected to IP65 and can be installed indoors or outdoors. Do not install the SUN2000L in a place where a person can easily touch it because its enclosure and heat sinks are extremely hot during operation. - Page 29 The SUN2000L must be installed in a well-ventilated environment to ensure good heat dissipation. When installed under direct sunlight, the power of the SUN2000L may be derated due to additional temperature rise. Install the SUN2000L in a sheltered place or install an awning over the SUN2000L.
-
Page 30: Installing The Mounting Bracket
SUN2000L-(2KTL-5KTL) User Manual 4 System Installation Installation Clearance Requirements Reserve enough clearance around the SUN2000L to ensure sufficient space for installation and heat dissipation. Figure 4-2 Installation clearance requirements 4.4 Installing the Mounting Bracket Fixing holes can be used in three combinations. Select a hole combination based on site requirements. -
Page 31: Wall-Mounted Installation
Step 1 Determine the positions for drilling holes using the mounting bracket. Level the positions of mounting holes using a bubble or digital level, and mark the positions with a marker. Figure 4-5 Determining hole positions Step 2 Install expansion bolts. Issue 06 (2020-03-19) Copyright © Huawei Technologies Co., Ltd. - Page 32 4 System Installation Avoid drilling holes in the utility pipes and/or cables attached to back of the wall. If the length or number of M8x80 expansion bolts supplied with the SUN2000L is not enough, prepare M8 stainless steel expansion anchor bolts.
-
Page 33: Support-Mounted Installation
Step 1 Determine the positions for drilling holes using the mounting bracket. Level the positions of mounting holes using a bubble or digital level, and mark the positions with a marker. Issue 06 (2020-03-19) Copyright © Huawei Technologies Co., Ltd. - Page 34 Step 2 Drill holes using a hammer drill. You are advised to apply anti-rust paint on the hole positions for protection. Figure 4-10 Drilling holes Step 3 Secure the mounting bracket. Issue 06 (2020-03-19) Copyright © Huawei Technologies Co., Ltd.
-
Page 35: Installing The Sun2000L
----End 4.5 Installing the SUN2000L Procedure Step 1 Hold the handles on both sides of the SUN2000L, lift the SUN2000L from the packing case, and move it to the installation position. Issue 06 (2020-03-19) Copyright © Huawei Technologies Co., Ltd. - Page 36 Step 2 Install the SUN2000L on the mounting bracket and align the SUN2000L enclosure with the mounting bracket. If the bottom of the mounting plate does not snap into place, push the SUN2000L from the front until the bottom of the mounting plate snaps into the mounting bracket.
- Page 37 SUN2000L-(2KTL-5KTL) User Manual 4 System Installation Figure 4-13 Mounting a SUN2000L Step 3 Tighten screw assemblies. Fixing holes can be used in three combinations. Select a hole combination based on site requirements. Combination A is preferred. Figure 4-14 Fixing holes...
- Page 38 Figure 4-15 Tightening screw assemblies Step 4 (Optional) Install an anti-theft lock. The function of an anti-theft lock is to secure the SUN2000L to the mounting bracket and protect it from being stolen. Use an anti-theft lock suitable for the lock hole diameter (Ф8 mm). The anti-theft lock is ...
-
Page 39: Installing The Wlan Antenna
Step 2 Remove the release paper of the double-sided tape and attach the washer to the enclosure. Step 3 Install the WLAN antenna. Ensure that the WLAN antenna is installed securely. Figure 4-17 Installing a WLAN antenna ----End Issue 06 (2020-03-19) Copyright © Huawei Technologies Co., Ltd. -
Page 40: Electrical Connections
(B) DC switch (C) SUN2000L (D) AC switch (E) Power distribution unit (F) Smart Power Sensor (G) Power meter (H) Power grid (I) Battery (J) Battery switch (K) Alarm beacon (L) Residential load Issue 06 (2020-03-19) Copyright © Huawei Technologies Co., Ltd. - Page 41 SUN2000L-(2KTL-5KTL) User Manual 5 Electrical Connections Figure 5-2 SUN2000L cable connections (dashed boxes indicate optional components) Table 5-1 Component description Component Description Source A PV string is composed Purchased by the PV string of the PV modules customer connected in series and works with an optimizer.
- Page 42 16 A (SUN2000L-2KTL) 25 A (SUN2000L-3KTL and SUN2000L-3.68KTL) 32 A (SUN2000L-4KTL, SUN2000L-4.6KTL, and SUN2000L-5KTL) Note a: Only the DDSU666-H Smart Sower Sensor (provided by Huawei) can be used in Spain. Issue 06 (2020-03-19) Copyright © Huawei Technologies Co., Ltd.
- Page 43 5 Electrical Connections The SUN2000L is embedded with a residual current monitoring unit (RCMU). Only a single-phase circuit breaker or a similar AC load breaking device is required to function as the external AC switch (shown by G in...
-
Page 44: Installing The Pe Cable
5.2 Installing the PE Cable Context Do not connect the neutral wire to the enclosure as a PE cable. Otherwise, electric shocks could occur. Procedure Step 1 Crimp the OT terminal. Issue 06 (2020-03-19) Copyright © Huawei Technologies Co., Ltd. - Page 45 Figure 5-3 Crimping an OT terminal (A) Core wire (B) Insulation layer (C) Heat shrink tubing (D) Hydraulic pliers (E) Heat gun Step 2 Connect the PE cable. Ensure that the PE cable is connected securely. Issue 06 (2020-03-19) Copyright © Huawei Technologies Co., Ltd.
-
Page 46: Installing The Ac Output Power Cable
5.3 Installing the AC Output Power Cable Prerequisites An AC switch must be installed on the AC side of the SUN2000L to ensure that the SUN2000L can be safely disconnected from the power grid. Do not connect any load between the SUN2000L and the AC switch. - Page 47 User Manual 5 Electrical Connections According to IEC62109, to ensure the safe operation of the SUN2000L in the case of PE cable damage or disconnection, connect the SUN2000L PE cable according to the requirements described 5.2 Installing the PE Cable and ensure that the SUN2000L PE cable meets at least one of the following requirements before disabling the grounding detection function.
- Page 48 For the core wire installation method and stripped length, see the instructions on the side of the plug insert. Figure 5-7 Stripped length Step 2 Connect the AC connector to the AC output port. Issue 06 (2020-03-19) Copyright © Huawei Technologies Co., Ltd.
- Page 49 Figure 5-9 Cable route ----End Follow-up Procedure Before removing the AC connector, ensure that the DC switch at the bottom of the SUN2000L and all the switches connecting to the SUN2000L are OFF. Issue 06 (2020-03-19) Copyright © Huawei Technologies Co., Ltd.
-
Page 50: Installing The Dc Input Power Cable
Before connecting the DC input power cable, ensure that the DC voltage is within the safe range (lower than 60 V DC) and that the DC switch on the SUN2000L is OFF. Failing to do so may result in electric shocks. - Page 51 During the installation of PV strings and SUN2000L, the positive or negative terminals of PV strings may be grounded if power cables are not properly installed or routed. In this case, an AC or DC short circuit may occur and damage the SUN2000L. This damage is not covered under any warranty.
- Page 52 Insert the crimped metal contacts of the positive and negative power cables into the corresponding positive and negative connectors. Then pull back the DC input power cables to check that they are connected securely. Figure 5-12 Assembling DC connectors (using metal cold forming contacts) Issue 06 (2020-03-19) Copyright © Huawei Technologies Co., Ltd.
- Page 53 (E) Negative connector (F) H4TW0001 open-end wrench Ensure that the core wires can be seen through the hole on the terminal both before and after the positive and negative metal terminals are crimped. Issue 06 (2020-03-19) Copyright © Huawei Technologies Co., Ltd.
- Page 54 Figure 5-14 Observing core wires through the hole on the terminal Step 2 Ensure that the DC input voltage of each PV string is within the specified range of the SUN2000L using a multimeter and check that the polarities of DC input power cables are correct.
- Page 55 Follow-up Procedure Before removing the positive and negative connectors, ensure that the DC switch is OFF. To remove the positive and negative connectors from the SUN2000L, insert an open-end wrench into the notch and press the wrench with an appropriate force.
-
Page 56: Installing Battery Cables
If no battery connects to the SUN2000L, do not remove the watertight cap from the battery terminal. Otherwise, the SUN2000L will not comply with its Ingress Protection Rating. If a battery connects to the SUN2000L, set aside the watertight cap. Reinstall the watertight cap immediately after removing the connector. - Page 57 In this case, an AC or DC short circuit may occur and damage the SUN2000L. This damage is not covered under any warranty or service agreement.
-
Page 58: Installing The Signal Cable
When laying out signal cables, separate them from power cables to avoid strong signal interference sources. Figure 5-19 Signal Cable Ports Signal cable ports are classified into COM ports and ALARM ports. Issue 06 (2020-03-19) Copyright © Huawei Technologies Co., Ltd. - Page 59 RS485 signal port and enable signal port on a 485A2 RS485A, RS485 differential battery. signal+ EN– Enable signal– Enable signal+ Connects to the shield layer Shielding ground of the cable. Issue 06 (2020-03-19) Copyright © Huawei Technologies Co., Ltd.
- Page 60 Residual Current Sensor alarm. The ALARM port reserves an RS485/12 V signal port. The alarm beacon should be installed within 2 meters away from the SUN2000L. The shield layer of the device signal cable connected to the ALARM port and the COM port is also advised to be grounded.
- Page 61 If a connector needs to connect to two signal cables, ensure that the cables have the same outer diameter. Figure 5-22 Assembling a signal connector (COM port) Issue 06 (2020-03-19) Copyright © Huawei Technologies Co., Ltd.
- Page 62 Do not confuse the connector to the COM port with that of ALARM port. Ensure that the signal connector is connected securely. Figure 5-24 Securing a connector (COM port) Issue 06 (2020-03-19) Copyright © Huawei Technologies Co., Ltd.
- Page 63 SUN2000L-(2KTL-5KTL) User Manual 5 Electrical Connections Figure 5-25 Securing a connector (ALARM port) ----End Issue 06 (2020-03-19) Copyright © Huawei Technologies Co., Ltd.
-
Page 64: System Commissioning
Grounding securely, and reliably. Switch status The DC switch and all the switches connecting to the SUN2000L are OFF. The AC output power cable, DC input power Cable connections cable, battery cable, and signal cable are connected correctly, securely, and reliably. -
Page 65: Powering On The System
AC voltage on the power grid side of the AC switch is within the specified range. If the DC is on and the AC is off, the SUN2000L reports a Grid Loss alarm. The SUN2000L starts normally only after the fault is rectified. -
Page 66: Commissioning
SUN2000L. No communication ----End 6.3 Commissioning For details, please refer to the FusionSolar App and SUN2000 App User Manual, you can download it by scanning the QR code below. Issue 06 (2020-03-19) Copyright © Huawei Technologies Co., Ltd. -
Page 67: Powering Off The System
Step 3 Turn off the DC switch at the bottom of the SUN2000L. Step 4 Turn off the DC switch between the PV string and the SUN2000L if there is any. Step 5 If a battery connects to the battery port, turn off the battery switch. -
Page 68: System Maintenance
System Maintenance 7.1 Routine Maintenance To ensure that the SUN2000L can operate properly in the long term, you are advised to perform routine maintenance on it as described in this chapter. Before cleaning the system, connecting cables, and maintaining the grounding reliability, power off the system (see 6.4 Powering Off the System... -
Page 69: Troubleshooting
Major: The SUN2000L enters Shutdown mode and disconnects from the power grid to stop generating power after a fault occurs. Minor: Some components are faulty but the SUN2000L can still connect to the power grid and generate power. ... - Page 70 Check whether the PV string is Reversed connected. reversely connected to the SUN2000L. If so, wait until the solar irradiance declines at night and the PV string current reduces to below 0.5 A. Then, turn off the DC switch and correct the PV string polarity.
- Page 71 If not, contact the local power operator. If so, modify the grid overfrequency protection threshold with the consent of the local power operator. Issue 06 (2020-03-19) Copyright © Huawei Technologies Co., Ltd.
- Page 72 2. If the alarm occurs frequently, check whether the grid frequency is within the acceptable range. If not, contact the local power operator. 1. The SUN2000L monitors its 2039 Output Major Cause ID = 1 external working conditions in Overcurrent The grid voltage drops real time.
- Page 73 PE. poor insulation points. The PV string is installed 2. Check that the SUN2000L PE in a moist environment cable is correctly connected. for a long time. 3. If you confirm that the...
- Page 74 Smart Power Sensor are the same as the actual configurations. 3. Check that the Smart Power Sensor is powered on and the RS485 communications cable is correctly connected. Issue 06 (2020-03-19) Copyright © Huawei Technologies Co., Ltd.
- Page 75 2. Replace the peripheral, and then start a self-check to check that the port functions properly. Contact your supplier or Huawei technical support if all failure analysis procedures listed above are completed and the fault still exists. Issue 06 (2020-03-19)
-
Page 76: Handling The Sun2000L
Step 5 Remove the mounting bracket. ----End 8.2 Packing the SUN2000L If the original packaging is available, put the SUN2000L inside it and then seal it using adhesive tape. If the original packaging is not available, put the SUN2000L inside a suitable cardboard box and seal it properly. -
Page 77: Technical Specifications
L-2KTL L-3KTL L-3.68KT L-4KTL L-4.6KTL L-5KTL Maximum 600 V (No battery connects to the SUN2000L.) input 495 V (An LG-RESU battery connects to the SUN2000L.) voltage Maximum 11 A input current (per MPPT) Maximum 15 A short-circu it current... - Page 78 PV array Operating 90–500 V (No battery connects to the SUN2000L.) voltage 90–495 V (An LG-RESU battery connects to the SUN2000L.) range Start 120–600 V (No battery connects to the SUN2000L.) voltage 120–495 V (An LG-RESU battery connects to the SUN2000L.)
- Page 79 (rated power) Note a: The maximum output power of the SUN2000L-5KTL is 4990 W if the Australian AS4777 grid code is selected. Note b: The maximum apparent power of the SUN2000L-4.6KTL is 4600 VA if the Germany VDE-AR-N 4105 grid code is selected. The maximum apparent power of the SUN2000L-4.6KTL and SUN2000L-5KTL is 4990 VA if the Australian AS4777 grid...
- Page 80 231mm (including the package) Weight Net weight: 11.6 kg (including the mounting plate) Including the package: 13.8kg –30° C to +60° C (derated above +45° C) Operating temperature Humidity 0%–100% RH Issue 06 (2020-03-19) Copyright © Huawei Technologies Co., Ltd.
- Page 81 SUN2000L-(2KTL-5KTL) User Manual 9 Technical Specifications Item SUN20 SUN2000 SUN2000 SUN2000 SUN2000 SUN2000 00L-2K L-3KTL L-3.68KT L-4KTL L-4.6KTL L-5KTL Operating 0–4000 m (derated above 2000 m) altitude Issue 06 (2020-03-19) Copyright © Huawei Technologies Co., Ltd.
-
Page 82: A Grid Codes
50 Hz power grid (I < 16 CEI0-21 Italy power grid 230 V 50 Hz EN50438-NL Netherlands power 230 V 50 Hz grid AS4777 Australia power 230 V 50 Hz grid Issue 06 (2020-03-19) Copyright © Huawei Technologies Co., Ltd. - Page 83 230 V 50 Hz EN50438-NL Netherlands power 230 V 50 Hz grid AS4777 Australia power 230 V 50 Hz grid IEC61727 IEC61727 230 V 50 Hz low-voltage power grid (50 Hz) Issue 06 (2020-03-19) Copyright © Huawei Technologies Co., Ltd.
- Page 84 230 V 50 Hz EN50438-NL Netherlands power 230 V 50 Hz grid AS4777 Australia power 230 V 50 Hz grid IEC61727 IEC61727 230 V 50 Hz low-voltage power grid (50 Hz) Issue 06 (2020-03-19) Copyright © Huawei Technologies Co., Ltd.
- Page 85 50 Hz grid AS4777 Australia power 230 V 50 Hz grid IEC61727 IEC61727 230 V 50 Hz low-voltage power grid (50 Hz) EN50438-TR Turkey 230 V 50 Hz low-voltage power grid Issue 06 (2020-03-19) Copyright © Huawei Technologies Co., Ltd.
- Page 86 IEC61727 IEC61727 230 V 50 Hz low-voltage power grid (50 Hz) EN50438-TR Turkey 230 V 50 Hz low-voltage power grid IEC61727-60Hz IEC61727 230 V 60 Hz low-voltage power grid (60 Hz) Issue 06 (2020-03-19) Copyright © Huawei Technologies Co., Ltd.
- Page 87 SUN2000L-(2KTL-5KTL) User Manual A Grid Codes National/Regional Description Grid Voltage Grid Grid Code Frequency CLC/TS50549_IE Ireland power grid 230 V 50 Hz Issue 06 (2020-03-19) Copyright © Huawei Technologies Co., Ltd.
-
Page 88: B Acronyms And Abbreviations
B Acronyms and Abbreviations Acronyms and Abbreviations alternating current direct current identifier light emitting diode LVRT low voltage ride-through Media Access Control maximum power point MPPT tracking personal computer protective earthing photovoltaic Issue 06 (2020-03-19) Copyright © Huawei Technologies Co., Ltd. - Page 89 RCMU unit relative humidity serial number total distortion of the input THDi current waveform waste electrical and WEEE electronic equipment WLAN wireless local area network Issue 06 (2020-03-19) Copyright © Huawei Technologies Co., Ltd.