
Related Manuals for Huawei SUN2000-63KTL-JPH0


Summary of Contents for Huawei SUN2000-63KTL-JPH0
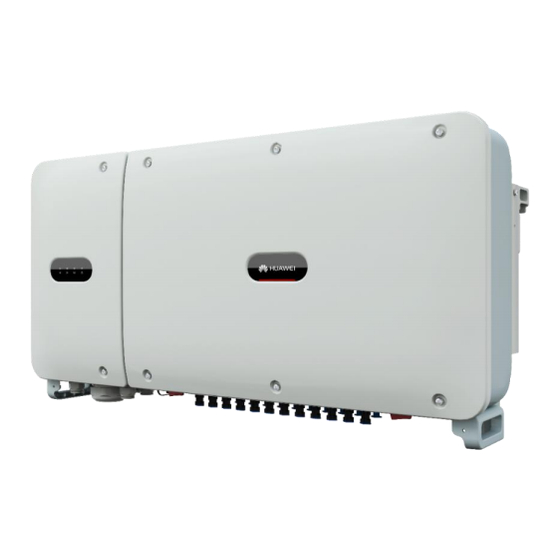
- Page 1 SUN2000-63KTL-JPH0 Quick Guide Issue: 06 Part Number: 31509805 Date: 2023-12-20 HUAWEI TECHNOLOGIES CO., LTD.
- Page 2 • Before installing the device, read the user manual carefully to get familiar with product information and safety precautions. Huawei shall not be liable for any consequences caused by the violation of the storage, transportation, installation, and operation regulations specified in this document and the user manual.
-
Page 3: Installation Requirements
Installation Requirements Angle Space ≥ 300 mm ≤ 15° ≥ 300 mm ≥ 200 mm ≥ 300 mm IS07H00036 For ease of installing the SUN2000 on the mounting bracket, connecting cables to the bottom of the SUN2000, and maintaining the SUN2000 in future, it is recommended that the bottom clearance be greater than or equal to 300 mm and less than or equal to 730 mm. -
Page 4: Installing The Sun2000
Installing the SUN2000 • The M12x40 bolt assemblies are delivered with the SUN2000. If the bolt assembly length does not meet the installation requirements, prepare M12 bolt assemblies by yourself and use them together with the delivered M12 nuts. Position for bundling •... -
Page 5: Electrical Connections
Electrical Connections Connect cables in accordance with the local installation laws and regulations. Preparing Cables Cable Type Conductor Cross- Outer Sectional Area Diameter Range (Recommended) PE cable Outdoor copper cable and M8 OT/DT ≥ 16 mm terminals AC output • If you connect a PE cable to the PE 24–57 •... -
Page 6: Opening The Maintenance Compartment Door
Installing the PE Cable (on the Enclosure) Reserved PE point • It is recommended that the PE cable be connected to a nearby PE point. Connect the PE points of all SUN2000s in the same PV array to ensure equipotential connections to PE cables. -
Page 7: Installing The Ac Output Power Cable
Installing the AC Output Power Cable • This document introduces how to install the four-core AC output power cable, which can be a reference for installing the three-core cable. The three-core cable does not need a PE cable installed in the maintenance compartment. •... - Page 8 • Ensure that the PV module output is well insulated to ground. • Before inserting the positive and negative connectors respectively into the positive and negative DC input terminals of the SUN2000, ensure that the DC voltage does not exceed 1500 V DC using a multimeter and that the cable polarities are correct.
-
Page 9: Installing The Rs485 Communications Cable
Installing the RS485 Communications Cable 1. When routing the communications cable, separate it from power cables and connect the shield layer to the ground point to prevent communication from being affected. 2. The RS485 communications cable can connect to a terminal block or an RJ45 network port. Select one in actual installation. - Page 10 Connecting to an RJ45 Network Port Definition Definition 1, 4 2, 5 RS485A, RS485 differential signal+ RS485B, RS485 differential signal– After the RS485 communications cable is installed, seal the cable gland.
-
Page 11: Closing The Maintenance Compartment Door
Closing the Maintenance Compartment Door 1. Install the cover and adjust the support bar. 2. Close the maintenance compartment door. If the screws on the enclosure door are lost, obtain the spare screws from the fitting bag tied at the enclosure bottom. Verifying Installation Acceptance Criteria The SUN2000 is installed correctly and securely. -
Page 12: Powering On The System
Powering On the System Before turning on the AC switch between the SUN2000 and the power grid, check that the AC voltage is within the specified range using a multimeter. 1. Turn on the AC switch between the SUN2000 and the power grid. 2. - Page 13 The app is named SUN2000. 2. Go to Huawei app store, search for SUN2000, and download the app installation package. You can also scan the QR code to download the Scan the QR installation package.
-
Page 14: Grid Codes
Function Menu • The screenshots in this document correspond to app version 3.2.00.013 (this app is available only on Android phones currently). • When the WLAN connection is used, the initial name of the WLAN hotspot is Adapter-WLAN module SN, and the initial password is Changeme. - Page 15 Huawei Technologies Co., Ltd. Huawei Industrial Base, Bantian, Longgang Shenzhen 518129 People's Republic of China www.huawei.com...