
Related Manuals for Greenwood Elite EL100


Summary of Contents for Greenwood Elite EL100
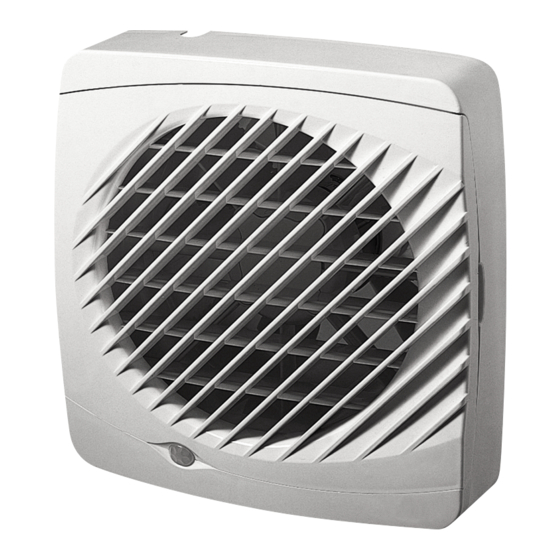
- Page 1 Elite EL100, EL100 SELV, EL150 Axial Fans Bathroom, Toilets, Utility Rooms and Kitchens Installation Instructions...
-
Page 2: Table Of Contents
Contents Page Installation Instructions Operation Window Mounting Wall Mounting Ceiling Mounting Wiring Details for Isolator Wiring Diagrams for EL100/EL150 Wiring Diagrams for EL100 SELV Sensor / Timer Adjustments To Clean or Service Fan SELV box for EL100 SELV... -
Page 3: Installation Instructions
Installation Instructions Read all instructions before commencing installations. 1.1.1 Warning: This appliance can be used by children aged from 8 years and above and persons with reduced physical, sensory or mental capabilities or lack of experience and knowledge if they have been given supervision or instruction concerning use of the appliance in a safe way and understand the hazards involved. -
Page 4: Operation
Operation The Elite range of fans are single and dual speed axial flow extract fans and single speed SELV 12V axial flow fans, designed to exceed Building Regulation requirements for bathroom, toilet, kitchen or utility room ventilation. Types of controls and operation as follows: 2.1.1 TYPE EL100, EL100 SELV, EL150 Operation by light switch, remote switch or remote sensor. -
Page 5: Window Mounting
Window Mounting EW100 / EW150 EL100 / EL100 SELV / EL150 2.2.1 For window mounting do not install fans in opening windows. Use the correct thickness of glass for the size of window (at least 4mm thick) if in doubt, contact a glazier. The components supplied are suitable for the installation of 2.2.2 fans in windows from 4mm single glaze to 28mm thick double-glazing. -
Page 6: Wall Mounting
Wall Mounting External Grille Ducting EL100 / EL100 SELV / EL150 Ø Ø EL100 Ø = 125mm EL100 Ø = 125mm EL150 Ø = 180mm EL150 Ø = 180mm EL100 SELV Ø = 125mm EL100 SELV Ø = 125mm Remove fascia grille using a coin. Make sure rubber cable grommet is fitted Refit front cover securely. -
Page 7: Ceiling Mounting
Ceiling Mounting (EL100 only) EL100 Flexible Ducting External Grille or irbrick EG1/R B 2.4.1 Cut an opening through the ceiling for the fan and electrical cable. 2.4.2 Feed cable through ceiling then through back face of rubber sealing grommet in fan back plate. -
Page 8: Wiring Details For Isolator
Wiring Details for Fan Isolator Only 25 mm 2–Wire Connection 25 mm 3–Wire Connection 35 mm EL100/EL150 EL100 SELV Tighten screws and close protective Put the wiring connector into its Refit front cover securely. cover. location, fix into place with screw and secure cable using the supplied cable clamp &... -
Page 9: Wiring Diagrams For El100/El150
Wiring Diagrams for EL100/EL150 Installation or disconnection must be carried out by a qualified Electrician 3 Amp Fuse and all wiring must conform to IEE Wiring or local regulations. Isolate electricity supply before External wiring for remote switch / light switch: starting work. -
Page 10: Wiring Diagrams For El100 Selv
Wiring Diagrams for EL100 SELV Installation or disconnection must be Mains To Fan 12 V carried out by a qualified Electrician and 230 V ~ 50 Hz all wiring must conform to IEE Wiring or local regulations. N SL 1 2 3 Isolate electricity supply before starting Fixing Hole... -
Page 11: Sensor / Timer Adjustments
Sensor / Timer Adjustments To be carried out by a suitably qualified/technically competent person. Remove fascia grille using a coin. Remove front cover to access the Model: T only respective timer or humidity sensor To adjust timer, rotate clockwise to controls. - Page 12 © Copyright Zehnder Group UK Ltd 2018. Zehnder Group UK Limited Watchmoor Point, Camberley, Surrey, GU15 3 D Customer Services: +44 (0) 1276 408404 Technical Services: +44 (0) 1276 408402 Email: info@greenwood.co.uk Web: www.greenwood.co.uk 05.10.155 Issue 6 January 2018...
Need help?
Do you have a question about the Elite EL100 and is the answer not in the manual?
Questions and answers