
Related Manuals for Canon imageRUNNER ADVANCE C350iF


Summary of Contents for Canon imageRUNNER ADVANCE C350iF
- Page 1 Starter Guide Read this guide rst. Please read this guide before operating this product. After you finish reading the guide, store it in a safe place for future reference.
- Page 2 The manuals for this machine are divided as follows. Please refer to them for detailed information. Guides with this symbol are printed manuals. Guides with this symbol are included on the accompanying CD-ROM. Guides with this symbol can be downloaded from the Canon website (http://www.canon.com/) and installed. Starter Guide (This Manual) Describes the precautions for using the machine.
- Page 3 How to Use the e-Manual Top Page of the e-Manual How to Install the e-Manual Windows 1. Insert the e-Manual CD-ROM in your computer. 2. Select the language for the e-Manual → click [Next]. If you select [Display], the e-Manual is displayed without installation.
-
Page 4: Table Of Contents
Contents Preface ................... 04 Chapter 3 Before Using This Machine How To Use This Manual ........... 04 Symbols Used in This Manual ......... 04 Keys and Buttons Used in This Manual ..... 04 Parts and Their Functions ..........30 Displays Used in This Manual ......... 05 External View ................ - Page 5 Utilisation au Canada ............82 Service Call Message ............63 Super G3 ..................83 Contacting Your Local Authorized Canon Dealer ... 64 Important Safety Instructions ........84 Setting the Limited Functions Mode from the Service Call Message Screen ........64 Installation ..................
-
Page 6: Preface
Preface Thank you for purchasing the Canon imageRUNNER ADVANCE C350iF/C250iF. Please read this manual thoroughly before operating the machine to familiarize yourself with its capabilities, and to make the most of its many functions. For information on the detailed settings for the functions described in this manual, see the e-Manual. -
Page 7: Displays Used In This Manual
Displays Used in This Manual Trademarks Screen shots of the touch panel display used in this "MEAP" is a trademark of CANON Inc., referring to an manual are those taken when the imageRUNNER "application platform" for Canon multifunction and ADVANCE C350iF has the following optional equipment single function printers. - Page 8 Adobe, the Adobe logo, PostScript, the PostScript All other trademarks are the property of their respective logo, and PostScript 3 are either registered trademarks owners. or trademarks of Adobe Systems Incorporated in the United States and/or other countries. Other product and company names herein may be the Linux is a registered trademark of Linus Torvalds.
-
Page 9: Installation Of The Machine
Installation of the Machine Installation Location and Handling ................................08 Installation Precautions ......................................08 Handling Precautions ......................................10 Installing the Machine ......................................11 1 Carrying the Machine to the Installation Site ............................11 2 Removing the Packing Materials ................................. 12 3 Checking Items Included with the Machine ............................ -
Page 10: Installation Location And Handling
Installation Location and Handling This section describes precautions for installation location and handling. We recommend that you read this section prior to using this machine. Installation Precautions Avoid poorly ventilated locations. This machine generates a slight amount of ozone etc. during normal use. Although sensitivity to ozone etc. -
Page 11: Select A Safe Power Supply
Depending on your locale or your telephone on the same floor of your building, contact your local connection, you may be unable to perform data authorized Canon dealer beforehand. Do not attempt to communication. In this case, contact your local move the machine yourself. -
Page 12: Handling Precautions
OFF, disconnect the power cord from the power outlet, and then call your local authorized Canon dealer. Using the machine in this state may cause a fire or electrical shock. Also, avoid placing objects around the power plug so that the machine can be disconnected whenever necessary. -
Page 13: Installing The Machine
Installing the Machine This section describes how to install the machine. Make sure that you read this section prior to installing the machine. CAUTION Carrying the Machine to the Make sure to grip the handles on the sides of the Installation Site machine firmly when lifting. -
Page 14: Removing The Packing Materials
3. Remove the packing materials attached to the paper Removing the Packing Materials drawer. When performing the following steps, make sure to remove all orange tape attached to the machine. Remove the items and packing materials from the paper drawer. 1. - Page 15 Remove the protective sheets attached to each part of the machine. Platen Glass Control Panel Upper Part of the Front Cover of the Main Unit If you own the optional Cassette Feeding Unit-AG1/Cassette Feeding Unit-AH1, carefully read "Attaching the Cassette Feeding Unit to the Machine"...
-
Page 16: Checking Items Included With The Machine
Checking Items Included with the Machine Check each item included with the machine against this list to ensure that nothing is missing. CD-ROM Paper Manual x 2 Power Cord Modular Cable Service Book Holder Envelope Feeder Attachment Glass Cleaning Sheet/Glass Cleaning Sheet Storage Box/ Double-Sided Tape Paper Size Labels... -
Page 17: Installing The Toner Cartridge
Insert the new toner cartridge. Installing the Toner Cartridge Open the front cover of the main unit. Open the package of the toner cartridge, and remove the toner cartridge. 1. Match the new toner cartridge with the slot on the main unit as shown in the illustration. -
Page 18: Storing The Envelope Feeder Attachment In A Paper Drawer
Storing the Envelope Feeder Attaching the Precaution Label Attachment in a Paper Drawer Open the feeder. Use the Envelope Feeder Attachment only when loading envelopes to a paper drawer. When not using the Envelope Feeder Attachment, store it in the storage area of the paper drawer. -
Page 19: Attaching The Glass Cleaning Sheet Storage Box
Attaching the Glass Cleaning Sheet Connecting Cables Storage Box Connect a modular cable into the This section describes how to attach the box for storing socket on the back left of the machine. sheets for cleaning the platen glass to the machine. It is recommended that you attach the box to the location indicated in the illustration. -
Page 20: Turning The Main Power On
Turning the Main Power ON For Users with the Optional Finisher: See the installation manual supplied with the optional finisher to attach the finisher to the machine, then connect the power cord. Connect the power cord into the socket on the back right of the machine and to the wall outlet. -
Page 21: Setting And Registering The Machine
Setting and Registering the Machine ................................20 Configuring the Machine (Setup Guide) Changing Specified Settings ....................................28... -
Page 22: Configuring The Machine (Setup Guide)
Configuring the Machine (Setup Guide) When the power is turned ON for the first time after installing the machine, the Setup Guide screen is displayed. It is recommended that you follow the instructions that appear on the touch panel display to configure the machine. - Page 23 Logging In Setting the Date and Time 1. Select the time zone from the <Time Zone> drop- In order to continue on with network settings, date/time, down list. and fax settings, it is necessary to log in as an administrator. 2.
- Page 24 To enable DHCP: Setting an IP Address When connecting to a network where each machine's IP address is automatically assigned to it by DHCP, set You can perform the following settings in order to connect to and use a TCP/IP network with the machine. <DHCP>...
- Page 25 2. Enter [Host Name] and [Domain Name] for <IPv4> → Setting the DNS Server press [Next]. DNS is the abbreviation of Domain Name System, and is the function that binds an IP address and a name (in this machine, host name). By setting the DNS server address for this machine, when accessing this machine through the network, this machine is accessed not by IP address but by a name such as "iR-ADV XXXX.
- Page 26 Setting the Proxy Server Setting Country/Region If accessing the internet or other external network 1. Select the country/region where the machine is located → press [Next]. through a proxy server from this machine, these settings are required. NOTE [Server Address]: This setting is necessary to specify the fax line settings.
- Page 27 Registering the Unit Name Specifying the System Manager Information Settings The unit's name appears on the receiving party's fax machine, or is printed on the received document as You can register the System Manager Information the Sender Name. You can register the name of your settings.
- Page 28 3. Press [Start Printing]. Adjusting the Gradation and Density Settings of the Machine NOTE This procedure involves outputting test pages and If paper appropriate for the test page is not loaded placing them on the platen glass for scanning. Finishing in any paper source, a message asking you to load this procedure enables you to reduce irregularities by the appropriate paper appears.
- Page 29 Closing the Setup Guide Closing the Setup Guide by pressing [OK] causes the machine to restart. After the restart, the main menu is displayed and you can use the machine. ▼ Configuring the Machine (Setup Guide)
-
Page 30: Changing Specified Settings
Changing Specified Settings You can change settings registered in the Setup Guide from the items in (Settings/Registration). From [Start Setup Guide] (Settings/Registration), you can start the Setup Guide and redo all the settings from the beginning. (See e-Manual > Security.) For more information on changing the settings, see the following. Setting Description Location in e-Manual Settings/Registration >... -
Page 31: Before Using This Machine
Before Using This Machine Parts and Their Functions ...................................... 30 External View ..........................................30 Internal View ..........................................31 Feeder ............................................... 32 Control Panel Parts and Functions .................................. 32 Main Power and Energy Saver Key .................................. 34 How to Turn ON the Main Power ..................................34 Energy Saver Key ........................................ -
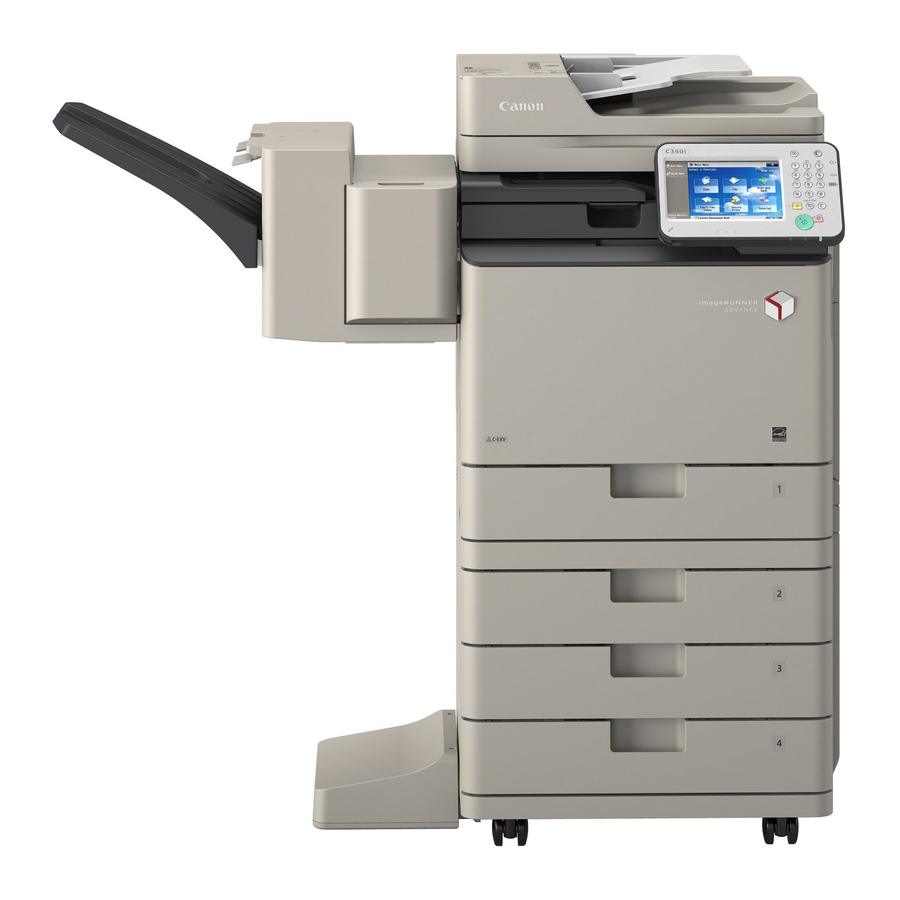
Page 32: Parts And Their Functions
Parts and Their Functions This section provides you with the names and functions of all the parts of the machine. For more information on optional products, parts and their functions, see e-Manual > Optional Products/Software. External View When the Staple Finisher-S1 and Cassette Feeding Unit-AH1 are attached. When the Copy Card Reader-F1 and Cassette Feeding Unit-AH1 are attached. -
Page 33: Internal View
Internal View When the Copy Card Reader-F1 and Cassette Feeding Unit-AH1 are attached. Front Cover of the Main Unit Fixing Assembly Open this cover to replace the toner cartridge, the waste The unit that fixes toner onto paper. If paper is jammed toner container, and the drum unit. -
Page 34: Feeder
Feeder Feeder Cover Original Output Area Open this cover to remove jammed paper. Originals that have been scanned from the original supply tray are output into the original output area. Slide Guides Document Feed Scanning Area Adjust these guides to match the width of the original. Originals placed in the feeder are scanned here. -
Page 35: Adjusting The Angle Of The Control Panel
Do not apply excess force to the control panel when indicator maintains a steady red light, contact your local adjusting its angle. authorized Canon dealer. Processing/Data Indicator Flashes or blinks green when the machine is performing operations, and maintains a steady green light when fax data is stored in memory. -
Page 36: Main Power And Energy Saver Key
Main Power and Energy Saver Key This section describes how to use the main power switch and the Energy Saver key. How to Turn ON the Main Power NOTE You can change the default display that appears Make sure that the power plug is firmly inserted into the after the machine is turned ON from [Default power outlet. -
Page 37: Energy Saver Key
Energy Saver Key Shutting Down the Machine You can press (Energy Saver) to make the machine This machine performs a procedure to protect the enter the Sleep mode and reduce power consumption. memory when the machine is shut down. If the machine is idle for a certain period of time, the This enables the machine to be shut down safely, machine will enter the Auto Sleep mode to minimize even if there are any jobs being processed, or a MEAP... -
Page 38: Backing Up/Exporting Data
A malfunction in the hard disk may cause these data to be lost. Please regularly back up/export your important data. Please note that Canon will not be held responsible for any damages caused by the loss of data. You can backup/export data in the following ways:... -
Page 39: Other Data You Can Import/Export/Back Up
Other Data You Can Import/Export/ Back Up You can exchange data with this machine and other machines which do not support the Import/Export All function. Data References e-Manual > Quick Quick Menu Information Menu License files for MEAP e-Manual > MEAP applications Instruction Data saved from MEAP... - Page 40 Backing Up/Exporting Data...
-
Page 41: Routine Maintenance
Routine Maintenance Loading Paper ..........................................40 Loading Paper into a Paper Drawer ................................40 Loading Envelopes ........................................43 Checking the Types of Paper That Can Be Used ............................. 43 Replacement Parts ........................................44 ............................. 45 Replacing the Staple Cartridge (Staple Finisher-S1) Replacing the Toner Cartridge .................................. -
Page 42: Loading Paper
Loading Paper If the selected paper runs out, or the selected paper drawer runs out of paper during printing, a screen prompting you to load paper appears on the touch panel display. CAUTION When handling paper, take care not to cut your hands on the edges of the paper. Loading Paper into a Paper Drawer NOTE Register the size and type of the loaded paper... - Page 43 NOTE Grip the handle, and pull out the paper When using inch paper, remove the A4 Feeder drawer until it stops. Attachments attached to the paper drawer and store them in the storage space. When using A or B series paper, make sure to attach the A4 Feeder Attachments to the paper drawer.
- Page 44 For high-quality printouts, use paper recommended Rewrap any remaining paper in its original package, by Canon. and store it in a dry place, away from direct sunlight. Before loading paper, always fan the sheets several If paper runs out and printing is stopped, load a times, and align the edges to facilitate feeding.
-
Page 45: Loading Envelopes
Loading Envelopes When loading paper into the paper drawer for the first time, or when changing If you are loading envelopes, the Envelope Feeder the paper size, attach a paper size label to Attachment that comes with the paper drawer must be attached. -
Page 46: Replacement Parts
Model Number: WT-201 Model Number: Canon GPR-51 Toner Black Drum Unit Model Number: Canon GPR-51 Toner Cyan Canon GPR-51 Drum Unit Black Canon GPR-51 Toner Magenta Canon GPR-51 Drum Unit Cyan Canon GPR-51 Toner Yellow Canon GPR-51 Drum Unit Magenta Staple Cartridge... -
Page 47: Replacing The Staple Cartridge (Staple Finisher-S1)
NOTE The Staple Finisher-S1 is an optional product. We recommend that you order staple cartridges from your local authorized Canon dealer before your stock runs out. NOTE Use only staple cases intended for use with this machine. -
Page 48: Replacing The Toner Cartridge
Replacing the Toner Cartridge Return the staple case to its original position in the stapler unit. When the Black toner or all of the toners run out completely and prints can no longer be made, a screen with instructions on how to replace the toner cartridge appears on the touch panel display. - Page 49 Use only toner cartridges intended for use with this NOTE machine. For information on the supported Canon genuine If the Black toner or all of the toners run out, this step toner, see "Replacement Parts, " on p.44. is not necessary.
- Page 50 Prepare the new toner cartridge. Insert the new toner cartridge. 1. Open the package of the toner cartridge, and remove 1. Match the new toner cartridge with the slot on the the toner cartridge. main unit as shown in the illustration. 2.
-
Page 51: Replacing The Waste Toner Container
IMPORTANT A toner cartridge with the Wrong item no. cart. may Your local authorized Canon dealer will dispose of wrong model number is be inserted. used waste toner containers. inserted. Used toner cannot be reused. Do not mix new and Toner cart. - Page 52 NOTE Remove the waste toner container. Use the bag in the box for the new waste toner 1. Open the front cover of the main unit. container. Place the removed waste toner container on a level 2. Pull out the waste toner container. surface.
-
Page 53: Replacing The Drum Unit
IMPORTANT For high-quality printouts, when replacing the drum unit we recommend using a Canon drum unit. Store drum units in a location away from light sources such as direct sunlight. Storing the drum unit in a room that is cold but... - Page 54 Pull out the drum unit to replace. Prepare to insert the new drum unit. 1. Grip the handle of the drum unit to replace, and pull 1. Remove the new drum unit from its box. it out. 2. Hold the drum unit horizontally in both hands as shown in the illustration, and tilt it to the left and right approximately 12 times.
- Page 55 Insert the new drum unit. Insert the waste toner container into the main unit. 1. Grip the handle and indented area of the drum unit, and insert the drum unit while aligning the mark on 1. Align the mark on the waste toner container and the drum unit with the mark on the slot of the main the mark on the slot of the main unit, and insert the unit.
-
Page 56: Consumables
Consumables The following consumables are available from Canon. For more information, contact your local authorized Canon dealer. We recommend that you order paper stock and toner from your local authorized Canon dealer before your stock runs out. Recommended Paper For information on the dedicated toner cartridge model numbers for this machine, see "Replacement Parts, "... -
Page 57: Drum Unit
80%.) Do not store toner cartridges in an upright position. [Be careful of counterfeit toners] Please be aware that there are counterfeit Canon toners in the marketplace. Use of counterfeit toner may result in poor print quality or machine performance. - Page 58 Consumables...
-
Page 59: Troubleshooting
When an Error Code Is Displayed ..................................62 Service Call Message ......................................... 63 Contacting Your Local Authorized Canon Dealer ..........................64 Setting the Limited Functions Mode from the Service Call Message Screen ..............64 Functions Available When the Printer/Scanner Cannot Be Used Due to an Error ............65... -
Page 60: Routine Cleaning
Routine Cleaning If an original is not copied clearly, clean the platen glass, the underside of the feeder, the document feed scanning area, and the rollers of the feeder. For high-quality printouts, we recommend cleaning these parts once or twice a month. The proper cleaning method for various cases is shown by the marks below. -
Page 61: Originals Cannot Be Scanned Properly (Cleaning The Platen Glass)
Originals Cannot Be Scanned Properly Scanned Originals Become Dirty (Cleaning the Platen Glass) (Manual Feeder Cleaning) If the platen glass or the underside of the feeder is dirty, If originals that have been fed through the feeder have the original may not be scanned clearly. Clean the platen streaks or appear dirty, clean the feed rollers. -
Page 62: When White Streaks Appear On Prints (Cleaning The Dust Proof Glass)
When White Streaks Appear on Prints Clean the document feed scanning (Cleaning the Dust Proof Glass) area (thin glass strip) and the white plate. When white streaks or other print defects occur, the dust 1. Open the feeder. proof glass may be dirty. Follow the procedure below to 2. - Page 63 Hold the dust proof glass cleaner so that the pad on the tip is facing down, insert it in the locations shown on the illustration until it stops, and then move it gently back and forth. Clean the four locations as shown below. There are marks on the main unit that indicate the cleaning locations.
-
Page 64: When An Error Message/Error Code Is Displayed
When an Error Message/Error Code Is Displayed When an Error Message Is Displayed When an Error Code Is Displayed Error messages may appear on the touch panel display If a job or operation does not complete successfully, the of the machine or the Web browser. Self-diagnostic error error code is displayed on the Details screen for Log on messages appear in the following cases: the Status Monitor/Cancel screen. -
Page 65: Service Call Message
If a malfunction occurs and the machine cannot operate normally, a screen prompting you to contact your local operate normally: authorized Canon dealer is displayed. If a screen such as the one below is displayed, contact your local authorized Canon dealer. (See "Contacting Your Local Authorized Canon Dealer"... -
Page 66: Contacting Your Local Authorized Canon Dealer
NOTE For precautions to take when restarting the machine, see "Main Power and Energy Saver Key, " on p.34. When you contact your local authorized Canon dealer, have the following information available: - Product name - Details of the malfunction... -
Page 67: Functions Available When The Printer/Scanner Cannot Be Used Due To An Error
Functions Available When the Printer/ Touch Panel Display Left Side Scanner Cannot Be Used Due to an Error When When the Available the Scan Even when an error occurs and the Print and Scan Print function Functions function is functions are restricted, there are functions that can be is restricted restricted used. -
Page 68: Locations Of Staple/Paper Jams
Locations of Staple/Paper Jams Paper and staple jams may occur in the following parts of the machine. By following the instructions in the applicable section, you can clear staple/paper jams. For details on these procedures, see the e-Manual. Paper Jams: e-Manual > Problem Solving > Locations of Paper Jams Staple Jams: e-Manual >... -
Page 69: Appendix
Telephone Equipment ............88 Other Warnings ..............88 Users in the (Federal Communications Commission) U.S.A ..................77 CANON imageRUNNER ADVANCE C350iF/C250iF Laser Safety ................78 SERIES LIMITED WARRANTY ........89 International ENERGY STAR Program ...... 78 TERMS OF imageWARE REMOTE SERVICE .... 90 IPv6 Ready Logo .............. -
Page 70: Specifications
Specifications Specifications are subject to change without notice for product improvement or future release. Main Unit Item Specifications Name Canon imageRUNNER ADVANCE C350iF/C250iF Type Reader-printer separated, Desktop Color Supported Full Color Resolution for Reading 600 x 600 dpi Resolution for Writing... - Page 71 * Activation time may vary, depending on the environment and conditions under which the machine is being used. (At a room temperature of 68 °F in all above cases.) First Copy Time imageRUNNER ADVANCE C350iF Full Color: 7.4 seconds Black-and-White: 5.9 seconds imageRUNNER ADVANCE C250iF Full Color: 10.5 seconds...
- Page 72 Item Specifications Paper Feeding System/Capacity Paper Drawer: 550 sheets (21 lb bond (80 g/m )) or 640 sheets (17 lb bond (64 g/m Multi-Purpose Tray: 100 sheets (21 lb bond (80 g/m Multiple Copies 999 sheets Memory Capacity 2 GB Hard Disk Capacity 160 GB (Used space: 80 GB) * The hard disk capacity is subject to change in future release.
-
Page 73: Feeder
) are supported. Original Tray Capacity 50 sheets (21 lb bond (80 g/m * 30 sheets for LGL documents Original Scanning Speed imageRUNNER ADVANCE C350iF: Copying: 1-sided scanning: 36 sheets/minute (LTR in Black-and-White/Full Color at 300 x 600 dpi) Scanning: 1-sided scanning:... -
Page 74: Cassette Feeding Unit-Ah1
Cassette Feeding Unit-AH1 Item Specifications Paper Sizes LGL, LTR, STMT, EXEC, and Custom size (3 7/8" x 7 1/2" to 8 1/2" x 14" (98.4 x 190.5 mm to 216 x 355.6 mm) Paper Drawers Capacity 550 sheets (21 lb bond (80 g/m )) or 640 sheets (17 lb bond (64 g/m Power Source/Maximum Power From the main unit/Approximately 35 W... -
Page 75: Copy Card Reader-F1
Copy Card Reader-F1 Item Specifications Available Cards Magnetic Card Readout Method Magnetic readout Magnetic Card Reading Face up Direction Store/Replay Replay Power Source From the main unit Dimensions (H x W x D) 1 5/8" x 3 1/2" x 3 3/4" (40 mm x 88 mm x 96 mm) (excluding the attachment kit and cable) Weight Approximately 7.1 oz (200 g) -
Page 76: Send Function (Scan Features)
Send Function (Scan Features) Item Specifications Communication Protocol FTP (TCP/IP), SMB (TCP/IP), WebDAV Data Format TIFF, JPEG, PDF, XPS, OOXML (PowerPoint) Resolution Black-and-White: 100 x 100 dpi, 150 x 150 dpi, 200 x 100 dpi, 200 x 200 dpi, 200 x 400 dpi, 300 x 300 dpi, 400 x 400 dpi, 600 x 600 dpi Color: 100 x 100 dpi, 150 x 150 dpi, 200 x 100 dpi, 200 x 200 dpi, 300 x 300 dpi... -
Page 77: Send Function (E-Mail And I-Fax Features)
Send Function (E-Mail and I-Fax Features) Item Specifications Communication Protocol SMTP, POP3 I-Fax Communication Mode Simple, Full Resolution For Sending E-mail (Black-and-White): 100 x 100 dpi, 150 x 150 dpi, 200 x 100 dpi, 200 x 200 dpi, 200 x 400 dpi, 300 x 300 dpi, 400 x 400 dpi, 600 x 600 dpi For Sending E-mail (Color): 100 x 100 dpi, 150 x 150 dpi, 200 x 100 dpi, 200 x 200 dpi, 300 x 300 dpi... -
Page 78: Network Environment (Hardware Specifications)
Network Environment (Hardware Specifications) Item Specifications Network Interface 10Base-T/100Base-TX/1000Base-T (RJ-45) Network Environment (Software Specifications) Item Specifications Protocol Supported TCP/IP: Frame type: Ethernet II Print applications: LPD/Raw/IPP/IPPS/FTP/WSD/SMB/NetWare IPX/SPX Frame type: Ethernet II/Ethernet 802.2/Ethernet 802.3/Ethernet SNAP/Auto Detect Print applications: Bindery PServer/NDS PServer/RPrinter/NPrinter Printer Settings (Software Specifications) Item... -
Page 79: Legal Notices
U.S.A., please refer to the This device complies with Part 15 of the FCC Rules. "SUPPORT" page on Canon U.S.A. ' s Web site (http://www. usa.canon.com). Operation is subject to the following two conditions: Canon U.S.A., Inc. -
Page 80: Laser Safety
This product complies with 21 CFR Chapter 1 As an ENERGY STAR® Partner, Subchapter J as a Class I laser product under the U.S. Canon USA, Inc. has determined Department of Health and Human Services (DHHS) that this machine meets the... -
Page 81: Copyright
This product includes software and/or software modules to be a guide only. If you are uncertain about the that are licensed by Canon Inc. or its licensors from third legality of using your product to scan, print or otherwise parties. Use and distribution of this software and/or... -
Page 82: Users In The U.s.a
"electrical using the equipment in the U.S.A., please refer to the noise. " Air conditioners, electric typewriters, copiers, and "SUPPORT" page on Canon U.S.A. ' s Web site (http://www. machines of this sort generate electrical noise that often usa.canon.com). -
Page 83: Users In Canada
Users in Canada Rights of the Telephone Company If this equipment imageRUNNER ADVANCE C350iF/ Preinstallation Requirements for Canon Facsimile C250iF causes harm to the telephone network, the Equipment telephone company may temporarily disconnect service. The telephone company also retains the right to make A. -
Page 84: Utilisation Au Canada
NOTE utility, telephone lines, and internal metallic water Canon vous conseille d'utiliser une ligne individuelle pipe system, if present, are connected together. This precaution may be particularly important in rural conforme aux normes industrielles, à savoir: ligne téléphonique 2500 (pour appareil à... -
Page 85: Super G3
Super G3 Remarques Le présent matériel est conforme aux spécifications Super G3 is a phrase used to techniques applicables d'Industrie Canada. describe the new generation of fax Avant d'installer cet appareil, l'utilisateur doit s'assurer machines that use ITU-T V.34 qu'il est permis de le connecter à l'équipement de standard 33.6 Kbps modems. -
Page 86: Important Safety Instructions
Do not use power supplies with voltages other than power outlet. Then, contact your local authorized those specified herein, as this may result in a fire or Canon dealer. electrical shock. - Necklaces and other metal objects Always grasp the power plug when disconnecting - Cups, vases, flowerpots, and other containers filled the power cord. -
Page 87: Handling
OFF the main power switch, and disconnect the power cord from the power outlet. Then, contact your local authorized Canon dealer. Continued use of the machine in this condition may result in a fire or electrical shock. -
Page 88: Maintenance And Inspections
Check the power cord and power plug regularly. If machine may cause dangerous radiation to the following conditions occur, contact your local escape from the machine. authorized Canon dealer, as the condition may cause a fire: IMPORTANT - There are burn marks on the power plug. -
Page 89: Consumables
Consumables CAUTION The fixing unit and its surroundings inside the WARNING machine may become hot during use. When removing jammed paper or when inspecting the Do not burn or throw used toner cartridges into inside of the machine, do not touch the fixing unit open flames, as this may cause the toner remaining and its surroundings, as doing so may result in inside the cartridges to ignite, resulting in burns or... -
Page 90: Telephone Equipment
Telephone Equipment WARNING When using telephone equipment incorporated into this machine, basic safety precautions should always be followed to reduce the risk of fire, electrical shock, or injury to persons, including the following: 1. Do not use this machine where there is a potential for contact with water or other liquid. -
Page 91: Canon Imagerunner Advance C350If/C250If Series Limited Warranty
("Purchaser") or 30,000 prints or copies (or a combination of both), whichever comes first. During such warranty period, Canon shall replace, without charge, any defective part with a new or comparable rebuilt part. This warranty shall not extend to consumables such as paper, chemicals, and toner as to which there shall be no warranty or replacement. -
Page 92: Terms Of Imageware Remote Service
TERMS OF imageWARE REMOTE SERVICE Important Safety Instructions... -
Page 93: Terms Of Content Delivery System
Canon USA [www.usa.canon.com] or Canon Canada [www.canon.ca.]. These materials include a Technology White Paper for the CDS Service. Your instruction to Canon USA, Canon Canada or your dealer to use CDS Service or your use of CDS Service for a Product shall be considered (i) a representation that you have an internal IP network and internet access available to Products connected to that network on a generally continuous basis;... - Page 94 Important Safety Instructions...
- Page 96 6390 Dixie Road Mississauga, Ontario L5T 1P7, Canada CANON EUROPA N.V. Bovenkerkerweg 59, 1185 XB Amstelveen, The Netherlands (See http://www.canon-europe.com/ for details on your regional dealer) CANON LATIN AMERICA, INC. One Canon Park, Melville, NY 11747, U.S.A. CANON AUSTRALIA PTY. LTD 1 Thomas Holt Drive, North Ryde, Sydney, N.S.W.