Huawei SmartACU2000D Series User Manual
With no pid module
Hide thumbs
Also See for SmartACU2000D Series:
- Quick manual (32 pages) ,
- Quick manual (31 pages) ,
- User manual (110 pages)

Related Manuals for Huawei SmartACU2000D Series


Summary of Contents for Huawei SmartACU2000D Series
- Page 1 SmartACU2000D Smart Array Controller User Manual (with No PID Module) Issue Date 2020-02-14 HUAWEI TECHNOLOGIES CO., LTD.
- Page 2 Notice The purchased products, services and features are stipulated by the contract made between Huawei and the customer. All or part of the products, services and features described in this document may not be within the purchase scope or the usage scope. Unless otherwise specified in the contract, all statements, information, and recommendations in this document are provided "AS IS"...
-
Page 3: About This Document
NOTICE is used to address practices not related to personal injury. Supplements the important information in the main text. NOTE is used to address information not related to personal injury, equipment damage, and environment deterioration. Issue 01 (2020-02-14) Copyright © Huawei Technologies Co., Ltd. - Page 4 Change History Updates between document issues are cumulative. The latest document issue contains all the changes in earlier issues. Issue 01 (2020-02-14) This issue is used for first office application (FOA). Issue 01 (2020-02-14) Copyright © Huawei Technologies Co., Ltd.
-
Page 5: Table Of Contents
4.3 Installation Requirements ............................34 4.4 Installing the Cabinet ..............................35 4.4.1 Wall-mounted Installation ............................35 4.4.2 Support-mounted Installation ..........................37 4.4.3 Pole-mounted Installation ............................40 4.5 Installing the Components ............................42 Issue 01 (2020-02-14) Copyright © Huawei Technologies Co., Ltd. - Page 6 7.3.5 Replacing the SmartMBUS CCO Module ....................... 76 7.3.6 Replacing the SmartLogger ............................. 77 7.3.7 Replacing the Power Adapter ..........................79 7.3.8 Replacing the Fiber Adapter ............................ 79 7.3.9 Replacing the USB Port ............................80 Issue 01 (2020-02-14) Copyright © Huawei Technologies Co., Ltd.
- Page 7 SmartACU2000D Smart Array Controller User Manual (with No PID Module) Contents 8 Technical Specifications ......................82 A Acronyms and Abbreviations ....................84 Issue 01 (2020-02-14) Copyright © Huawei Technologies Co., Ltd.
-
Page 8: Safety Precautions
The "NOTICE", "CAUTION", "WARNING", and "DANGER" statements in this document do not cover all the safety instructions. They are only supplements to the safety instructions. Huawei will not be liable for any consequence caused by the violation of general safety requirements or design, production, and usage safety standards. -
Page 9: Personnel Requirements
Do not touch the energized equipment, as the enclosure is hot. 1.2 Personnel Requirements Personnel who plan to install or maintain Huawei equipment must receive thorough training, understand all necessary safety precautions, and be able to correctly perform all operations. -
Page 10: Electrical Safety
Before connecting a power cable, check that the label on the power cable is correct. If the equipment has multiple inputs, disconnect all the inputs before operating the equipment. Issue 01 (2020-02-14) Copyright © Huawei Technologies Co., Ltd. -
Page 11: Installation Environment Requirements
Ensure that the ladder is securely positioned. The recommended angle for a ladder against the floor is 75 degrees, as shown in the following figure. An angle rule can be used to measure the angle. Issue 01 (2020-02-14) Copyright © Huawei Technologies Co., Ltd. -
Page 12: Commissioning
Maintain the equipment with sufficient knowledge of this document and using proper tools and testing equipment. Prior to maintenance, power off the equipment. Place temporary warning signs or erect fences to prevent unauthorized access to the maintenance site. Issue 01 (2020-02-14) Copyright © Huawei Technologies Co., Ltd. - Page 13 If the equipment is faulty, contact your dealer. The equipment can be powered on only after all faults are rectified. Failing to do so may escalate faults or damage the equipment. Issue 01 (2020-02-14) Copyright © Huawei Technologies Co., Ltd.
-
Page 14: Overview
D: version D D: ≤ 800 V three-phase AC input Voltage level Configuration 00: one MBUS route 02: two MBUS routes 05CN: one MBUS route and 4G antenna Issue 01 (2020-02-14) Copyright © Huawei Technologies Co., Ltd. -
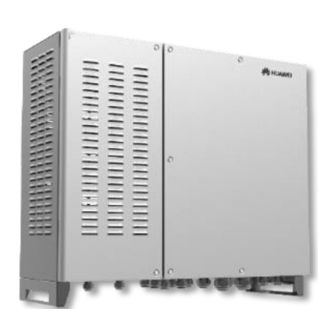
Page 15: Product Introduction
4G antenna, SmartModule1000, Ethernet switch, access terminal box (ATB), and power over Ethernet (PoE) module. The SmartLogger monitors and manages PV power systems. It converges ports, converts protocols, and centrally monitors and maintains the equipment in PV power systems. Issue 01 (2020-02-14) Copyright © Huawei Technologies Co., Ltd. - Page 16 Stable and reliable: Has a built-in surge protection module. The industrial application is secure and reliable. Networking Figure 2-3 Networking of the SmartACU2000D-D-00 or SmartACU2000D-D-02 Wired network: fiber ring network solution Issue 01 (2020-02-14) Copyright © Huawei Technologies Co., Ltd.
- Page 17 The IP address of the SmartLogger and that of the customer-premises equipment (CPE) must be on the same network segment. Figure 2-4 Networking of the SmartACU2000D-D-05CN Wired network: fiber ring network solution Issue 01 (2020-02-14) Copyright © Huawei Technologies Co., Ltd.
-
Page 18: Appearance
Inner diameter: 13–18 mm (0.51–0.71 in.) Waterproof connectors for the Specifications: 3/4 in. RS485 communications cable, Inner diameter: 13–18 mm network cable, or DC input and (0.51–0.71 in.) output power cable (RS485/ETH/DC) Issue 01 (2020-02-14) Copyright © Huawei Technologies Co., Ltd. - Page 19 (SFP1) Inner diameter: 13–18 mm (0.51–0.71 in.) Waterproof connector for the Specifications: 3/4 in. optical cable, network cable, or Inner diameter: 13–18 mm 4G antenna (SFP2/4G LTE/4G) Issue 01 (2020-02-14) Copyright © Huawei Technologies Co., Ltd.
-
Page 20: Enclosure Signs
Otherwise, the device will be damaged. Warning label for surge Do not remove or install an protection module energized surge protection operation module. Issue 01 (2020-02-14) Copyright © Huawei Technologies Co., Ltd. -
Page 21: Product Composition
Figure 2-7 SmartACU2000D-D-02 Components Table 2-2 Components and reserved installation positions Name Specifications Quantity Power adapter of the AC input: 100–240 V, 50 Hz/60 Hz SmartLogger (U01) DC output: 12 V/2 A Issue 01 (2020-02-14) Copyright © Huawei Technologies Co., Ltd. - Page 22 RS485 communications 12P; supports the wires with a cross-sectional area terminal (JX01) ranging from 1 mm to 2.5 mm (or 18–14 AWG) Position for the SmartModule1000A01 (SmartModule) Protective earthing (PE) bar Issue 01 (2020-02-14) Copyright © Huawei Technologies Co., Ltd.
- Page 23 V power module (JX02) = 385 V AC; 20 kA/40 kA; 8/20 μs; 4P Single-phase surge protective device (SPD) (F03) = 680 V AC; 20 kA/40 kA; 8/20 μs; 1P Three-phase SPD (F01) Issue 01 (2020-02-14) Copyright © Huawei Technologies Co., Ltd.
- Page 24 For details about the installation method, see the installation guide of the components. You are advised to route cables through the cable trough or cable bridge in the smart array controller. Huawei device faults caused by any of the three components are not covered by the warranty.
-
Page 25: Working Principles
SmartLogger3000, choose Monitoring > MBUS > Networking Settings, and set Networking to Enable (default value). When the SACU communicates with the solar inverters over RS485, set Networking to Disable. For details, see the SmartLogger3000 User Manual. RS485 communication mode Issue 01 (2020-02-14) Copyright © Huawei Technologies Co., Ltd. - Page 26 The SmartLogger connects to the transformer station, power meter, solar inverter, MBUS CCO module, and other devices that support RS485 communication over COM ports. The figure displays only major components and cables and is for reference only. MBUS communication mode Issue 01 (2020-02-14) Copyright © Huawei Technologies Co., Ltd.
- Page 27 Ethernet switch. − The SmartLogger has a 10M/100M/1000M Ethernet electrical port (WAN), and the SmartLogger connecting to an Ethernet switch has five 10M/100M/1000M Ethernet electrical ports. Issue 01 (2020-02-14) Copyright © Huawei Technologies Co., Ltd.
-
Page 28: Configuration In Different Scenarios
The SmartLogger communicates with the cloud server over a 4G wireless network. 2.6 Configuration in Different Scenarios 2.6.1 Fiber Ring Network Only the SmartACU2000D-D-00 and SmartACU2000D-D-02 are applicable to this scenario. Issue 01 (2020-02-14) Copyright © Huawei Technologies Co., Ltd. - Page 29 Specifications t Source SACU (Optional) SmartModule SmartModule1000A01 Purchased from Huawei (Optional) Ethernet UT-H605 or ES1000 switch (Optional) 24 V power supply Fitting bag Optical for optical module ring Optical switching jumper Issue 01 (2020-02-14) Copyright © Huawei Technologies Co., Ltd.
- Page 30 (FC) switch. Components listed in the table need to be installed onsite. Models of the components inside the transformer station are specified by the transformer station vendor. Issue 01 (2020-02-14) Copyright © Huawei Technologies Co., Ltd.
- Page 31 (2.5 mm DC output armored copper cable 14–12 AWG (14 AWG) power cable Connection through a tube: single-core outdoor copper cable Operating voltage to the ground ≥ 300 V Issue 01 (2020-02-14) Copyright © Huawei Technologies Co., Ltd.
-
Page 32: Lte
Recommended Model or Compo Quantity Specifications nent Source SACU (Optional) SmartModule SmartModule1000A01 Purchas ed from (Optional) 24 V power Huawei supply Fitting bags PoE module for the PoE PoE SPD module and Issue 01 (2020-02-14) Copyright © Huawei Technologies Co., Ltd. - Page 33 Note a: If the CPE model is EG860, a PoE SPD is required. Components listed in the table need to be installed onsite. Models of the components inside the transformer station are specified by the transformer station vendor. Issue 01 (2020-02-14) Copyright © Huawei Technologies Co., Ltd.
- Page 34 10–6 AWG (6 AWG) Network 20 m (65.62 ft) long network cable delivered cable from the with the Huawei CPE (If the cable is not long PoE module enough, prepare a Cat 5e outdoor shielded or PoE SPD network cable with an outer diameter of less to the CPE than 9 mm (0.35 in.) and internal resistance of...
- Page 35 Purchased switch from Huawei (Optional) SmartModule SmartModule1000A01 (Optional) 24 V power supply SIM Card Standard SIM card of a local Prepared by carrier (size: 25 mm x 15 mm) the customer Issue 01 (2020-02-14) Copyright © Huawei Technologies Co., Ltd.
- Page 36 Components listed in the table need to be installed onsite. Models of the components inside the transformer station are specified by the transformer station vendor. Issue 01 (2020-02-14) Copyright © Huawei Technologies Co., Ltd.
- Page 37 (2.5 mm DC output power armored copper cable 14–12 AWG (14 cable Connection through a tube: single-core AWG) outdoor copper cable Operating voltage to the ground ≥ 300 V Issue 01 (2020-02-14) Copyright © Huawei Technologies Co., Ltd.
-
Page 38: Storage Requirements
If the SACU has been stored for a long time, it needs to be inspected by professionals before it is put into use. Huawei shall not be liable for any consequence caused by violation of the storage requirements specified in this document. -
Page 39: System Installation
Φ16 mm (12.59 in.) 3 mm x 150 mm cross-shaped head: (0.63 in.) (0.12 in. x 5.91 in.) M3, M4, and M6) Socket wrench set Torque wrench Wire strippers Diagonal pliers Issue 01 (2020-02-14) Copyright © Huawei Technologies Co., Ltd. - Page 40 Network cable Multimeter SPD extracting tool tester Heat shrink tubing Heat gun Vacuum cleaner Marker Measuring tape Level Cable tie Personal protective equipment (PPE) Safety boots Safety gloves Safety goggles Anti-dust respirator Issue 01 (2020-02-14) Copyright © Huawei Technologies Co., Ltd.
-
Page 41: Installation Requirements
SmartACU2000D Smart Array Controller User Manual (with No PID Module) 4 System Installation 4.3 Installation Requirements Figure 4-1 Installation requirements Issue 01 (2020-02-14) Copyright © Huawei Technologies Co., Ltd. -
Page 42: Installing The Cabinet
Step 2 Drill holes using a hammer drill and install expansion bolts. Avoid drilling holes into the water pipes and power cables buried in the wall. Issue 01 (2020-02-14) Copyright © Huawei Technologies Co., Ltd. - Page 43 Step 3 Assign two persons to lift the cabinet and mount it on the bolts, and assign another person to assist. Step 4 Tighten the bolts using a torque wrench with the open end of 18 mm (0.71 in.). Issue 01 (2020-02-14) Copyright © Huawei Technologies Co., Ltd.
-
Page 44: Support-Mounted Installation
Step 1 Determine the positions for drilling holes into the support based on the delivered marking-off template. For details, see Figure 4-2. Level the marking-off template using a level, and mark mounting holes using a marker. Step 2 Drill holes using a hammer drill. Issue 01 (2020-02-14) Copyright © Huawei Technologies Co., Ltd. - Page 45 Figure 4-5 Drilling a hole Step 3 Insert the M12x40 bolt assemblies delivered with the cabinet into the holes, and secure them using the supplied nuts and flat washers. Do not fully tighten the bolts. Issue 01 (2020-02-14) Copyright © Huawei Technologies Co., Ltd.
- Page 46 Step 4 Assign two persons to lift the cabinet and mount it on the bolts, and assign another person to assist. Step 5 Tighten the bolts using a torque wrench with the open end of 18 mm (0.71 in.). Issue 01 (2020-02-14) Copyright © Huawei Technologies Co., Ltd.
-
Page 47: Pole-Mounted Installation
Step 1 Secure the pole-mounting brackets to the pole and tighten the U-shaped bolts to a torque of 45 N· m using a torque wrench with the open end of 18 mm (0.71 in.). Issue 01 (2020-02-14) Copyright © Huawei Technologies Co., Ltd. - Page 48 User Manual (with No PID Module) 4 System Installation Figure 4-8 Securing pole-mounting brackets Step 2 Secure the SACU to the pole-mounting brackets. For detailed operations, see 4.4.2 Support-mounted Installation. Figure 4-9 Securing a cabinet ----End Issue 01 (2020-02-14) Copyright © Huawei Technologies Co., Ltd.
-
Page 49: Installing The Components
Step 2 Remove the panel at the position where the SmartModule is to be installed from the cabinet and take out the mounting kit. Step 3 Secure the mounting bracket to the SmartModule. Step 4 Install the SmartModule. Issue 01 (2020-02-14) Copyright © Huawei Technologies Co., Ltd. - Page 50 Step 6 Connect the preinstalled RS485 cable to the COM port on the SmartLogger based on the label. Step 7 Connect the preinstalled power cable to the 12V 1A port on the SmartModule based on the cable label. Figure 4-12 Connecting a cable ----End Issue 01 (2020-02-14) Copyright © Huawei Technologies Co., Ltd.
-
Page 51: Optional) Installing The Ethernet Switch
Ethernet switch. Step 5 Connect the preinstalled power cable to the 12VDC 1A port on the Ethernet switch based on the label. Figure 4-14 Connecting an Ethernet switch cable ----End Issue 01 (2020-02-14) Copyright © Huawei Technologies Co., Ltd. -
Page 52: Optional) Installing The 24 V Power Module
Step 3 Place the PoE module at the installation position and align the mounting holes. Then secure the PoE module. Indicators should be in the lower left corner. Step 4 Secure the mounting board. Issue 01 (2020-02-14) Copyright © Huawei Technologies Co., Ltd. -
Page 53: Optional) Installing The Poe Spd
Step 4 Place the PoE SPD in the mounting bracket. Ensure that the PE point faces upwards and the surface marked PE faces outwards. Step 5 Secure the PoE SPD fastener. Step 6 Connect the other end of the ground cable to the PE bar. Issue 01 (2020-02-14) Copyright © Huawei Technologies Co., Ltd. -
Page 54: Installing The Sim Card And 4G Antenna
Step 2 Take the SmartLogger out of the installation position. Step 3 Install the SIM card, reinstall the SmartLogger, and secure the SmartLogger. Step 4 Reconnect the cables based on the labels. Issue 01 (2020-02-14) Copyright © Huawei Technologies Co., Ltd. - Page 55 Step 1 Remove the 4G antenna bound inside the cabinet. Step 2 Install the 4G antenna on the cabinet. Step 3 Connect the cable to the 4G port on the SmartLogger. Figure 4-19 Installing a 4G antenna ----End Issue 01 (2020-02-14) Copyright © Huawei Technologies Co., Ltd.
-
Page 56: Electrical Connections
(green-and-yellow cables are only used for protective earthing). 5.1 Selecting a Connection Mode You can connect a peripheral cable to the SACU in common mode or through a tube based on site requirements. Issue 01 (2020-02-14) Copyright © Huawei Technologies Co., Ltd. -
Page 57: Common Connection
3/4 in. waterproof connector, a 3/4 in. tube is recommended. The tube appearance is for reference only. The actual tube prevails. This is applicable to all other similar figures. Issue 01 (2020-02-14) Copyright © Huawei Technologies Co., Ltd. - Page 58 Step 5 Check that the cable is connected correctly and securely. Then take appropriate measures to ensure that the tube conduit and fitting are secured reliably, and seal the cable hole using supplied firestop putty. Step 6 Clear foreign matter from the cabinet. ----End Issue 01 (2020-02-14) Copyright © Huawei Technologies Co., Ltd.
-
Page 59: Crimping An Ot Terminal
Wrap the wire crimping area with heat shrinkable tubing or PVC insulation tape. The heat shrink tubing is used as an example. When using a heat gun, protect the devices from being scorched. Figure 5-4 Crimping an OT terminal 5.3 Connecting the PE Cable Issue 01 (2020-02-14) Copyright © Huawei Technologies Co., Ltd. -
Page 60: Connecting The Communications Cables For The Fiber Ring Network
Step 1 Obtain optical modules from the fitting bag for optical ring switching. Step 2 Insert an optical module into the SFP1 or SFP2 port. If there are two modules, insert one into each port. Issue 01 (2020-02-14) Copyright © Huawei Technologies Co., Ltd. - Page 61 As optical cables are hard, prepare optical cables before routing them into the SACU. Only professionals are allowed to connect optical cables. Connect two optical cables in a ring optical network, and connect one optical cable in a star optical network. Issue 01 (2020-02-14) Copyright © Huawei Technologies Co., Ltd.
- Page 62 (2) Fixing points for internal steel wires of optical cables (3) Cable clip Step 1 Remove the external mechanical parts from the ATB. Figure 5-8 Removing external mechanical parts Step 2 Remove the optical cable fastener. Issue 01 (2020-02-14) Copyright © Huawei Technologies Co., Ltd.
- Page 63 Only professionals are allowed to splice fibers. Figure 5-10 Connecting optical cables Step 6 Check that the cables are connected correctly and securely. Then reinstall the optical cable fastener and external mechanical parts. Issue 01 (2020-02-14) Copyright © Huawei Technologies Co., Ltd.
-
Page 64: Connecting The 4G Lte Cable (With A Poe Spd)
Step 2 Connect the factory-installed network cable on the SmartLogger to the DATA port on the PoE module. Step 3 Connect the factory-installed power cable on the SmartLogger to the PoE module. Issue 01 (2020-02-14) Copyright © Huawei Technologies Co., Ltd. - Page 65 Figure 5-12 Connecting cables to the PoE module Step 4 Connect the network cable delivered with the CPE to the Surge port on the PoE SPD. Figure 5-13 Connecting a CPE network cable ----End Issue 01 (2020-02-14) Copyright © Huawei Technologies Co., Ltd.
-
Page 66: Connecting The 4G Lte Cable (Without A Poe Spd)
Figure 5-14 Connecting cables to the PoE module Step 3 Connect the network cable delivered with the CPE to the PoE port on the PoE module. Figure 5-15 Connecting a CPE network cable ----End Issue 01 (2020-02-14) Copyright © Huawei Technologies Co., Ltd. -
Page 67: Connecting The Three-Phase Ac Power Cable
C on the transformer station busbar 2 over a three-phase power switch. Ensure that the L1, L2, and L3 wires are connected in correct phase sequence. Step 3 Bind the cable. Issue 01 (2020-02-14) Copyright © Huawei Technologies Co., Ltd. -
Page 68: Connecting The Peripheral Rs485 Communications Cables
Port on the JX01 Definition Terminal Block RS485-1 (+) RS485A, RS485 differential signal+ RS485-1 (–) RS485B, RS485 differential signal– RS485-2 (+) RS485A, RS485 differential signal+ RS485-2 (–) RS485B, RS485 differential signal– Issue 01 (2020-02-14) Copyright © Huawei Technologies Co., Ltd. - Page 69 Step 2 Connect the communications cable to the JX01 terminal block. Step 3 Crimp an OT terminal on the shield layer, and connect the shield layer to the cabinet ground point. Step 4 Bind the communications cable. Issue 01 (2020-02-14) Copyright © Huawei Technologies Co., Ltd.
-
Page 70: Optional) Connecting The Peripheral Network Cable
Verify that the network cable functions properly using a network cable tester. Step 2 Connect the peripheral network cable to the FE2 port on the Ethernet switch. Step 3 Bind the network cable. Issue 01 (2020-02-14) Copyright © Huawei Technologies Co., Ltd. -
Page 71: Optional) Connecting The Dc Output Power Cable To The 24 V Power Module
Step 1 Prepare a cable. Figure 5-22 Length for cable stripping Step 2 Connect the cable to the 24V OUT+ and 24V OUT- ports on the power module. Step 3 Bind the cable. Issue 01 (2020-02-14) Copyright © Huawei Technologies Co., Ltd. -
Page 72: Connecting The Single-Phase Power Cable
Connect the L and N (L) wires to the L and N (L) terminals of the station-service power source for the transformer station through an MCB. Step 3 Bind the cable. Issue 01 (2020-02-14) Copyright © Huawei Technologies Co., Ltd. -
Page 73: Connecting Do/Di/Ai Cables
The SACU reserves the waterproof connectors for the, DO, DI, and AI cables. Cabling routes are provided for the signal cables. For details about how to prepare and connect the cables, see the SmartPID2000 User Manual and SmartLogger3000 User Manual. Issue 01 (2020-02-14) Copyright © Huawei Technologies Co., Ltd. - Page 74 SmartACU2000D Smart Array Controller User Manual (with No PID Module) 5 Electrical Connections Figure 5-26 Cabling routes Issue 01 (2020-02-14) Copyright © Huawei Technologies Co., Ltd.
-
Page 75: System Commissioning
You have put on proper PPE. Ensure that the power voltage of the SACU is within the operating voltage range, and the three-phase input voltage is within the operating voltage range of the MBUS CCO. Issue 01 (2020-02-14) Copyright © Huawei Technologies Co., Ltd. -
Page 76: Closing The Cabinet Door
Figure 6-1 Closing the main cabinet door If a screw used for securing the cabinet door is lost, use the security torx screw in the fitting bag. 6.4 Powering Off the System Issue 01 (2020-02-14) Copyright © Huawei Technologies Co., Ltd. - Page 77 If the SACU supports the access of one MBUS route, turn off the FU01 switch. If the SACU supports the access of two MBUS routes, turn off the FU01 and FU02 switches. ----End Issue 01 (2020-02-14) Copyright © Huawei Technologies Co., Ltd.
-
Page 78: System Maintenance
Idle waterproof connectors are plugged and the locking caps are tightened. The cover on the USB port is tightened. Grounding All ground cables are reliably connected. Once every twelve reliability months Issue 01 (2020-02-14) Copyright © Huawei Technologies Co., Ltd. -
Page 79: Troubleshooting
3. Check whether the power cable is connected to the AC socket. 4. The power adapter is faulty. 4. Replace the power adapter. 5. The SmartLogger is faulty. 5. Contact the dealer or Huawei technical support. Issue 01 (2020-02-14) Copyright © Huawei Technologies Co., Ltd. -
Page 80: Component Replacement
2. Log in to the SmartLogger WebUI or SUN2000 app and check whether a communication certificate expiration alarm is generated. If yes, reload the certificate. 3. Contact the dealer or Huawei technical support. 7.3 Component Replacement Issue 01 (2020-02-14) Copyright © Huawei Technologies Co., Ltd. -
Page 81: Replacing The Single/Three-Phase Spd
SPD. Step 1 Remove the faulty surge protection module from the SPD. Figure 7-1 Removing a faulty surge protection module Step 2 Install a new surge protection module. Issue 01 (2020-02-14) Copyright © Huawei Technologies Co., Ltd. -
Page 82: Replacing The Knife Fuse Switch
Step 2 Remove the faulty knife fuse switch. Figure 7-3 Removing a faulty knife fuse switch Step 3 Install a new knife fuse switch. Step 4 Connect the cables based on their labels. ----End Issue 01 (2020-02-14) Copyright © Huawei Technologies Co., Ltd. -
Page 83: Replacing The Fuse Of A Knife Fuse Switch
7.3.5 Replacing the SmartMBUS CCO Module Step 1 Disconnect the cables from the SmartMBUS CCO module and label the cables. Step 2 Remove the faulty SmartMBUS CCO module and its mounting ears. Issue 01 (2020-02-14) Copyright © Huawei Technologies Co., Ltd. -
Page 84: Replacing The Smartlogger
Step 5 Connect the cables based on their labels. ----End 7.3.6 Replacing the SmartLogger Step 1 Disconnect the cables from the SmartLogger and label the cables. Step 2 Remove the faulty SmartLogger and its cabinet-mounting kit. Issue 01 (2020-02-14) Copyright © Huawei Technologies Co., Ltd. - Page 85 Step 3 Remove the mounting ears and guide rail–mounting kit from a new SmartLogger, and install the cabinet-mounting kit. Figure 7-8 Replacing a SmartLogger Step 4 Install the new SmartLogger in the cabinet. Step 5 Connect the cables based on their labels. Issue 01 (2020-02-14) Copyright © Huawei Technologies Co., Ltd.
-
Page 86: Replacing The Power Adapter
Step 4 Connect the cables based on their labels. ----End 7.3.8 Replacing the Fiber Adapter Step 1 Disconnect the cables from the fiber adapter and label the cables. Step 2 Remove the faulty fiber adapter. Issue 01 (2020-02-14) Copyright © Huawei Technologies Co., Ltd. -
Page 87: Replacing The Usb Port
7.3.9 Replacing the USB Port Step 1 Disconnect the cable from the USB port, and label the cable. Step 2 Remove the faulty USB port. Figure 7-11 Removing a USB port Issue 01 (2020-02-14) Copyright © Huawei Technologies Co., Ltd. - Page 88 Step 3 Ensure that the rubber ring is on the inner side of the cabinet when installing a new USB port. Step 4 Connect the cables based on their labels. ----End Issue 01 (2020-02-14) Copyright © Huawei Technologies Co., Ltd.
-
Page 89: Technical Specifications
Installed on a support, pole, or wall Dimensions (H x 770 mm x 640 mm x 315 mm (30.31 in. x 25.20 in. x 12.40 in.) W x D, including the mounting plate) Issue 01 (2020-02-14) Copyright © Huawei Technologies Co., Ltd. - Page 90 –40° C to +70° C (–40° F to +158° F) Storage temperature Note a: Supports a 24 V power system. DC input and output: 24–28 V DC; 70 W (maximum) Issue 01 (2020-02-14) Copyright © Huawei Technologies Co., Ltd.
-
Page 91: Acronyms And Abbreviations
Acronyms and Abbreviations alternating current analog input application access terminal box CAT 5E Category 5 enhanced central controller customer-premises equipment direct current digital input digital output environmental monitoring instrument Ethernet Long Term Evolution Issue 01 (2020-02-14) Copyright © Huawei Technologies Co., Ltd. - Page 92 User Manual (with No PID Module) A Acronyms and Abbreviations monitoring bus MBUS protective earthing power over Ethernet relative humidity small form-factor pluggable surge protective device WEEE waste electrical and electronic equipment Issue 01 (2020-02-14) Copyright © Huawei Technologies Co., Ltd.