Advertisement
Advertisement
Table of Contents

Related Manuals for Huawei eSpace IAD104H


Summary of Contents for Huawei eSpace IAD104H
- Page 1 IAD104H Quick Start Issue Date 2019-04-09 HUAWEI TECHNOLOGIES CO., LTD.
-
Page 2: Table Of Contents
4.4 Connecting to the IMS (SIP) .................. 27 4.5 Accessing Network Through the IAD ..............38 5 Configuration (EMS) ............... 40 6 FAQs ....................43 7 Technical Specifications and Environment Requirements ..46 Issue 10 (2019-04-09) Huawei Proprietary and Confidential Copyright © Huawei Technologies Co., Ltd. -
Page 3: Packing List
If the items in the package are different from those in the table, contact the sales person. Item Quantity eSpace 104H Power supply adapter Network cable CD-ROM Quick Start Certificate Issue 10 (2019-04-09) Huawei Proprietary and Confidential Copyright © Huawei Technologies Co., Ltd. -
Page 4: Safety Precautions
Keep the power plug clean and dry to avoid the electric shock and other potential risks. Issue 10 (2019-04-09) Huawei Proprietary and Confidential Copyright © Huawei Technologies Co., Ltd. - Page 5 Before you clean the device, stop the device and turn off the power. Remove all the cables connected to the device, such as the power cables and network cables. Issue 10 (2019-04-09) Huawei Proprietary and Confidential Copyright © Huawei Technologies Co., Ltd.
- Page 6 Discard them at the specified recycle station. Comply with the local laws and regulations on processing the device package materials, consumed batteries, and obsolete devices, and support the recycling. Class A Products Issue 10 (2019-04-09) Huawei Proprietary and Confidential Copyright © Huawei Technologies Co., Ltd.
- Page 7 Quick Start This product is of class A and may cause radio interference in a living environment. If radio interference exists, take some measures to eliminate the interference. Issue 10 (2019-04-09) Huawei Proprietary and Confidential Copyright © Huawei Technologies Co., Ltd.
-
Page 8: Installation
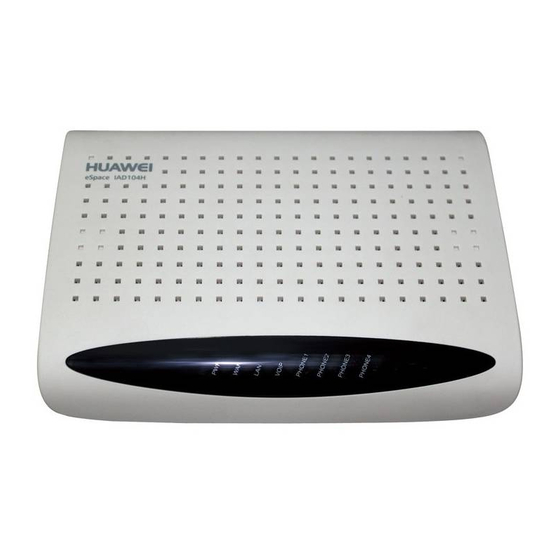
IAD104H 3 Installation Quick Start Installation The eSpace Integrated Access Device 104H (eSpace IAD104H) is the case-shaped device. You only need to connect cables. Issue 10 (2019-04-09) Huawei Proprietary and Confidential Copyright © Huawei Technologies Co., Ltd. -
Page 9: Manual Configuration (Cli)
You can log in to the web management system of the IAD104H in either of the following modes: HTTPS The web browser interacts with IAD104H through HTTPS, which ensures user information security. Issue 10 (2019-04-09) Huawei Proprietary and Confidential Copyright © Huawei Technologies Co., Ltd. - Page 10 IAD. For details about how to load the certificates and restart the IAD, see the load and reboot commands under Command Reference > Config Commands in the eSpace IAD104H Product Documentation. Establishing the Web Configuration Environment The IAD hardware connections are set up and the IAD is powered on.
- Page 11 PC for the first time, the message "Certificate Error: Navigation Blocked" is displayed. In this case, you need to load the web_rootcert certificate on the PC. For details, see Maintenance > Loading the Web Root Certificate in the eSpace IAD104H Product Documentation. Figure 4-1 Login page If you forget the IP address of the IAD, you can do as follows to obtain the IP address.
- Page 12 For details about how to log in to the IAD through the serial port, see Configuration > Manual Configuration(CLI) > Logging in to the CLI > Logging In Through Local Serial Port in the eSpace IAD104H Product Documentation. Set the system language to simplified Chinese or English as required.
-
Page 13: Connecting To Ngn/Ip Pbx (Sip)
Control protocol SIP protocol Protocol mode: SIP used between the softswitch and the IAD IP address of the 192.168.1.40/255.25 IP address of the SIP softswitch 5.255.0 server: 192.168.1.40 Issue 10 (2019-04-09) Huawei Proprietary and Confidential Copyright © Huawei Technologies Co., Ltd. - Page 14 IAD is the same as (based on the authentication password) password on the softswitch.Contact the network carrier or softswitch administrator to determine whether to set the password and the specific password. Issue 10 (2019-04-09) Huawei Proprietary and Confidential Copyright © Huawei Technologies Co., Ltd.
- Page 15 The gateway IP address must be in the same network segment as the IAD IP address. Contact the network administrator to obtain the gateway IP address. Procedure Step 1 Set the communication protocol. Issue 10 (2019-04-09) Huawei Proprietary and Confidential Copyright © Huawei Technologies Co., Ltd.
- Page 16 Step 2 Log in to the web management system and click Step 3 Configure network parameters for the IAD104H. Click Start. The Basic Configuration > Network Parameter page is displayed. Set WAN parameters as planned. Issue 10 (2019-04-09) Huawei Proprietary and Confidential Copyright © Huawei Technologies Co., Ltd.
- Page 17 After the IP address is changed, re-log in to the web management system, click and click Start to access the Basic Configuration > Network Parameter page again. (Optional) Configure the DNS server. Issue 10 (2019-04-09) Huawei Proprietary and Confidential Copyright © Huawei Technologies Co., Ltd.
- Page 18 If Obtain type is set to DHCP, configure the SIP server by DHCP. For details, see eSpace IAD104H Product Documentation. (Optional) Select a value for SIP server register mode and click OK. Issue 10 (2019-04-09) Huawei Proprietary and Confidential Copyright ©...
- Page 19 The default SIP signaling port number is 5060. You are advised to use the default value. If you want to change the local port number, change it accordingly on the SIP server. Click Next. Issue 10 (2019-04-09) Huawei Proprietary and Confidential Copyright © Huawei Technologies Co., Ltd.
- Page 20 User name and Password are optional. Contact the operator to confirm whether User name and Password are required. Click OK. Step 7 (Optional) Click Next and configure the SIP digitmap. Issue 10 (2019-04-09) Huawei Proprietary and Confidential Copyright © Huawei Technologies Co., Ltd.
- Page 21 Step 8 Save the settings. Click Next. The Maintenance > Save Data page is displayed. Click OK. Click Finish. If you want to configure other data, see the eSpace IAD104H Product Documentation. ---- End Verification After the preceding configuration is complete, the IAD is running properly.
-
Page 22: Accessing Ngn/Ip Pbx (Mgcp)
Protocol mode: MGCP used between the SoftX3000 and the IAD IP address of the 192.168.1.70/255.25 IP address of the MGC IFMI board on 5.255.0 server: 192.168.1.70 the SoftX3000 Issue 10 (2019-04-09) Huawei Proprietary and Confidential Copyright © Huawei Technologies Co., Ltd. - Page 23 ID is 0) Number of the 6540001 User number for port 1: user B (whose 6540001 device ID is 1) Table 4-4 Other network information Item Data Issue 10 (2019-04-09) Huawei Proprietary and Confidential Copyright © Huawei Technologies Co., Ltd.
- Page 24 Therefore, you must save the settings before changing the protocol. Choose Advanced Configuration > Protocol Mode. The Protocol Mode page is displayed. Select MGCP and click OK. Issue 10 (2019-04-09) Huawei Proprietary and Confidential Copyright © Huawei Technologies Co., Ltd.
- Page 25 For details, see the help information. Click Save. The confirmation dialog box is displayed. Click OK. The web management system automatically restarts. Issue 10 (2019-04-09) Huawei Proprietary and Confidential Copyright © Huawei Technologies Co., Ltd.
- Page 26 Set DNS parameters according to the data plan and help information. Click Save. Step 4 Configure the MG data. Click Next. The MGCP Service Configuration > MG page is displayed. Set MG parameters. Issue 10 (2019-04-09) Huawei Proprietary and Confidential Copyright © Huawei Technologies Co., Ltd.
- Page 27 DNS and then configure the MGC domain name. Step 6 (Optional) Set the MGCP software parameters. Click Next. The MGCP Service Configuration > Soft Parameter page is displayed. Issue 10 (2019-04-09) Huawei Proprietary and Confidential Copyright © Huawei Technologies Co., Ltd.
- Page 28 The Maintenance > Save Data page is displayed. Click OK. Click Finish. If you want to configure other data, see the eSpace IAD1224 Product Documentation. ---- End Issue 10 (2019-04-09) Huawei Proprietary and Confidential Copyright © Huawei Technologies Co., Ltd.
-
Page 29: Connecting To The Ims (Sip)
You can obtain the connection data between the IAD and the IMS from the network carrier or network administrator. The following describes how to enable the voice function for an IAD104H user. Issue 10 (2019-04-09) Huawei Proprietary and Confidential Copyright © Huawei Technologies Co., Ltd. - Page 30 Local port number: 5060 port number on the IAD Domain name of abc.example.com User domain name: the IAD abc.example.com NOTE The user domain name must be unique. Issue 10 (2019-04-09) Huawei Proprietary and Confidential Copyright © Huawei Technologies Co., Ltd.
- Page 31 IMPI: User name: +8657143210002 +8657143210002@abc. @abc.example.co example.com Password: 123457 Password: 123457 Table 4-6 Other network information Item Data IP address of the DNS server 192.168.1.50 Issue 10 (2019-04-09) Huawei Proprietary and Confidential Copyright © Huawei Technologies Co., Ltd.
- Page 32 Select SIP and click OK. The protocol change will trigger the IAD restart. The restart process takes about 2 minutes. Re-log in to the web management system after the IAD restart. Issue 10 (2019-04-09) Huawei Proprietary and Confidential Copyright © Huawei Technologies Co., Ltd.
- Page 33 For details, see the help information. Click Save. The confirmation dialog box is displayed. Click OK. The web management system automatically restarts. Issue 10 (2019-04-09) Huawei Proprietary and Confidential Copyright © Huawei Technologies Co., Ltd.
- Page 34 Set DNS parameters according to the data plan and help information. Click Save. Step 4 Configure the SIP server. Click Next. The SIP Service Configuration > SIP Server page is displayed. Issue 10 (2019-04-09) Huawei Proprietary and Confidential Copyright © Huawei Technologies Co., Ltd.
- Page 35 If Obtain type is set to DHCP, configure the SIP server by DHCP. For details, see eSpace IAD104H Product Documentation. (Optional) Select a value for SIP server register mode and click OK. The IAD104 supports three registration modes. Select a mode according to the help information.
- Page 36 SIP server. Click Next. The SIP Service Configuration > Local Port page is displayed. Change the local port number. Click OK. Step 6 (Optional) Configure the wildcard groups. Issue 10 (2019-04-09) Huawei Proprietary and Confidential Copyright © Huawei Technologies Co., Ltd.
- Page 37 Select the slot number for the board where SIP users will be configured. Select port numbers and then configure SIP user parameters according to the data plan and help information. Issue 10 (2019-04-09) Huawei Proprietary and Confidential Copyright © Huawei Technologies Co., Ltd.
- Page 38 The SIP Service Configuration > Soft Parameter page is displayed. Set SIP software parameters according to the data plan and help information. Use default values for all parameters。 Issue 10 (2019-04-09) Huawei Proprietary and Confidential Copyright © Huawei Technologies Co., Ltd.
- Page 39 The Maintenance > Save Data page is displayed. Click OK. Click Finish. If you want to configure other data, see the eSpace IAD104H Product Documentation ---- End Issue 10 (2019-04-09) Huawei Proprietary and Confidential Copyright © Huawei Technologies Co., Ltd.
-
Page 40: Accessing Network Through The Iad
For example, to configure a PC to access the network through the IAD104H, do as follows: Connect the PC to the LAN port of the IAD, and the WAN port to the uplink, as shown below. Issue 10 (2019-04-09) Huawei Proprietary and Confidential Copyright © Huawei Technologies Co., Ltd. - Page 41 IAD is in the NAT mode. If the CLI does not display that NAT is started, run nat enable to enter the NAT mode. Issue 10 (2019-04-09) Huawei Proprietary and Confidential Copyright © Huawei Technologies Co., Ltd.
-
Page 42: Configuration (Ems)
IP addresses of both UCEMS servers. The two servers will work in the active and standby mode. For example: TERMINAL(config)#nms primary 192.168.1.201 secondary 192.168.1.55 Issue 10 (2019-04-09) Huawei Proprietary and Confidential Copyright © Huawei Technologies Co., Ltd. - Page 43 UCEMS Set the getcom: public parameters for setcom: private communication trapcom: public between the IAD and the trapport: 162 UCEMS register: on Issue 10 (2019-04-09) Huawei Proprietary and Confidential Copyright © Huawei Technologies Co., Ltd.
- Page 44 : 30 S register switch : on If the "register state" field displays "succeed", it indicates that the IAD has registered to the UCEMS successfully. ----End Issue 10 (2019-04-09) Huawei Proprietary and Confidential Copyright © Huawei Technologies Co., Ltd.
-
Page 45: Faqs
Restart the IAD for the settings to take effect. When the device restarts, use the default IP address 192.168.100.1, user name root, and password huawei123(For V300R001,the password is admin) to log in. Issue 10 (2019-04-09) Huawei Proprietary and Confidential Copyright © Huawei Technologies Co., Ltd. - Page 46 A: Log in to the CLI, and run the enable and configure terminal commands in sequence to enter the global configuration mode. Then run the display physical-serial-num command. Q: How do I view the elabel of the IAD? Issue 10 (2019-04-09) Huawei Proprietary and Confidential Copyright © Huawei Technologies Co., Ltd.
- Page 47 Then run the pstnport attribute set 0 enable command. If port 0 needs to be connected to the DTMF phone, run the pstnport attribute set 0 disable command to disable the pulse dialing function. Issue 10 (2019-04-09) Huawei Proprietary and Confidential Copyright © Huawei Technologies Co., Ltd.
-
Page 48: Technical Specifications And Environment Requirements
Working temperature 0° C-40° C Working humidity 5%-95% (no condensing) Dimensions IAD104H: 234 mm (depth) x 170 mm (width) x 36 mm (height) Weight <500 g Issue 10 (2019-04-09) Huawei Proprietary and Confidential Copyright © Huawei Technologies Co., Ltd. - Page 49 ≤3 Number of paralleled phones (subscriber line distance is smaller than or equal to 2.0 km and the subscriber line diameter is 0.4 mm) Issue 10 (2019-04-09) Huawei Proprietary and Confidential Copyright © Huawei Technologies Co., Ltd.