Table of Contents
Advertisement
Advertisement
Table of Contents

Related Manuals for Opticum XS65


Summary of Contents for Opticum XS65
- Page 1 Receiver XS65 Manual digital satellite receiver KK 02/15...
-
Page 2: Table Of Contents
Contents Brief description 1.1 Basic features 1.2 Package Contents 1.3 Front panel 1.4 Rear Panel 1.5 Remote Control Installation 2.1 Connection 2.2 First start 2.3 List of satellites 2.4 Antenna Installation 2.5 Easyfind 2.6 Automatic switch-off of the receiver 2.7 Conditional Access Card Operation 3.1 Basic functions 3.2 Changing channels... - Page 3 Menu 4.1 Main Menu 4.2 Edit Channel 4.3 Installing the antenna 4.4 System Settings 4.5 Media player 4.6 Network / APP 4.7 Access Card 4.8 Setup Disk Troubleshooting Safety Precautions Environmental protection Technical Specifications Contents...
-
Page 4: Brief Description
Brief description 1.1 Basic features 1. Smart Card reader in Conax Conditional access system 2. Support of SD / HD (MPEG2 / H.264), DVB-S, DVB-S2 3. High resolution video output - HDMI 4. Standard video output - SCART 5. 2 ports in USB 2.0 standard 6. -
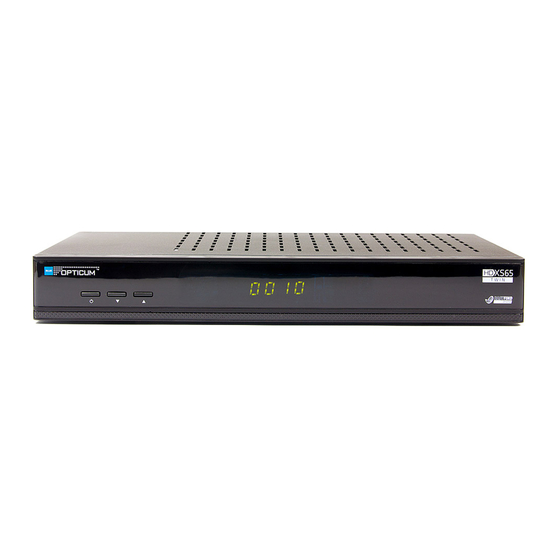
Page 5: Front Panel
1.3 Front Panel display change channels/ Power on/off move cursor 1.4 Rear Panel signal card reader HDMI ethernet input output USB1 S/PDIF SCART USB2 power cord output WiFi Brief description... -
Page 6: Remote Control
1.5 Remote Control... - Page 7 Button Function POWER - Turns on / off the receiver from / to standby mode HDMI Switches HDMI output resolution of the image. Turns on / off the sound. MUTE - 0–9 Set the channel; Allows you to enter the parameters in the menu. Display the list of groups of favorite channels by a category.
-
Page 8: Installation
Installation Read this chapter to find out: 1. how to connect the receiver to your TV, 2. how to install the antenna, 3. how to configure the receiver, 4. and how to use the USB drives with the receiver. 2.1 Connection Connect the antenna to the input according to the installation guide on the screen. -
Page 9: List Of Satellites
2.2 Starting up for the first time Turn the TV on and using its functions set the input to the receiver. Turn on the receiver by pressing the POWER button . The installation guide OSD (On Screen Display - items displayed on the screen by the receiver) will appear on the screen. - Page 10 [OK] – Select Use the OK button, select the satellite to be received – a star symbol will show, which satellite is selected. Edit Using the red button you can change the name of the satellite, and also set the longitude and direction of E-east and W - West.
-
Page 11: Antenna Installation
2.4 Antenna Installation In this menu, you can install the antenna and then search for channels. An- tenna installation process is often complicated because it requires technical knowledge and additional multiple devices. In many cases you will not need the knowledge of the advanced settings. Modern technologies allow to ad- just the antenna without leaving home, using the receiver. - Page 12 Scan the satellite Press the Red button to scan a single satellite. De- tailed satellite scan options: Satellite Select the satellite to scan. FTA Only Select No or Yes, if you want to search only unen- crypted channels. Network search Select No or Yes, if you want to scan only the frequ- encies with the NIT (Network Information Table).
- Page 13 TP search Transponder scan. Press the green button to scan the transponder. In the window that appears after 3 seconds on the screen, set the options: FTA only Select Yes if you want to search only unencrypted channels. Scan channels Select the type of channels you want to search (TV, radio, or both at once).
- Page 14 Features available in the edit transponder window (colored buttons): Edit Set frequency, symbol rate and polarization for the selected transponder. Add a new transponder, set its frequency, symbol rate and polarization. Delete Delete a transponder. Confirm your decision by selecting „Yes” and press OK or select „No” to exit. Search Scan a transponder as in TP Scan menu (described above).
- Page 15 2.5.2 Scanning options – using the LNB Press the white button to select how to set the antenna to the LNB. Satellite Select the satellite you want to use. You can choose from the satellites that were previously selected and marked with a star on the list of satellites.
- Page 16 IF Channel Select IF Channel (1 to 8). Delete all Delete all the settings of the antenna; available if the DiSEqC1.2 was selected. Motor Setting detailed settings of the motor. (Different settings depending on the selected standard USALS / DiSEqC1.2) Settings for DiSEqC1.2: Satellite Press...
- Page 17 Settings for USALS: Satellite Press to select the satellite. You can choose from satellites marked with a star symbol already on the list of satellites. Transponder Press / to select a transponder. The antenna should automatically turn to the selected satellite and transponder.
-
Page 18: Easyfind
2.5 Easyfind Easyfind is a feature that allows you to set the position of a satellite dish without compass, another person and technical understanding. You need the matching Easyfi nd LNB (which is the gizmo on the end of the dish arm that collects the satellite signal and sends it to the receiver). -
Page 19: Conditional Access Card
2.6 Automatic Power Down In accordance to the EU requirements, your receiver has been equipped with the „Automatic Power Down” function. After a set amount of time, the re- ceiver will automatically switch to the standby mode. It means that in prac- tice, if the receiver doesn’t receive any signal from the remote controller or from the buttons on the front panel, it switches itself off. -
Page 20: Operation
Operation Read this chapter to learn how to use and set up the receiver, depending on your needs. 3.1 Basic Features To turn your receiver ON or to Standby, use the button on the remote con- trol. Choose the desired channel with the / buttons. Alternatively, you can input the channel number with the numeric buttons on the remote control. -
Page 21: Sleep Timer
P+, P- or / The P+ and buttons to switch to the next channel. The P- and buttons to switch to the previous channel. Press the EPG in viewing mode to display the electronic program guide. Use / , to select a channel from the list and press OK to switch to it. Favorite Use the FAV button to see a list of your favorite channels. - Page 22 displayed. Using the REC button, add or delete a recording. This function is described in 3.6 TIMER the next section Info bar displays information about the current program. If you want to enlar- ge it, use the INFO button on the remote control. In the menu „System Settings”...
-
Page 23: Timer
3.6 TIMER Timer is a function, which can be accessed via the EPG menu by pressing the • REC button. Use the cursor keys to navigate through the options in the timer settings. Timer mode Press / to set the recording mode. Recording – sin- gle recording;... -
Page 24: Radio Channels
3.7 Radio channels The receiver is adapted to receive and play digital radio channels available from a satellite. Use the TV/ button,to switch between TV and radio chan- nels. Radio channels have their own list and EPG. You can manage the radio channels almost the same way as TV channels. -
Page 25: Pvr - Recording Programs
3.10 PVR – recording programs List of recordings Press the yellow button (PVR) to go to the list of recordings. Already made recordings are marked with white color and scheduled recordings are red. Press / to select the recording from the list to edit it. Edit the list of recor- dings using the colored buttons: Rename Rename planned or existing recordings. - Page 26 Start recording Available if the mode is set to recording. Set the number of minutes before the scheduled program for the receiver to start recording (from 0 to 30). Stop recording Available if the mode is set to recording. Set the number of minutes after a scheduled program for the receiver to stop recording (from 0 to 30).
-
Page 27: Time Shift
Recording To make recording possible, connect the USB drive to the receiver. The recor- ding time depends on the size of the USB memory. In a viewing mode, recor- • REC. ding directly from the remote control can be turned on by pressing The receiver will ask „Do you want to stop the recording at the end of the program?”... -
Page 28: Audio
In this window, you can see which channel and which satellite and transpon- der is being read. There are also information about the both possible tuners: status, signal strength and quality. In the receiver status there is also available the EasyFind function. Press the red button to turn it on or off. -
Page 29: Subtitles
button. Use 0-9 to enter the number of the page you want to view. Colored buttons on the remote control allow you jump to a specific page immedia- tely, as indicated at the bottom of the teletext. Use / to select the previous or next page. -
Page 30: Menu
Menu Read this chapter to learn how to use the menu of the receiver, and setbthe receiver to fit your needs. 4.1 Main menu To access the main menu, press the MENU button while in the viewing mode. Use the cursor keys to navigate through the menus. Use the OK button to se- lect the submenu. - Page 31 Use / to select the channel you want to select, and then press OK. You can also use to select or deselect all channels. Favorites Use the WHITE button on the remote control. Then use / to select the category you want to assign to a channel and press OK.
-
Page 32: Installing The Antenna
BLUE to save the changes. To edit a group, first highlight it using / and then select OK. A group can be modified only if it has already channels assign. Select the channel that you want to modify and press OK. To move the channel in the order of the list, press the YELLOW button, and then set it with / . -
Page 33: System Settings
4.4 System settings Select System Settings using the cursor keys and press OK to enter. Use / to highlight the selected submenu and press OK to enter it. Press EXIT or MENU to return to the previous menu. Receiver Information Here you can find information on the model of the receiver and its software. -
Page 34: Display Settings
Resolution With / switch between the values from 480i to 1080p. Apply a resolution that fits your TV. Format Use this feature to select the aspect ratio and the prefer- red method of conversion. Available options are: Auto (automatic detection of aspect ratio), 4: 3 PS (widescreen image shows the full 16: 9 to 4: 3 TV), 4: 3 LB (black bars on top and below the picture) and 16: 9 (use this setting for TVs 16: 9). -
Page 35: Parental Lock
Summer time Select On to add an hour during daylight saving time. Date Date and Time settings are available when the option GMT Usage is disabled. With 0-9 to enter the date. Time Date and Time settings are available when the option GMT Usage is disabled. - Page 36 Teletext Use / to select language of the teletext (if available) OSD Settings In this menu, you can change the settings for the OSD, which is the menu and other items displayed. Use / to select OSD Settings and press OK. Display of Use the / to set display to Manual, Off or On.
-
Page 37: Media Player
Others Automatic power With the buttons switch between the values of timing and Off. When this feature is enabled, the re- ceiver turns off after the preset time since last use of the remote control or the buttons on the unit. Disable this feature to avoid automatic shutdown. - Page 38 Your recordings In the menu you record programs already recorded are displayed in white, and scheduled (timer) in red. Use the / buttons to highlight the selected recording and press OK to start play. During playback, you can do the following: •...
- Page 39 Using the red button, go to the window to rename the hi- rename ghlighted record. Using the green button lock the recording so that wat- lock ching it would be possible only after entering the password. (The default password is 0000) Remove unwanted recording.
-
Page 40: Network / App
4.6 Network / APP Select Network / APP using the cursor keys and press OK to enter. Use / , to highlight the selected submenu and press OK to enter it. Network Settings Internet connection can be automatic – via DHCP or set manually. To set the connection manually, set DHCP to Off. -
Page 41: Internet Radio
Internet Radio When the receiver is connected to the internet you can play Internet radio sta- tions. Internet Radio menu displays a list of available radio stations. To naviga- te through the list, use the / and OK to play. Some radio stations provide a ... -
Page 42: Access Card
4.7 Access card Select access card using the cursor keys and press OK to enter. Use / to highlight the selected submenu and press OK to enter it. Press EXIT or MENU to return to the previous menu. Status subscription In this menu, you can check the status of your subscription and the right to receive the channels. -
Page 43: Recording Settings
mation about the USB disk drive Settings menu and press OK. You can check out what is the size of the drive and how much free space is left on it. Additionally, you can format the disk, using the BLUE button. Con- firm the action by selecting Yes. -
Page 44: Troubleshooting
Troubleshooting There are various reasons for the malfunction of the receiver. After you ap- ply the following tips, if the receiver still does not work properly, contact a professional service. Do not open or disassemble the receiver. This can lead to a dangerous situation and the warranty will be void. - Page 45 Problem Possible Cause Suggested solution No response to Receiver is off Plug in the receiver and remote control turn it on Remote control is not Aim a remote control to- aimed correctly wards the front panel Front panel is obstruc- Remove the obstacle Remote control batte- Change the batteries...
-
Page 46: Safety Precautions
Safety Precautions ATTENTION: Warning: The lightning flash with arrowhead symbol, within an equilateral triangle, is intended to alert the user to „dangerous voltage” and to prevent from a risk of electric shock. Warning: To reduce the risk of electric shock, don’t open the cabinet. - Page 47 Attachments: Never add any attachments and/or equipment without the manufacturer consent; as such additions may result in the risk of fire, electric shock, or other personal injury. Locating: Slots and openings in the cabinet are provided for ventilation to protect it from overheating. Do not block these openings or allow them to be blocked by placing the receiver on a bed, sofa, or other similar surface, nor should it be placed over a radiator or heat register.
-
Page 48: Environment Protection
Environment Protection Attention! Your product Is marked with this symbol. It means that used electrical and electronic products should not be mixed with general household waste. There is a separate collection system for these products. Information on Disposal for Users (private households) in the European Union. -
Page 49: Technical Specifications
Technical Specification Model: Digital Satellite Receiver DVB-S2 Display Type: LED, 4-digit, Keys 3, micro switch Slots: Smart Card Input frequency: 950-2150MHz RF input connector: IEC 169-24, Female, 250mA Input impedance: 75 Ω RF loop connector: IEC169-24, Female, 250mA Modulation: QPSK (DVB-S), QPSK / 8PSK / H8PSK / :16APSK (DVB-S2) Decoding: MPEG2 (MP @ ML), AVC / H.264 (HP@L4.1) Image resolution: 480i, 576i, 480p, 576p, 720i, 1080i, 1080p...
Need help?
Do you have a question about the XS65 and is the answer not in the manual?
Questions and answers