ABB ACS580-04 Hardware Manual
Drive modules (200 to 500 kw)
Hide thumbs
Also See for ACS580-04:
- Hardware manual (298 pages) ,
- Quick installation manual (100 pages) ,
- User manual (22 pages)

Related Manuals for ABB ACS580-04


Summary of Contents for ABB ACS580-04
- Page 1 ABB general purpose drives Hardware manual ACS580-04 drive modules (200 to 500 kW)
-
Page 2: List Of Related Manuals
List of related manuals Drive hardware manuals and guides Code (English) Code (Chinese) ACS580-04 drive modules (200 to 500 kW) hardware 3AXD50000015497 3AXD50000016428 manual ACS580-04 drive modules (200 to 500 kW) quick 3AXD50000015469 3AXD50000015469 installation and start-up guide ACS-AP-x Assistant control panels user’s manual... -
Page 3: 1. Safety Instructions
Hardware manual ACS580-04 drive modules (200 to 500 kW) Table of contents 1. Safety instructions 6. Installation instructions 9. Start-up 2016 ABB Oy. All Rights Reserved. 3AXD50000015497 Rev C EFFECTIVE: 2016-07-01... -
Page 5: Table Of Contents
Table of contents List of related manuals ........... 2 1. - Page 6 AM_ ............54 Additional requirements for ABB high-output and IP23 motors ....54 Additional requirements for non-ABB high-output and IP23 motors .
- Page 7 Connecting the control cables ..........80 Default I/O connection diagram (ABB standard macro) ..... . . 82 Switches .
- Page 8 Option slot 2 (I/O extension modules) ........87 Option slot 1 (fieldbus adapter modules) .
- Page 9 Replacing the battery in the assistant control panel ......110 12. Technical data Contents of this chapter ..........113 Ratings .
- Page 10 14. Example circuit diagram Contents of this chapter ..........133 Example circuit diagram .
- Page 11 LEDs ............153 Technical data .
- Page 12 Product training ............175 Providing feedback on ABB Drives manuals ....... . 175...
-
Page 13: Safety Instructions
Safety instructions 13 Safety instructions Contents of this chapter This chapter contains the safety instructions which you must obey when you install and operate the drive and do maintenance on the drive. If you ignore the safety instructions, injury, death or damage can occur. Use of warnings and notes Warnings tell you about conditions which can cause injury or death, or damage to the equipment. -
Page 14: General Safety In Installation, Start-Up And Maintenance
14 Safety instructions General safety in installation, start-up and maintenance These instructions are for all personnel that install the drive module and do maintenance work on it. WARNING! Obey these instructions. If you ignore them, injury or death, or damage to the equipment can occur. •... - Page 15 Safety instructions 15 • To prevent the drive module from falling, attach its top lifting lugs with chains to the cabinet frame before you push the module into the cabinet and pull it from the cabinet. Work carefully preferably with help from another person as shown below. Keep a constant pressure with one foot on the base of the module to prevent the module from falling on its back 3AUA0000088632...
-
Page 16: Electrical Safety In Installation, Start-Up And Maintenance
16 Safety instructions Electrical safety in installation, start-up and maintenance Precautions before electrical work These warnings are for all personnel that do work on the drive, motor cable or motor. WARNING! Obey these instructions. If you ignore them, injury or death, or damage to the equipment can occur. -
Page 17: Additional Instructions And Notes
Safety instructions 17 Additional instructions and notes WARNING! Obey these instructions. If you ignore them, injury or death, or damage to the equipment can occur. • If you are not a qualified electrician, do not do installation or maintenance work. •... -
Page 18: Grounding
18 Safety instructions Grounding These instructions are for all personnel who are responsible for the grounding of the drive. WARNING! Obey these instructions. If you ignore them, injury or death, or equipment malfunction can occur, and electromagnetic interference can increase. •... -
Page 19: Additional Instructions For Permanent Magnet Motor Drives
Safety instructions 19 Additional instructions for permanent magnet motor drives Safety in installation, start-up and maintenance These are additional warnings concerning permanent magnet motor drives. The other safety instructions in this chapter are also valid. WARNING! Obey these instructions. If you ignore them, injury or death and equipment malfunction can occur. - Page 20 20 Safety instructions...
-
Page 21: Introduction To The Manual
Introduction to the manual 21 Introduction to the manual Contents of this chapter This chapter describes the intended audience and contents of the manual. It contains a flowchart of steps in checking the delivery, installing and commissioning the drive. The flowchart refers to chapters/sections in this manual and other manuals. -
Page 22: Contents Of The Manual
22 Introduction to the manual Contents of the manual This manual contains the instructions and information for the basic drive module configuration. The chapters of the manual are briefly described below. Safety instructions gives safety instructions for the installation, commissioning, operation and maintenance of the drive module. -
Page 23: Categorization By Frame Size And Option Code
Introduction to the manual 23 Categorization by frame size and option code The instructions, technical data and dimension drawings which concern only certain drive frame sizes are marked with the symbol of the frame size (R10 or R11). The frame size is marked on the type designation label. - Page 24 24 Introduction to the manual Task Standard drive modules Installing the drive module into a cabinet (page • Install the additional components into the cabinet: for example, main disconnector, main contactor, main AC Connecting the power cables (page fuses, etc. Manuals for any optional equipment •...
-
Page 25: Terms And Abbreviations
Introduction to the manual 25 Terms and abbreviations Term/Abbreviation Explanation ACS-AP-x Assistant control panel, advanced operator keypad for communication with the drive. The ACS580 supports types ACS-AP-I and ACS-AP-S. CHDI-01 Optional 115/230 V digital input extension module CMOD-01 Optional multifunction extension module (external 24 V AC/DC and digital I/O extension) CMOD-02 Optional multifunction extension module (external 24 V AC/DC and isolated PTC... - Page 26 26 Introduction to the manual...
-
Page 27: Operation Principle And Hardware Description
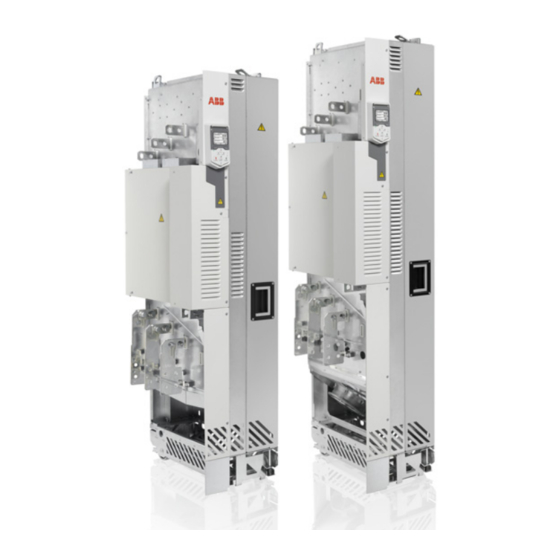
This chapter describes the operating principle and construction of the drive module. Product overview The ACC580-04 is a drive module for controlling asynchronous AC induction motors and permanent magnet motors. The main circuit of the drive module is shown below. ACS580-04 UDC+ UDC- L1/U1 T1/U2... -
Page 28: Layout
28 Operation principle and hardware description Layout Standard drive module configuration Lifting lugs Fastening bracket Input cable connection busbars (L1/U1, L2/V1, L3/W1) Circuit board compartment PE busbar Output cable connection terminals (T1/U2, T2/V2, T3/W2) attached Control cable duct Main cooling fans Pedestal Upper front cover Lower front cover... -
Page 29: Drive Module Configuration With Option +B051
Operation principle and hardware description 29 Drive module configuration with option +B051 The drive module configuration with clear plastic shrouds (option +B051) mounted is shown below. Upper front cover Pedestal Lower front cover Control panel Clear plastic shrouds attached (option +B051) See the next page for the part descriptions. - Page 30 30 Operation principle and hardware description +B051 +H370 Clear plastic shroud to be attached onto the Output power cable connection terminals drive module input power cabling (a). Lead- through shroud for side cabling (b). Option +B051. Clear plastic shrouds to be attached onto the Grounding terminal for output power cable drive module output power cabling with option shields...
-
Page 31: Control Panel
Operation principle and hardware description 31 Control panel ACS-AP-S assistant control panel ACS-AP-I assistant control panel (option +J425) DPMP-03 door mounting kit (option +J410) In the standard drive module configuration, the control panel is located on the internal control unit. DPMP-03 door mounting platform is also available with option +J410. -
Page 32: Overview Of Power And Control Connections
Option slot 2 for optional I/O extension modules Panel port I/O terminal blocks. See section External control connection terminals below and section Default I/O connection diagram (ABB standard macro) on page 82. Control panel (see page 88) du/dt or sine filter (optional, see page 169) -
Page 33: External Control Connection Terminals
Operation principle and hardware description 33 External control connection terminals The layout of the external control connection terminals on the drive module control are shown below. SLOT 1 SLOT 1 Option slot 1 (fieldbus adapter modules) ANALOG IN/OUT 1…3 Analog input 1 Current/Voltage selection switch for analog input 1... -
Page 34: Type Designation Label
The first digits from left express the basic configuration. The optional selections are given thereafter, separated by plus signs, eg, +J410. The main selections are described below. Not all selections are available for all types. For more information, refer to ACS580-04 Ordering Information (3AXD10000307681), available on request. Code Description... - Page 35 Operation principle and hardware description 35 Code Description Option codes (plus codes) Construction, pedestal and cabling B051 IP20 shrouds for cabling area 0H354 No pedestal H356 DC connection busbars H370 Full-size input power cable connection terminals and PE busbar 0H371 No full-size output power cable connection terminals 0P919 No installation ramp...
- Page 36 36 Operation principle and hardware description...
-
Page 37: Guidelines For Planning The Cabinet Installation
Limitation of liability You must always plan and make the installation according to applicable local laws and regulations. ABB does not assume any liability whatsoever for any installation which breaches the local laws and/or other regulations. Installation positions of the drive module You can put the drive module in the bookshelf position in a cabinet. -
Page 38: Planning The Layout Of The Cabinet
38 Guidelines for planning the cabinet installation Planning the layout of the cabinet Plan a spacious layout to ensure easy installation and maintenance. Sufficient cooling air flow, obligatory clearances, cables and cable support structures all require space. Place the control board(s) away from: •... -
Page 39: Layout Example, Door Open (Standard Drive Module Configuration)
Guidelines for planning the cabinet installation 39 Layout example, door open (standard drive module configuration) L1/U1 L2/V1 L3/W1 T3/W2 T2/V2 T1/U2 A – A 1 Supporting frame of the cabinet 8 Motor cable including the protective ground conductor of the drive module 2 Vertical (2a, 2b) and horizontal (2c, 2d) air 9 Drive module control unit. -
Page 40: Layout Example, Door Open (Option +B051)
40 Guidelines for planning the cabinet installation Layout example, door open (option +B051) This diagram shows a layout example for drive modules with IP20 shrouds (option +B051). L1/U1 L2/V1 L3/W1 T3/W2 T2/V2 T1/U2 A – A 1 Supporting frame of the cabinet 7 Drive module Vertical (2a) and horizontal (2b) air baffles 8 Motor cable including the protective ground conductor... -
Page 41: Arranging The Grounding Inside The Cabinet
Always fasten the drive module from its fastening points to the cabinet. For details, see the module installation instructions. WARNING! Do not fasten the cabinet by electric welding. ABB does not assume any liability for damages caused by electric welding as the welding circuit can damage electronic circuits in the cabinet. -
Page 42: Planning The Cabinet Placement On A Cable Channel
42 Guidelines for planning the cabinet installation Planning the cabinet placement on a cable channel Note the following when you plan to place the cabinet on a cable channel: • The cabinet structure must be sturdy enough. If the whole cabinet base is not supported from below, the cabinet weight will lie on the sections that the floor carries. - Page 43 Guidelines for planning the cabinet installation 43 • We recommend 360° high frequency grounding of the motor cable shields at their entries. The grounding can be implemented by a knitted wire mesh screening as shown below. Cable Cable tie Strain relief Bare cable shield Knitted wire mesh Cabinet lead-through plate...
-
Page 44: Planning The Cooling
44 Guidelines for planning the cabinet installation Planning the cooling Note the following guidelines when you plan the cooling of the cabinet: • Ventilate the installation site sufficiently so that the cooling air flow and ambient temperature requirements of the drive module are met, see pages and 120. -
Page 45: Preventing The Recirculation Of Hot Air
Guidelines for planning the cabinet installation 45 • The internal cooling fans of the drive modules and reactors/chokes are usually sufficient to keep the component temperatures low enough in IP22 cabinets. • In IP54 cabinets, thick filter mats are used to prevent water splashes from entering the cabinet. -
Page 46: Standard Drive Module Configuration
46 Guidelines for planning the cabinet installation Standard drive module configuration This diagram shows air baffle positions inside an example cabinet. For the descriptions, see the next page. L1/U1 L2/V1 L3/W1 T3/W2 T2/V2 T1/U2 C – C A - A B - B D –... - Page 47 Guidelines for planning the cabinet installation 47 1a Air flow to the drive module, max. 40 °C Optional air baffle that is needed when there is no (104 °F) fan on the lower part of the cabinet door (see 1b on page 38).
-
Page 48: Drive Module With Option +B051
48 Guidelines for planning the cabinet installation Drive module with option +B051 This diagram shows air baffle positions inside an example cabinet. L1/U1 L2/V1 L3/W1 T3/W2 T2/V2 T1/U2 C – C B – B A – A 1a Air flow to the drive module, max. 40 °C Drive module (104 °F) 1b Air inlet to the drive module circuit boards and... -
Page 49: Required Free Space
• height 2000 mm (78.74 in.). Other installation positions Contact your local ABB representative for more information. Drive module on its back If you install the drive module on its back, make sure that the hot cooling air that flows... -
Page 50: Planning The Placement Of The Control Panel
50 Guidelines for planning the cabinet installation Planning the placement of the control panel Note the following alternatives when you plan the placement of the control panel: • As standard, the control panel is integrated on the control unit inside the drive module. •... -
Page 51: Guidelines For Planning The Electrical Installation
ABB does not assume any liability whatsoever for any installation which breaches the local laws and/or other regulations. Furthermore, if the recommendations given by ABB are not obeyed, the drive can experience problems that the warranty does not cover. -
Page 52: Selecting The Supply Disconnecting Device
52 Guidelines for planning the electrical installation Selecting the supply disconnecting device Install a hand-operated input disconnecting device between the AC power source and the drive. The disconnecting device must be of a type that can be locked to the open position for installation and maintenance work. -
Page 53: Requirements Table
The following table shows how to select the motor insulation system and when optional ABB du/dt filters, insulated N-end (non-drive end) motor bearings and ABB common mode filters are required. Failure of the motor to fulfil the following requirements or improper installation may shorten motor life or damage the motor bearings and voids the warranty. -
Page 54: And Am
Common mode filter (option +E208) N-end bearing (Insulated motor non-drive end bearing) Additional requirements for ABB motors of types other than M2_, M3_, M4_, HX_ and AM_ Use the selection criteria given for non-ABB motors. -
Page 55: Additional Data For Calculating The Rise Time And The Peak Line-To-Line Voltage
Guidelines for planning the electrical installation 55 Additional data for calculating the rise time and the peak line-to-line voltage The diagrams below show the relative peak line-to-line voltage and rate of change of voltage as a function of the motor cable length with and without a du/dt filter in use. To calculate the actual peak voltage for a certain cable length read the relative Û... -
Page 56: Typical Power Cable Sizes
56 Guidelines for planning the electrical installation Note: When continuous metal conduit is employed, shielded cable is not required. The conduit must have bonding at both ends. A four-conductor system is allowed for input cabling, but shielded symmetrical cable is recommended. -
Page 57: Alternative Power Cable Types
Guidelines for planning the electrical installation 57 Alternative power cable types The recommended and not allowed power cable types to be used with the drive are presented below. Recommended power cable types Symmetrical shielded cable with three phase conductors and a concentric PE conductor as shield. -
Page 58: Selecting The Control Cables
Relay cable type The cable type with braided metallic screen (for example ÖLFLEX by LAPPKABEL, Germany) has been tested and approved by ABB. Control panel cable length and type In remote use, the cable connecting the control panel to the drive must not exceed three meters (10 ft). -
Page 59: Routing The Cables
Guidelines for planning the electrical installation 59 Routing the cables Route the motor cable away from other cable routes. Motor cables of several drives can be run in parallel when installed next to each other. The motor cable, input power cable and control cables should be installed on separate trays. -
Page 60: Continuous Motor Cable Shield Or Enclosure For Equipment In The Motor Cable
Protect the drive with fuses (a) and the input cable with fuses (b) as shown below: ACS580-04 Size the fuses or the circuit breaker at the distribution board according to local regulations for the input cable protection. Select the fuses for the drive according to the instructions... -
Page 61: Protecting The Drive And The Input Power And Motor Cables Against Thermal Overload
Guidelines for planning the electrical installation 61 Protecting the drive and the input power and motor cables against thermal overload The drive protects itself and the input and motor cables against thermal overload when the cables are dimensioned according to the nominal current of the drive. No additional thermal protection devices are needed. -
Page 62: Implementing The Emergency Stop Function
Using power factor compensation capacitors with the drive Power factor compensation is not needed with AC drives. However, if a drive is to be connected in a system with compensation capacitors installed, contact ABB for instructions. Implementing a safety switch between the drive and the... -
Page 63: Using A Contactor Between The Drive And The Motor
Guidelines for planning the electrical installation 63 Using a contactor between the drive and the motor Implementing the control of the output contactor depends on how you select the drive to operate. See also section Implementing a bypass connection on page 63. When you have selected to use •... -
Page 64: Example Bypass Connection
64 Guidelines for planning the electrical installation Example bypass connection An example bypass connection is shown below. Drive main switch Bypass circuit breaker Drive main contactor Bypass contactor Drive output contactor Drive main contactor on/off control Motor power supply selection (drive or direct-on-line) Start when motor is connected direct-on-line Stop when motor is connected direct-on-line Switching the motor power supply from drive to direct-on-line... -
Page 65: Switching The Motor Power Supply From Direct-On-Line To Drive
Guidelines for planning the electrical installation 65 Switching the motor power supply from direct-on-line to drive 1. Stop the motor with S42. 2. Switch the motor power supply from direct-on-line to the drive with S40. 3. Close the main contactor of the drive with switch S11 (-> turn to position ST for two seconds and leave to position 1). -
Page 66: Connecting A Motor Temperature Sensor To The Drive I/O
66 Guidelines for planning the electrical installation Connecting a motor temperature sensor to the drive I/O WARNING! IEC 60664 requires double or reinforced insulation between live parts and the surface of accessible parts of electrical equipment which are either non-conductive or conductive but not connected to the protective earth. To fulfil this requirement, ypu can connect a thermistor (and other similar components) to the inputs of the drive: •... -
Page 67: Installation Instructions
Installation instructions 67 Installation instructions Contents of this chapter This chapter contains the general installation instructions for the drive module. The chapter refers to the installation example chapters which contain instructions that depend on the selected drive configuration. Safety WARNING! If you are not a qualified electrician do not do the installation work described in this chapter. -
Page 68: Moving And Unpacking The Unit
68 Installation instructions Moving and unpacking the unit WARNING! Obey the safety instructions in chapter Safety instructions. If you ignore them, injury or death, or damage to the equipment can occur. Move the transport package by pallet truck to the installation site. Unpack the package as follows (see the package drawing on page 67): •... - Page 69 Installation instructions 69 3AUA0000101742 Transport package contents With option +B051: Clear plastic shrouds. See below for the box contents. With standard drive module configuration: Output cable connection terminals. See below for the box contents. Plywood support Drive module with factory installed options and multilingual residual voltage warning sticker, top guide plate, pedestal guide plate, telescopic ramp package, fastening screws in a plastic bag, control unit options, delivery documents, printed multilingual installation and start-up quick guide.
- Page 70 70 Installation instructions Box B1 contents (option +B051) Paper fill Clear plastic shroud for output cabling Cardboard box cover Cardboard box bottom Support Bands Back clear plastic shroud (lower) Back clear plastic shroud (upper) Front clear plastic shroud 10 Clear plastic shroud for input cabling 11 Top clear plastic shroud 12 Clear plastic shroud for input...
- Page 71 Installation instructions 71 Input connection terminal box contents (option +H370 Metallic shroud with ground bar Paper fill Input cable connection terminal L3/W1 Input cable connection terminal L2/V1 Input cable connection terminal L1/U1 Cardboard box Screws and insulators in a plastic 33AXD5000009522 Ramp box contents Screw package...
-
Page 72: Checking The Delivery
72 Installation instructions Accessories box contents Screw package Feed through Bracket for attaching the drive module from top to Rittal cabinet punched section. See page Support bracket for attaching the drive module from top to a mounting plate or wall. The bracket brings a gap for cooling air flow and prevents the drive module screws from chafing the... -
Page 73: Checking The Insulation Of The Assembly
Earth conductor using a measuring voltage of 1000 V DC. The insulation resistance of an ABB motor must exceed 100 Mohm (reference value at 25 °C or 77 °F). For the insulation resistance of other motors, consult the manufacturer’s instructions. Note: Moisture inside the motor casing will reduce the insulation resistance. -
Page 74: Drive Module Without Output Cable Connection Terminals (Option +0H371)
74 Installation instructions Install the metallic shroud with ground bar as shown below. Combi screw M4×8 Torx T20 2 N·m 3AXD50000017460 Drive module without output cable connection terminals (option +0H371) The power cables can be connected directly to the drive module input and output terminals with cable lugs or by busbars. -
Page 75: Attaching The Drive Module To A Mounting Plate Or Wall
Installation instructions 75 Attaching the drive module to a mounting plate or wall Use the support bracket if you attach the drive module directly to a mounting plate or wall. The support bracket prevents the drive module screws from chafing against the plate. M4×12 Torx Alternatives for grounding the drive module ... -
Page 76: Installing The Bottom Grille (For Ip20 Degree Protection)
76 Installation instructions Installing the bottom grille (for IP20 degree protection) For option +B051: If IP20 degree of protection is needed from the bottom side, install the bottom grille as shown below. Insert lifting hooks to the drive module lifting eyes and lift the module to the installation place. -
Page 77: Connecting The Power Cables
Installation instructions 77 Connecting the power cables Connection diagram (PE) (PE) ACS580-04 UDC- UDC+ INPUT OUTPUT For alternatives, see section Selecting the supply disconnecting device on page In the installing example of this chapter, the disconnecting device is not in the same cubicle with the drive module. -
Page 78: Power Cable Connection Procedure
78 Installation instructions Use a separate grounding cable if the conductivity of the cable shield is < 50% of the conductivity of the phase conductor and there is no symmetrically constructed grounding conductor in the cable (see page 55). Common mode filter (optional, see page 50) du/dt filter (optional, see page 147) EMC filter (option +E210) The drive module frame must be connected to the cabinet frame. -
Page 79: Dc Connection
The UDC+ and UDC– terminals are intended for common DC configurations of a number of drives, allowing regenerative energy from one drive to be utilized by the other drives in the motoring mode. For more information, contact your local ABB representative. -
Page 80: Connecting The Control Cables
80 Installation instructions Connecting the control cables 1. Remove the middle front cover of the drive module. 2 × Combi screw M4×8 Torx T20 2 N·m 2. Attach the option modules if not attached already. See section Installing optional modules on page 86. - Page 81 Default I/O connection diagram (ABB standard macro) on page for the default I/O connections of the ABB standard macro. For other macros, see the firmware manual. Use shrink tubing or insulating tape to contain any stray strands. Tighten the screws to secure the connection.
-
Page 82: Default I/O Connection Diagram (Abb Standard Macro)
82 Installation instructions Default I/O connection diagram (ABB standard macro) The default I/O connections of the ABB Standard macro are shown below. Analog input 1 1…10 kohm Signal cable shield (screen) Output frequency/speed reference 1: 0…10 V AGND Analog input circuit common... -
Page 83: Switches
Installation instructions 83 Notes: Current [0(4)…20 mA, R = 100 ohm] or voltage [0(2)…10 V, R > 200 kohm] input selected with switch AI1. Change of setting requires changing the corresponding parameter. Current [0(4)…20 mA, R = 100 ohm] or voltage [ 0(2)…10 V, R >... -
Page 84: Pnp Configuration For Digital Inputs (Digital In)
84 Installation instructions PNP configuration for digital inputs (DIGITAL IN) Internal and external +24 V power supply connections for PNP configuration are shown in the figure below. Internal +24 V power supply External +24 V power supply PNP connection (source) PNP connection (source) +24V +24V... -
Page 85: Connection Examples Of Two-Wire And Three-Wire Sensors
Installation instructions 85 Connection examples of two-wire and three-wire sensors Hand/Auto, Hand/PID, and PID macros use analog input 2 (AI2). The macro wiring diagrams on these pages use an externally powered sensor (connections not shown). The figures below give examples of connections using a two-wire or three-wire sensor/transmitter supplied by the drive auxiliary voltage output. -
Page 86: Ai1 And Ai2 As Pt100, Pt1000, Ni1000, Kty83 And Kty84 Sensor Inputs (Analog In/Out)
86 Installation instructions AI1 and AI2 as Pt100, Pt1000, Ni1000, KTY83 and KTY84 sensor inputs (ANALOG IN/OUT) One, two or three Pt100 sensors; one, two or three Pt1000 sensors; or one Ni1000, KTY83 or KTY84 sensor for motor temperature measurement can be connected between an analog input and output as shown below. -
Page 87: Installing Optional Modules
Installation instructions 87 Installing optional modules Disconnect the drive from the power line. Lock the main disconnecting device and ensure by measuring that there is no voltage. Option slot 2 (I/O extension modules) 1. Put the module carefully into its position on the control unit. 2. -
Page 88: Connecting A Pc
88 Installation instructions Connecting a PC WARNING! Do not connect the PC directly to the control panel connector of the control unit as this can cause damage. To be able to connect a PC to the drive, you need an assistant control panel (ACS-AP-x or ACH-AP-H). -
Page 89: Installation Example Of Drive Module With Ip20 Shrouds (Option +B051)
Limitation of liability Always obey the general rules given in this chapter and local laws and regulations. ABB does not assume any liability whatsoever for any installation which breaches local laws and/or other regulations. -
Page 90: Required Parts
Punched section with mounting flange, outer mounting level for 600 mm horizontal TS 4396.500 Support rails SK 3243.200 Air filter 323 mm × 323 mm. Remove the filter mats. Customer-made parts (not ABB or Rittal products) Air baffles See section Preventing the recirculation of hot air on page and section... -
Page 91: Installing The Drive Module Into A Cabinet
Installation example of drive module with IP20 shrouds (option +B051) 91 Installing the drive module into a cabinet See appendix Step-by-step drawings for an installation example of drive module with options +B051 and +E208 in Rittal TS 8 600 mm wide cabinet on page and ACS580- 04 quick installation guide (3AXD50000015469 [English]). - Page 92 92 Installation example of drive module with IP20 shrouds (option +B051) Step Task (input cables) Step drill carefully sufficiently big holes to the lead-through clear plastic shroud for the cables to the connected. Align the holes in the vertical direction according to the alignment holes in the shroud. Smooth the hole edges.
-
Page 93: Installing The Roof And Door
Installation example of drive module with IP20 shrouds (option +B051) 93 Installing the roof and door Install the air inlet gratings to the cabinet door and the spacers on top of the cabinet as shown below. Rittal 7967.000 Rittal 3326.200 592 [23.31] 3AUA0000145776 Door... -
Page 94: Miscellaneous
94 Installation example of drive module with IP20 shrouds (option +B051) Miscellaneous Input power cable lead-through from top If you run the input cables from top to the drive module, drill the lead-through holes to the top clear plastic shroud. Attaching the drive module to a mounting plate ... -
Page 95: Installation Checklist
Installation checklist 95 Installation checklist Contents of this chapter This chapter contains a list for checking the mechanical and electrical installation of the drive module. Installation checklist Go through the checklist below together with another person. WARNING! Obey the safety instructions in chapter Safety instructions. - Page 96 96 Installation checklist Check that … Drive option modules and other components Type and number of option modules and other equipment is correct. Option modules and other equipment are not damaged. Optional modules and terminals are labelled correctly. The placement of optional modules and other equipment inside the cabinet and on the cabinet door is correct.
- Page 97 Installation checklist 97 Check that … Installation of the cabinet The drive cabinet has been attached to floor and also from top to the wall or roof. The ambient operating conditions agree with the specifications given in chapter Technical data. The cooling air will flow freely in and out of the drive cabinet, and air recirculation inside the cabinet will not be possible (air baffle plates are on place).
- Page 98 98 Installation checklist...
-
Page 99: Start-Up
3. Perform the start-up tasks instructed by the cabinet-installer of the drive module. 4. Switch the power on, setup the drive control program, and perform the first start of the drive and motor. See the ACS580-04 quick installation and start-up guide (3AXD50000015469 [English]) or ACS580 firmware manual (3AXD50000016097 [English]). - Page 100 100 Start-up...
-
Page 101: Fault Tracing
Fault tracing 101 Fault tracing Contents of this chapter This chapter describes the fault tracing possibilities of the drive. Warning and fault messages See the firmware manual for the descriptions, causes and remedies of the control program warning and fault messages. - Page 102 102 Fault tracing...
-
Page 103: Maintenance
(www.abb.com/drivesservices).For more information, consult your local ABB Service representative ( www.abb.com/searchchannels). The maintenance and component replacement intervals are based on the assumption that the equipment is operated within the specified ratings and ambient conditions. ABB recommends annual drive inspections to ensure the highest reliability and optimum performance. -
Page 104: Descriptions Of Symbols
104 Maintenance Descriptions of symbols Action Description Visual inspection and maintenance action if needed Performance of on/off-site work (commissioning, tests, measurements or other work) Replacement of component Recommended annual maintenance actions by the user. Target Action Connections and environment Quality of supply voltage Spare parts Spare parts... -
Page 105: Heatsink
Maintenance 105 Heatsink The module heatsink fins pick up dust from the cooling air. The drive runs into overtemperature warnings and faults if the heatsink is not clean. Cleaning the interior of the heatsink WARNING! Obey the safety instructions in chapter Safety instructions. -
Page 106: Fans
For resetting the running time signal after a fan replacement, please contact ABB. Replacement fans are available from ABB. Do not use other than ABB specified spare parts. Replacing the circuit board compartment cooling fan ... -
Page 107: Replacing The Main Cooling Fans
Maintenance 107 Replacing the main cooling fans WARNING! Obey the safety instructions in chapter Safety instructions. If you ignore them, injury or death, or damage to the equipment can occur. 1. Stop the drive and do the steps in section Precautions before electrical work on page before you start the work. -
Page 108: Replacing The Drive Module
108 Maintenance Replacing the drive module WARNING! Obey the safety instructions in chapter Safety instructions. If you ignore them, injury or death, or damage to the equipment can occur. • Handle the drive module carefully: • Use safety shoes with a metal toe cap to prevent foot injury. •... -
Page 109: Capacitors
It is not possible to predict a capacitor failure. The capacitor failure is usually followed by damage to the unit and an input cable fuse failure, or a fault trip. Contact ABB if a capacitor failure is suspected. Replacements are available from ABB. Do not use other than ABB specified spare parts. -
Page 110: Control Panel
110 Maintenance Control panel Cleaning the control panel Use a soft damp cloth to clean the control panel. Avoid harsh cleaners which could scratch the display window. Replacing the battery in the assistant control panel A battery is only used in assistant control panels that have the clock function. The battery keeps the clock operating in memory during power interruptions. - Page 111 Maintenance 111 4. To reinstall the control panel, put the bottom of the container in position (4a), press the retaining clip at the top (4b) and push the control panel in at the top edge (4c). For the use of the control panel, see ACS580 firmware manual (3AXD50000016097 [English]) and ACS-AP-X assistant control panels user’s manual (3AUA0000085685 [English]).
- Page 112 112 Maintenance...
-
Page 113: Technical Data
The ratings of the drive modules with 50 Hz supply are given below. IEC ratings IEC RATINGS Drive type Frame Input Output ratings size current Nominal use Light-duty use Heavy-duty use ACS580-04- = 380…415 V (380, 400, 415 V) 505A-4 585A-4 650A-4 725A-4 1020 820A-4 1020 880A-4 1100 725* 3AXD00000586715... -
Page 114: Nema Ratings
The power ratings apply to most IEC 34 motors at the nominal voltage of the drive. We recommend to select the drive, motor and gear combination for the required motion profile with the DriveSize dimensioning tool available from ABB. Output derating ... -
Page 115: Ambient Temperature Derating
Derating factor (k) for the minimum switching frequencies 1 kHz 2 kHz 4kHz 8 kHz 0.92 0.78 0.58 0.92 0.78 0.58 Note: Changing the value of parameter 97.01 Switching frequency reference does not require derating. For more information, contact local ABB. -
Page 116: Fuses (Iec)
Fuses (IEC) aR fuses for protection against short-circuit in the input power cable or drive are listed below. Ultrarapid (aR) fuses Drive type Input Fuse ACS580-04- current Manufacturer Type DIN 43620 Size = 380…415 V (380, 400, 415 V) 505A-4... -
Page 117: Losses, Cooling Data And Noise
It is possible to use the maximum cable size (4 × [3 × 240] mm or 4 ×[(3 × 500 AWG]) only with special cable lugs and additional insulation. For more information, contact your local ABB representative. Terminal data for the control cables See page 82. -
Page 118: Dc Connection Data
Note: Motor cable longer than 100 m (328 ft) is allowed but then the EMC Directive requirements of Category C3 may not be fulfilled. DC connection data Drive type Capacitance (mF) = 400 V ACS580-04-505A-4 ACS580-04-585A-4 ACS580-04-650A-4 ACS580-04-725A-4 ACS580-04-820A-4 1033... -
Page 119: Control Panel Type
Technical data 119 Control panel - PC USB Type Mini-B, max. cable length 2 m connection Isolation areas Panel port SLOT 1 Fieldbus module 1…3 4…6 Power unit connection 7…9 10…12 24 V 13…15 16…18 34…38 40, 41 Ext. 24 V 19…21 SLOT 2 22…24... -
Page 120: Ambient Conditions
120 Technical data Ambient conditions Environmental limits for the drive are given below. The drive is to be used in a heated, indoor, controlled environment. Operation Storage Transportation installed for stationary in the protective in the protective package package Installation site altitude For TN and TT neutral- grounded network systems and IT non-... -
Page 121: Ce Marking
IEC 62635 guidelines. To aid recycling, plastic parts are marked with an appropriate identification code. Contact your local ABB distributor for further information on environmental aspects and recycling instructions for professional recyclers. End of life treatment must follow international and local regulations. -
Page 122: Compliance With The European Emc Directive
122 Technical data Compliance with the European EMC Directive The EMC Directive defines the requirements for immunity and emissions of electrical equipment used within the European Union. The EMC product standard (EN 61800- 3:2004) covers requirements stated for drives. See section Compliance with EN 61800- 3:2004 below. -
Page 123: Category C3
Equipment 2. An EMC plan for preventing disturbances is drawn up for the installation. A template is available from the local ABB representative. 3. The motor and control cables are selected as specified in the hardware manual. 4. The drive is installed according to the instructions given in the hardware manual. -
Page 124: Cyber Security Disclaimer
ABB and its affiliates are not liable for damages and/or losses related to such security breaches, any unauthorized access, interference, intrusion, leakage and/or theft of data or information. -
Page 125: Dimension Drawings
Dimension drawings 125 Dimension drawings Contents of this chapter This chapter contains dimension drawings of the drive modules. -
Page 126: R10 Standard Configuration
126 Dimension drawings R10 standard configuration... -
Page 127: R10 With Options +E208+0H354+H356+0H370+0H371
Dimension drawings 127 R10 with options +E208+0H354+H356+0H370+0H371... -
Page 128: R10 With Option +B051
128 Dimension drawings R10 with option +B051... -
Page 129: R11 Standard Configuration
Dimension drawings 129 R11 standard configuration... -
Page 130: R11 With Options +E208+0H354+H356+0H370+0H371
130 Dimension drawings R11 with options +E208+0H354+H356+0H370+0H371... -
Page 131: R11 With Option +B051
Dimension drawings 131 R11 with option +B051... -
Page 132: Air Baffles For The Drive Module With Option +B051
132 Dimension drawings Air baffles for the drive module with option +B051 This drawing shows the dimensions of the hole in the air baffle around the drive module with option +B051. The drawing also shows the correct vertical location area of the air baffle as measured from the top grill... -
Page 133: Example Circuit Diagram 133
Example circuit diagram 133 Example circuit diagram Contents of this chapter This chapter shows an example circuit diagram for a cabinet-installed drive module. -
Page 134: Example Circuit Diagram
134 Example circuit diagram Example circuit diagram This diagram is an example for the main wiring of a drive cabinet. Note that the diagram includes components which are not included in a basic delivery (* plus code options, ** other options, *** to be acquired by the customer). -
Page 135: Safe Torque Off Function
Safe torque off function 135 Safe torque off function Contents of this chapter This chapter describes the Safe torque off (STO) function of the drive and gives instructions for its use. Description The Safe torque off function can be used, for example, to construct safety or supervision circuits that stop the drive in case of danger (such as an emergency stop circuit). -
Page 136: Compliance With The European Machinery Directive
24 V DC power supply is used (page 141). For information on the specifications of the STO input, see section Default I/O connection diagram (ABB standard macro) on page 82. For drives with option +L537, see CPTC-02 ATEX-certified thermistor protection module, Ex II (2) GD (+L537+Q971) user's manual (3AXD50000030058 [English]). -
Page 137: Grounding Of Protective Shields
Safe torque off function 137 Maximum cable lengths: • 300 m (984 ft) between activation switch [K] and drive control unit • 60 m (200 ft) between multiple drives • 60 m (200 ft) between external power supply and first drive. Note that the voltage at the INx terminals of each control unit must be at least 17 V DC to be interpreted as “1”. -
Page 138: Single Drive (External +24 V Dc Power Supply)
138 Safe torque off function Single drive (external +24 V DC power supply) 24 V DC Drive Control unit OUT1 + 24 V DC OUT2 + 24 V DC SGND UDC+ T1/U, Control logic T2/V, T3/W UDC- Wiring examples ... - Page 139 Safe torque off function 139 An example of a Safe torque off wiring with external +24 V DC power supply is shown below. +24 V DC external Safe PLC Drive power supply OUT1 OUT2 36 SGND Safety relay...
-
Page 140: Multiple Drives (Internal Power Supply)
140 Safe torque off function Multiple drives (internal power supply) ACS580-04 Control unit OUT1 + 24 V DC OUT2 + 24 V DC SGND ACS580-04 Control unit OUT1 + 24 V DC OUT2 + 24 V DC SGND ACS580-47... -
Page 141: Multiple Drives (External Power Supply)
Safe torque off function 141 Multiple drives (external power supply) 24 V DC – ACS580-07 Control unit OUT1 + 24 V DC OUT2 + 24 V DC SGND ACS580-07 Control unit OUT1 + 24 V DC OUT2 + 24 V DC SGND ACS580-07 Control unit... -
Page 142: Operation Principle
142 Safe torque off function Operation principle 1. The Safe torque off activates (the activation switch is opened, or safety relay contacts open). 2. STO inputs on the drive control unit de-energize. 3. The control unit cuts off the control voltage from the drive IGBTs. 4. -
Page 143: Use
Safe torque off function 143 Action Test the operation of the STO function when the motor is stopped. • Give a stop command for the drive (if running) and wait until the motor shaft is at a standstill. Make sure that the drive operates as follows: •... -
Page 144: Maintenance
If any wiring or component change is needed after start-up, or the parameters are restored, follow the test given in section Acceptance test procedure on page 142. Use only ABB approved spare parts. Record all maintenance and proof test activities in the machine logbook. Competence ... -
Page 145: Safety Data
Any failures of the Safe torque off function must be reported to ABB. Safety data Preliminary safety data for the Safe torque off function is given below. -
Page 146: Abbreviations
146 Safe torque off function Abbreviations Abbr. Reference Description Cat. EN ISO 13849-1 Classification of the safety-related parts of a control system in respect of their resistance to faults and their subsequent behavior in the fault condition, and which is achieved by the structural arrangement of the parts, fault detection and/or by their reliability. -
Page 147: Declaration Of Conformity
Safe torque off function 147 Declaration of conformity ... - Page 148 148 Safe torque off function...
-
Page 149: Optional I/O Extension Modules
Optional I/O extension modules 149 Optional I/O extension modules Contents of this chapter This chapter describes how to install and start up the optional CHDI-01, CMOD-01 and CMOD-02 IO extension modules. The chapter also contains their diagnostics and technical data. CHDI-01 115/230 V digital input extension module Safety instructions ... -
Page 150: Layout
150 Optional I/O extension modules Layout Item Description Additional information Grounding screw Hole for mounting screw 3-pin terminal blocks for relay outputs Page 3-pin terminal block for 115/230 V inputs Page Diagnostic LED Page Mechanical installation Necessary tools and instructions •... -
Page 151: Electrical Installation
Optional I/O extension modules 151 Electrical installation Warnings WARNING! Obey the instructions in chapter Safety instructions on page 13. If you ignore them, injury or death, or damage to the equipment can occur. If you are not a qualified electrician, do not do electrical work. Make sure that the drive is disconnected from the input power during installation. -
Page 152: Start-Up
152 Optional I/O extension modules Relay output connection example RO4C RO4A 24 V DC RO4B CHDI-01 Digital input connection example 230 V AC source HDI7 HDI8 NEUTRAL CHDI-01 Start-up Setting the parameters 1. Power up the drive. 2. If no warning is shown, •... -
Page 153: Leds
Optional I/O extension modules 153 LEDs The extension module has one diagnostic LED. Color Description Green The extension module is powered up. Technical data Dimension drawing: The dimensions are in millimeters and [inches]. Installation: Into an option slot on the drive control unit Degree of protection: IP20 Ambient conditions: See the drive technical data. - Page 154 154 Optional I/O extension modules Isolation areas: CHDI-01 Plugged to drive SLOT2 Symbol Description Reinforced insulation (IEC 61800-5-1:2007) Functional insulation (IEC 61800-5-1:2007) Relay outputs (50…52, 53…55): • Wire size max. 1.5 mm • Minimum contact rating: 12 V / 10 mA •...
-
Page 155: Cmod-01 Multifunction Extension Module (External 24 V Ac/Dc And Digital I/O)
Optional I/O extension modules 155 CMOD-01 multifunction extension module (external 24 V AC/DC and digital I/O) Safety instructions WARNING! Obey the safety instructions for the drive. If you ignore the safety instructions, injury or death can occur. Hardware description ... -
Page 156: Layout
156 Optional I/O extension modules Layout Item Description Additional information Grounding screw Hole for mounting screw 3-pin terminal blocks for relay outputs Page 3-pin terminal block for transistor output Page 2-pin terminal block for external power supply Page Diagnostic LED Page Mechanical installation ... -
Page 157: Electrical Installation
Optional I/O extension modules 157 Electrical installation Warnings WARNING! Obey the instructions in chapter Safety instructions on page 13. If you ignore them, injury or death, or damage to the equipment can occur. If you are not a qualified electrician, do not do electrical work. Make sure that the drive is disconnected from the input power during installation. - Page 158 158 Optional I/O extension modules Relay output connection example RO4C RO4A 24 V DC RO4B CMOD-01 Digital output connection example DO1 SRC 24 V DC DO1 OUT DO1 SGND CMOD-01 Frequency output connection example DO1 SRC DO1 OUT DO1 SGND CMOD-01 An externally supplied frequency indicator which provides, for example: •...
-
Page 159: Start-Up
Optional I/O extension modules 159 Start-up Setting the parameters 1. Power up the drive. 2. If no warning is shown, • make sure that the value of both parameter 15.02 Detected extension module and parameter 15.01Extension module type is CMOD-01. If warning A7AB Extension I/O configuration failure is shown, •... -
Page 160: Leds
160 Optional I/O extension modules LEDs The extension module has one diagnostic LED. Color Description Green The extension module is powered up. Technical data Dimension drawing: The dimensions are in millimeters and [inches]. Installation: Into an option slot on the drive control unit Degree of protection: IP20 Ambient conditions: See the drive technical data. - Page 161 Optional I/O extension modules 161 Isolation areas: CMOD-01 Plugged to 24 V drive SLOT2 Symbol Description Reinforced insulation (IEC 61800-5-1:2007) Functional insulation (IEC 61800-5-1:2007) Relay outputs (50…52, 53…55): • Wire size max. 1.5 mm • Minimum contact rating: 12 V / 10 mA •...
-
Page 162: Cmod-02 Multifunction Extension Module (External 24 V Ac/Dc And Isolated Ptc Interface)
162 Optional I/O extension modules CMOD-02 multifunction extension module (external 24 V AC/DC and isolated PTC interface) Safety instructions WARNING! Obey the safety instructions for the drive. If you ignore the safety instructions, injury or death can occur. Hardware description ... -
Page 163: Layout
Optional I/O extension modules 163 Layout Item Description Additional information Grounding screw Hole for mounting screw 2-pin terminal block for motor thermistor connection Page 2-pin terminal block for relay output Page 2-pin terminal block for external power supply Page Diagnostic LED Page Mechanical installation ... -
Page 164: Electrical Installation
164 Optional I/O extension modules Electrical installation Warnings WARNING! Obey the instructions in chapter Safety instructions on page 13. If you ignore them, injury or death, or damage to the equipment can occur. If you are not a qualified electrician, do not do electrical work. Make sure that the drive is disconnected from the input power during installation. -
Page 165: Start-Up
Optional I/O extension modules 165 Motor thermistor connection example PTC IN PTC IN CMOD-02 1) One or 3…6 PTC thermistors connected in series. The PTC input is reinforced/double insulated. If the motor part of the PTC sensor and wiring are reinforced/double insulated, voltages on the PTC wiring are within SELV limits. If the motor PTC circuit is not reinforced/double insulated (ie, it is basic insulated), it is mandatory to use reinforced/double insulated wiring between the motor PTC and CMOD- 02 PTC terminal. -
Page 166: Diagnostics
166 Optional I/O extension modules If warning A7AB Extension I/O configuration failure is shown, • make sure that the value of parameter 15.02 Detected extension module is CMOD-02. • set parameter 15.01 Extension module type to CMOD-02. You can now see the parameters of the extension module in parameter group 15 I/O extension module. - Page 167 Optional I/O extension modules 167 Ambient conditions: See the drive technical data. Package: Cardboard Isolation areas: CMOD-02 Plugged 24 V to drive SLOT2 Symbol Description Reinforced insulation (IEC 61800-5-1:2007) Motor thermistor connection (60…61): • Wire size max. 1.5 mm • Supported standards: DIN 44081 and DIN 44082 •...
-
Page 168: Cptc-02 Atex-Certified Thermistor Protection Module, (External 24 V Ac/Dc And Isolated Ptc Interface)
168 Optional I/O extension modules CPTC-02 ATEX-certified thermistor protection module, (external 24 V AC/DC and isolated PTC interface) See CPTC-02 ATEX-certified thermistor protection module, Ex II (2) GD (+L537+Q971) user's manual (3AXD50000030058 [English]). -
Page 169: Du/Dt Filters
Frame du/dt filter type FOCH0610-70 FOCH0875-70 3AXD00000586715 Ordering codes Filter type ABB ordering code FOCH-0610-70 68550483 FOCH-0875-70 3AUA0000125245 Description, installation and technical data of the FOCH filters See FOCH du/dt filters hardware manual (3AFE68577519 [English]). - Page 170 170 du/dt filters...
-
Page 171: B051 And +E208 In Rittal Ts 8 600 Mm Wide Cabinet
Step-by-step drawings for an installation example of drive module with options +B051 and +E208 in Rittal TS 8 600 mm wide cabinet 171 Step-by-step drawings for an installation example of drive module with options +B051 and +E208 in Rittal TS 8 600 mm wide cabinet Tapping screw M6×12 Torx Combi screw M8×30 (Hex) Tapping screw M6×12 Torx... -
Page 172: B051 And +E208 In Rittal Ts 8 600 Mm Wide Cabinet
172 Step-by-step drawings for an installation example of drive module with options +B051 and +E208 in Rittal TS 8 600 mm wide cabinet Combi screw M12×25 Hex 70 N·m Combi screw M8×16 Hex Hex nut M12 70 N·m Combi screw M6×12 Torx T25 20 N·m Combi screw M12×25 Hex Washer M12 or equal... -
Page 173: B051 And +E208 In Rittal Ts 8 600 Mm Wide Cabinet
Step-by-step drawings for an installation example of drive module with options +B051 and +E208 in Rittal TS 8 600 mm wide cabinet 173 Hex nut M12 70 N·m Washer M12 or equal Hex screw M12×35 full thread 70 N·m Washer M12 or equal +B051 +B051 +B051... -
Page 174: B051 And +E208 In Rittal Ts 8 600 Mm Wide Cabinet
174 Step-by-step drawings for an installation example of drive module with options +B051 and +E208 in Rittal TS 8 600 mm wide cabinet Note: These air baffles are compatible with option +B051 only, for the standard drive module configuration, see section Standard drive module configuration on page 46. -
Page 175: Product And Service Inquiries
Product and service inquiries Address any inquiries about the product to your local ABB representative, quoting the type designation and serial number of the unit in question. A listing of ABB sales, support and service contacts can be found by navigating to www.abb.com/searchchannels. - Page 176 Contact us www.abb.com/drives www.abb.com/drivespartners 3AXD50000015497 Rev C (EN) 2016-07-01...
Need help?
Do you have a question about the ACS580-04 and is the answer not in the manual?
Questions and answers