ABB ACS550-01 User Manual
Hide thumbs
Also See for ACS550-01:
- User manual (255 pages) ,
- Quick start manual (2 pages) ,
- Installation supplement manual (16 pages)

Related Manuals for ABB ACS550-01


Summary of Contents for ABB ACS550-01
- Page 1 ACS550 User’s Manual ACS550-01 Drives (0.75 160 kW) … ACS550-U1 Drives (1 200 hp) …...
-
Page 2: List Of Related Manuals
List of related manuals GENERAL MANUALS REPL-01 Ethernet POWERLINK Adapter Module User's Manual 3AUA0000052289 (English) ACS550-01/U1 User's Manual (0.75…160 kW) / RETA-01 Ethernet Adapter Module User's Manual (1…200 hp) 3AFE64539736 (English) 3AFE64804588 (3AUA0000001418) (English) RETA-02 Ethernet Adapter Module User's Manual •... - Page 3 ACS550-01/U1 Drives 0.75…160 kW 1…200 hp User’s Manual 3AFE64804588 (3AUA0000001418) Rev G EFFECTIVE: 2009-07-07 SUPERSEDES: 3AFE64804588 (3AUA0000001418) Rev F 2007-04-16 © 2009 ABB Oy. All Rights Reserved.
-
Page 5: Safety
ACS550-01/U1 User’s Manual Safety Use of warnings and notes There are two types of safety instructions throughout this manual: • Notes draw attention to a particular condition or fact, or give information on a subject. • Warnings caution you about conditions which can result in serious injury or death and/or damage to the equipment. - Page 6 I/O board of the drive. The maximum allowed number of charging cycles of the DC capacitors (i.e. power-ups by applying power) is five in ten minutes. WARNING! The ACS550-01/U1 is not field repairable. Never attempt to repair a malfunctioning drive; contact the factory or your local Authorized Service Center for replacement.
-
Page 7: Table Of Contents
ABB Standard macro ........ -
Page 8: Table Of Contents
ABB Drives profile technical data ........242... -
Page 9: Table Of Contents
Product training ..........319 Providing feedback on ABB Drives manuals ......319 Document library on the Internet . -
Page 10: Table Of Contents
ACS550-01/U1 User’s Manual Table of contents... -
Page 11: Installation
5. Note: The installation must always be designed and made according to applicable local laws and regulations. ABB does not assume any liability whatsoever for any installation which breaches the local laws and/or other regulations. Furthermore, if the recommendations given by ABB are not followed, the drive may experience problems that the warranty does not cover. -
Page 12: Preparing For Installation
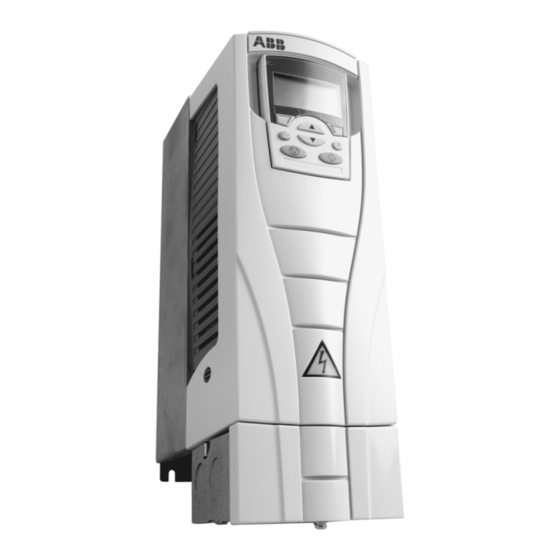
ACS550-01/U1 User’s Manual Preparing for installation Lifting the drive Lift the drive only by the metal chassis. Unpacking the drive 1. Unpack the drive. 2. Check for any damage and notify the shipper immediately if damaged components are found. IP2040 3. - Page 13 Options Examples of options: B055 = IP54 / UL type 12 (no specification = IP21 / UL type 1). UL type 12 is not available for type ACS550-01-290A-4. 0J400 = No control panel J404 = ACS-CP-C Basic Control Panel L511 = OREL-01 Relay output extension...
- Page 14 ACS550-01/U1 User’s Manual Motor compatibility The motor, drive and supply power must be compatible: Motor Verify Reference specification Motor type 3-phase induction motor – Nominal current Motor value is within this • Type designation label on drive, entry for range: 0.2…2.0 · I...
- Page 15 Confirm that the mounting location meets the following constraints: • The drive must be mounted vertically on a smooth, solid surface, and in a suitable environment as defined above. For horizontal installation, contact your local ABB representative for more information.
-
Page 16: Installing The Drive
FMK-A-R4 100000988 FMK-B-R4 100000996 AC8-FLNGMT-R5 ACS800-PNTG01U- AC8-FLNGMT-R6 1. Not available in ACS550-01 series. Prepare the mounting location The ACS550 should only be mounted where all of the requirements defined in section Preparing for installation on page are met. 1. Mark the position of the mounting holes with the help of the mounting template provided with the drive. - Page 17 ACS550-01/U1 User’s Manual Remove the front cover IP21 / UL type 1 1. Remove the control panel, if attached. 2. Loosen the captive screw at the top. 3. Pull near the top to remove the cover. IP2000 … IP54 / UL type 12 1.
- Page 18 ACS550-01/U1 User’s Manual Mount the drive IP21 / UL type 1 1. Position the ACS550 onto the mounting screws or bolts and securely tighten in all four corners. Note: Lift the ACS550 by its metal chassis (frame size R6 by the lifting holes on both sides at the top).
- Page 19 Preparing for installation on page 12. If in doubt, contact your local ABB sales or service office. As you install the wiring, observe the following: • There are four sets of wiring instructions – one set for each combination of drive enclosure type (IP21 / UL type and IP54 / UL type 12) and wiring type (conduit or cable).
- Page 20 289. R3, R4, R5, R6 UDC+, UDC- DC bus Contact your ABB representative to order either: • braking unit or • chopper and resistor • When installing control wiring, refer to the following chapters or sections, as appropriate: –...
- Page 21 ACS550-01/U1 User’s Manual Power connection diagrams The following diagram shows the terminal layout for frame size R3, which, in general, applies to frame sizes R1 R6, except for the R5/R6 power and ground … terminals. J1 – DIP switches for analog inputs (two types can be used) Diagram shows the R3 frame.
- Page 22 ACS550-01/U1 User’s Manual The following diagram shows the power and ground terminal layout for frame sizes R5 and R6. X0011 Power output to motor Power input (U2, V2, W2) (U1, V1, W1) Optional braking Frame Terminal Brake options size labels R5, R6 UDC+, UDC- •...
- Page 23 ACS550-01/U1 User’s Manual Disconnecting the internal EMC filter On certain types of systems, you must disconnect the internal EMC filter, otherwise the system will be connected to ground potential through the EMC filter capacitors, which might cause danger, or damage the drive.
- Page 24 ACS550-01/U1 User’s Manual Control terminals table The following provides information for connecting control wiring at X1 on the drive. Hardware description Terminal for signal cable shield (screen). (Connected internally to chassis ground.) Analog input channel 1, programmable. Default = frequency reference. Resolution 0.1%, accuracy ±1%.
- Page 25 ACS550-01/U1 User’s Manual Hardware description 19 RO1C Relay output 1, programmable. Default = Ready Maximum: 250 V AC / 30 V DC, 2 A 20 RO1A Minimum: 500 mW (12 V, 10 mA) 21 RO1B 22 RO2C Relay output 2, programmable. Default...
- Page 26 Protective Earth conductor using a measuring voltage of 500 V DC. The insulation resistance of an ABB motor must exceed 10 Mohm (reference value at 25 °C or 77 °F). For the insulation resistance of other motors, please consult the manufacturer’s instructions.
- Page 27 ACS550-01/U1 User’s Manual Wiring IP21 / UL type 1 enclosure with cables 1. Open the appropriate knockouts in the conduit/gland box. (See section Conduit/Gland kit on page 19.) 2. Install the cable clamps for the power/motor cables. X0004 3. On the input power cable, strip the sheathing back far enough to route individual wires.
- Page 28 ACS550-01/U1 User’s Manual Wiring IP21 / UL type 1 enclosure with conduit 1. Open the appropriate knockouts in the conduit/gland box. (See section Conduit/Gland kit on page 19.) 2. Install thin-wall conduit clamps (not supplied). X0007 3. Install conduit/gland box.
- Page 29 ACS550-01/U1 User’s Manual Wiring IP54 / UL type 12 enclosure with cables 1. Cut the cable seals as needed for the power, motor and control cables. The cable seals are cone- shaped, rubber seals on the bottom of the drive.
- Page 30 ACS550-01/U1 User’s Manual Wiring IP54 / UL type 12 enclosure with conduit 1. Remove and discard the cable seals where conduit will be installed. (The cable seals are cone-shaped, rubber seals on the bottom of the drive.) IP5013 2. For each conduit run, install water tight conduit connectors (not supplied).
- Page 31 ACS550-01/U1 User’s Manual Check installation Before applying power, perform the following checks. Check Installation environment conforms to the drive’s specifications for ambient conditions. The drive is mounted securely. Space around the drive meets the drive’s specifications for cooling. The motor and driven equipment are ready for start.
- Page 32 ACS550-01/U1 User’s Manual Reinstall the cover IP21 / UL type 1 1. Align the cover and slide it on. 2. Tighten the captive screw. 3. Reinstall the control panel. 4. Continue with start-up. See chapter Start-up, control with I/O and ID Run on page 33.
-
Page 33: Start-Up, Control With I/O And Id Run
ACS550-01/U1 User’s Manual Start-up, control with I/O and ID Run The chapter instructs how to: • perform the start-up • start, stop, change the direction of rotation and adjust the speed of the motor through the I/O interface • perform an Identification Run for the drive. - Page 34 ACS550-01/U1 User’s Manual Check that the starting of the motor does not cause any danger. De-couple the driven machine if: • there is a risk of damage in case of incorrect direction of rotation, or • an ID Run needs to be performed during the drive start-up. ID Run is essential only in applications that require the ultimate in motor control accuracy.
- Page 35 ACS550-01/U1 User’s Manual Select the application macro (parameter 9902). The general 9902 parameter setting procedure is given above. The default value 1 ( ) is suitable in most cases. ABB STANDARD Select the motor control mode (parameter 9904). 9904 ) is suitable in most cases. 2 (...
- Page 36 ACS550-01/U1 User’s Manual Select the motor identification method (parameter 9910). The default value 0 ( ) using the identification magnetization is suitable for most IDMAGN applications. It is applied in this basic start-up procedure. Note however that this requires that: •...
- Page 37 ACS550-01/U1 User’s Manual To change the direction of the motor rotation: forward • Disconnect input power from the drive, and wait 5 minutes direction for the intermediate circuit capacitors to discharge. Measure the voltage between each input terminal (U1, V1 and W1)
- Page 38 ACS550-01/U1 User’s Manual How to perform the guided start-up To be able to perform the guided start-up, you need the Assistant Control Panel. Before you start, ensure that you have the motor nameplate data on hand. SAFETY The start-up may only be carried out by a qualified electrician.
- Page 39 ACS550-01/U1 User’s Manual After completing a set-up task, the Start-up Assistant suggests the CHOICE Do you want to next one. continue with application setup? • Press (when is highlighted) to continue with the Continue Continue Skip suggested task. EXIT 00:00 •...
-
Page 40: How To Control The Drive Through The I/O Interface
Ensure that the control connections are wired according to the See section ABB Standard macro on page 74. connection diagram given for the ABB Standard macro. Ensure that the drive is in remote control. Press key to switch In remote control, the panel display shows text REM. -
Page 41: How To Perform The Id Run
ACS550-01/U1 User’s Manual How to perform the ID Run The drive estimates motor characteristics automatically using identification magnetization when the drive is started for the first time and after any motor parameter (Group 99: START-UP DATA) is changed. This is valid when parameter... - Page 42 ACS550-01/U1 User’s Manual ID RUN WITH THE ASSISTANT CONTROL PANEL Change parameter 9910 to 1 ( ). Save the new setting PAR EDIT ID RUN by pressing SAVE 9910 ID RUN CANCEL 00:00 SAVE If you want to monitor actual values during the ID Run, go to 50.0Hz...
-
Page 43: Control Panels
ACS550-01/U1 User’s Manual Control panels About control panels Use a control panel to control the drive, read status data and adjust parameters. The drive works with either of two different control panel types: • Basic Control Panel – This panel (described in section Basic Control Panel page 64) provides basic tools for manual entry of parameter values. -
Page 44: Assistant Control Panel
ACS550-01/U1 User’s Manual Assistant Control Panel Features The Assistant Control Panel features: • alphanumeric control panel with an LCD display • language selection for the display • Start-up Assistant to ease drive commissioning • copy function – parameters can be copied to the control panel memory for later transfer to other drives or for backup of a particular system. - Page 45 ACS550-01/U1 User’s Manual Status line The top line of the LCD display shows the basic status information of the drive. MAIN MENU 49.1Hz No. Field Alternatives Significance 1 Control location Drive control is local, that is, from the control panel.
- Page 46 ACS550-01/U1 User’s Manual Initially, the panel is in the Output mode, where you can 49.1Hz start, stop, change the direction, switch between local and 1 Hz remote control, modify the reference value and monitor up to three actual values. To do other tasks, go first to the Main menu and select the appropriate mode on the menu.
- Page 47 ACS550-01/U1 User’s Manual How to get help Step Action Display Press to read the context-sensitive help text for the item that is highlighted. PAR GROUPS 01 OPERATING DATA 03 FB ACTUAL SIGNALS 04 FAULT HISTORY 10 START/STOP/DIR 11 REFERENCE SELECT...
- Page 48 ACS550-01/U1 User’s Manual How to start, stop and switch between local and remote control You can start, stop and switch between local and remote control in any mode. To be able to start or stop the drive, the drive must be in local control.
-
Page 49: Hz 5 A
ACS550-01/U1 User’s Manual Output mode In the Output mode, you can: • monitor actual values of up to three signals in Group 01: OPERATING DATA • change the direction of the motor rotation • set the speed, frequency or torque reference •... -
Page 50: 00:00 Menu
ACS550-01/U1 User’s Manual How to set the speed, frequency or torque reference Step Action Display EXIT If you are not in the Output mode, press repeatedly until you get there. 49.1Hz 1 Hz 00:00 MENU If the drive is in remote control (REM shown on the status line), switch to local 49.1Hz... -
Page 51: Loc Main Menu
ACS550-01/U1 User’s Manual Parameters mode In the Parameters mode, you can: • view and change parameter values • start, stop, change the direction and switch between local and remote control. How to select a parameter and change its value Step... - Page 52 ACS550-01/U1 User’s Manual How to select the monitored signals Step Action Display You can select which signals are monitored in the Output mode and how they PAR EDIT are displayed with Group 34: PANEL DISPLAY parameters. See page 3401 SIGNAL1 PARAM OUTPUT FREQ detailed instructions on changing parameter values.
-
Page 53: Assistants
ACS550-01/U1 User’s Manual Assistants mode When the drive is first powered up, the Start-up Assistant guides you through the setup of the basic parameters. The Start-up Assistant is divided into assistants, each of which guides you through the task of specifying a related parameter set, for example Motor Set-up or PID Control. - Page 54 ACS550-01/U1 User’s Manual Step Action Display • To accept the new value and continue to the setting of the next parameter, PAR EDIT SAVE press 9906 MOTOR NOM CURR 1.2 A EXIT • To stop the assistant, press EXIT 00:00 SAVE The table below lists the tasks of the assistants and the relevant drive parameters.
- Page 55 ACS550-01/U1 User’s Manual Name Description Set parameters Selecting timed function status indicated through relay output RO 1401 Selecting timed PID1 parameter set 1/2 control 4027 Protections Setting the current and torque limits 2003, 2017 Output signals Selecting the signals indicated through relay output RO...
-
Page 56: Changed Parameters
ACS550-01/U1 User’s Manual Changed Parameters mode In the Changed Parameters mode, you can: • view a list of all parameters that have been changed from the macro default values • change these parameters • start, stop, change the direction and switch between local and remote control. -
Page 57: Fault Logger
ACS550-01/U1 User’s Manual Fault Logger mode In the Fault Logger mode, you can: • view the drive fault history of maximum ten faults (after a power off, only the three latest faults are kept in the memory) • see the details of the three latest faults (after a power off, the details of only the most recent fault is kept in the memory) •... -
Page 58: Time And Date
ACS550-01/U1 User’s Manual Time and Date mode In the Time and Date mode, you can: • show or hide the clock • change date and time display formats • set the date and time • enable or disable automatic clock transitions according to the daylight saving changes •... - Page 59 ACS550-01/U1 User’s Manual Step Action Display SET DATE • To set the date, select SET DATE on the menu and press . Specify the first part of the date (day or month depending on the selected date format) with 19.03.05...
-
Page 60: Parameter Backup
ACS550-01/U1 User’s Manual Parameter Backup mode The Parameter Backup mode is used to export parameters from one drive to another or to make a backup of the drive parameters. Uploading to the panel stores all drive parameters, including up to two user sets, to the Assistant Control Panel. The full set, partial parameter set (application) and user sets can then be downloaded from the control panel to another drive or the same drive. - Page 61 ACS550-01/U1 User’s Manual How to upload and download parameters For the upload and download functions available, see above. Note that the drive has to be in local control for uploading and downloading. Step Action Display MENU Go to the Main menu by pressing...
- Page 62 ACS550-01/U1 User’s Manual How to view information about the backup Step Action Display MENU Go to the Main menu by pressing if you are in the Output mode, otherwise MAIN MENU PARAMETERS EXIT by pressing repeatedly until you get to the Main menu.
- Page 63 ACS550-01/U1 User’s Manual I/O Settings mode In the I/O Settings mode, you can: • check the parameter settings related to any I/O terminal • edit the parameter setting. For example, if “1103: REF1” is listed under Ain1 (Analog input 1), that is, parameter...
-
Page 64: Basic Control Panel
ACS550-01/U1 User’s Manual Basic Control Panel Features The Basic Control Panel features: • numeric control panel with an LCD display • copy function – parameters can be copied to the control panel memory for later transfer to other drives or for backup of a particular system. -
Page 65: Control Panel
ACS550-01/U1 User’s Manual Operation You operate the control panel with menus and keys. You select an option, e.g. operation mode or parameter, by scrolling the arrow keys until the option is visible in the display and then pressing the key. - Page 66 ACS550-01/U1 User’s Manual How to start, stop and switch between local and remote control You can start, stop and switch between local and remote control in any mode. To be able to start or stop the drive, the drive must be in local control.
-
Page 67: Ratings
ACS550-01/U1 User’s Manual Output mode In the Output mode, you can: • monitor actual values of up to three Group 01: OPERATING DATA signals, one signal at a time • start, stop, change the direction and switch between local and remote control.