
Related Manuals for Toro 23516


Summary of Contents for Toro 23516
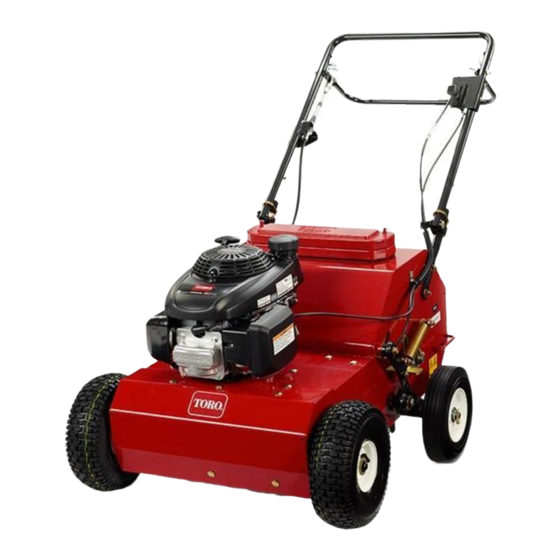
- Page 1 Form No. 3382-918 Rev B 18in Walk-Behind Aerator Model No. 23516—Serial No. 314000001 and Up Model No. 33516—Serial No. 314000001 and Up G022080 *3382-918* B Register at www.Toro.com. Original Instructions (EN)
-
Page 2: Introduction
If you require a spark arrester, contact your Authorized Toro Service Dealer. Serial No. Genuine Toro spark arresters are approved by the USDA Forestry Service. This manual identifies potential hazards and has safety messages identified by the safety alert symbol (Figure 2),... -
Page 3: Table Of Contents
Contents Safety Improperly using or maintaining the machine can result Introduction ..............2 in injury. To reduce the potential for injury, comply with Safety ................3 these safety instructions and always pay attention to the Safe Operating Practices........... 3 safety alert symbol, which means Caution , Warning , or Slope Indicator ............ -
Page 4: Slope Operation
Never remove fuel cap or add fuel with the engine tightened. Replace all worn or damaged decals. running. • Use only Toro-approved attachments. The warranty • Allow engine to cool before refueling. may be voided if the machine is used with unapproved •... -
Page 5: Slope Indicator
Slope Indicator G011841 Figure 3 This page may be copied for personal use. 1. The maximum slope you can safely operate the machine on is 20 degrees. Use the slope chart to determine the degree of slope of hills before operating. Do not operate this machine on a slope greater than 20 degrees. Fold along the appropriate line to match the recommended slope. -
Page 6: Safety And Instructional Decals
Safety and Instructional Decals Safety decals and instructions are easily visible to the operator and are located near any area of potential danger. Replace any decal that is damaged or lost. 121–6229 117–2718 1. Off 2. On 121-2009 1. Warning—read the 3. - Page 7 121-6150 1. Cutting hazard of hand and foot–stay away from moving parts. 130-2155 121–6222 1. Choke 3. Slow 2. Fast...
-
Page 8: Setup
Setup Product Overview Unfolding the Handle 1. Raise the handle to the operating position. Figure 5 1. Fuel valve 6. Weights 2. Air cleaner 7. Handle-locking ring 8. Transport locking pin 3. Spark-plug wire 4. Engine 9. Wheel stop 5. Fuel-tank cap 10. -
Page 9: Controls
Controls Engine Switch When the engine switch is in the On position, it allows the engine to run. Moving the engine switch to the Off position stops the engine. G022376 Figure 9 1. Throttle lever Traction-control Bail G022088 Figure 7 The traction-control bail (Figure 6) controls the forward and neutral actions of the machine. -
Page 10: Specifications
Weight (as shipped with 2 135.6 kg (299 lb) weights) Note: Toro Premium Engine Oil is available from your Authorized Toro Dealer. Important: Use 4-cycle engine oil that meets or exceeds the requirements for API service category SJ, SL, SM, or higher. -
Page 11: Filling The Fuel Tank
Filling the Fuel Tank Capacity: 0.93 L (0.25 US gallons) DANGER In certain conditions, gasoline is extremely flammable and highly explosive. A fire or explosion from gasoline can burn you and others and can damage property. • Fill the fuel tank outdoors, in an open area, and when the engine is cold. -
Page 12: Starting The Engine
Note: Fresh fuel is less than 30 days old. 3. Move the engine switch to the On position. • Ethanol: Gasoline with up to 10% ethanol (gasohol) 4. Move the throttle lever all the way forward to the or 15% MTBE (methyl tertiary butyl ether) by volume Choke position;... -
Page 13: Adding Weight To The Machine
Adding Weight to the Machine To ensure that the tines penetrate fully into the soil, you can add weight to the top of the machine. The machine is shipped with 2 weights and has 2 posts that hold the weights. G022089 Figure 18 1. -
Page 14: Securing The Machine For Transport
Securing the Machine for Transport When transporting the machine on a trailer, always use the following procedure: Important: Do not operate or drive the machine on roadways. 1. Drive the machine onto the trailer, stop the machine, stop the engine, turn off the fuel valve, and disconnect the spark-plug wire. -
Page 15: Maintenance
Maintenance Recommended Maintenance Schedule(s) Maintenance Service Maintenance Procedure Interval • Change the engine oil. After the first 8 hours • Check the tension of the drive chain. After the first 10 hours • Check the tension of the transmission drive belts. After the first 25 hours •... -
Page 16: Tipping The Machine
Lubrication Lubricating the Drive Chain Service Interval: Every 25 hours 1. Raise the tines, stop the machine, stop the engine, and disconnect the spark-plug wire. 2. Raise the front of the machine to gain access to the chain, and block it in place; refer to Tipping the Machine (page 16). -
Page 17: Greasing The Machine
Greasing the Machine Engine Maintenance Use a grease gun to lubricate the grease fittings on the front axle with general-purpose lithium grease (Figure 24). Servicing the Air Cleaner Service Interval: Every 25 hours—Clean the foam pre-cleaner (more frequently in dusty conditions). -
Page 18: Changing The Engine Oil
Changing the Engine Oil Service Interval: After the first 8 hours Every 50 hours G016924 Note: Toro Premium Engine Oil is available from your Figure 27 Authorized Toro Dealer. Important: Use 4-cycle engine oil that meets or exceeds 6. Tip the machine to the side, with the air filter up, to... -
Page 19: Servicing The Spark Plug
Servicing the Spark Plug Service Interval: Every 100 hours—Inspect and adjust the spark plug; replace it if necessary. Every 200 hours—Replace the spark plug. Use an NGK BPR5ES spark plug or equivalent. 1. Stop the engine and wait for all moving parts to stop. 2. -
Page 20: Drive System Maintenance
Drive System Maintenance Checking the Tire Pressure Service Interval: Before each use or daily Maintain the air pressure in the tires as specified. Check the tires when they are cold, to get the most accurate reading. g013126 Pressure: 138 kPa (20 psi) Figure 32 1. -
Page 21: Belt Maintenance
Belt Maintenance Checking and Adjusting the Belt Tension Service Interval: After the first 25 hours Every 50 hours Figure 35 1. Raise the tines, stop the machine, stop the engine, and disconnect the spark-plug wire. 1. Cable fitting 3. Increased tension (more threads exposed) 2. -
Page 22: Tine Maintenance
Tine Maintenance Note: Ensure that the new tine is facing the same direction as the other tines on the assembly. 6. Secure the new tine with the bolt and nut you removed Checking and Replacing the previously and torque them to 40.6 N-m (30 ft-lb). Tines 7. -
Page 23: Storage
Storage 1. Raise the tines, stop the machine, stop the engine, insert the transport locking pin, and disconnect the spark-plug wire. 2. Remove dirt and grime from the entire machine. Important: You can wash the machine with mild detergent and water. Do not pressure wash the machine. -
Page 24: Troubleshooting
Troubleshooting Problem Possible Cause Corrective Action The engine will not start. 1. The engine switch is in the Off position. 1. Move the switch to the On position. 2. The throttle lever is in the Off position. 2. Move the throttle lever to the Choke position. - Page 25 Notes:...
- Page 26 Notes:...
- Page 27 Notes:...
- Page 28 Toro importer. If all other remedies fail, you may contact us at Toro Warranty Company. Australian Consumer Law: Australian customers will find details relating to the Australian Consumer Law either inside the box or at your local Toro Dealer.