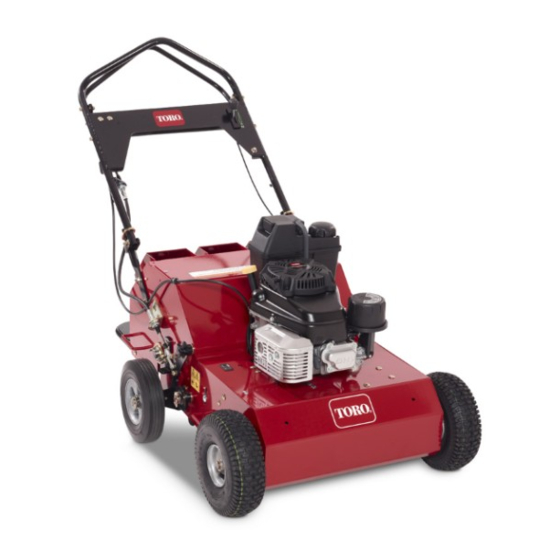
Toro 23515 Operator's Manual
21in walk-behind aerator
Hide thumbs
Also See for 23515:
- Service manual (78 pages) ,
- Operator's manual (44 pages) ,
- Operation manual (24 pages)

Related Manuals for Toro 23515


Summary of Contents for Toro 23515
- Page 1 Form No. 3379-664 Rev A 21in Walk-Behind Aerator Model No. 23515—Serial No. 314000001 and Up Model No. 33515—Serial No. 314000001 and Up *3379-664* A Register at www.Toro.com. Original Instructions (EN)
-
Page 2: Introduction
Note emphasizes general information worthy of special product properly and safely. attention. You may contact Toro directly at www.Toro.com for product and accessory information, help finding a dealer, or to register your product. Whenever you need service, genuine Toro parts, or additional... -
Page 3: Table Of Contents
Contents Troubleshooting ............29 Introduction ..............2 Safety ................4 Safe Operating Practices........... 4 Slope Indicator ............6 Safety and Instructional Decals ......... 7 Setup ................10 Unfolding the Handle ..........10 Checking the Oil Level ..........10 Product Overview ............10 Controls ...............10 Specifications ............11 Attachments/Accessories........11 Operation ..............11 Adjusting the Handle ..........11... -
Page 4: Safety
Operation Safety • Never run an engine in an enclosed area. Improper use or maintenance by the operator or • Only operate in good light, keeping away from holes and owner can result in injury. To reduce the potential hidden hazards. for injury, comply with these safety instructions and •... - Page 5 • Keep all parts in good working condition and all hardware tightened. Replace all worn or damaged decals. • Use only Toro-approved attachments. The warranty may be voided if the machine is used with unapproved attachments.
-
Page 6: Slope Indicator
Slope Indicator G011841 Figure 3 This page may be copied for personal use. 1. The maximum slope you can safely operate the machine on is 20 degrees. Use the slope chart to determine the degree of slope of hills before operating. Do not operate this machine on a slope greater than 20 degrees. Fold along the appropriate line to match the recommended slope. -
Page 7: Safety And Instructional Decals
Safety and Instructional Decals Safety decals and instructions are easily visible to the operator and are located near any area of potential danger. Replace any decal that is damaged or lost. 121-6150 1. Cutting hazard of hand and foot–stay away from moving parts. - Page 8 116-8699 1. To start the engine, read the Operator’s 2. Traction drive—move the traction 3. Raising/Lowering the tines—push the Manual—(1) Park the machine on a control lever forward to move the control lever down to lower the tines; level surface (2) Fill the engine with oil machine forward;...
- Page 9 126-1209 1. Read and understand the operator’s 4. Check tire pressure - 13 psi (2x) every 7. Check transmission belt drive tension manual before servicing this machine 50 hours every 25 hours 2. Grease tine shaft bearings (2x) every 5. Clean and oil chains (2x) every 25 8.
-
Page 10: Setup
Setup Product Overview Unfolding the Handle 1. Raise the handle to the operating position. g017578 Figure 5 1. Tine-control lever 4. Fuel tank Figure 4 2. Traction-control lever 5. Recoil starter 3. Handle 6. Throttle lever 2. Slide the oval locking rings down each side of the upper handle over the lower handle, locking the handle Controls sections together. -
Page 11: Specifications
A selection of Toro approved attachments and accessories is available for use with the machine to enhance and expand its capabilities. Contact your Authorized Service Dealer or Distributor or go to www.Toro.com for a list of all approved attachments and accessories. -
Page 12: Checking The Engine Oil Level
Note: When the crankcase is empty, pour about 3/4 of the crankcase capacity of oil in the crankcase, then follow the procedure in this section. 1. Move the machine to a level surface. 2. Clean around the dipstick (Figure 10). Figure 8 Middle handle position 1. -
Page 13: Filling The Fuel Tank With Gasoline
Filling the Fuel Tank with DANGER Gasoline When fueling, under certain circumstances, a static charge can develop, igniting the gasoline. A fire or • Fuel tank capacity: 3.8 l (1 US Gallon) explosion from gasoline can burn you and others •... -
Page 14: Starting The Engine
Starting the Engine Note: The throttle setting governs the maximum drive speed of the aerator. 1. Connect the wire to the spark plug. 2. Open the fuel valve by turn it in-line with the fuel hose Stopping the Engine (Figure 12). 1. -
Page 15: Aerating
Note: The machine with aerate in both forward and reverse. 4. When finished, stop the machine and pull the tine control lever rearward and up to lower the rear wheels and lifts the tines out of the ground. Important: Do not drive the machine across pavement or other hard surfaces without first raising the tines. -
Page 16: Adjusting The Tine-Control Lever
Figure 18 3. Wheel arm assembly 1. Pivot shaft assembly 2. 4.8 inches (12 cm) 5. The lower ball joint bolt, on the upper link rod, should be offset 1/4 inch (6 mm) from the handle pivot bolt. Figure 17 If not, loosen the lock nuts on the lift link strap ball joints, adjust as necessary, and retighten locknuts. -
Page 17: Securing The Machine For Transport
Operating Tips • For best performance and maximum tine penetration, water the turf thoroughly the day before aerating. • Clean the area of debris before using the machine. • Mark and avoid shallow obstacles such as sprinkler heads and invisible fence wires. Figure 20 1. -
Page 18: Maintenance
Maintenance Recommended Maintenance Schedule(s) Maintenance Service Maintenance Procedure Interval • Change the engine oil. After the first 5 hours • Check the engine oil level. • Check the condition and tension of the tine drive chains. • Check the condition of the front drive chains. •... -
Page 19: Premaintenance Procedures
Premaintenance Procedures Accessing the Tines The machine has a rear access panel that you can remove to access and maintain the tines (Figure 21). g017586 Figure 22 1. Jack stand WARNING Mechanical or hydraulic jacks may fail to support machine and cause a serious injury. •... -
Page 20: Lubrication
Lubrication CAUTION If you do not securely block the up the front Greasing the Tine Shaft of the machine, the machine could fall on you during service, injuring you. Bearings Ensure that you place a jack-stand or block Service Interval: Every 25 hours under the front of the machine to hold it up Every 25 hours securely. -
Page 21: Engine Maintenance
Engine Maintenance 7. Install the foam pre-cleaner onto the paper air filter. Note: Use a new paper air filter if you discarded the old one. Servicing the Air Cleaner 8. Install the air filter assembly and cover. Service Interval: Every 25 hours—Clean the foam pre-cleaner (more frequently in dusty Changing the Engine Oil conditions). -
Page 22: Changing The Oil Filter
Figure 27 5. Install the new filter and hand tighten it 2/3 turn only. 6. Insert the dipstick into the filler neck and rotate the cap clockwise until it is tight. 7. Slowly pour oil into the oil fill tube, periodically g017582 checking the level with the dipstick, until the dipstick Figure 26... -
Page 23: Check The Spark Arrester (If Equipped)
Fuel System Maintenance Emptying the Fuel Tank and Cleaning the Fuel Filter Service Interval: Every 100 hours Figure 28 The fuel filter (screen) element is located inside the fuel tank. 1. Center electrode insulator 1. Stop the engine and wait for it to cool down. 2. -
Page 24: Drive System Maintenance
Drive System Maintenance Checking the Tire Pressure Service Interval: Every 50 hours Maintain the air pressure in the tires as specified. Check the tires when they are cold to get the most accurate reading. Pressure: 83-97 kPa (12-14 psi) g017588 Figure 29 1. -
Page 25: Belt Maintenance
Belt Maintenance Checking the Hydrostatic Drive Belt Service Interval: Every 25 hours 1. Raise the tines, stop the machine, stop the engine, and disconnect the spark plug wire. 2. Raise the front of the machine to gain access to the Figure 31 pump drive belt and block it in place. -
Page 26: Controls System Maintenance
Controls System Hydraulic System Maintenance Maintenance Changing the Hydraulic Adjusting the Self-Propel Drive Transmission Fluid 1. Raise the tines, stop the machine, stop the engine, and disconnect the spark plug wire. Service Interval: Every 100 hours 2. Squeeze the self-propel bail to the handle until the 1. - Page 27 12. Fill the transmission at the oil-fill port until the oil level is 13–32 mm (1/2–1 1/4 inches) below the top of the fill port. Toro Premium Hydro Oil is recommended. Mobil 1 15W50 is an acceptable alternative. 13. Install the previously removed oil-fill port fitting.
-
Page 28: Tine Maintenance
Tine Maintenance Storage 1. Raise the tines, stop the machine, stop the engine, and Checking/Replacing Tines disconnect the spark plug wire. 2. Remove dirt and grime from the entire machine. Service Interval: Before each use or daily 1. Raise the tines, stop the machine, stop the engine, and Important: You can wash the machine with mild disconnect the spark plug wire. - Page 29 Troubleshooting Problem Possible Cause Corrective Action Engine will not start. 1. The throttle lever is in the Off position. 1. Move the throttle lever tot he Choke position. 2. The spark plug is disconnected. 2. Connect the spark plug. 3. The fuel is turned off. 3.
- Page 30 Notes:...
- Page 31 Notes:...
- Page 32 Toro importer. If all other remedies fail, you may contact us at Toro Warranty Company. Australian Consumer Law: Australian customers will find details relating to the Australian Consumer Law either inside the box or at your local Toro Dealer.