Linksys WPS54G User Manual
2.4ghz 802.11g wireless-g printserver
Hide thumbs
Also See for WPS54G:
- Quick installation (2 pages) ,
- Product data (2 pages) ,
- Installation manual

Related Manuals for Linksys WPS54G


Summary of Contents for Linksys WPS54G
-
Page 1: User Guide
® A Division of Cisco Systems, Inc. Wireless-G 802.11g User Guide PrintServer WIRELESS WPS54G Model No. - Page 2 Wireless-G PrintServer Copyright and Trademarks Specifications are subject to change without notice. Linksys is a registered trademark or trademark of Cisco Systems, Inc. and/or its affiliates in the U.S. and certain other countries. Copyright © 2004 Cisco Systems, Inc. All rights reserved.
-
Page 3: Table Of Contents
Wireless-G PrintServer Table of Contents Chapter 1: Introduction Welcome What’s in this Guide? Chapter 2: Getting to Know the PrintServer The Bottom Panel The Front Panel Chapter 3: Connecting the PrintServer Overview Connecting the PrintServer to Your Network Placement Options Chapter 4: Configuring the PrintServer Using the Setup Wizard Installation Chapter 5: Windows Driver Installation... - Page 4 Wireless-G PrintServer Chapter 7: Bi-Admin Management Overview Bi-Admin Installation Starting the Bi-Admin Management Utility The Bi-Admin Management Utility Chapter 8: Internet Printing Protocol (IPP) Overview Windows IPP Client Setup Appendix A: Troubleshooting Common Problems and Solutions Appendix B: Wireless Security Security Precautions Security Threats Facing Wireless Networks Appendix C: About Bi-Directional Printing...
- Page 5 Wireless-G PrintServer List of Figures Figure 2-1: PrintServer’s Bottom Panel Figure 2-2: PrintServer’s Front Panel Figure 3-1: Connect to the Ethernet Port Figure 3-2: Connect to the USB Port Figure 3-3: Connect to the Power Port Figure 3-4: Desktop Placement Figure 4-1: Welcome Figure 4-2: Wireless-G PrintServer Setup Figure 4-3: Basic Settings...
- Page 6 Wireless-G PrintServer Figure 6-8: Wireless Tab - Security (WEP) Figure 6-9: Printer - Internet Printing Figure 6-10: Printer - Logical Port Figure 6-11: Status Tab - Device Figure 6-12: Firmware Upgrade Figure 6-13: Status Tab - Printer Figure 6-14: Status Tab - Wireless Figure 6-15: Exit Figure 7-1: Welcome Figure 7-2: Bi-Admin Setup Welcome...
-
Page 7: Chapter 1: Introduction
Chapter 1: Introduction Welcome Thank you for choosing the Linksys Wireless-G PrintServer. The PrintServer lets you connect a USB printer directly to your network, eliminating the need to dedicate a PC to print sharing chores. Using a PrintServer frees up your “print share PC” so you don’t have to leave it on all the time. It also removes the printing bottleneck, and sets your PC free to do more useful work. -
Page 8: What's In This Guide
Wireless-G PrintServer What’s in this Guide? This user guide covers the steps for setting up and using the PrintServer. • Chapter 1: Introduction This chapter describes the PrintServer’s applications and this User Guide. • Chapter 2: Getting to Know the PrintServer This chapter describes the physical features of the PrintServer. - Page 9 • Appendix I: Regulatory Information This appendix supplies the regulatory information regarding the PrintServer. • Appendix J: Contact Information This appendix provides contact information for a variety of Linksys resources, including Technical Support. Chapter 1: Introduction What’s in this Guide?
-
Page 10: Chapter 2: Getting To Know The Printserver
Wireless-G PrintServer Chapter 2: Getting to Know the PrintServer The Bottom Panel The PrintServer’s ports and Reset button are located on the bottom panel. Figure 2-1: PrintServer’s Bottom Panel Power The Power port is where you will connect the power adapter. Ethernet The Ethernet port is where you will connect the PrintServer to your wired network. -
Page 11: The Front Panel
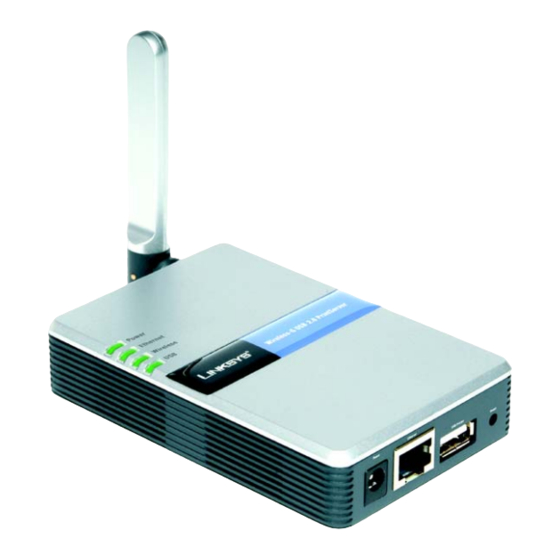
Wireless-G PrintServer The Front Panel The PrintServer’s LEDs are located on the front panel. Power Green/Orange. If the Power LED is continuously lit green, then the PrintServer is ready for use. The LED flashes green when the PrintServer is booting up, a system self-test is running, or the firmware is being upgraded. -
Page 12: Chapter 3: Connecting The Printserver
Wireless-G PrintServer Chapter 3: Connecting the PrintServer Overview Before starting the physical installation, note the PrintServer’s default name, which starts with “LK” (for example, LK71107). The default name is shown in the Server field on the PrintServer’s sticker, which is located on the PrintServer’s back panel. -
Page 13: Placement Options
Wireless-G PrintServer Placement Options There are different ways to place the PrintServer. The first way is to place the PrintServer horizontally on a surface, so it sits on four small rubber pads. You can also use the included velcro to mount the PrintServer on a wall or underneath a shelf. -
Page 14: Chapter 4: Configuring The Printserver Using The Setup Wizard
Wireless-G PrintServer Chapter 4: Configuring the PrintServer Using the Setup Wizard Installation To install the PrintServer, you will use the Setup CD-ROM to run the Setup Wizard. It is highly recommended that you use a computer on the wired network to set up the PrintServer. However, if you only have a wireless network, then you can use a computer on the wireless network to set up the PrintServer. -
Page 15: Figure 4-3: Basic Settings
Wireless-G PrintServer 4. The Basic Settings screen will appear. If you want to change the Device Name or Domain Name, enter the Device Name and Domain Name in the respective fields. Click Next to continue, or click Back to return to the previous screen. 5. -
Page 16: Figure 4-5: Set Printserver's Password
Wireless-G PrintServer 6. The Set PrintServer’s Password screen will appear. If you want to change your password, enter your current password in the Current Password field. Enter the new password in the New Password field, then enter it again in the Verify Password field. Click Next to continue, or click Back to return to the previous screen. -
Page 17: Figure 4-7: Wireless Security Settings
16 alphanumeric characters or fewer. It must match the passphrase of your wireless network and is compatible with Linksys wireless products only. (You will have to enter the WEP key(s) manually on any non-Linksys wireless products.) If you want to enter the WEP key manually, then leave the Passphrase field blank;... -
Page 18: Figure 4-9: Confirmation
Wireless-G PrintServer 10. The Confirmation screen will appear. Your old and new settings will be displayed. If you want to save the new settings, click Yes. If you want to make a change, click No, and you will exit the Setup Wizard; you will have to start the Setup Wizard again. -
Page 19: Chapter 5: Windows Driver Installation
3. When you see the Welcome screen, click User Install to continue. Click Exit to end the installation. Chapter 5: Windows Driver Installation Overview HAVE YOU: already set up your printer? Linksys recommends that you set up your printer and install your printer’s driver before you install the PrintServer’s driver. -
Page 20: Figure 5-2: Driver Setup Welcome
Wireless-G PrintServer 4. The Welcome screen of the driver installation program will appear first. Click Next to continue with the driver installation, or click Cancel to quit the setup program and then close the open programs. 5. The Choose Destination Location screen will appear. Choose the location where the driver’s folder will be installed. -
Page 21: Figure 5-4: Select Program Folder
Wireless-G PrintServer 6. The Select Program Folder screen will appear. An icon will be added to the program folder listed. You may change the name for the program folder, if you wish. Click Next. You can also click Back to return to the previous screen or click Cancel to end the driver installation. 7. -
Page 22: Starting The Print Driver Utility
Wireless-G PrintServer Starting the Print Driver Utility 1. Click Start, Programs, Print Server Utility, and then Print Driver Setup. If the Print Driver Setup icon has been created, you can double-click it instead. 2. The Information screen will appear. Read the on-screen information, and then click OK. 3. -
Page 23: Figure 5-8: Configure Printer Port
Wireless-G PrintServer 5. The Configure Printer Port screen will appear. Your installed printer(s) will appear in the field. Select the printer you want, and click the Connect button to associate the printer with your selected printer port. To add another printer, click the Add New Printer button. Click Cancel to cancel the setup. -
Page 24: Chapter 6: Configuring The Printserver Using The Web-Based Utility
Wireless-G PrintServer Chapter 6: Configuring the PrintServer Using the Web-based Utility Overview After setting up the PrintServer with the Setup Wizard, the PrintServer will be ready for use. However, if you’d like to change its settings, use the PrintServer’s web-based utility. This chapter will describe each web page of the utility and each page’s key functions. -
Page 25: The Setup Tab
The first screen that appears is the Setup tab and allows you to change the PrintServer’s general settings. WPS54G Device Name Enter the PrintServer’s name in the field provided. The name is located on a sticker on the bottom of the PrintServer. -
Page 26: The Protocol Tab - Tcp/Ip
Wireless-G PrintServer The Protocol Tab - TCP/IP Click the TCP/IP tab to view or change the TCP/IP values of the PrintServer. IP Address Obtain an IP Address Automatically. If your network router is using DHCP to assign IP addresses, select Obtain an IP Address Automatically. -
Page 27: The Protocol Tab - Appletalk
Wireless-G PrintServer The Protocol Tab - AppleTalk AppleTalk is a network communications protocol that allows computers to talk to each other using Ethernet. Typically only Macintoshes use AppleTalk, although other platforms can use it if they have the necessary, third- party software. -
Page 28: The Protocol Tab - Netbeui
Wireless-G PrintServer The Protocol Tab - NetBEUI NetBEUI connection settings of the PrintServer are available on this tab. Domain Name Enter the name of the domain that you want the PrintServer associated with in the Domain Name field. If you are unsure of the Domain Name, you can find it out by looking on any computer already on the network. In Windows 98, right-click Network Neighborhood and select Properties. -
Page 29: The Protocol Tab - Snmp
Wireless-G PrintServer The Protocol Tab - SNMP Use this screen to view or change the PrintServer’s SNMP (Simple Network Management Protocol) settings. The PrintServer supports SNMP, which allows network administrators to monitor and control the PrintServer through the use of network management platforms, such as HP OpenView. The appropriate MIB file must be imported into your SNMP management program using the Import-Compile command. -
Page 30: The Wireless Tab - Basic
Wireless-G PrintServer The Wireless Tab - Basic This screen allows you to change the PrintServer’s basic wireless settings. Configuration Regulatory Domain and MAC Address. The PrintServer’s Regulatory Domain and MAC Address are listed and cannot be changed. SSID. In the SSID field, enter the name of your wireless network. This is the unique name shared by all devices in Figure 6-6: Wireless Tab - Basic a wireless network. -
Page 31: The Wireless Tab - Security
Passphrase. Enter a Passphrase and click the Generate Keys button to automatically generate WEP Keys 1-4. The Passphrase is case-sensitive and should have no more than 16 alphanumeric characters. It must match your wireless network’s passphrase and is compatible with Linksys wireless products only. (Enter the WEP key(s) manually on any non-Linksys wireless products.) Figure 6-8: Wireless Tab - Security (WEP) Key 1 to Key 4. -
Page 32: The Printer Tab - Internet Printing
Wireless-G PrintServer The Printer Tab - Internet Printing Internet Printing allows you to automatically print any e-mails that are sent to a specific e-mail account on your network. This is especially useful for printing information when you are not connected to the network. You can print from any location where you can access e-mail. -
Page 33: The Printer Tab - Logical Port
Wireless-G PrintServer The Printer Tab - Logical Port The Logical Printers tab contains the logical printer settings of the PrintServer. Configure them for each Logical Printer. The PrintServer has six logical or virtual printer ports. For example, you can have three different configurations for your parallel printer: Logical Printer 1 for landscape orientation, Logical Printer 2 for double-sided copies, and Logical Printer 3 for manual feed. -
Page 34: The Status Tab - Device
This screen is for information only. Upgrade. If you want to upgrade the PrintServer’s firmware, follow these instructions: 1. Visit www.linksys.com and download the firmware upgrade file for the Wireless-G PrintServer. 2. Extract the file on your computer. 3. On the Device screen, click the Upgrade button. -
Page 35: The Status Tab - Printer
Wireless-G PrintServer The Status Tab - Printer The Printer tab allows you to view information about the Printers. No values can be changed on this screen. This screen is for information only. Port 1 (USB Port) The port’s status information is displayed here. No values can be changed on this screen. This screen is for information only. -
Page 36: Chapter 7: Bi-Admin Management
Wireless-G PrintServer Chapter 7: Bi-Admin Management Overview If you use Windows, then you can manage the PrintServer using its web-based utility (see “Chapter 6: Configuring the PrintServer Using the Web-based Utility”) or an advanced utility program called Bi-Admin. (If you use a Macintosh or other non-Windows operating system, you can manage the PrintServer only by using its web- based utility.) Bi-Admin is provided on the PrintServer’s Setup CD-ROM and is fully compatible with Windows 98, Me, 2000, and... -
Page 37: Figure 7-3: Choose Destination Location
Wireless-G PrintServer 5. The Choose Destination Location screen will appear. Choose the location where the B-Admin folder will be installed. To install the driver in the default location, click Next. If you want the folder to be installed in a different location, click the Browse button and select the location. -
Page 38: Starting The Bi-Admin Management Utility
Wireless-G PrintServer Starting the Bi-Admin Management Utility 1. To start the Bi-Admin program, click Start, Programs, Print Server Utility, and then Bi-Admin Management Utility. If the Bi-Admin Management Utility icon has been created, you can just double-click it instead. You can drag the shortcut icon onto your Desktop for easy access to the Bi-Admin Management Utility. -
Page 39: The Bi-Admin Management Utility
Wireless-G PrintServer The Bi-Admin Management Utility The Bi-Admin Management Utility screen will appear next. Any hardware found on the network will appear on the left-hand side of the screen. The Utility can be managed from this screen. The menu and icon options will be explained in this section. -
Page 40: Figure 7-9: Printer Status
Wireless-G PrintServer • Printer Status. This option allows you to view the printer status, as well as set port and printer parameters. If you click Printer Status, the Printer Status screen will appear. The Device Name will be displayed and the Current Selected Port will be highlighted. -
Page 41: Figure 7-10: Configuration - System
Wireless-G PrintServer • Configure. You may configure the PrintServer with this option. If you click Configure, the Configuration screen will appear. It displays eight tabs: System, TCP/IP, AppleTalk, NetBEUI, Internet Printing, Port, Wireless, and SNMP. The tabs will be described below. System •... -
Page 42: Figure 7-11: Configuration - Tcp/Ip
Wireless-G PrintServer TCP/IP • Dynamic IP Address (DHCP). If your network router is using DHCP to assign IP addresses, select Dynamic IP Address (DHCP). By default, Dynamic IP Address (DHCP) is enabled. • Fixed IP Address. If you need to assign the PrintServer a fixed IP address (also known as static IP address), select Fixed IP Address, and enter the appropriate values under IP Address, Subnet Mask, and Gateway. -
Page 43: Figure 7-12: Configuration - Appletalk
Wireless-G PrintServer Apple Talk • Zone Name. Typically only Macintoshes use AppleTalk, although other platforms can use it if they have the necessary, third-party software installed. Enter the Zone Name in the field provided. • Port Setting. Select the port number from the drop-down menu. The Printer Type can be obtained from the manufacturer of the printer. -
Page 44: Figure 7-13: Configuration - Netbeui
Wireless-G PrintServer NetBEUI • Domain Name. Enter the name of the domain that you want the PrintServer associated with in the Domain Name field. If you are unsure of the Domain Name, you can find it out by looking on any computer already on the network. -
Page 45: Figure 7-14: Configuration - Internet Printing
Wireless-G PrintServer Internet Printing • Mail Server. Enter the address of your mail server in the Mail Server IP Address fields. (This value must be a fixed IP address.) Enter the Mail Account name and Password next. Enter the password again in the Confirm Password field. -
Page 46: Figure 7-15: Configuration - Port
Wireless-G PrintServer Port • Physical Port. Select the number of the Selected Physical Port from the drop-down menu. Select the Handshake Signal, Busy Only or Busy & Ack. Select the Printer Type, High Speed or Low Speed. • Logical Port. Select the Selected Logical Port from the drop-down menu and then the physical port you want to map it to from the drop-down menu for Map to Physical Port. -
Page 47: Figure 7-16: Configuration - Wireless
Wireless-G PrintServer Wireless • SSID (Service Set Identifier). In the SSID field, enter the name of your wireless network. This is the unique name shared by all devices in a wireless network. The SSID is case-sensitive and should have 32 characters or fewer. -
Page 48: Figure 7-17: Configuration - Snmp
Wireless-G PrintServer SNMP • SysContact. Enter the name of the contact person in the SysContact field. • SysLocation. Enter the location of the contact person in the SysLocation field. • Configuration Item. From the Configuration Item box, select the number of the management station (M1- M4) or trap receiver (T1-T4). -
Page 49: Figure 7-18: Upgrade
Wireless-G PrintServer • Upgrade. You may use this option to upgrade the firmware of the PrintServer. Follow these instructions: 1. On the Upgrade screen, click the Files button. 2. The Detected LAN Cards screen will appear. Select the LAN card the PrintServer is connected to, and then click the OK button. -
Page 50: Chapter 8: Internet Printing Protocol (Ipp)
Wireless-G PrintServer Chapter 8: Internet Printing Protocol (IPP) Overview Internet Printing Protocol (IPP) is a standards-based system that allows remote printing from a PC to any accessible printer. Normally, the printer will be attached to a computer or other device that functions as an IPP Server. - Page 51 Wireless-G PrintServer IPP Client Configuration for Windows 98, Me, 2000, and XP 1. Run the Add IPP Port program entry created by the installation. 2. On the Output Select screen, enter the IP Address or URL of the IPP Server. 3.
-
Page 52: Figure 8-1: Windows Xp - Local Or Network Printer
Wireless-G PrintServer Changing the IPP Port Settings After the IPP port is created, you can reach the Configure IPP Port screen by performing these steps: 1. Open the Printers folder (Start => Settings => Printers). 2. Right-click IPP Printer and select Properties. 3. -
Page 53: Figure 8-2: Windows Xp - Specify A Printer
Wireless-G PrintServer 6. On the Specify a Printer screen, select Connect to a printer on the Internet or on a home or office network, and enter the URL of the IPP Server as follows (ip_address represents the IP Address of the IPP Server, and 631 represents the port number). - Page 54 Wireless-G PrintServer 7. If the connection can be established, and the printer on that port is online, the Connect to Printer dialog box will be displayed. This screen notifies you that the printer driver is not installed. Click the OK button. 8.
-
Page 55: Appendix A: Troubleshooting
This appendix consists of “Common Problems and Solutions”. Provided are possible solutions to problems that may occur during the installation and operation of the PrintServer. Read the descriptions below to help you solve your problems. If you can’t find an answer here, check the Linksys website at www.linksys.com. Common Problems and Solutions 1. - Page 56 8. I need to upgrade the firmware. In order to upgrade the firmware with the latest features, follow these steps: 1. Go to the Linksys website at http://www.linksys.com and download the latest firmware for the PrintServer. Then extract the firmware file on your PC.
-
Page 57: Appendix B: Wireless Security
Wireless-G PrintServer Appendix B: Wireless Security Linksys wants to make wireless networking as safe and easy for you as possible. The current generation of Linksys products provide several network security features, but they require specific action on your part for implementation. - Page 58 This includes hackers. So, don’t broadcast the SSID. Wireless networking products come with a default SSID set by the factory. (The Linksys default SSID is “linksys”.) Hackers know these defaults and can check these against your network. Change your SSID to something unique and not something related to your company or the networking products you use.
- Page 59 These security recommendations should help keep your mind at ease while you are enjoying the most flexible and convenient technology Linksys has to offer. Appendix B: Wireless Security Security Threats Facing Wireless Networks...
-
Page 60: Appendix C: About Bi-Directional Printing
That does not mean that they can’t be used on a network, however. Linksys designed the PrintServers to function with both regular as well as bi-directional printers. Standard print servers cannot work with bi-directional printers, but the PrintServer features a custom design to support both parallel as well as bi-directional parallel interfaces. -
Page 61: Appendix D: Upgrading Firmware
Appendix D: Upgrading Firmware Use the PrintServer’s Web-based Utility to upgrade its firmware. Follow these instructions: 1. Visit www.linksys.com and download the firmware upgrade file for the Wireless-G PrintServer. 2. Extract the file on your computer. 3. Open the PrintServer’s Web-based Utility. -
Page 62: Appendix E: Windows Help
Wireless-G PrintServer Appendix E: Windows Help All Linksys wireless products require Microsoft Windows. Windows is the most used operating system in the world and comes with many features that help make networking easier. These features can be accessed through Windows Help and are described in this appendix. -
Page 63: Appendix F: Glossary
Wireless-G PrintServer Appendix F: Glossary 802.11b - A wireless networking standard that specifies a maximum data transfer rate of 11Mbps and an operating frequency of 2.4GHz. 802.11g - A wireless networking standard that specifies a maximum data transfer rate of 54Mbps, an operating frequency of 2.4GHz, and backward compatibility with 802.11b devices. - Page 64 Wireless-G PrintServer Cable Modem - A device that connects a computer to the cable television network, which in turn connects to the Internet. CSMA/CA (Carrier Sense Multiple Access/Collision Avoidance) - A method of data transfer that is used to prevent data collisions.
- Page 65 Wireless-G PrintServer EAP (Extensible Authentication Protocol) - A general authentication protocol used to control network access. Many specific authentication methods work within this framework. EAP-PEAP (Extensible Authentication Protocol-Protected Extensible Authentication Protocol) - A mutual authentication method that uses a combination of digital certificates and another system, such as passwords. EAP-TLS (Extensible Authentication Protocol-Transport Layer Security) - A mutual authentication method that uses digital certificates.
- Page 66 Passphrase - Used much like a password, a passphrase simplifies the WEP encryption process by automatically generating the WEP encryption keys for Linksys products. Ping (Packet INternet Groper) - An Internet utility used to determine whether a particular IP address is online.
- Page 67 Wireless-G PrintServer POP3 (Post Office Protocol 3) - A standard mail server commonly used on the Internet. Port - The connection point on a computer or networking device used for plugging in cables or adapters. Power over Ethernet (PoE) - A technology enabling an Ethernet network cable to deliver both data and power. PPPoE (Point to Point Protocol over Ethernet) - A type of broadband connection that provides authentication (username and password) in addition to data transport.
- Page 68 Wireless-G PrintServer SSID (Service Set IDentifier) - Your wireless network's name. Static IP Address - A fixed address assigned to a computer or device that is connected to a network. Static Routing - Forwarding data in a network via a fixed path. Subnet Mask - An address code that determines the size of the network.
- Page 69 Wireless-G PrintServer WAN (Wide Area Network)- The Internet. WEP (Wired Equivalent Privacy) - A method of encrypting network data transmitted on a wireless network for greater security. WINIPCFG - A Windows 98 and Me utility that displays the IP address for a particular networking device. WLAN (Wireless Local Area Network) - A group of computers and associated devices that communicate with each other wirelessly.
-
Page 70: Appendix G: Specifications
Wireless-G PrintServer Appendix G: Specifications Model WPS54G Standards IEEE 802.11g, IEEE 802.11b, IEEE 802.3, USB 2.0 Ports Power, Ethernet, USB Printer Button Reset Cabling Type USB 2.0, UTP CAT5 LEDs Power, Ethernet, Wireless, USB Security Features WEP, WPA-PSK WEP Key Bits... -
Page 71: Appendix H: Warranty Information
Your exclusive remedy and Linksys' entire liability under this warranty will be for Linksys at its option to repair or replace the Product or refund Your purchase price less any rebates. -
Page 72: Appendix I: Regulatory Information
Canadian regulations. EC DECLARATION OF CONFORMITY (EUROPE) Linksys declares that this product conforms to the specifications listed below, following the provisions of the European R&TTE directive 1999/5/EC: EN 301 489-1, 301 489-17 General EMC requirements for Radio equipment. - Page 73 Linksys vakuuttaa täten että dieses produkt tyyppinen laite on direktiivin 1999/5/EY oleellisten vaatimusten ja sitä koskevien näiden direktiivien muiden ehtojen mukainen. Linksys déclare que le produit est conforme aux conditions essentielles et aux dispositions relatives à la directive 1999/5/EC. Belgique: Dans le cas d'une utilisation privée, à...
-
Page 74: Appendix J: Contact Information
Can't find information about a product you want to buy on the web? Do you want to know more about networking with Linksys products? Give our advice line a call at: Or fax your request in to: If you experience problems with any Linksys product,...