Linksys WPSM54G User Manual
Wireless-g printserver with multifunction printer support
Hide thumbs
Also See for WPSM54G:
- User manual (245 pages) ,
- Quick installation manual (132 pages) ,
- Quick installation (2 pages)
Table of Contents
Advertisement
Quick Links
Download this manual
See also:
User Manual
Advertisement
Table of Contents

Related Manuals for Linksys WPSM54G


Summary of Contents for Linksys WPSM54G
-
Page 1: User Guide
Wireless-G 802.11g PrintServer with User Guide Multifunction Printer Support WIRELESS WPSM54G Model No. - Page 2 Wireless-G PrintServer with Multifunction Printer Support Copyright and Trademarks Specifications are subject to change without notice. Linksys is a registered trademark or trademark of Cisco Systems, Inc. and/or its affiliates in the U.S. and certain other countries. Copyright © 2006 Cisco Systems, Inc. All rights reserved.
-
Page 3: Table Of Contents
Wireless-G PrintServer with Multifunction Printer Support Table of Contents Chapter 1: Introduction Welcome What’s in this Guide? Chapter 2: Getting to Know the PrintServer Overview The Back Panel The Front Panel Chapter 3: Installing the PrintServer Using the Setup Wizard Before You Begin Installation About the New Program Icons... - Page 4 Wireless-G PrintServer with Multifunction Printer Support Appendix A: Troubleshooting Common Problems and Solutions Appendix B: Wireless Security Security Precautions Security Threats Facing Wireless Networks Appendix C: Upgrading Firmware Appendix D: Windows Help Appendix E: Glossary Appendix F: Specifications Appendix G: Warranty Information Appendix H: Regulatory Information Appendix I: Contact Information...
- Page 5 Wireless-G PrintServer with Multifunction Printer Support List of Figures Figure 2-1: PrintServer’s Back Panel Figure 2-2: PrintServer’s Front Panel Figure 3-1: Welcome Figure 3-2: Set up PrintServer Figure 3-3: Disconnect the USB Printer Cable and Power Figure 3-4: Connect the PrintServer to the Printer Figure 3-5: Connect the PrintServer to the Router Figure 3-6: Connect the Power to the PrintServer Figure 3-7: Reconnect the Power to the Printer...
- Page 6 Wireless-G PrintServer with Multifunction Printer Support Figure 4-6: Print Test Page Figure 5-1: Diagnostic Utility Icon Figure 5-2: Right-Click Utility Icon Figure 5-3: About Print Server Utility Figure 5-4: Exit Utility Figure 5-5: Program Icons Figure 5-6: Print Server Information - Connected Figure 5-7: Print Server Information - Disconnected Figure 5-8: Auto-Disconnect (Time) Figure 5-9: Auto-Disconnect (Always Connect)
-
Page 7: Chapter 1: Introduction
Chapter 1: Introduction Welcome Thank you for choosing the Linksys Wireless-G PrintServer with Multifunction Printer Support. The PrintServer lets you connect a multifunction USB printer directly to your network, eliminating the need to dedicate a PC to print sharing chores. Using a PrintServer frees up your “print share PC” so you don’t have to leave it on all the time. -
Page 8: What's In This Guide
Wireless-G PrintServer with Multifunction Printer Support What’s in this Guide? This user guide covers the steps for setting up and using the PrintServer. • Chapter 1: Introduction This chapter describes the PrintServer’s applications and this User Guide. • Chapter 2: Getting to Know the PrintServer This chapter describes the physical features and placement options of the PrintServer. - Page 9 • Appendix H: Regulatory Information This appendix supplies the regulatory information regarding the PrintServer. • Appendix I: Contact Information This appendix provides contact information for a variety of Linksys resources, including Technical Support. Chapter 1: Introduction What’s in this Guide?
-
Page 10: Chapter 2: Getting To Know The Printserver
Wireless-G PrintServer with Multifunction Printer Support Chapter 2: Getting to Know the PrintServer Overview This chapter describes the back panel, front panel, and placement options of the PrintServer. The Back Panel The PrintServer’s ports and Reset button are located on the back panel. Figure 2-1: PrintServer’s Back Panel Reset Button Use the Reset Button to reset the PrintServer to its factory defaults or print a test page. -
Page 11: The Front Panel
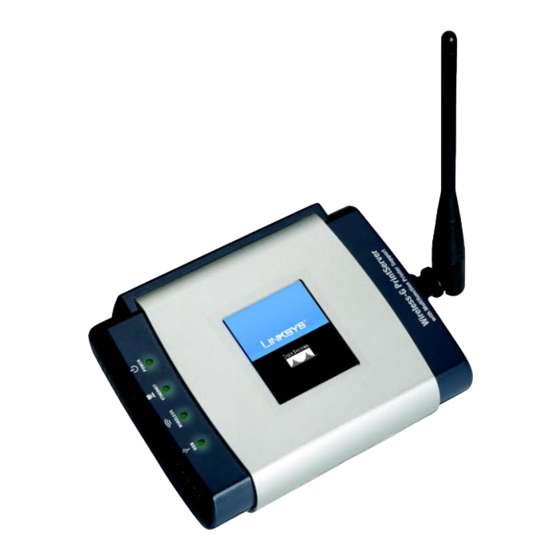
Wireless-G PrintServer with Multifunction Printer Support The Front Panel The PrintServer’s LEDs are located on the front panel. Figure 2-2: PrintServer’s Front Panel Green/Orange. The USB LED lights up green when there is a printer connected to the USB port. The LED flashes green when the PrintServer is sending data through the USB port. -
Page 12: Chapter 3: Installing The Printserver Using The Setup Wizard
Setup Wizard Before You Begin HAVE YOU: already set up your printer? Linksys recommends that you set up your printer and install your printer’s driver before you install the PrintServer’s driver. Note the PrintServer’s default name, which starts with “LK” (for example, LK71107). It is shown in the Server field on the sticker located on the PrintServer’s back panel. -
Page 13: Figure 3-3: Disconnect The Usb Printer Cable And Power
Wireless-G PrintServer with Multifunction Printer Support 4. Disconnect the USB printer cable from the computer, and disconnect the printer’s power adapter from the electrical outlet. Click Next. Figure 3-3: Disconnect the USB Printer Cable and Power 5. Connect the USB printer cable to the USB port on the PrintServer. Click Next. Figure 3-4: Connect the PrintServer to the Printer Chapter 3: Installing the PrintServer Using the Setup Wizard Installation... -
Page 14: Figure 3-5: Connect The Printserver To The Router
Wireless-G PrintServer with Multifunction Printer Support 6. Connect the Ethernet network cable to your router. Connect the other end of the cable to the Ethernet port of the PrintServer. (The Ethernet connection is for configuration purposes only. Later you can disconnect the Ethernet network cable when the PrintServer has connected wirelessly.) Click Next. -
Page 15: Figure 3-7: Reconnect The Power To The Printer
Wireless-G PrintServer with Multifunction Printer Support 8. Reconnect the printer’s power adapter to the electrical outlet. Click Next. 9. Wait a few moments while the system searches for the PrintServer. Select the appropriate PrintServer. If you cannot find the PrintServer, click Refresh. Click Next. -
Page 16: Figure 3-9: Configure Ip Settings (Automatic)
Wireless-G PrintServer with Multifunction Printer Support 10. If your network uses a router that automatically assigns IP addresses, select Automatically obtain an IP address (DHCP). If your network uses a static IP address, select Set IP configuration manually, and enter the IP Address, Subnet Mask, and Gateway in the fields provided. -
Page 17: Figure 3-11: Set The Printserver's Password
Wireless-G PrintServer with Multifunction Printer Support 11. Create a password and enter it in the Password field. Enter the new password again in the Confirm field. Click Next. 12. Select the wireless network that the PrintServer should join. If you do not see the wireless network you want to use, click Refresh and locate the network. -
Page 18: Figure 3-13: Configure Wireless Settings
Wireless-G PrintServer with Multifunction Printer Support 13. If you clicked Manual Setup, the Configure Wireless Settings screen appears with the SSID field. Enter the SSID or name of the wireless network. This is the unique name shared by all devices in a wireless network. The SSID is case-sensitive and should have 32 or fewer characters. -
Page 19: Figure 3-15: Wireless Security - Wep (128-Bit)
Enter a Passphrase that has 16 or fewer alphanumeric characters. Click Next. A WEP key will be automatically generated. (The Passphrase is compatible with Linksys wireless products only. You will have to manually enter the WEP key on any non-Linksys wireless products.) If you want to manually enter the WEP key, leave the Passphrase field blank and click Next. -
Page 20: Figure 3-18: Disconnect The Power Adapter
Wireless-G PrintServer with Multifunction Printer Support 16. Wait a few moments while the PrintServer’s settings are updated. In the next few screens, you will disconnect and reconnect the PrintServer. Proceed in the order specified to avoid any networking conflicts. Disconnect the power adapter from the PrintServer. Click Next. 17. -
Page 21: Figure 3-20: Reconnect The Power Adapter
Wireless-G PrintServer with Multifunction Printer Support 18. Reconnect the power adapter to the PrintServer and click Next. Wait a few moments while the system checks for the network. 19. Wait a few minutes while the PrintServer connects to your wireless network. The next screen will indicate that the PrintServer is now part of your wireless network. -
Page 22: About The New Program Icons
After you have run the Set up PrintServer Setup Wizard, the PrintServer program icons will appear in the Start menu. To access these icons, click Start. Select Programs. Then select Linksys MFP Network Adapter. You will have four options available: •... -
Page 23: Chapter 4: Installing The Printserver Driver
PrintServer for print jobs. (The PrintServer is fully compatible with Windows 2000 and XP.) HAVE YOU: already set up your printer? Linksys recommends that you set up your printer and install your printer’s driver before you install the PrintServer’s driver. -
Page 24: Figure 4-1: Welcome
Wireless-G PrintServer with Multifunction Printer Support 3. When you see the Welcome screen, click Click Here to Start to continue. Click Exit to end the installation. Click User Guide button to view the User Guide. Figure 4-1: Welcome 4. Click Set up Computer. Figure 4-2: Set up Computer Chapter 4: Installing the PrintServer Driver Installation... -
Page 25: Figure 4-3: Select Printer
Wireless-G PrintServer with Multifunction Printer Support 5. Select the printer connected to the PrintServer. Click Next. NOTE: If the PrintServer is not listed, click Refresh. If the PrintServer is not found, then follow these instructions: 1. Disconnect the power adapter from the PrintServer. 2. -
Page 26: Figure 4-5: Please Wait
Wireless-G PrintServer with Multifunction Printer Support 7. Please wait while the printer drivers are configured for use with the PrintServer. This may take two to three minutes. 8. You will be notified when the installation of the PrintServer is complete. If you want to print a test page, click Test Print. -
Page 27: Chapter 5: Using The Diagnostic Utility
Wireless-G PrintServer with Multifunction Printer Support Chapter 5: Using the Diagnostic Utility Overview This chapter describes the diagnostic utility used to control the PrintServer. How to Access the Diagnostic Utility There are two ways to access the diagnostic utility. One way uses the diagnostic icon in the system tray, and the other way uses the program icon accessed through the Start menu. -
Page 28: About The Print Server Information Screen
Program Icon Accessed through the Start Menu The PrintServer program icons appear in the Start menu. To access these icons, click Start. Select Programs. Then select Linksys MFP Network Adapter. You will have four options available: • To uninstall the PrintServer from your computer, click Uninstall. -
Page 29: Figure 5-8: Auto-Disconnect (Time)
Wireless-G PrintServer with Multifunction Printer Support Auto-Disconnect By default, the computer will be disconnected three minutes after the scan, print job, or fax is completed. To make changes, click the Change button. To change the length of time before the computer is disconnected from the printer, select the appropriate length of time from the drop-down menu, and then click the Set button. -
Page 30: Chapter 6: Using The Web-Based Utility
Wireless-G PrintServer with Multifunction Printer Support Chapter 6: Using the Web-based Utility Overview After setting up the PrintServer with the Setup Wizard, the PrintServer will be ready for use. However, if you’d like to change its advanced settings, use the PrintServer’s web-based utility. This chapter will describe each web page of the utility and each page’s key functions. -
Page 31: The Setup Tab
The first screen that appears is the Setup tab and allows you to change the PrintServer’s general settings. WPSM54G Device Name Enter the PrintServer’s name in the field provided. The name is located on a sticker on the bottom of the PrintServer. -
Page 32: The Protocol Tab - Tcp/Ip
Wireless-G PrintServer with Multifunction Printer Support The Protocol Tab - TCP/IP Click the TCP/IP tab to view or change the TCP/IP values of the PrintServer. IP Address Obtain an IP Address Automatically. If your network router is using DHCP to assign IP addresses, select Obtain an IP Address Automatically. -
Page 33: The Protocol Tab - Snmp
Wireless-G PrintServer with Multifunction Printer Support The Protocol Tab - SNMP Use this screen to view or change the PrintServer’s SNMP (Simple Network Management Protocol) settings. The PrintServer supports SNMP, which allows network administrators to monitor and control the PrintServer through the use of network management platforms, such as HP OpenView. -
Page 34: The Wireless Tab - Basic
Wireless-G PrintServer with Multifunction Printer Support The Wireless Tab - Basic This screen allows you to change the PrintServer’s basic wireless settings. Configuration Regulatory Domain and MAC Address. The PrintServer’s Regulatory Domain and MAC Address are listed and cannot be changed. SSID. -
Page 35: The Wireless Tab - Security
Wireless-G PrintServer with Multifunction Printer Support The Wireless Tab - Security Configure the security of your wireless network on this screen. Wi-Fi Protected Access (WPA), WPA2, and two levels of Wired Equivalent Privacy (WEP) encryption are available. If you do not want to use wireless security, select None from the Security Mode drop-down menu. -
Page 36: Figure 6-8: Wireless Tab - Security (Wep)
Passphrase. Enter a Passphrase and click the Generate Keys button to automatically generate WEP Keys 1-4. The Passphrase is case-sensitive and should have no more than 16 alphanumeric characters. It must match your wireless network’s passphrase and is compatible with Linksys wireless products only. (Enter the WEP key(s) manually on any non-Linksys wireless products.) Key 1 to Key 4. -
Page 37: The Printer Tab - Scan
Wireless-G PrintServer with Multifunction Printer Support The Printer Tab - Scan By default, the computer that sent the print job will be disconnected three minutes after the print job is completed. Use this screen to change the length of time the computer is connected to the printer. Auto Disconnect 3 min after job completed. -
Page 38: The Printer Tab - Internet Printing
Wireless-G PrintServer with Multifunction Printer Support The Printer Tab - Internet Printing Internet Printing allows you to automatically print any e-mails that are sent to a specific e-mail account on your network. This is especially useful for printing information when you are not connected to the network. You can print from any location where you can access e-mail. -
Page 39: The Printer Tab - Logical Port
Wireless-G PrintServer with Multifunction Printer Support The Printer Tab - Logical Port The Logical Printers tab contains the logical printer settings of the PrintServer. Configure them for each Logical Printer. The PrintServer has three logical or virtual printer ports. For example, you can have three different configurations for your USB printer: Logical Printer 1 for landscape orientation, Logical Printer 2 for double-sided copies, and Logical Printer 3 for manual feed. -
Page 40: The Status Tab - Device
This screen is for information only. Click the Refresh button to update this information. Upgrade. If you want to upgrade the PrintServer’s firmware, follow these instructions: 1. Visit www.linksys.com and download the firmware upgrade file for the Wireless-G PrintServer with Multifunction Printer Support. -
Page 41: The Status Tab - Printer
Wireless-G PrintServer with Multifunction Printer Support The Status Tab - Printer The Printer tab displays information about the printer. No values can be changed on this screen. This screen is for information only. Port 1 (USB Port) The port’s status information is displayed here. No values can be changed on this screen. This screen is for information only. -
Page 42: Appendix A: Troubleshooting
This appendix consists of “Common Problems and Solutions”. Provided are possible solutions to problems that may occur during the installation and operation of the PrintServer. Read the descriptions below to help you solve your problems. If you can’t find an answer here, check the Linksys website at www.linksys.com. Common Problems and Solutions 1. - Page 43 7. I need to upgrade the firmware. In order to upgrade the firmware with the latest features, follow these steps: 1. Go to the Linksys website at http://www.linksys.com and download the latest firmware for the PrintServer. Then extract the firmware file on your PC.
-
Page 44: Appendix B: Wireless Security
Wireless-G PrintServer with Multifunction Printer Support Appendix B: Wireless Security Linksys wants to make wireless networking as safe and easy for you as possible. The current generation of Linksys products provide several network security features, but they require specific action on your part for implementation. - Page 45 This includes hackers. So, don’t broadcast the SSID. Wireless networking products come with a default SSID set by the factory. (The Linksys default SSID is “linksys”.) Hackers know these defaults and can check these against your network. Change your SSID to something unique and not something related to your company or the networking products you use.
-
Page 46: Appendix C: Upgrading Firmware
Appendix C: Upgrading Firmware Use the PrintServer’s web-based utility to upgrade its firmware. Follow these instructions: 1. Visit www.linksys.com and download the firmware upgrade file for the Wireless-G PrintServer with Multifunction Printer Support. 2. Extract the file on your computer. -
Page 47: Appendix D: Windows Help
Wireless-G PrintServer with Multifunction Printer Support Appendix D: Windows Help Almost all Linksys wireless products require Microsoft Windows. Windows is the most used operating system in the world and comes with many features that help make networking easier. These features can be accessed through Windows Help and are described in this appendix. -
Page 48: Appendix E: Glossary
This glossary contains some basic networking terms you may come across when using this product. For more advanced terms, see the complete Linksys glossary at http://www.linksys.com/glossary. Access Point - A device that allows wireless-equipped computers and other devices to communicate with a wired network. - Page 49 Wireless-G PrintServer with Multifunction Printer Support DMZ (Demilitarized Zone) - Removes the Router's firewall protection from one PC, allowing it to be “seen” from the Internet. DNS (Domain Name Server) - The IP address of your ISP's server, which translates the names of websites into IP addresses.
- Page 50 Passphrase - Used much like a password, a passphrase simplifies the WEP encryption process by automatically generating the WEP encryption keys for Linksys products. Ping (Packet INternet Groper) - An Internet utility used to determine whether a particular IP address is online.
- Page 51 Wireless-G PrintServer with Multifunction Printer Support RJ-45 (Registered Jack-45) - An Ethernet connector that holds up to eight wires. Roaming - The ability to take a wireless device from one access point's range to another without losing the connection. Router - A networking device that connects multiple networks together. Server - Any computer whose function in a network is to provide user access to files, printing, communications, and other services.
- Page 52 Wireless-G PrintServer with Multifunction Printer Support TKIP (Temporal Key Integrity Protocol) - a wireless encryption protocol that provides dynamic encryption keys for each packet transmitted. Topology - The physical layout of a network. TX Rate - Transmission Rate. Upgrade - To replace existing software or firmware with a newer version. Upload - To transmit a file over a network.
-
Page 53: Appendix F: Specifications
Wireless-G PrintServer with Multifunction Printer Support Appendix F: Specifications Model WPSM54G Standards IEEE 802.3, IEEE 802.11g, IEEE 802.11b, USB 1.1, USB 2.0 Ports Power, USB, Ethernet Button Reset LEDs Power, Ethernet, Wireless, USB Cabling type Category 5e Ethernet cable # of Antennas... - Page 54 Wireless-G PrintServer with Multifunction Printer Support Storage Temp. -20ºC to 70ºC (-4ºF to 158ºF) Operating Humidity 10% to 85%, Non-Condensing Storage Humidity 5% to 90%, Non-Condensing Appendix F: Specifications...
-
Page 55: Appendix G: Warranty Information
Your exclusive remedy and Linksys' entire liability under this warranty will be for Linksys at its option to repair or replace the Product or refund Your purchase price less any rebates. -
Page 56: Appendix H: Regulatory Information
Wireless-G PrintServer with Multifunction Printer Support Appendix H: Regulatory Information FCC Statement This device complies with Part 15 of the FCC Rules. Operation is subject to the following two conditions: (1) This device may not cause harmful interference, and (2) this device must accept any interference received, including interference that may cause undesired operation. - Page 57 Wireless-G PrintServer with Multifunction Printer Support Industry Canada Statement This device complies with Industry Canada ICES-003 and RSS210 rules. Déclaration d’Industrie Canada Cet appareil est conforme aux normes NMB003 et RSS210 d'Industrie Canada. Industry Canada Statement Operation is subject to the following two conditions: 1.
- Page 58 User Information for Consumer Products Covered by EU Directive 2002/96/EC on Waste Electric and Electronic Equipment (WEEE) This document contains important information for users with regards to the proper disposal and recycling of Linksys products. Consumers are required to comply with this notice for all electronic products bearing the following symbol:...
- Page 59 Wireless-G PrintServer with Multifunction Printer Support Appendix H: Regulatory Information...
- Page 60 Wireless-G PrintServer with Multifunction Printer Support Appendix H: Regulatory Information...
- Page 61 Wireless-G PrintServer with Multifunction Printer Support Appendix H: Regulatory Information...
- Page 62 Wireless-G PrintServer with Multifunction Printer Support For more information, visit www.linksys.com. Appendix H: Regulatory Information...
-
Page 63: Appendix I: Contact Information
Can't find information about a product you want to buy on the web? Do you want to know more about networking with Linksys products? Give our advice line a call at: Or fax your request in to: If you experience problems with any Linksys product,...