Linksys WPS11 User Manual
Wireless printserver instant wireless series ver. 3
Hide thumbs
Also See for WPS11:
- Quick installation (2 pages) ,
- Specifications (2 pages) ,
- User manual (30 pages)

Related Manuals for Linksys WPS11


Summary of Contents for Linksys WPS11
- Page 1 Instant Wireless ™ Series Wireless PrintServer Use this guide to install: Model No.: WPS11 ver. 3 User Guide...
- Page 2 Specification section of this User Guide. If the product proves defective during this warranty period, call Linksys Customer Support in order to obtain a Return Authorization number. BE SURE TO HAVE YOUR PROOF OF PURCHASE ON HAND WHEN CALLING.
-
Page 3: Table Of Contents
Using Bi-Admin Setting the Wireless PrintServer’s IP Address Changing the Device Name Enabling and Disabling Protocols Attaching Bi-Admin to a Remote Linksys PrintServer Resetting the Wireless PrintServer Restoring Factory Default Chapter 6: Configuring the Wireless PrintServer Using the Web-based Utility... -
Page 4: Chapter 1: Introduction
Chapter 1: Introduction The Instant Wireless™ PrintServer Congratulations on your purchase of the Instant Wireless™ PrintServer, the fastest and easiest way to network your printers. Now you can share your print- ing resources without tying up your workstation performance with pending print jobs. -
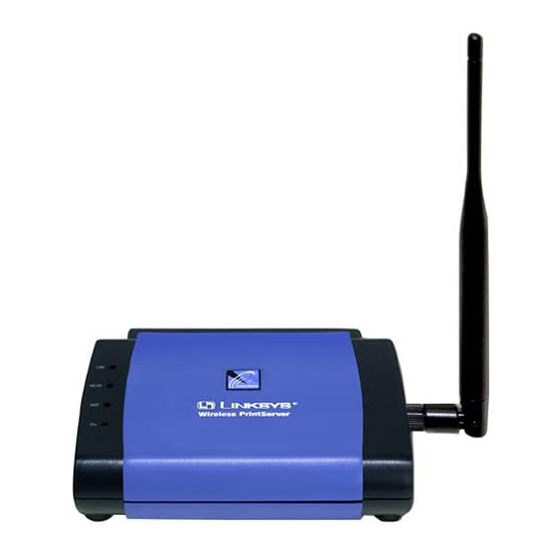
Page 5: Chapter 2: Getting To Know The Wireless Printserver
Chapter 2: Getting to Know the Wireless PrintServer The Wireless PrintServer’s LEDs Green. The LAN LED serves two purposes. If the LED is continuously illuminated, the Wireless PrintServer is successfully con- nected to a device through the LAN port. If the LED is flickering, the Wireless PrintServer is actively sending or receiving data to the wired network. -
Page 6: Chapter 3: Hardware Installation
Chapter 3: Hardware Installation Overview Before starting the physical installation, be sure to find the Wireless PrintServer’s Default Name first. The information for the Default Name may be hard to access after the Wireless PrintServer is completely installed in your network and surrounded by wires and computers. -
Page 7: Chapter 4: Windows Driver Setup
Chapter 4: Windows Driver Setup Overview This section installs the Wireless PrintServer’s software on your Windows 95, 98, Millennium, NT, 2000 or XP computers to give them Wireless PrintServer printing abilities. The Wireless PrintServer is fully compatible with Windows 95, 98, Millennium, NT 4.0, 2000 and XP environments. At this point, you must have: •... - Page 8 3. The next screen that appears, shown in Figure 4-3, will request you to choose a destination folder. You can either use the default folder by clicking the Next button or choose an alternate folder by clicking the Browse button and selecting a folder from the window that pops up.
- Page 9 Figure 4-7 4. The following screen, shown in Figure 4-8, will assign a Program Folder from the Windows Taskbar. The default Program Folder is the Linksys PrintServer Driver. If you would like to use another name for the Program Folder, type it in the Program Folders field or select one from the Existing Folders field.
- Page 10 8. The Printer Port Setup screen will display the Wireless PrintServer and all of the printers with which it communicates. Here, you have the option of installing the printer by highlighting its description and clicking the Next button. You can also close this screen by clicking the Close button. Figure 4-11 9.
-
Page 11: Chapter 5: Bi-Admin: Printserver Management
Starting the Bi-Admin Management Utility 1. To start the Bi-Admin program, click on Start, Programs, Linksys PrintServer Admin, and then Bi-Admin. If the Bi-Admin icon has been created, you can just double-click on it instead. You can drag the shortcut icon onto your Desktop for easy access to the Bi-Admin program. -
Page 12: Using Bi-Admin
Printing Account Name: Redirect Account Name: SMB Info: Domain Name: WIRELESS Info: Station Name:00-C0-02-71-01-13 SSID:linksys BSSID:00:C0:02:70:60:01 Channel No:6 Network Type:Infrastructure Primary Firmware:PF010100.HEX Secondary Firmware:SF010402.HEX You can save this information to a text file by clicking Save to file in the Backup/Restore Device Information window and giving Bi-Admin the loca- tion to which the file should be saved. - Page 13 ROM chip regularly. To do so, you must be able to access the Wireless PrintServer device from your computer. Click on the Upgrade Firmware icon and follow the instructions on the screen. For the latest firmware, go to the Linksys website at www.linksys.com. Figure 5-5...
-
Page 14: Setting The Wireless Printserver's Ip Address
PrintServer located on a remote network, click on InitDevice, and then Attach. The Add Cross Segment PrintServer window will appear. Enter the IP address of the remote unit, and then click Set. The remote Linksys PrintServer will appear in the list of available PrintServers, allowing you to configure it. -
Page 15: Chapter 6: Configuring The Wireless Printserver Using The Web-Based Utility
Chapter 6: Configuring the Wireless PrintServer Using the Web-based Utility Accessing the Web-based Utility You can use the Wireless PrintServer’s built-in Web-based Utility to configure the Wireless PrintServer. In order to open the Utility, follow the instructions below. Open your web browser and type http:// followed by the Wireless PrintServer’s IP address in the browser’s Address box. -
Page 16: The Tcp/Ip Page
The TCP/IP Page Figure 6-5 Click the TCP/IP tab to view or change the TCP/IP values of the Wireless PrintServer. If you are using DHCP to assign IP addresses, select DHCP Client. By default, DHCP is enabled. If you need to assign the Wireless PrintServer a Fixed IP Address (also known as Static IP Address), select this option, and enter the appropriate values under Device IP Address, Subnet Mask, and Gateway IP Address. -
Page 17: The Status Page
Save button to implement the changes. Note: Linksys does not support its products in an Apple networking environment. If you encounter trouble, consult your printer documen- tation for possible help with settings. -
Page 18: The Internet Printing Page
If you make any mistakes, you can simply hit the Cancel button, which will let you exit the screen without making any changes. Once you are certain of any changes you have made, click the Save button to implement the changes. Note: Linksys does not provide any technical support for logical print- ers configuration. -
Page 19: The Netbeui Page
Once you are certain of any changes you have made, click the Save button to implement the changes. Note: Linksys does not provide technical support for the NetBEUI protocol. Instant Wireless™ Series... -
Page 20: Chapter 8: Internet Printing Protocol (Ipp)
CLIENT.EXE in the drop-down box (where “D” is the letter of your CD- ROM drive). 2. For the Welcome screen, click Next, and follow the prompts to complete the installation. Note: Linksys does not provide technical support for Internet printing. - Page 21 IPP Client Configuration for Windows 95/98/Millennium/NT 4.0/2000/XP 1. Run the Add IPP Port program entry created by the installation. A screen like the one shown in Figure 8-1 will be displayed. If you do not see the Add IPP Port program entry, then click Start. Select Programs and then IPP Port Monitor.
- Page 22 3. Click the Port Settings or Configure Port button (Details or Port tab, depending on your version of Windows). The Configure IPP Port screen (shown in Figure 8-3) will appear. Figure 8-3 There are two settings—Retry Interval and Retry Count—which can be adjusted if you have problems connecting to the IPP Server.
-
Page 23: Chapter 9: Dhcp Support For The Wireless Printserver
5. Select the printer manufacturer and model to match the printer connected to the port on the IPP Server. 6. Click Next and complete the Wizard. The IPP printer is now ready for use. Using IPP Printers The IPP Printer can be selected and used like any other Windows printer. If the IPP Server is not on your network, your Internet connection needs to be active. -
Page 24: Appendix A: Troubleshooting
That does not mean that they can’t be used on a network, however. Linksys designed the Wireless PrintServers to function with both regular as well as bi-directional printers. Standard print servers cannot work with bi- directional printers, but the Wireless PrintServer features a custom design to support both parallel as well as bi-directional parallel interfaces. -
Page 25: Appendix C: About The Wireless
TCP/IP protocol installed. TCP/IP installation files are included on your original Windows 95, 98, Millennium, NT, 2000, or XP CD-ROM. Please be aware that although Linksys provides instructions for the setup of the TCP/IP protocol, these instructions are provided for reference only. Linksys will not provide technical support for the configuration and troubleshooting of the TCP/IP protocol. - Page 26 DHCP (Dynamic Host Configuration Protocol) - A protocol that lets network administrators manage centrally and automate the assignment of Internet Protocol (IP) addresses in an organization's network. Using the Internet's set of protocol (TCP/IP), each machine that can connect to the Internet needs a unique IP address.
- Page 27 IEEE - The Institute of Electrical and Electronics Engineers. The IEEE describes itself as “the world’s largest technical professional society—promot- ing the development and application of electrotechnology and allied sciences for the benefit of humanity, the advancement of the profession, and the well- being of our members.”...
- Page 28 Software - Instructions for the computer. A series of instructions that performs a particular task is called a “program.” The two major categories of software are “system software” and “application software.” System software is made up of control programs such as the operating system and database management sys- tem (DBMS).
-
Page 29: Appendix E: Specifications
Appendix E: Specifications Standards: IEEE 802.3, IEEE 802.3u, IEEE 802.11b, IEEE1284 Protocol: CSMA/CD Ports: One 10/100 RJ-45 Port One DB-25 Bidirectional Parallel Port Transfer Speed: LAN: 10 Mbps or 100 Mbps (Half Duplex) 20 Mbps or 200 Mbps (Full Duplex) Parallel Ports: Up to 1.5 Mbps Wireless:... -
Page 30: Appendix G: Warranty Information
CALL LINKSYS FOR MORE DETAILS. Wireless PrintServer Instant Wireless™ Series Appendix H: Contact Information For help with the installation or operation of this product, contact Linksys Technical Support at one of the phone numbers or Internet addresses below. Sales Information Technical Support... - Page 31 © Copyright 2002 Linksys, All Rights Reserved.