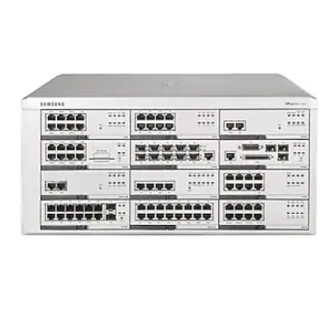
Samsung OfficeServ 7400 Installation Manual
Hide thumbs
Also See for OfficeServ 7400:
- Technical manual (381 pages) ,
- General description manual (112 pages) ,
- Installation manual (82 pages)
Table of Contents
Advertisement
Quick Links
Advertisement
Table of Contents

Related Manuals for Samsung OfficeServ 7400


Summary of Contents for Samsung OfficeServ 7400
- Page 1 OfficeServ 7400 Installation Manual...
- Page 2 This manual is proprietary to SAMSUNG Electronics Co., Ltd. and is protected by copyright. No information contained herein may be copied, translated, transcribed or duplicated for any commercial purposes or disclosed to the third party in any form without the prior written consent of SAMSUNG Electronics Co., Ltd.
-
Page 3: Introduction
CHAPTER 2. Installing Cabinets This chapter describes how to install an OfficeServ 7400 cabinet on the ground or inside a rack, depending on the installation environment, and how to connect the grounding wire. CHAPTER 3. Mounting and Replacing Boards This chapter describes how to mount or replace various boards of the OfficeServ 7400 system. -
Page 4: Conventions
OfficeServ 7400 system. CHAPTER 8. Starting the System This chapter describes items to check before starting the OfficeServ 7400 system, the procedure for starting the system, and the procedure for testing whether the system is normally operating after startup. -
Page 5: Reference
OfficeServ 7400 Installation Manual Reference OfficeServ 7400 System Manual This document introduces OfficeServ 7400 and describes the system information, such as hard configuration, specification, and functions, necessary for this system. Revision History EDITION DATE OF ISSUE REMARKS 09. 2005. Original Draft... - Page 6 Ошибка! Стиль не определен. This page is intentionally left blank. © SAMSUNG Electronics Co., Ltd.
-
Page 7: Safety Concerns
OfficeServ 7400 Installation Manual SAFETY CONCERNS For product safety and correct operation, the following information must be given to the operator/user and shall be read before the installation and operation. Symbols Caution Indication of a general caution Restriction Indication for prohibiting an action for a product... -
Page 8: Warning
Warning WARNING Caution for Grounding - Do not connect the grounding wire of the OfficeServ 7400 system to a power conduit of a building - The standards for power and grounding should comply with the country standard and the pertinent work should be conducted according to the country standard. -
Page 9: Caution
Do not wear metal accessories such as rings and watches to prevent electrical damages to the system. Un-allowed Use of Selector Switch The OfficeServ 7400 system only use 220V. Do not change the input power freely by means of the selector switch. AC Power Connection Inhibited... - Page 10 Ошибка! Стиль не определен. Use of Stable AC Power The system should always use the stable AC power. The momentary power failure due to unstable supply of the power may cause system malfunction or battery failure. © SAMSUNG Electronics Co., Ltd. VIII...
-
Page 11: Table Of Contents
OfficeServ 7400 Installation Manual TABLE OF CONTENTS INTRODUCTION Purpose ............................... I Document Content and Organization ......................I Conventions ............................... II Reference..............................III Revision History ............................III SAFETY CONCERNS Symbols..............................V Warning ..............................VI Caution ..............................VII CHAPTER 1. Before Installing Site Information ........................1-1 Grounding Conditions ...................... - Page 12 Connecting Analog Phones..................... 7-2 7.1.3 Connecting Digital Phones ...................... 7-4 7.1.4 Connecting IP Phones......................7-6 7.1.5 Connecting an Wireless LAN Access Point................7-9 7.1.6 Connecting to a Door Phone and a Door Lock ..............7-11 7.1.7 Connecting KDB-D/KDB-S....................7-13 © SAMSUNG Electronics Co., Ltd.
- Page 13 OfficeServ 7400 Installation Manual Connecting Additional Equipment ..................7-14 7.2.1 Connecting MOH/BGM Equipment ..................7-14 7.2.2 Connecting External/Additional Page Equipment..............7-15 7.2.3 Connecting Common Bell ......................7-16 7.2.4 Connection OfficeServ WebMMC..................7-16 7.2.5 Connecting SMDR........................7-17 7.2.6 Connecting Printers ........................7-18 CHAPTER 8. Starting the System Pre-Check ..........................
- Page 14 Figure 2.6 Rack Installation (4)......................2-4 Figure 2.7 Grounding .......................... 2-5 Figure 3.1 Front View of OfficeServ 7400 Cabinet................3-1 Figure 3.2 Rear View of OfficeServ 7400 Cabinet ................3-2 Figure 3.3 Setting Switches of MP40 Board..................3-4 Figure 3.4 Mounting Optional Board ....................3-5 Figure 3.5 Setting Switches of a RCM Board ..................
- Page 15 OfficeServ 7400 Installation Manual Figure 3.30 Removing a Board ......................3-24 Figure 3.31 Replacing a New Board....................3-25 Figure 4.1 Connecting an External Battery ..................4-2 Figure 4.2 Power Cable ........................4-3 Figure 4.3 Connecting an External Rectifier..................4-3 Figure 5.1 Connecting the Power (use of a cabinet)................5-2 Figure 5.2 Connecting the Power (connecting each cabinet)............5-2...
- Page 16 Table 3.8 Interface Boards for Optional Boards................3-12 Table 3.9 Types of Interface Boards and Slots Available ..............3-20 Table 6.1 Conditions of OfficeServ 7400 Line..................6-1 Table 7.1 Distance Between Stations and the System..............7-1 Table 7.2 Specification for Wireless LAN Equipment Connection ............ 7-9 Table 7.3 Wiring between 4WLI and WBS24 ..................
-
Page 17: Chapter 1. Before Installing
Select a site that satisfies the following conditions for safety, temperature and humidity: Safety Conditions The OfficeServ 7400 system should not be installed near materials that can cause a fire, such as explosive gas and inflammables. The OfficeServ 7400 system should not be near equipments that generate electromagnetic waves, such as monitors or copying machines. -
Page 18: Grounding Conditions
Cautions for Grounding - Do not connect the grounding wire of the OfficeServ 7400 system to a power conduit of a building. - The standards for power and grounding should comply with the country standard and the pertinent work should be conducted according to the country standard. -
Page 19: Checking The Package
OfficeServ 7400 Installation Manual 1.4 Checking the Package The list of items included in the OfficeServ 7400 package is as follows. Table 1.2 Package Items Category Name Quantity Remark Basic Cabinet Basic Cabinet Main Control Board(MP40) Sun-control Board(LP40) Power Cable... - Page 20 CHAPTER 1. Ошибка! Стиль не определен. This page is intentionally left blank. © SAMSUNG Electronics Co., Ltd.
-
Page 21: Chapter 2. Installing Cabinets
OfficeServ 7400 Installation Manual CHAPTER 2. Installing Cabinets This chapter describes how to install an OfficeServ 7400 cabinet on the ground, inside rack or on a wall depending on the installation environment 2.1 Procedure of the System Installation The procedure of system installation is as follows: 1) Install the OfficeServ SME cabinet on the ground, inside rack depending on the installation environment. -
Page 22: Selecting Installation Method
CHAPTER 2. Ошибка! Стиль не определен. 2.2 Selecting Installation Method The OfficeServ 7400 cabinet can be installed on the ground, inside a 19-inch rack depending on the number of cabinets and environment of the installation area. Caution for Installation Only a trained service staff can install the OfficeServ 7400 system. -
Page 23: Installing In A Rack
OfficeServ 7400 Installation Manual 2.3.3 Installing in a Rack The procedure for installing the OfficeServ 7400 cabinet inside a 19-inch rack is as follows: 1) Attach the cabinet bracket to the bottom surface of the OfficeServ 7400 cabinet and fasten the bracket firmly with the three screws. -
Page 24: Figure 2.5 Rack Installation (3)
4) Align the two holes of the cabinet bracket and the holes of the rack brackets, and fasten the cabinet to the rack with the two screws. Figure 2.6 Rack Installation (4) 5) The above steps 1) through 4) also apply to expansion cabinets. © SAMSUNG Electronics Co., Ltd. -
Page 25: Connecting The Grounding Wire
External grounding is required to prevent human injuries or system damages caused by lightning, static electricity, or voltage surge. As shown in the figure below, earth to the ground lug behind the OfficeServ 7400. To use an expansion cabinet, earth the external grounding wire between and the basic cabinet and the expansion cabinet. - Page 26 CHAPTER 2. Ошибка! Стиль не определен. This page is intentionally left blank. © SAMSUNG Electronics Co., Ltd.
-
Page 27: Chapter 3. Mounting And Replacing Boards
CHAPTER 3. Mounting and Replacing Boards This chapter describes how to mount and replace various boards of the OfficeServ 7400 system. 3.1 Cabinet Configuration The OfficeServ 7400 system can be configured with a basic cabinet and two expansion cabinets. The basic and expansion cabinets of the OfficeServ 7400 system have 12 slots. -
Page 28: Figure 3.2 Rear View Of Officeserv 7400 Cabinet
Position of Slots Equipped with Board MG165 board and TEPR12 boards should be mounted on slot 1, 2, 4~11 of the basic rack to use the whole capacity(64ch) of board channels. Figure 3.2 Rear View of OfficeServ 7400 Cabinet © SAMSUNG Electronics Co., Ltd. -
Page 29: Table 3.2 Parts In The Rear Panel Of The Cabinet
The LED indicates the normal output of DC power. Battery Receptacle Receptacle for an external battery. Power Switch Power-on/off of OfficeServ 7400 Power I/O Connector Connector for power cable Battery Switch Switch to supply the power to OfficeServ 7400 or charge an battery © SAMSUNG Electronics Co., Ltd. -
Page 30: Mounting Control Boards
SW6-On: 4 digits for C.O. line Off: 3 digits for C.O. line SW7-On: 4 digits for an extension group Off: 3 digits for an extension group SW8-On: 4 digits for an extension number Off: 3 digits for an extension number © SAMSUNG Electronics Co., Ltd. -
Page 31: Setting Lp 40 Board Switches And Mounting Optional Boards
OfficeServ 7400 Installation Manual 4) Align the connectors and holes of the MP40 board to that of the optional boards (Modem), and firmly press the optional boards downward with two hands. MODEM Figure 3.4 Mounting Optional Board 3.2.2 Setting LP 40 Board Switches and Mounting Optional Boards The LP40 board is Equipped with various optional boards(SCM, MFM, MIS, RCM, RCM2, CRM) in according to user’s purpose and system configuration. -
Page 32: Figure 3.6 Setting Switches Of A Rcm2 Board
LOC1 LOC2 LOC3 Figure 3.7 Mounting an Optional Board to the LP40 Board © SAMSUNG Electronics Co., Ltd. -
Page 33: Mounting Control Boards
Mount LP40 and MP40, which are control boards, on Slot 0 and slot 3 in the basic cabinet of the OfficeServ 7400 system. For expansion cabinets, LP40 and an interface board can be mounted o slot0 and slot3, respectively. For the locations of Slot 0 through slot 11, refer to ‘3.1. -
Page 34: Figure 3.9 Inserting The Control Board To A Connector Of The Main Board
Figure 3.8 Mounting the Control Board to Slot 0 3) Push the front panel lever of the MP40 board until the board is completely inserted into the connector of the OfficeServ 7400 main board. Figure 3.9 Inserting the Control Board to a connector of the Main Board 4) Align the LP40 board to the guardrail of slot 0 of the basic cabinet, and slide the LP40 board into the slot. -
Page 35: Connecting A M40 Board And A Lp40 Board
OfficeServ 7400 expansion cabinet. 3.2.4 Connecting a M40 Board and a LP40 Board If the OfficeServ 7400 system consists of a basic cabinet and an extension cabinet, connect a MP40 board to a LP40 board using extension cables to transmit and receive signals between the control boards. -
Page 36: Connecting A M40 Board And A Lp40 Board
With the OfficeServ 7400 system as the basic cabinet, the expansion cabinets of the existing OfficeServ 7200 system can be connected to the OfficeServ 7400 system. To do so, the MP40 board and LCP board should be connected with an extension cable to enable signal transfer between control boards. -
Page 37: Figure 3.15 Connecting The Mp40/Lcp Board
OfficeServ 7400 Installation Manual 2) With an extension cable, connect the ‘LINK21’ port of the MP40 board built in the basic cabinet and the ‘LINK21’ port of the LCP board built in an expansion cabinet. 3) With another extension cabinet, connect the ‘LINK22’ port of the MP40 board and the ‘LINK2’... -
Page 38: Mounting Interface Boards
- EXT: Supply of 54 V from an external PoE power module - INT: Supply of 54 V from the system power supply Table 3.8 Interface Boards for Optional Boards Interface board Optional Board GWIM GWIMS MGI2D © SAMSUNG Electronics Co., Ltd. 3-12... -
Page 39: Figure 3.16 Setting Gwim Board Jumpers
OfficeServ 7400 Installation Manual 3.3.1.1 GWIM Boards Gigabit WAN Interface Module(GWIM), which is an board for external Internet and data communication, provides not only various external interfaces but also ports for the connection with the internal network. Set jumpers in the GWIM board and mount an extension board as follows: 1) Set J1 and J2 of the GWIM board. -
Page 40: Figure 3.18 Setting The Switch Of The Mgi Board
2) Align the connector of the MGI board to the connector of the optional board (MGI1D/2D) and insert the optional board downward. Up to four optional boards can be mounted. MGI2D MGI2D MGI2D MGI2D Figure 3.19 Mounting an Optional Board on the MGI Board © SAMSUNG Electronics Co., Ltd. 3-14... -
Page 41: Figure 3.20 Setting S1 Switch Of The Tepri Board
OfficeServ 7400 Installation Manual 3.3.1.3 TEPRI Boards T1E1PRI(TEPR1) board, which provides a digital C.O. line, supports E1, T1 and ISDN PRI and provides the Q-SIG function. Set the S1 switch and jumpers of the TEPRI board as follows: Setting S1 Switch... -
Page 42: Figure 3.21 Setting Switches Of The Tepri2 Board
T1/E1 24B + D User Network Figure 3.21 Setting Switches of the TEPRI2 Board Setting Jumpers J1, J2, J3 and J4: Connect #1 and #2 for E1 cable, #2 and #3 for T1 cable. © SAMSUNG Electronics Co., Ltd. 3-16... -
Page 43: Figure 3.22 Lim-P Board
OfficeServ 7400 Installation Manual 3.3.1.5 LIM-P Boards LAN Interface Module with PoE(LIM-P) can use Power Supply Unit(PSU) or an external rectifier and selects the power supply source by using shunt pins. For the use of PSU: The shunt pins(J1, J2 and J3) are connected between pin1 and pin2. -
Page 44: Figure 3.23 Setting The Jumpers Of The Gsim Board
Layer 3 to support data network. Set jumpers in the GSIM board and mount an extension board as follows: 1) Set J3 and J4 of the GSIM board. Figure 3.23 Setting the Jumpers of the GSIM Board © SAMSUNG Electronics Co., Ltd. 3-18... -
Page 45: Figure 3.24 Setting The Jumpers Of The Glimp Board
OfficeServ 7400 Installation Manual 3.3.1.7 GLIMP Boards GLIMP(Gigabit LAN Interface Module with PoE) is a board which sends/receives the data from the intranet, and provides 12 ports of 10/100 BASE-T interface and 2 ports of 1000 BASE-TX/SX/LX. The GLIMP only operates as a simple switching for the hub, and interfaces with GWIM with one board to provide VLAN function for supporting QoS. -
Page 46: Mounting Interface Boards To Slots
Slot 1, 2, 4~11 of the basic cabinet Slot 1 to 11 of the expansion cabinet Functions and Characteristics of Each Interface For detail information on functions and characteristics of each Interface board, refer to ‘OfficeServ 7400 System Manual’ © SAMSUNG Electronics Co., Ltd. 3-20... -
Page 47: Figure 3.25 Mounting An Interface Board On A Slot
1) Check the exterior of the interface board for any damages. 2) Align each Interface board to the guardrail of the universal slot of the OfficeServ 7400 basic cabinet or expansion cabinet, and slide the Interface board into the slot. -
Page 48: Connecting Power Backup Lines
C.O. line is directly connected to the phone connected to pin4 and 5 through pin1 and 2 of SLI by the internal relay operation. Figure 3.27 Connecting Power Backup Line to a 8/16SLI Board © SAMSUNG Electronics Co., Ltd. 3-22... -
Page 49: Replacing Boards
OfficeServ 7400 Installation Manual 3.5 Replacing Boards If the OfficeServ 7400 system fails to operate normally due to an error on the power supply board, control board, or interface board, replace the board to a new one. Removing Cables Replace a board after removing all cables connected to the board. -
Page 50: Figure 3.29 Removing Cables
MP40 board to the LP40 board. Also, remove all cables connected to the board to be replaced. LP40 LINK1 LINK3 MISC1 LINK2 MISC2 LINK23 MP40 Figure 3.29 Removing Cables 3) Extract the board by pulling the lever of the board carefully. Figure 3.30 Removing a Board © SAMSUNG Electronics Co., Ltd. 3-24... -
Page 51: Figure 3.31 Replacing A New Board
4) Align the new board to the guardrail of the slot, and slide the new board into the slot. After then, lock the lever in the front panel of the board to fully insert into the connector of the OfficeServ 7400 main board. Figure 3.31 Replacing a New Board ©... - Page 52 CHAPTER 3. Ошибка! Стиль не определен. This page is intentionally left blank. © SAMSUNG Electronics Co., Ltd. 3-26...
-
Page 53: Chapter 4. Connecting External Batteries And Rectifiers
4.1 Connecting External Batteries Cautions when Connecting External Batteries External batteries are required to ensure stable operation of the OfficeServ 7400 system in case a power failure occurs. The rated capacity of an external battery is DC 48V per cabinet. -
Page 54: Figure 4.1 Connecting An External Battery
The procedure for using a battery cable to connect an external battery to the OfficeServ 7400 system is as follows: 1) Prepare the battery cable that was provided with the OfficeServ 7400 system. The battery cable consists of a red line and a blue line, and at the end of each line, GND(red line), -48VDC(blue line) are labeled. -
Page 55: Connecting External Rectifiers
The external rectifier is an external power that supplies the power to IP phones or WBS24 connected when LIM-P board is used in the OfficeServ 7400 system. Since the internal power source has the insufficient capacity, the additional power source to supply the power to external equipment is required. - Page 56 External Battery connected to an External Rectifier An external battery connected to an external rectifier should have the same capacity as that of the OfficeServ 7400 system. In addition, the procedure and the cautions to connect are, also, same. For detailed information on the capacity of the external battery, refer to ‘4.1 connecting External Batteries’...
-
Page 57: Cautions When Connecting Power
AC power of the system supports 110V, 220 V(Free Voltage). Make sure that the input power of the OfficeServ 7400 is within the range of AC 100~240 V and other electric devices, such as motors and compressors, do not use the same input power. -
Page 58: Figure 5.1 Connecting The Power (Use Of A Cabinet)
5.2 Connecting the Power Single cabinet configuration Use the power cable provided with the OfficeServ 7400 system to connect the input power terminal on the back panel of the basic cabinet to a grounded outlet Figure 5.1 Connecting the Power (use of a cabinet) -
Page 59: Line Conditions
OfficeServ 7400 Installation Manual CHAPTER 6. Connecting C.O. Lines This chapter describes how to connect C.O. lines to the OfficeServ 7400 system after installation. 6.1 Line Conditions Cautions for connecting C.O. lines are as follows: Cables with AWG #24 or AWG #26 width should be used as subscriber lines. -
Page 60: Cautions When Connecting C.o. Lines
6.2.2 Connecting Common C.O. Lines Use a pair of cable with AWG #24(or AWG #26) width to connect a common C.O. line to the terminal pin of a terminal box connected to the OfficeServ 7400 system equipped with a 8TRK board. -
Page 61: Connecting Stations
OfficeServ 7400 Installation Manual CHAPTER 7. Connecting Stations and Additional Equipment This chapter describes how to connect various stations and additional equipment, such as analog/digital phones, door phones and door locks, to the OfficeServ SME system. 7.1 Connecting Stations 7.1.1 Cautions for Connecting Stations Take the following cautions when connecting stations: Do not connect stations in weather conditions such as storm and lightning. -
Page 62: Connecting Analog Phones
7.1.2 Connecting Analog Phones Connect an analog phone to the 8SLI, 16SLI, 16SLI2, 8HYB or 8HYB board mounted on the OfficeServ 7400 system. Connecting to a 8SLI Board Connect an analog phone to the ports of a 8SLI board by using a pair of AWG #24 or AWG #26 cables. -
Page 63: Figure 7.3 Rj-45 Port Of 16Sli2 Board
OfficeServ 7400 Installation Manual Connecting to a 16SLI2 Board Connect an analog phone to the 16SLI2 board by using a pair of AWG #24 or AWG #26 cables to P1 through P8. P1-P16 Ports (RJ-45) Figure 7.3 RJ-45 Port of 16SLI2 Board P1 Port Pin No. -
Page 64: Connecting Digital Phones
Connect a digital phone to the ports of the 16DLI board by using a pair AWG #24 or AWG #26 cables. P1-P8 Ports (RJ-45) Figure 7.7 RJ-45 Port of 16DLI Board (for digital phone) Pin No. Function DLI 1 DLI 1 DLI 9 DLI 9 RING RING © SAMSUNG Electronics Co., Ltd. -
Page 65: Figure 7.8 Rj-45 Port Of 16Dli2 Board (For Digital Phone)
OfficeServ 7400 Installation Manual Connecting to a 16DLI2 Board Connect a digital phone to the ports of the 16DLI2 board by using a pair AWG #24 or AWG #26 cables. P1-P16 Ports (RJ-45) Figure 7.8 RJ-45 Port of 16DLI2 Board (for digital phone) Pin No. -
Page 66: Connecting Ip Phones
7.1.4 Connecting IP Phones IP phone is a phone that provides calls through Ethernet LAN. The interface between a digital phone connected to the OfficeServ 7400 system and an IP phone connected to LAN is as follows: 1) The connection between a digital phone and an IP phone is established or released using the IP address of the LAN connected to the OfficeServ 7400 system. -
Page 67: Figure 7.11 Signal Transfer Of Ip Phones
OfficeServ 7400 Installation Manual Digital Phone IP Phone MGI/MGI64 Board Voice Analog Packet data Voice PCM data Analog PCM data Conversion Conversion 16DLI Board Conversion Packet data Digital Phone IP Phone Voice Analog Analog Packet data Voice PCM data Conversion... -
Page 68: Figure 7.12 Connection Of Ip Phones
SFP type of 1000Base SX/LX/TX, in order to connect the 10/100 BaseT with the RJ45 Connector, use P1~P12 port of GLIMP. 4DSL Board - Up Link port(LAN) MP40, LP40, MGI, MGI64, TEPRI2 and SVMi-20E Boards-LAN port © SAMSUNG Electronics Co., Ltd. -
Page 69: Connecting An Wireless Lan Access Point
7.1.5 Connecting an Wireless LAN Access Point Wireless LAN service offered by the OfficeServ 7400 system requires the following equipment: 4WLI board: WLI Board: A board mounted on the OfficeServ 7400 system for WBS24 connection WBS24: Wireless LAN Access Point(AP) WIP-5000M: Wireless LAN IP phone Table 7.2 Specification for Wireless LAN Equipment Connection... -
Page 70: Figure 7.14 Rj-45 Port Of 4Wli Board
Pin No. of 4WLI Port Port D Channel Data Sync. Line D Channel Data Sync. Line D Channel Data Sync. Line D Channel Data Sync. Line For cable connection, use the cable that #3~#6 and #4~#5 are twisted. © SAMSUNG Electronics Co., Ltd. 7-10... -
Page 71: Connecting To A Door Phone And A Door Lock
OfficeServ 7400 Installation Manual 7.1.6 Connecting to a Door Phone and a Door Lock Connect a door phone and a door lock to the OfficeServ 7400 system by using a Door Phone Interface Module(DPIM). 1) Connect a pair of #24 AWG or #26 AWG cables to the LINE port of DPIM and to P1- p8 ports of 8DLI/16DLI/16DLI2/8HYB/8HYB2 board of the OfficeServ 7400 system. -
Page 72: Figure 7.18 Rj-45 Port Of 8Hyb Board (For Door Phone)
100 mA. MMC MMC Related MMC 211 is used to assign call numbers to door phones For detailed information on the program, refer to ‘OfficeServ 7400 Programming Manual’ in e-manual site(http://www.samsungdocs.co.kr) of SAMSUNG Electronics Co., Ltd. © SAMSUNG Electronics Co., Ltd. -
Page 73: Connecting Kdb-D/Kdb-S
OfficeServ 7400 Installation Manual 7.1.7 Connecting KDB-D/KDB-S KDB-D and KDB-S are modules installed on a digital phone connected to the OfficeServ 7400 system. The KDB module enhances the functions of the phone and increases the number of local ports according to module types. -
Page 74: Connecting Additional Equipment
MMC Related Select music sources for C.O. lines through MMC 408 and music sources for extensions through MMC 308 For detailed information on the program, refer to ‘OfficeServ 7400 Programming Manual’ in e-manual site(http://www.samsungdocs.co.kr) of SAMSUNG Electronics Co., Ltd. © SAMSUNG Electronics Co., Ltd. -
Page 75: Connecting External/Additional
Instead of an internal speaker, external broadcasting equipment, such as amps or speakers, and additional equipment that can broadcast page(ring) signals outside a building can be connected to the OfficeServ 7400 system. Connect external/additional page equipment to the MISC1 and MISC2 ports of the LP40 board. -
Page 76: Connecting Common Bell
WebMMC software when installing new system elements and change them, or modify the system database. Refer to the OfficeServ WebMMC user’s manual for the additional information of detail installation and the use. © SAMSUNG Electronics Co., Ltd. 7-16... -
Page 77: Connecting Smdr
The SMDR computer can be connected via the LIM board built in the OfficeServ 7400 system or an external LAN port. -
Page 78: Connecting Printers
- For the method to connect to the network, refer to print user’s manual. - For detailed information on the program, refer to ‘OfficeServ 7400 Programming Manual’ in e-manual site(http://www.samsungdocs.co.kr) of SAMSUNG Electronics Co., Ltd. -
Page 79: Pre-Check
Halor 1301 and Carbon Dioxide. Make sure that the input power of the OfficeServ 7400 system is within the range of AC 100~240 V and other electric devices, such as motors and compressors, do not use the same input power. - Page 80 1) Check if the boards and cables are properly mounted and connected to the OfficeServ 7400 cabinet. 2) Turn on the power of the OfficeServ 7400 basic cabinet, and turn on the power of the expansion cabinet. 3) Check the LEDs of the MP40 and LP40 boards.
-
Page 81: Numbering Extensions And C.o. Lines
OfficeServ 7400 Installation Manual 8.3 Numbering Extensions and C.O. Lines Once the OfficeServ 7400 system is booted, the MP40/LP40 board verifies the boards mounted on each slot and saves this information as the default configuration of the system. According to the setting of the S2 switches(SW6, SW7 and SW8) of the MP40 board, the OfficeServ SME system assigns 3 or 4 digits to C.O. -
Page 82: Checking System Operation
8.4 Checking System Operation After starting the OfficeServ 7400 system, check if the system is operating normally. Check if the basic functions of the OfficeServ 7400 system, such as Station Call, Station Camp-On, C.O. Line Call, and C.O. Line Camp-On are properly executed. -
Page 83: Line Call Function
OfficeServ 7400 Installation Manual 8.4.3 C.O. Line Call Function Follow the procedure below and check if outside calls are normally connected. 1) Lift the handset of the test phone. Verify the intercom dial tone. 2) Press the C.O. line call code. -
Page 84: Fan Operation
MJA08 is the message to tell the malfunction of the fan and inform that the system will be turned off after 24 hours. If this alarm occurs, the fan should be replaced within 24 hours. © SAMSUNG Electronics Co., Ltd. - Page 85 OfficeServ 7400 Installation Manual ABBREVIATION Alternating Current Automatic Function Test Add On Module Access Point American Wire Gauge Computer Telephony Integration Direct Current Digital Line Interface DPIM Door Phone Interface Module Digital Subscriber Line Ground Hybrid Internet Protocol Keyset Daughter Board...
- Page 86 TEPRI2 T1E1PRI 2port Trunk Unshielded Twisted Pair VLAN Virtual Local Area Network Wide Area Network Wireless Base Station Wide Area Network Interface Module WIMD WAN Interface Module Daughter board Wireless IP Phone Wireless LAN Interface © SAMSUNG Electronics Co., Ltd.
-
Page 87: Installation Manual
OfficeServ 7400 Installation Manual ©2005 Samsung Electronics Co., Ltd. All rights reserved. Information in this manual is proprietary to SAMSUNG Electronics Co., Ltd. No information contained here may be copied, translated, transcribed or duplicated by any form without the prior written consent of SAMSUNG.