Draytek Vigor2760 Series User Manual
High speed vdsl2 router
Hide thumbs
Also See for Vigor2760 Series:
- User manual (619 pages) ,
- Quick start manual (39 pages) ,
- Quick start manual (2 pages)

Related Manuals for Draytek Vigor2760 Series


Summary of Contents for Draytek Vigor2760 Series
- Page 2 Vigor2760 Series High Speed VDSL2 Router User’s Guide Version: 1.0 Firmware Version: V1.0.0_RC14 (For future update, contact DrayTek) Date: 14/12/2012 Vigor2760 Series User’s Guide...
-
Page 3: Copyright Information
Web registration is preferred. You can register your Vigor router via Owner http://www.draytek.com. Firmware & Tools Due to the continuous evolution of DrayTek technology, all routers will be regularly Updates upgraded. Please consult the DrayTek web site for more information on newest firmware, tools and documents. -
Page 4: European Community Declarations
Product: Vigor2760 Series Router DrayTek Corp. declares that Vigor2760 Series of routers are in compliance with the following essential requirements and other relevant provisions of R&TTE Directive 1999/5/EEC. The product conforms to the requirements of Electro-Magnetic Compatibility (EMC) Directive 2004/108/EC by complying with the requirements set forth in EN55022/Class B and EN55024/Class B. -
Page 5: Table Of Contents
4.1.1.9 WAN USB ......................46 4.1.1.10 WAN DSL Mode ....................48 4.1.2 LAN ..........................49 4.1.2.1 Basics of LAN ...................... 49 4.1.2.2 What is Routing Information Protocol (RIP)............49 4.1.2.3 What is Static Route .................... 49 Vigor2760 Series User’s Guide... - Page 6 4.4.4.2 Schedule Group....................120 4.5 CSM ............................ 122 4.5.1 Application Filter ......................122 4.5.2 URL Content Filter ......................124 4.5.3 Web Content Filter......................128 4.5.3.1 Web Content Filter..................... 129 4.5.3.2 Advanced......................132 4.6 User Management....................... 133 Vigor2760 Series User’s Guide...
- Page 7 4.11.4.2 Mail Alert......................198 4.11.5 Time and Date ......................200 4.11.6 Management....................... 201 4.11.7 SNMP.......................... 202 4.11.8 Reboot System ......................205 4.11.9 Firmware Upgrade ...................... 205 4.11.10 Activation ........................206 4.12 Diagnostics........................207 4.12.1 Routing Table ......................207 Vigor2760 Series User’s Guide...
- Page 8 5.4 Checking If the ISP Settings are OK or Not ................ 217 5.5 Backing to Factory Default Setting If Necessary ..............218 Software Reset ......................218 Hardware Reset......................218 5.6 Contacting Your Dealer ....................... 219 viii Vigor2760 Series User’s Guide...
-
Page 9: Introduction
The Vigor2760 series are the routers with high speed in data transmission through DSL port and LAN ports. With the development of NGN (Next Generation Network), you may recently hear the news about FTTx deployment in your local area or even have already subscribed the unbundling last mile service (e.g. -
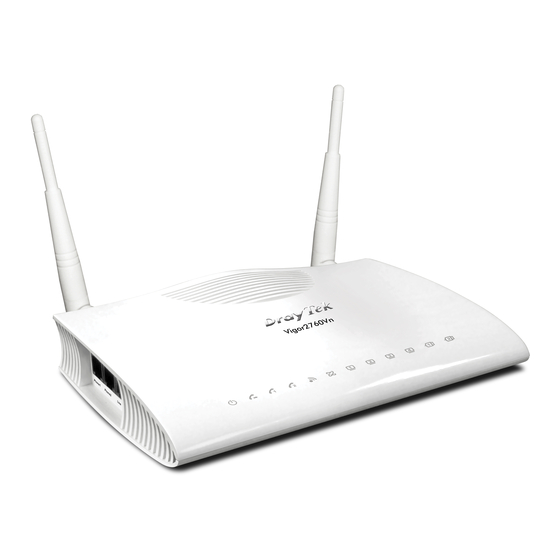
Page 10: Led Indicators And Connectors
The DSL port is connected. Blinking The router is ready. DSL (Green) (Slowly) Blinking The connection is training. (Quickly) On (Green) The port is connected. Blinking The data is transmitting. LAN1/2/3/4 (Green) A USB device is connected and active. USB1/2 Vigor2760 Series User’s Guide... - Page 11 Then the router will restart with the factory default configuration. VDSL/ADSL Connector for accessing the Internet. USB (1-2) Connector for USB storage device (Pen Driver/Mobile HD) or printer or 3G backup. LAN (1-4) Connectors for local network devices. Vigor2760 Series User’s Guide...
-
Page 12: For Vigor2760N
The router is ready. DSL (Green) (Slowly) Blinking The router is trying to connect to Internet. (Quickly) The port is connected. Blinking The data is transmitting. LAN1/2/3/4 (Green) A USB device is connected and active. USB1/2 Vigor2760 Series User’s Guide... - Page 13 WLAN ON/OFF - Press the button once to enable (WLAN LED on) or disable (WLAN LED off) wireless connection. VDSL/ADSL Connector for accessing the Internet. USB (1-2) Connector for USB storage device (Pen Driver/Mobile HD) or printer or 3G backup. LAN (1-4) Connectors for local network devices. Vigor2760 Series User’s Guide...
-
Page 14: For Vigor2760Vn
The router is ready. DSL (Green) (Slowly) Blinking The router is trying to connect to Internet. (Quickly) The port is connected. Blinking The data is transmitting. LAN1/2/3/4 (Green) A USB device is connected and active. USB1/2 Vigor2760 Series User’s Guide... - Page 15 Connector for USB storage device (Pen Driver/Mobile HD) or printer or 3G backup. LAN (1-4) Connectors for local network devices. Interface Description LINE Connector for PSTN life line. Phone1/Phone2 Connector of analog phone for VoIP communication. Vigor2760 Series User’s Guide...
-
Page 16: Hardware Installation
Connect Phone port to a conventional analog telephone (for V model only). Connect detachable antennas to the router for Vigor2760 series (for n model only). Connect one end of the power cord to the power port of this device. Connect the other end to the wall outlet of electricity. -
Page 17: Printer Installation
You can install a printer onto the router for sharing printing. All the PCs connected this router can print documents via the router. The example provided here is made based on Windows XP/2000. For Windows 98/SE/Vista, please visit www.draytek.com. Before using it, please follow the steps below to configure settings for connected computers (or wireless clients). - Page 18 Open File->Add a New Computer. A welcome dialog will appear. Please click Next. Click Local printer attached to this computer and click Next. In this dialog, choose Create a new port Type of port and use the drop down list to select Standard TCP/IP Port. Click Next. Vigor2760 Series User’s Guide...
- Page 19 In the following dialog, type 192.168.1.1 (router’s LAN IP) in the field of Printer Name or IP Address and type IP_192.168.1.1 as the port name. Then, click Next. Click Standard and choose Generic Network Card. Then, in the following dialog, click Finish. Vigor2760 Series User’s Guide...
- Page 20 11. Select "LPR" on Protocol, type p1 (number 1) as Queue Name. Then click OK. Next please refer to the red rectangle for choosing the correct protocol and UPR name. Vigor2760 Series User’s Guide...
- Page 21 Note 1: Some printers with the fax/scanning or other additional functions are not supported. If you do not know whether your printer is supported or not, please visit www.draytek.com to find out the printer list. Open FAQ/Application Notes; find out the link of Printer Server and click it;...
- Page 22 This page is left blank. Vigor2760 Series User’s Guide...
-
Page 23: Initial Configuration
Please type “admin/admin” on Username/Password and click Login for opening the web configurator. Notice: If you fail to access to the web configuration, please go to “Trouble Shooting” for detecting and solving your problem. Vigor2760 Series User’s Guide... -
Page 24: Quick Start Wizard For Connecting Internet
The home page will change slightly in accordance with the router you have. Here we take Vigor2760 as an example. Click Wizard >>Quick Start Wizard (or click the Quick Start Wizard link on the quick bar on the top). Vigor2760 Series User’s Guide... - Page 25 Confirm Password. After restarting the router, new password must be typed for accessing into router web page. Then, click the Next button for next page. Choose the time zone for the router located. Then, click the Next button for next page. Vigor2760 Series User’s Guide...
- Page 26 Stands for Virtual Channel Identifier. It is a 16-bit field inside ATM cell’s header that indicates the cell’s next destination as it travels through the network. A virtual channel is a logical connection between two end devices on the network. Vigor2760 Series User’s Guide...
- Page 27 ATM cell’s header that indicates the cell’s next destination as it travels through the network. A virtual channel is a logical connection between two end devices on the network. Connection Type Select a connection mode for this WAN interface. Vigor2760 Series User’s Guide...
- Page 28 ATM cell’s header that indicates the cell’s next destination as it travels through the network. A virtual channel is a logical connection between two end devices on the network. Connection Type Select a connection mode for this WAN interface. Vigor2760 Series User’s Guide...
-
Page 29: Dashboard For System Status
Status, Routing Table, ARP Table, DHCP Table, Session Table and License Table. Open Dashboard>>Dashboard from the main menu on the left side of the main page (or click the Dashboard link on the quick bar on the top). Vigor2760 Series User’s Guide... -
Page 30: Quick Access For Common Used Menu
Privilege, TR-069, Mail Alert, Remote Dial-in User and Session Table are displayed under the bar. Move your mouse cursor on any one of the links and click on it. The corresponding setting page will be open immediately. Vigor2760 Series User’s Guide... -
Page 31: Applications And Tutorials
Note: After finished the network connection, you need to register your router first to get more service from DrayTek. In addition, such section should be done before activating WCF service stated in section 3.2. Make sure the router has been configured and connected to Internet. You can check the WAN status by opening Network>>WAN. - Page 32 And click Login. If you do not have the account and password, simply click the link of click here to create a new one, then return here to continue. The following page will be displayed after you logging in MyVigor. From this page, please click Add. Vigor2760 Series User’s Guide...
- Page 33 Registration Date). After adding the basic information for the router, please click Submit. Now, your router information has been added to the database. Click OK to leave this web page and return to My Information web page. Vigor2760 Series User’s Guide...
-
Page 34: Activating Web Content Filter Mechanism
There are two methods to activate the WCF license. By means of Service Activation By means of MyVigor Website Follow the steps below to activate the WCF mechanism: Open Wizard>>Service Activation and click Activate. Vigor2760 Series User’s Guide... - Page 35 I have read and accept…. The Activation Date will be determined automatically by the system. Click Next. Make a confirmation of activating the free trial license or not. If YES, click Next. Vigor2760 Series User’s Guide...
- Page 36 Now, the one month free trial of WCF mechanism has been activated correctly. Click Close to return to the web configurator of Vigor router. Open CSM>>Web Content Filter. Click Add to configure new WCF rule for special purpose (e.g., child protection). Vigor2760 Series User’s Guide...
- Page 37 (e.g., block porn website). Click Add. 11. In the following web page, check the box of Enable and type block porn as a firewall rule name. Choose block porn website as the Web Content Filter (WCF). Vigor2760 Series User’s Guide...
- Page 38 Now, the website with porn information classified by Commtouch can be blocked easily. For example, if you try to access into www.pornhub.com or www.xvideos.com, you will get the following message: However, general website (without porn information) can be accessed normally. Vigor2760 Series User’s Guide...
-
Page 39: By Means Of Myvigor Website
You will get the following page. Here we take BPjM license as an example. If the trial version has not been activated, you will see a Trial button in this page. Yet, if the trial version has been activated, the Active button will be shown instead. Click Active. Vigor2760 Series User’s Guide... - Page 40 In the following page, check the box of I have read and … and click Next. In the following page, the Activation Date will be displayed automatically. Click Register. Now, the system displays successful activation of the chosen license. Vigor2760 Series User’s Guide...
- Page 41 Click Close to return to the web configurator of Vigor router. The license has been activated and displayed on the web page. Vigor2760 Series User’s Guide...
- Page 42 This page is left blank. Vigor2760 Series User’s Guide...
-
Page 43: Advanced Web Configuration
Please type “admin/admin” on Username/Password for administration operation. Now, the Main Screen will appear. This menu allows you to configure network settings such as WAN, LAN, NAT, DHCP, Static Route, Dynamic Route, DNS, Quality of Service, Failover and Switch. Vigor2760 Series User’s Guide... -
Page 44: Wan
Later, if the specified WAN interface is active again, the backup one will disconnect automatically. Note that you have to specify the function of the 3G USB modem to be backup or failover WAN from Network>>Failover. Vigor2760 Series User’s Guide... -
Page 45: Several Connection Protocols Used For The Router
The supported 3G USB Modem will be listed on DrayTek web site. Please visit www.draytek.com for more detailed information. PPPoE stands for Point-to-Point Protocol over Ethernet. It relies on two widely accepted standards: PPP and Ethernet. It connects users through an Ethernet to the Internet with a common broadband medium, such as a single DSL line, wireless device or cable modem. -
Page 46: Wan Status
Display the WAN IP address of the router. MAC Address Display the MAC address of the router. Rx Packet Display the total received packets via such WAN interface. Tx Packet Display the total transmission packets via such WAN interface. Vigor2760 Series User’s Guide... -
Page 47: Wan Dsl
Enable – The default route is applied to the WAN profile. Disable – The default route is not applied to the WAN profile. To add a new WAN profile, please do the following: Click the Add button. Vigor2760 Series User’s Guide... - Page 48 Encapsulation - Choose a proper type for this channel. The types will be different according to the protocol setting that you choose. Protocol The following protocols are available when Both is chosen as Profile Type. Vigor2760 Series User’s Guide...
- Page 49 1442 or 1500 based on the protocol you select. Default Route Check the box to enable the default route for such WAN profile. Always On If you want to connect to Internet all the time, check the Vigor2760 Series User’s Guide...
- Page 50 Click it to remove the modification of the web page. Cancel Click it to return to previous web page. After finished the settings above, click Apply to save the settings then click Cancel to return to previous page. Vigor2760 Series User’s Guide...
-
Page 51: Wan Bridge
Display a brief description for such profile. Display which type of DSL network (ADSL or VDSL) this Bridge Profile bridge will connect to. To add a new WAN profile, please do the following: Click the Add button. Vigor2760 Series User’s Guide... - Page 52 VCI - Stands for Virtual Channel Identifier. It is a 16-bit field inside ATM cell’s header that indicates the cell’s next destination as it travels through the network. A virtual channel is a logical connection between two end devices on the network. Vigor2760 Series User’s Guide...
- Page 53 Note that the wireless SSIDs selected here can not be used in other profiles. ATM QoS Such configuration is applied to upstream packets. Such information will be provided by ISP. Please contact with your ISP for detailed information. Select a proper QoS type Vigor2760 Series User’s Guide...
-
Page 54: Wan Usb
Default Route Display if the default route is applied to such WAN profile or not. Enable – The default route is applied to the WAN profile. Disable – The default route is not applied to the WAN Vigor2760 Series User’s Guide... - Page 55 Such value is used to dial through USB mode. Please use the default value. If you have any question, please contact to your ISP. PPP Username Type the PPP username (optional). Type the PPP password (optional). PPP Password Vigor2760 Series User’s Guide...
-
Page 56: Wan Dsl Mode
Check it to enable the debug mode to find out the problem via DSL synchronization. Apply Click it to save the settings. Clear Click it to remove the modification of the web page. Click it to refresh the web page. Refresh Vigor2760 Series User’s Guide... -
Page 57: Lan
Static routes function rather than other method. You may simply set rules to forward data from one specified subnet to another specified subnet without the presence of RIP. Below shows the configuration tabs for LAN, including Status and Ethernet. Vigor2760 Series User’s Guide... -
Page 58: Lan Status
Item Description Create new LAN profiles. Edit Edit the selected LAN profile. To edit the profile, simply check the profile box you want to edit and then click this button. Remove the selected LAN profile. Delete Vigor2760 Series User’s Guide... - Page 59 To add LAN profile, please do the following: Click Add. The following page appears. Available parameters are listed below: Item Description Enable Check the box to enable such profile. Type a name for such profile. Name Vigor2760 Series User’s Guide...
- Page 60 Firewall related configuration web pages. Advanced Settings Alias IP Address All the IP address (es) defined here will be allowed to access to the interface defined in this profile. Vigor2760 Series User’s Guide...
-
Page 61: Nat
IP addresses and/or service ports into different specified services. In other words, the NAT function can be achieved by using port mapping methods. Below shows the web page of Network >>NAT: Available parameters are listed below: Item Description Vigor2760 Series User’s Guide... - Page 62 Enable – The function is activated. Disable – The function is not activated. Mapped IP Address Display the LAN IP address that the Destination IP will be transferred to. To add a NAT profile, please do the following: Click Add. Vigor2760 Series User’s Guide...
- Page 63 Such LAN IP address is the one that the Destination IP will Mapped IP Address be transferred to. Type Note that the type you choose will result in different web settings offered by this web page. Vigor2760 Series User’s Guide...
- Page 64 (start and end) or port range of the service offered by the internal host. Apply Click it to save the settings. Clear Click it to remove the modification of the web page. Cancel Click it to return to previous web page. Vigor2760 Series User’s Guide...
-
Page 65: Dhcp
Display the activation status for such interface. Enable – The DHCP profile is activated. Disable –The DHCP profile is not activated. Name Display the profile name for DHCP. Interface Display the interface of such DHCP profile. Vigor2760 Series User’s Guide... - Page 66 The client must inquire to the relay agent which DHCP server will be used. Therefore, you have to configure Forward to and the Server IP additionally. Forward To – Use the drop down list to choose a LAN Vigor2760 Series User’s Guide...
- Page 67 IP Address –Type the IP address that will be used for the specified MAC address. Click it to save the settings. Apply Clear Click it to remove the modification of the web page. Cancel Click it to return to previous web page. Vigor2760 Series User’s Guide...
-
Page 68: Static Route
DSL connection as the default route. Available parameters are listed below: Item Description Enable Check this box to enable the function of static route. Interface Specify an interface for the static route. Vigor2760 Series User’s Guide... -
Page 69: Static Route
Display the profile name for the static route. Name Destination IP Display the destination address/mask of the static route. Address/Mask Interface Display the interface that such static route uses. Gateway Display the IP address receiving the packets from destination IP address/mask. Vigor2760 Series User’s Guide... - Page 70 IP address/mask will be forwarded to the gateway specified here. Apply Click it to save the settings. Clear Click it to remove the modification of the web page. Cancel Click it to return to previous web page. Vigor2760 Series User’s Guide...
-
Page 71: Dynamic Route
If the user is idle over the limitation of the timer, the network connection will be stopped for such user. By default, the Timeout is set to 180 seconds. Interface Choose an interface for the static route. Vigor2760 Series User’s Guide... -
Page 72: Dns
DNS Status displays the IP address for all of the DNS servers inside the router. The default IP address setting for the DNS server is “8.8.8.8”. Available parameters are listed below: Item Description Server Name Display the IP address of the DNS server. Vigor2760 Series User’s Guide... -
Page 73: Dns Setting
(or in another term “dropped”) from an overflowing queue, packets of sensitive applications mentioned above might be the ones to drop off. How this will affect application performance? There are two components within Primary configuration of QoS deployment: Vigor2760 Series User’s Guide... - Page 74 Disable –The profile is not activated. Outbound Borrow Display the activation status for such interface. Bandwidth Enable – The profile is activated. Disable –The profile is not activated. To add a static route profile, please do the following: Click Add. Vigor2760 Series User’s Guide...
- Page 75 Click it to save the settings. Clear Click it to remove the modification of the web page. Cancel Click it to return to previous web page. After finished the settings above, click Apply to save the settings. Vigor2760 Series User’s Guide...
-
Page 76: Failover
Enable – The profile is activated. Disable –The profile is not activated. Name Display the profile name for the static route. Interface Display the interface used by such profile. Failover Pool Display the interface(s) selected as the failover interface. Vigor2760 Series User’s Guide... - Page 77 It displays all the available interfaces. The selected item shall not be the same as the one selected in Interface. The interface selected in Selected Items is the failover interface when the original WAN interface disconnects. Apply Click it to save the settings. Vigor2760 Series User’s Guide...
-
Page 78: Switch
Click it to refresh the web page. Name Display the name of the physical port. Port Type Display the type of the physical port. It might be Switch or xxx. To edit the switch port setting, please do the following: Vigor2760 Series User’s Guide... - Page 79 Click it to remove the modification of the web page. Cancel Click it to return to previous web page. After finished the settings above, click Apply to save the settings then click Cancel to return to previous page. Vigor2760 Series User’s Guide...
-
Page 80: Port Mirror
Select which ports are necessary to be mirrored. Apply Click it to save the settings. Click it to clear current settings and return to the settings Refresh saved previously. After finished the settings above, click Apply to save the setting. Vigor2760 Series User’s Guide... -
Page 81: Wireless Lan
The default security mode is Mixed (WPA/WPA2)-PSK. Default Pre-Shared Key (PSK) is provided and stated on the label pasted on the bottom of the router. For the wireless client who wants to access into Internet through such router, please input the default PSK value for connection. Vigor2760 Series User’s Guide... -
Page 82: General Setup
Below shows the menu items for Wireless LAN. General Setup will set up the information of this wireless network, including its SSID as identification, channel. This page is used to enable the wireless LAN function, specify channel and set advanced wireless settings. Vigor2760 Series User’s Guide... - Page 83 40%* more (for 11g station). It is active only when both sides of Access Point and Station (in wireless client) invoke this function at the same time. That is, the wireless client must support this feature and invoke Vigor2760 Series User’s Guide...
- Page 84 To edit the SSID setting, please do the following: Move your mouse cursor on the SSID profile (from SSID1 to SSID4 based on the order) you want to edit and click on it. In this case, we choose SSID2. Vigor2760 Series User’s Guide...
- Page 85 PSK. The WPA encrypts each frame transmitted from the radio using the key, which either PSK (Pre-Shared Key) entered manually in this field below or automatically negotiated via Vigor2760 Series User’s Guide...
- Page 86 Click it to remove the modification of the web page. Clear Cancel Click it to return to previous web page. After finished the settings above, click Apply to save the settings. Now, you have configured the SSID2 successfully. Vigor2760 Series User’s Guide...
-
Page 87: Wps
On the side of Vigor 2760 series which served as an AP, press WPS button once on the front panel of the router or click Start PBC on web configuration interface. On the side of a station with network card installed, press Start PBC button of network card. Vigor2760 Series User’s Guide... - Page 88 Click Start PBC to invoke Push-Button style WPS setup Button procedure. The router will wait for WPS requests from wireless clients about two minutes. The WPS LED on the router will blink fast when WPS is in progress. It will return Vigor2760 Series User’s Guide...
-
Page 89: Access Control
Display the type (Deny List or Allow List) of the profile. To edit an Access Control profile, please do the following: Choose the profile (from SSID1 to SSID4) you want and click the check box. Click Edit to open the following page. Vigor2760 Series User’s Guide... - Page 90 Click it to save the settings. Click it to remove the modification of the web page. Clear Cancel Click it to return to previous web page. After finished the settings above, click Apply to save the settings. Vigor2760 Series User’s Guide...
-
Page 91: Wds
To meet the above requirement, two WDS modes are implemented in Vigor router. One is Bridge, the other is Repeater. Below shows the function of WDS-bridge interface: The application for the WDS-Repeater mode is depicted as below: Vigor2760 Series User’s Guide... - Page 92 To edit a WDS profile, please do the following: Move your mouse cursor on the WDS profile (from WDS1 to WDS4) you want to edit and click on it. In this case, we choose WDS2. Vigor2760 Series User’s Guide...
- Page 93 64 hexadecimal digits leading by “0x”. Such function is available when WEP/WPA is selected as Security Setting. The format of WEP Key is restricted to 5 ASCII characters or 10 hexadecimal values in 64-bit encryption level, or Vigor2760 Series User’s Guide...
- Page 94 Click it to save the settings. Clear Click it to remove the modification of the web page. Cancel Click it to return to previous web page. After finished the settings above, click Apply to save the settings. Vigor2760 Series User’s Guide...
-
Page 95: Wmm
Click it to clear current settings and return to the settings saved previously. To edit the parameter of Access Point or Station, please do the following: Move your mouse cursor on the parameter of Access Point or Station you want to edit and click on it. Vigor2760 Series User’s Guide... - Page 96 It means transmission opportunity. For WMM categories of AC_VI and AC_VO that need higher priorities in data transmission, please set greater value for them to get highest transmission opportunity. Specify the value ranging from 0 to 65535. Vigor2760 Series User’s Guide...
-
Page 97: Ap Discovery
Please click Refresh to discover all the connected APs. This page will scan automatically to find out surrounding APs and display the scanned AP with SSID, channel, MAC address and Security settings. Vigor2760 Series User’s Guide... -
Page 98: Channel Statistics
The router can be treated as an AP which allows the wireless stations connecting to Internet via Vigor router. Station List provides the knowledge of connecting wireless clients now along with its status code. There is a code summary below for explanation. Vigor2760 Series User’s Guide... - Page 99 (00:26:c7:40:c8:64) connects to the router through SSID2, the value displayed here will be “2”。 IP Address Display the IP address of the wireless station connecting to Vigor2760. Connected Time Display the duration of the wireless stations connecting to Vigor2760. Vigor2760 Series User’s Guide...
-
Page 100: Firewall
Once the packet matches with the first filter rule, the other filter rules will be ignored and will not be applied to the packet. Therefore, the sequence of the filter rules influence the operation of the firewall significantly. Vigor2760 Series User’s Guide... - Page 101 Schedule Display the profile(s) that the filter rule will be valid at certain time interval Action Display the action to be taken when packets match the rule. Display the activation status of NAT for such profile. Vigor2760 Series User’s Guide...
- Page 102 Description Enter filter set comments/description. Maximum length is 14- character long. Source Interface / Set the direction of packet flow. Use the drop down list to Destination Interface choose the source interface and the destination interface. Vigor2760 Series User’s Guide...
- Page 103 All the incoming packets must be filtered with identity authentication first. If the packets doest not pass the identity authentication, they will not be filtered with current filter rule but filtered by next filter rule directly. Vigor2760 Series User’s Guide...
- Page 104 Additional Information for User Management When the box of User Management is checked, the router allows you to add more filter settings. Refer to the following figure. Click the button on the right side to open the following setting page. Vigor2760 Series User’s Guide...
-
Page 105: Default Rule
(B) but filtered by next filter rule directly. When there is no filter rule existed or the incoming packets cannot match with any filter conditions, they will be filtered by the default rule configured in this page. Vigor2760 Series User’s Guide... -
Page 106: Dos Defence
Display the activation status of the rule. Enable – The rule is activated. Disable – The rule is not activated. Name Display the name of the rule profile. Interface Display the interface used for such DoS defence profile. Vigor2760 Series User’s Guide... - Page 107 Threshold – Set a value for each DoS policy. Block time – Set a timeout value for each DoS policy. SYN Flood Check the box to activate the SYN flood defense function. Once detecting the Threshold of the TCP SYN packets from Vigor2760 Series User’s Guide...
- Page 108 Click it to remove the modification of the web page. Click it to return to previous web page. Cancel After finished the settings above, click Apply to save the settings then click Cancel to return to previous page. Vigor2760 Series User’s Guide...
-
Page 109: Objects Setting
Click it to fresh the web page. Name Display the name of the profile. Invert Selection Display if such function is enabled or disabled. To create a new object profile, please do the following: Click the Add button. Vigor2760 Series User’s Guide... - Page 110 Start IP Address and the Subnet Mask. MAC–The object contains MAC address. If you choose this type, you have to specify a MAC Address. Start IP Address Type the start IP address for Range and Subnet type. Vigor2760 Series User’s Guide...
- Page 111 IP Address). If it is checked, and MAC is selected as the Type, the router will inspect if the IP address of the incoming packets matches with the specified IP address(es) or not. If not, the Vigor2760 Series User’s Guide...
- Page 112 Cancel Click it to return to previous web page. After finished the settings above, click Apply to save the file and wait for the following dialog appears. Click OK. A new object profile has been created. Vigor2760 Series User’s Guide...
-
Page 113: Address Group
Display the type (range, MAC or subnet) of the object profile. Group Display the IP object profiles grouped under such profile. To create a new object group profile, please do the following: Click the Add button. The following setting page will appear. Vigor2760 Series User’s Guide... - Page 114 Selected Items – Display the object profiles selected for such group. Apply Click it to save the settings. Clear Click it to remove the modification of the web page. Cancel Click it to return to previous web page. Vigor2760 Series User’s Guide...
-
Page 115: Service Type
Moreover, it allows you to define other service types by yourself. This page is simply used to define the service type object. Each item will be explained as follows: Vigor2760 Series User’s Guide... - Page 116 Click the Add button. The following setting page will appear. Available parameters are listed below: Item Description Type a name for this profile. Maximum 15 characters are Name allowed. Protocol Specify the protocol(s) which this profile will apply to. Vigor2760 Series User’s Guide...
- Page 117 Click it to remove the modification of the web page. Cancel Click it to return to previous web page. After finished the settings above, click Apply to save the file and wait for the following dialog appears. Vigor2760 Series User’s Guide...
-
Page 118: Service Type Group
Click it to retrieve the default settings of this page. Refresh Click it to fresh the web page. Name Display the name of the profile. Group Display the service type object profiles grouped under such group. Vigor2760 Series User’s Guide... - Page 119 Selected Items – Display the object profiles selected for such group. Apply Click it to save the settings. Clear Click it to remove the modification of the web page. Cancel Click it to return to previous web page. Vigor2760 Series User’s Guide...
-
Page 120: Keyword
Each item will be explained as follows: Item Description Create a new service type group profile. Edit Modify the selected service type group profile. You have to check the service type group you want and then Vigor2760 Series User’s Guide... - Page 121 Type the keyword one by one and separate the words with comma. Apply Click it to save the settings. Clear Click it to remove the modification of the web page. Cancel Click it to return to previous web page. Vigor2760 Series User’s Guide...
-
Page 122: Keyword Group
Create a new keyword group profile. Edit Modify the selected keyword group profile. You have to check the keyword group you want and then click this button to open the edit window for modification. Delete Remove the selected keyword group. Vigor2760 Series User’s Guide... - Page 123 Available Items onto Selected Items. Available Items – Display the available keyword profiles. Selected Items – Display the keyword profiles selected for such group. Note: New added keyword object profiles will be displayed on the bottom on Available Items. Vigor2760 Series User’s Guide...
-
Page 124: Default Keyword Object / Group
Click OK. A new group profile has been created. There are several keyword objects and groups pre-defined and stored in Vigor router. Click the Default Keyword Object and the Default Keyword Group tab for viewing the details. Refer to the following two figures: Vigor2760 Series User’s Guide... -
Page 125: Schedule
Remove the selected schedule object. You have to check the schedule object you want and then click this button. Reset Click it to retrieve the default settings of this page. Refresh Click it to fresh the web page. Vigor2760 Series User’s Guide... - Page 126 Specify how often the schedule will be applied. Once -The schedule will be applied just once Periodically -Specify which days in one week should perform the schedule. Start Date Specify the starting date of the schedule. Vigor2760 Series User’s Guide...
- Page 127 Cancel Click it to return to previous web page. After finished the settings above, click Apply to save the file and wait for the following dialog appears. Click OK. A new object profile has been created. Vigor2760 Series User’s Guide...
-
Page 128: Schedule Group
Click it to fresh the web page. Name Display the name of the profile. Group Display the schedule object profiles grouped under such group. To create a new schedule object group profile, please do the following: Click the Add button. Vigor2760 Series User’s Guide... - Page 129 Click it to remove the modification of the web page. Clear Cancel Click it to return to previous web page. After finished the settings above, click Apply to save the file and wait for the following dialog appears. Vigor2760 Series User’s Guide...
-
Page 130: Csm
Application Filter profile will be applied in Filter Rule of Firewall>>Filter Setup for filtering. Each item will be explained as follows: Item Description Create a new filter profile. Edit Modify the selected filter profile. You have to check the filter profile you want and then click Vigor2760 Series User’s Guide... - Page 131 The following setting page will appear. Available parameters are listed below: Item Description Name Type a name for this filter profile. Maximum 63 characters are allowed. Description Type a brief description for such profile. Maximum 63 characters are allowed. Vigor2760 Series User’s Guide...
-
Page 132: Url Content Filter
At office, URL Content Filter can also provide a job-related only environment hence to increase the employee work efficiency. How can URL Content Filter work better than traditional firewall in the field of filtering? Because it checks Vigor2760 Series User’s Guide... - Page 133 Syslog. URL Filter Display the URL filter applied to the profile. Block IP Address Access Display the activation of IP address blocked or not. Enable – The function is enabled. Disable – The function is disabled. Vigor2760 Series User’s Guide...
- Page 134 Block –The router will block all the packages that match with the conditions specified in this page. None – There is no log file will be recorded for this profile. Pass – Only the log about Pass will be recorded in Syslog. Vigor2760 Series User’s Guide...
- Page 135 Check the box to block the file upload by way of web page. Apply Click it to save the settings. Clear Click it to remove the modification of the web page. Cancel Click it to return to previous web page. Vigor2760 Series User’s Guide...
-
Page 136: Web Content Filter
Vigor router will then decide whether to allow access to this site according to the categories you have selected. Please note that this action will not introduce any delay in your Web surfing because each of multiple load balanced database servers can handle millions of requests for categorization. Vigor2760 Series User’s Guide... -
Page 137: Web Content Filter
Display the name of the profile. Display the type of the action that the related information about that action will be recorded in Syslog. To create a new filter profile, please do the following: Click the Add button. Vigor2760 Series User’s Guide... - Page 138 Disable – The black/white list will not be applied to such filter profile. Enable –Activate white/black list function for such profile. If you enable this function, you have to set Black/White Action and specify keyword object(s) additionally. Vigor2760 Series User’s Guide...
- Page 139 Log – If you check this box, information related to such category/item will be recorded in Syslog. Apply Click it to save the settings. Clear Click it to remove the modification of the web page. Cancel Click it to return to previous web page. Vigor2760 Series User’s Guide...
-
Page 140: Advanced
L1 – the router will check the URL that the user wants to access via WCF. If the URL has been accessed previously, it will be stored for a short time (about 1 second) in the router Vigor2760 Series User’s Guide... -
Page 141: User Management
You can set customized profiles for user object and user group. The user profile (including user object and user group) can be found on Firewall>>Filter Setup and available for choosing as filter rule. Vigor2760 Series User’s Guide... -
Page 142: User Object
Disable – The user object profile is not available for choosing. Display the name of the profile. Name The profile with a name - admin is defined in default. To create a new user object profile, please do the following: Click the Add button. Vigor2760 Series User’s Guide... - Page 143 Type the password above again to make confirmation. External Server It is available when External is selected as the Type. Use the drop down list to choose an available external server (e.g., RADIUS server). If there is no item to be chosen, it Vigor2760 Series User’s Guide...
- Page 144 Click it to return to previous web page. After finished the settings above, click Apply to save the file and wait for the following dialog appears. Click OK. A new user object profile has been created. Vigor2760 Series User’s Guide...
-
Page 145: User Group
Display the name of the profile. Name The profile with a name - admin is defined in default. Type Display the type of the group profile. Group Display the user object profiles grouped under such user group. Vigor2760 Series User’s Guide... - Page 146 Use the “>” button to move the selected item listed in Available Items onto Selected Items. Available Items – Display all the available user objects based on the type you specify above. Selected Items – Display the user object selected for such Vigor2760 Series User’s Guide...
- Page 147 Click it to return to previous web page. After finished the settings above, click Apply to save the file and wait for the following dialog appears. Click OK. A new user group profile has been created. Vigor2760 Series User’s Guide...
-
Page 148: Radius
Display the name of the profile. Display the IP address of the RADIUS server. Server IP Address Port Display the port number of the RADIUS server. To create a new RADIUS profile, please do the following: Click the Add button. Vigor2760 Series User’s Guide... - Page 149 Confirm Server Re-type the password for confirmation. Password Apply Click it to save the settings. Clear Click it to remove the modification of the web page. Cancel Click it to return to previous web page. Vigor2760 Series User’s Guide...
-
Page 150: Privilege
The great the authority is, the more functions the user /user group will have. Each item will be explained as follows: Item Description Create a new privilege profile. Vigor2760 Series User’s Guide... - Page 151 To create a new privilege profile, please do the following: Click the Add button. The following setting page will appear. Available parameters are listed below: Item Description Name Type a name for such new privilege profile. Vigor2760 Series User’s Guide...
- Page 152 Click it to remove the modification of the web page. Cancel Click it to return to previous web page. After finished the settings above, click Apply to save the file and wait for the following dialog appears. Vigor2760 Series User’s Guide...
-
Page 153: Advertisement
Reset Click it to retrieve the default settings of this page. Refresh Click it to fresh the web page. Here is an example which will show you how to make a log-in advertisement. Open User Management>>Advertisement. Vigor2760 Series User’s Guide... - Page 154 Open System Maintenance>>Administrator Setting. Check the box in front of Advertisement. Then, click Edit. In the Administration Message box, type the message that you want to display on the screen (e.g., Warning: Do not use the computer after 11:00PM). Vigor2760 Series User’s Guide...
-
Page 155: Applications
DNS first which can speed up the inquiry. This page is used to add new domain name profiles and modify the profiles whenever you want. Each item will be explained as follows: Item Description Vigor2760 Series User’s Guide... - Page 156 To create a new DNS service profile, please do the following: Click the Add button. The following setting page will appear. Available parameters are listed below: Item Description Name Type a name for such local DNS profile. Type Choose the type for such DNS service profile. Vigor2760 Series User’s Guide...
- Page 157 If DNS_A is selected as a type, simply type the name of the host (e.g., draytek.com). If DNS_MX is selected as a type, simply type the name of the mail server (e.g., draytek.com). IP Address If DNS_A is selected as a type, type an IP address (e.g., 192.168.1.56) for mapping to the host.
-
Page 158: Advanced
The cache is used to record the result of DNS inquiry. Apply Click it to save the settings. Reset Click it to retrieve the default settings of this page. Refresh Click it to fresh the web page. Vigor2760 Series User’s Guide... -
Page 159: Dynamic Dns
Refresh Click it to refresh the information of the web page. Name Display the profile name of the DDNS server profile. Domain Name Display the domain name that the DDNS server profile uses. Vigor2760 Series User’s Guide... -
Page 160: Service
Enable – The service profile is available for choosing. Disable – The service profile is not available for choosing. Name Display the name of the profile. To create a new DNS service profile, please do the following: Click the Add button. Vigor2760 Series User’s Guide... - Page 161 Service Provider Select the service provider for the DDNS account. Select a service type (Dynamic, Custom or Static). If you Service Type choose Custom, you can modify the domain that is chosen in the Domain Name field. Vigor2760 Series User’s Guide...
- Page 162 Click it to return to previous web page. After finished the settings above, click Apply to save the settings and wait for the following dialog appears. Click OK. A new DNS service profile has been created. Vigor2760 Series User’s Guide...
-
Page 163: Advanced
Click it to save the settings. Reset Click it to retrieve the default settings of this page. Refresh Click it to remove the modification of the web page. After finished the settings above, click Apply to save the settings. Vigor2760 Series User’s Guide... -
Page 164: Upnp
Use the “>” button to move the selected item listed in Available Items onto Selected Items. Available Items – Display all the available user objects based on the type you specify above. Selected Items – Display the user object selected for such Vigor2760 Series User’s Guide... - Page 165 Can't work with Firewall Software Enabling firewall applications on your PC may cause the UPnP function not working properly. This is because these applications will block the accessing ability of some network ports. Vigor2760 Series User’s Guide...
-
Page 166: Igmp
The application of multicast will be executed through WAN port. In addition, such function is available in NAT mode. External Proxy Interface Define which WAN interface shall receive the Multicast Stream (IPTV Traffic) here. (Up Stream) Vigor2760 Series User’s Guide... -
Page 167: Usb Applications
This page displays the "storage" status of the USB disk which users can access via FTP or Samba. If you plug in one USB disk, related information will be shown here. If you plug in two USB disks, then both of them will be displayed at the same time. Vigor2760 Series User’s Guide... -
Page 168: Disk Status
Display the activation status of the USB disk. Enable – The USB printer is available for printing. Disable – The USB printer is not powered up. Manufacturer Display the manufacturer of the disk. Product Display the model number of the printer. Vigor2760 Series User’s Guide... -
Page 169: Samba
Click it to retrieve the default settings of this page. Refresh Click it to fresh the web page. Share Name Display the name for such profile Share Path Display the location of the hardware storage. Descriptions Display the brief explanation for such profile. Vigor2760 Series User’s Guide... - Page 170 User Name – Use the drop down list to select a name from a list of available users or user groups created under User Management >>User Profile. Privilege – Determine the right (read/write or ready only) that such user profile will have. Vigor2760 Series User’s Guide...
- Page 171 Click it to exit the web page without saving the configuration. After finished the settings above, click Apply to save the file and wait for the following dialog appears. Click OK. A new profile has been created. Vigor2760 Series User’s Guide...
-
Page 172: General
; : " < > * + = \ | ?. Apply Click it to save the settings. Reset Click it to retrieve the default settings of this page. Refresh Click it to clear current settings and return to the settings saved previously. Vigor2760 Series User’s Guide... -
Page 173: Ftp Server
Display the authority (ready only or read/write) for such profile. Login Path Display the directory that a user will find himself / herself reside in after logging into the FTP server successfully. Currently it's either the "internal storage" or "USB disk". Vigor2760 Series User’s Guide... - Page 174 USB Disk – Each USB disk plugged in will have a mounting path, e.g. /mnt/usb/Disc-A1. Apply Click it to save the settings. Clear Click it to remove the modification of the web page. Cancel Click it to exit the web page without saving the configuration. Vigor2760 Series User’s Guide...
-
Page 175: General
Just keep the default setting. Click it to save the settings. Apply Reset Click it to retrieve the default settings of this page. Refresh Click it to clear current settings and return to the settings saved previously. Vigor2760 Series User’s Guide... -
Page 176: Vpn And Remote Access
Check the box to enable such service. L2TP VPN Service Check the box to enable such service. IPsec VPN Service Check the box to enable such service. Apply Click it to save the settings. Refresh Click it to refresh the web page. Vigor2760 Series User’s Guide... -
Page 177: Lan To Lan
Display the name of the profile. Description Display the comments/description of the VPN profile. Call Direction Display the allowed call direction of this LAN-to-LAN profile. Remote LAN Gateway Display the IP address of the remote dial-in user. Vigor2760 Series User’s Guide... - Page 178 The default value is 300 seconds. If the connection has been idled over the value, the router will drop the connection. Call Direction Specify the allowed call direction of this LAN-to-LAN profile. Both:-initiator/responder Dial-Out- initiator only Dial-In- responder only. Dial-out Vigor2760 Series User’s Guide...
- Page 179 This option 128-bit indicates that the router will use the MPPE encryption scheme with maximum bits (128-bit) to encrypt the data. If you choose Dial-out as the Call Direction and choose MS-CHAP or MS-CHAP-V2 as PPP Authentication, Vigor2760 Series User’s Guide...
- Page 180 Certificate is selected as Authentication Method above. Choose the ID type for the remote end. If you choose Accept any peer ID, it is not necessary for you to specify any ID further. All the peer IDs are acceptable Vigor2760 Series User’s Guide...
- Page 181 Peer ID (DN). Only the specified one is acceptable. The data shall be typed as, e.g., “C=TW, ST=Hsinchu, L=Hokou, O=Draytek, OU=RD, CN=John/emailAddress=john@test.com” or “C=TW”, O=Draytek”.
- Page 182 VPN connection. Remote LAN This field is only applicable when you select PPTP or L2TP Gateway with or without IPsec policy above. Type the LAN gateway address of the remote router for the VPN tunnel. Vigor2760 Series User’s Guide...
- Page 183 IDs of phase 2 quick mode. After finished the settings above, click Apply to save the file and wait for the following dialog appears. Click OK. A new LAN to LAN profile has been created. Vigor2760 Series User’s Guide...
-
Page 184: Remote Dial-In User
Only the object profiles configured with External type will be displayed here. Thus, you have to complete the following settings first before adjusting the settings in this field. Add a new RADIUS profile in User Management>> RADIUS. Vigor2760 Series User’s Guide... - Page 185 Security Method This field is applicable when you select L2TP above. Currently, the default setting is ESP. Authentication Method This group of fields is applicable for both L2TP and L2TP over IPsec boxes are enabled. Vigor2760 Series User’s Guide...
- Page 186 Peer ID (DN). Only the specified one is acceptable. The data shall be typed as, e.g., “C=TW, ST=Hsinchu, L=Hokou, O=Draytek, OU=RD, CN=John/emailAddress=john@test.com” or “C=TW”, O=Draytek”.
- Page 187 Dead Peer Detection –Action – This function will detect if any response received from the peer. If no response, the chosen action will be performed. Hold means such VPN connection is Vigor2760 Series User’s Guide...
- Page 188 Click it to save the settings. Apply Clear Click it to remove the modification of the web page. Cancel Click it to exit the web page without saving the configuration. After finished the settings above, click Apply to save the settings. Vigor2760 Series User’s Guide...
-
Page 189: Status
This page displays the existed VPN profiles for your reference. You can click the Overview, IPsec, L2TP or PPTP tab to check and choose the VPN profile you want. Next, click Dial to build the VPN connection between your PC and the remote end. Vigor2760 Series User’s Guide... -
Page 190: Certificate Management
Upload the PC to your router. Generate Open a window to generate certiface request. Refresh Click it to refresh the web page. Name Display the name of the certificate. Status Display the status of the certificate. Vigor2760 Series User’s Guide... -
Page 191: Generate Local Certificate
Type the name of the country that such certificate located. Type the name of the state /province for such certificate. State/Province Locality (City) Type the name of the city for such certificate. Organization Type the name of the organization. Vigor2760 Series User’s Guide... - Page 192 Select the new generated certificate request and click Download to download the request to the PC. A CA server shall sign the certificate request and send it back to the PC. Next, click Upload to transmit the issued certificate from the PC to your router. Vigor2760 Series User’s Guide...
- Page 193 Click OK. The Certificate has been uploaded to Vigor router and displayed on this page. Note: Do not manually delete the certificate request file before completing the process of Uploading. If the uploading is successfully, the system will remove the request automatically. Vigor2760 Series User’s Guide...
-
Page 194: Upload Local Certificate
This item will be available when Certificate is chosen as the Type. Locate the private key files from your host according to the certificate file selected. Passphrase This item will be available when Certificate or PKCS12 is Vigor2760 Series User’s Guide... - Page 195 Click it to exit the web page without saving the configuration. After finished the settings above, click Apply to upload the file and wait for the following dialog appears. Click OK. The Certificate has been uploaded to Vigor router and displayed on this page. Vigor2760 Series User’s Guide...
-
Page 196: Remote Certificate
Valid To Display the end point of the valid time of the certificate. Certificates obtained from other sources and stored on the PC can be uploaded to Vigor router, do the following: Click the Upload button. Vigor2760 Series User’s Guide... - Page 197 After finished the settings above, click Apply to upload the file and wait for the following dialog appears. Click OK. The Certificate has been uploaded to Vigor router and displayed on this page. Vigor2760 Series User’s Guide...
-
Page 198: Trusted Ca Certificate
Display the end point of the valid time of the certificate. Trusted CA certificate obtained from other sources and stored on the PC can be uploaded to Vigor router, do the following: Click the Upload button. Vigor2760 Series User’s Guide... - Page 199 After finished the selection, click Apply to upload the file and wait for the following dialog appears. Click OK. A trusted CA certificate has been uploaded to Vigor router and displayed on this page. Vigor2760 Series User’s Guide...
-
Page 200: Certificate Revocation List
Revocation List obtained from other sources and stored on the PC can be uploaded to Vigor router, do the following: Click the Upload button. The following setting page will appear. To specify a CRL file, click the Select File button to locate the one you want. Vigor2760 Series User’s Guide... -
Page 201: System Maintenance
CPE to be controlled and managed with VigorACS server. Users need to type URL, username and password for the VigorACS server that such device will be connected. However URL, username and password under CPE client are fixed that users cannot change it. The Vigor2760 Series User’s Guide... - Page 202 CPE with VigorACS, you can type as the following: Username: acs Password: XXXXXX ACS Server Password Type the password for ACS Server for authentication. For example, if you want to use such CPE with VigorACS, Vigor2760 Series User’s Guide...
-
Page 203: Administrator Setting
This page allows you to modify the content of the message box of the profiles with different purposes. Available parameters are listed below: Item Description Edit Edit the selected profile. To edit the profile, simply check the profile box you want to Vigor2760 Series User’s Guide... -
Page 204: 3Configuration Backup
To restore a restored configuration file, simply click the Restoration tab. Click the Select File.. button to locate the backup file you want, then click Apply. The configuration file will be restored to the router. Vigor2760 Series User’s Guide... -
Page 205: Syslog And Mail Alert
Interface, System log information to Syslog. System Log Apply Click it to save the settings. Reset Click it to retrieve the default settings of this page. Refresh Click it to clear current settings and return to the settings saved Vigor2760 Series User’s Guide... -
Page 206: Mail Alert
Display the port number of the mail alert server. SSL/TLS Display the activation status for SSL/TLS. Enable – The SSL/TLS is activated. Disable –The SSL/TLS is not activated. To add a new mail alert profile, please do the following: Click the Add button. Vigor2760 Series User’s Guide... - Page 207 Name – Type a name of the receiver. E-mail Receiver – Type the e-mail address of the receiver. Advanced SSL/TLS – Check the box to enable the network connection Vigor2760 Series User’s Guide...
-
Page 208: Time And Date
Select the time zone where the router is located. Daylight Saving Check the box to enable the daylight saving. Such feature is available for certain area. Mode Choose the mode for adjusting the time and the date. Vigor2760 Series User’s Guide... -
Page 209: Management
Available parameters are listed below: Item Description SSH Server Port Type the standard port numbers for such server. The default setting is 22. Telnet Server Port Type the standard port numbers for such server. The default setting is 23. Vigor2760 Series User’s Guide... -
Page 210: Snmp
Display the activation status for such interface. Enable – The SNMP profile is activated. Disable –The SNMP profile is not activated. Get Community Display the name for getting community. To add a SNMP profile, please do the following: Click Add. Vigor2760 Series User’s Guide... - Page 211 Specify the items to be executed by SNMP function. SNMP Event Event – Available events will be shown as follows. You have to specify the event you want by checking the box related to that event. Vigor2760 Series User’s Guide...
- Page 212 Clear Click it to remove the modification of the web page. Cancel Click it to return to previous web page. After finished the settings above, click Apply to save the settings and return to previous page. Vigor2760 Series User’s Guide...
-
Page 213: Reboot System
Apply. Apply Click it to process the system reboot. Download the newest firmware from DrayTek's web site or FTP site to your hard disk. The DrayTek web site is www.DrayTek.com (or local DrayTek's web site) and FTP site is ftp.DrayTek.com. -
Page 214: Activation
Display the ending date for the valid time of the license. Authentication Message Display the brief description of the license. Display current status (Activated or Not Activated) of the Status WCF license. Note: Refer to section 3.1 to get detailed information. Vigor2760 Series User’s Guide... -
Page 215: Diagnostics
You have to check the line you want and then click this button. Click it to refresh the web page. Refresh IP Address Display the IP address of the host. Hardware Type Display the type of hardware (e.g,, ether means Ethernet). Vigor2760 Series User’s Guide... -
Page 216: Dhcp Table
Flow Monitor. If not, a notification dialog box will appear to remind you enabling it. Each item will be explained as follows: Item Description Block Prevent specified PC accessing into Internet within 5 minutes. Pass The device with the IP address is allowed to access into Vigor2760 Series User’s Guide... -
Page 217: System Table
Item Description Refresh Click it to refresh the web page. Memory Usage The used memory and remaining capacity will be displayed by blue and white. Basic system information will be seen by clicking Diagnostics>>System Table>>System Information. Vigor2760 Series User’s Guide... - Page 218 Display the configuration version of Vigor router. Uptime Display the duration time when the router connects to Internet. System Time Display the time of the system. Related information of DSL interface will be seen by clicking Diagnostics>>System Table>>DSL Information. Vigor2760 Series User’s Guide...
-
Page 219: Traffic Graph
Each item will be explained as follows: Item Description Interface Choose the interface to display the traffic graph about it. Apply Click it to confirm the interface selection. Click it to refresh the web page. Refresh Vigor2760 Series User’s Guide... -
Page 220: Web Syslog
Click it to rest to factory default settings. Refresh Click it to refresh the web page. Date Display the date of the record. Time Display the time of the record. Message Display related information for firewall/VPN/User Access/Interface/System. Vigor2760 Series User’s Guide... -
Page 221: Trouble Shooting
Turn on the router. Make sure the ACT LED blink once per second and the correspondent LAN LED is bright. If not, it means that there is something wrong with the hardware status. Simply back to “1.3 Hardware Installation” to execute the hardware installation again. And then, try again. Vigor2760 Series User’s Guide... -
Page 222: For Windows
Go to Control Panel and then double-click on Network Connections. Right-click on Local Area Connection and click on Properties. Select Internet Protocol (TCP/IP) and then click Properties. Vigor2760 Series User’s Guide... -
Page 223: For Mac Os
Select Obtain an IP address automatically and Obtain DNS server address automatically. Double click on the current used Mac OS on the desktop. Open the Application folder and get into Network. On the Network screen, select Using DHCP from the drop down list of Configure IPv4. Vigor2760 Series User’s Guide... -
Page 224: Pinging The Router From Your Computer
Open the Application folder and get into Utilities. Double click Terminal. The Terminal window will appear. Type ping 192.168.1.1 and press [Enter]. If the link is OK, the line of “64 bytes from 192.168.1.1: icmp_seq=0 ttl=255 time=xxxx ms” will appear. Vigor2760 Series User’s Guide... -
Page 225: Checking If The Isp Settings Are Ok Or Not
Open Network>>WAN and check whether the ISP settings are set correctly. Vigor2760 Series User’s Guide... -
Page 226: Backing To Factory Default Setting If Necessary
5 seconds. When you see the ACT LED blinks rapidly, please release the button. Then, the router will restart with the default configuration. After restore the factory default setting, you can configure the settings for the router again to fit your personal request. Vigor2760 Series User’s Guide... -
Page 227: Contacting Your Dealer
If the router still cannot work correctly after trying many efforts, please contact your dealer for further help right away. For any questions, please feel free to send e-mail to support@draytek.com. Vigor2760 Series User’s Guide...