Draytek Vigor2760Vn Quick Start Manual
Draytek vigor2760 series high speed vdsl2 router
Hide thumbs
Also See for Vigor2760Vn:
- User manual (355 pages) ,
- Quick start manual (39 pages) ,
- User manual (227 pages)
Table of Contents
Advertisement
Advertisement
Table of Contents

Related Manuals for Draytek Vigor2760Vn


Summary of Contents for Draytek Vigor2760Vn
- Page 1 Vigor2760 Series Quick Start Guide...
- Page 2 Vigor2760 Series Quick Start Guide...
-
Page 3: Quick Start Guide
May 2014 / Firmware V3.7.5.1 Note: Product specification is subject to continuous evolution which may not always be reflected in current documentation. For the formal specification of your product, please refer only to the web site at www.draytek.co.uk Vigor2760 Series Quick Start Guide... -
Page 5: Copyright Information
Due to the continuous evolution of DrayTek technology and emerging risks, Updates router firmware updates may be issued. Please consult the DrayTek web site for more information on newest firmware, tools and documents. www.draytekco.uk (For users and products in the UK/Ireland) -
Page 6: European Community Declarations
No. 26, Fu Shing Road, HuKou, HsinChu Industrial Park, Hsin-Chu, Taiwan 303 Product: Vigor2760 Series Router DrayTek Corp. declares that Vigor2760 Series complies with R&TTE Directive 1999/5/EEC, the requirements of Electro-Magnetic Compatibility (EMC) Directive 2004/108/EC, EN55022/Class B and EN55024/Class B and Low Voltage (LVD) Directive 2006/95/EC complying with EN60950-1. -
Page 7: Table Of Contents
1. Introduction ..................1 1.1 Front Panel & Connectors ................2 1.2 Package Contents (Accessories)..............5 2. Installing Your Router ................6 2.1 Hardware Installation ..................6 3. Quick Setup ..................8 3.1 Accessing the Web User Interface (WUI) ............8 3.2 Configuring WAN1 for Internet Access ............9 3.3 Configuring WAN2 for Internet Access ............ -
Page 9: Introduction
The Vigor2760 series is a router/firewall supporting ADSL, VDSL or Ethernet-fed WAN technologies, ideal to allow later migration or standardization on a single model regardless of your Internet connectivity The Vigor 2760 series includes 802.11n Wireless LAN (n models) with multiple security methods to help protect your network. -
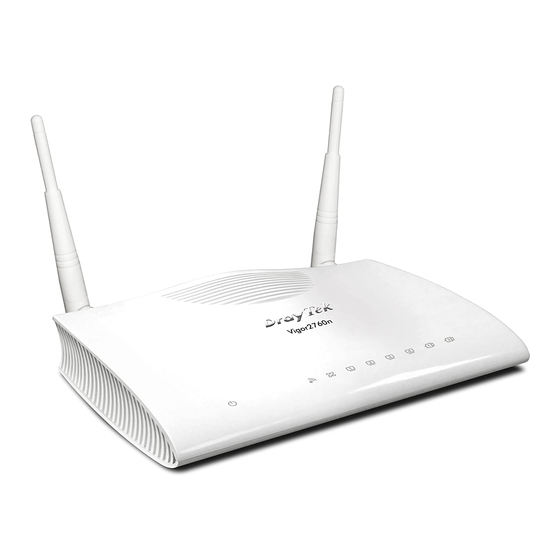
Page 10: Front Panel & Connectors
& & Status Explanation Blinking The router is running normally. The router is powered off. A PSTN phone call is active on a connected telephone handset. There is no active PSTN phone call. LINE (Vigor 2760Vn only) The phone on this port is off-hook. The phone on this port is on-hook. - Page 11 Interface Description Connector for the power adapter. Power switch. Turns the unit on or off. I / O Factory Reset Restore the default settings. Usage: Turn on the router (ACT LED is blinking). Press gently and hold for more than 5 seconds. When the ACT LED blinks rapidly, release the button and the router will restart with its factory default configuration.
- Page 12 Analogue Line / Phone Ports (Vigor 2760Vn only) On the Vigor 2760Vn, you can take advantage of VoIP using any provider compatible with the ‘SIP’ protocol (such as www.draytel.org). VoIP enables low cost or free calls and gives you additional call capacity (like having two extra phone lines).
-
Page 13: Package Contents (Accessories)
Operation with any other PSU may cause product malfunction or damage the product and will invalidate your manufacturer’s warranty. If you lose your PSU, use a genuine replacement from your DrayTek dealer. For the Vigor 2760Vn model, you will additionally have two RJ11-BT adaptors (to plug in phones) and an RJ11-BT plug cable, for connecting to the analogue phone line for POTS (landline) voice calls. -
Page 14: Installing Your Router
The street Cabinet). The Vigor2760 is not compatible with actual fibre. 1. Connect the xDSL interface to the external xDSL splitter (microfilter) with an xDSL line cable. With the Vigor2760Vn, also connect the Line interface to the phone port on the xDSL splitter. - Page 15 3. If required, connect the Phone ports to a regular analogue telephone (for Vn model only). Cordless DECT base stations are also compatible. 4. Connect the antennae to the router for Vigor2760 series (for n models only). Attach them firmly but do not over-tighten. 5.
-
Page 16: Quick Setup
1. Make sure your PC connects to the router correctly. Normally, your computer will get its IP address dynamically from the router (using ‘DHCP’), otherwise you must set the PCs IP address to be in the same IP subnet as the router (e.g. 192.168.1.2). -
Page 17: Configuring Wan1 For Internet Access
The web interface that you see will vary depending on your exact model, specification and firmware version in use. The dashboard gives you a live snapshot of the current router and ports’ status. 1. Select WAN>>General Setup. The below menu will appear: Vigor2760 Series Quick Start Guide... - Page 18 2. Click on the WAN1 link to open the following page: 3. Ensure that WAN1 interface is enabled (Enable:Yes). Set ‘Display Name’ to your ISP’s name (e.g. BT, Sky, TalkTalk etc.). For the UK, other default settings should be correct. Click OK to save/exit. 4.
- Page 19 5. Click the Details Page button for WAN1. Depending on your your ISP, click either the PPPoE/PPPoA, MPoA/Static or Dynamic tab: 6. The PPPoE/PPPoA tab and the default settings are appropriate for nearly all ISPs in the UK. 7. Users in Ireland may have different settings requirements. For VDSL/FTTC users may need a VLAN tag of 10 (see point 2 above) and for ADSL, use PPPoE/LLC with VPI/VCI settings of 8 and 35 (check with your ISP for the latest settings).
-
Page 20: Configuring Wan2 For Internet Access
The WAN2 port supports connections where there is Ethernet presentation from the ISP supplied modem or Internet connection instead of xDSL. WAN2 uses the physical port normally designated as LAN4. If WAN2 is used then WAN1 will be disabled and vice versa. To setup the Vigor 2760 to connect via WAN2 then please follow the steps below: 1. - Page 21 4. Open the menu WAN>>Internet Access. 5. Click the Details Page button for WAN2. Depending on the information supplied by your ISP, enable PPPoE, Static or Dynamic IP: 6. Fill in the information provided by your ISP. If you are using DHCP, you may not need to change any settings.
-
Page 22: Configuring Wan3 For Internet Access
WAN3 uses your USB port and supports an optional 3G/4G USB modem for backup (automatic failover) to your primary Internet connection. Check for the latest list of compatible USB modems. 1. In the router’s web interface, go to the WAN>Internet Access menu and set WAN3 to 34/4G modem, then click on the adjacent Details Page button as shown below: 2. -
Page 23: Troubleshooting
Checking if the ISP settings are OK Reset back to factory default setting if necessary. If things are still not okay, it’s time to contact your dealer or DrayTek support for more advanced help and troubleshooting (see later). -
Page 24: Check Your Computer's Network Connection Settings
’ ’ Your computer may have the wrong network connection settings. The examples shown are based on Windows 7. For examples on other operating systems, please refer to support notes on our web site. 1. Go to Control Panel and then double-click on Network and Sharing Center. - Page 25 3. Select Internet Protocol (TCP/IP) and then click Properties. 4. Ensure that Obtain an IP address automatically and Obtain DNS server address automatically are selected. Vigor2760 Series Quick Start Guide...
-
Page 26: For Mac Os
1. Double click on the current used Mac OS on the desktop. 2. Open the Application folder and get into Network. 3. On the Network screen, select Using DHCP from the drop down list of Configure IPv4. Vigor2760 Series Quick Start Guide... -
Page 27: Pinging The Router From Your Computer
The default gateway IP address of the router is 192.168.1.1. You can use “ping” to check if your PC can reach the router. Your PC should receive a ping reply from the router at 192.168.1.1. 1. For Windows 2000/XP/Vista/7/8, open the Command Prompt window (Press the Windows Key+R simultaneously) and type cmd (and press Enter). -
Page 28: Check The Isp Settings On The Router
Open WAN>>Internet and check that the ISP settings are set correctly. ’ ’ You have to wait at least 15 seconds after inserting the 3G/4G USB modem into your Vigor 2760. Synchronization and connection to the network can take up to 1 minute. The router’s USB LED will light to indicate that the USB Modem is active. -
Page 29: 4G Connection Speed
Connect your 3G/4G USB Modem to a PC directly to test or compare the connection speed. In addition, please refer to the manual of 3G USB Modem for LED Status to check that it’s using the right connection mode (e.g. HSDPA mode and not a slower mode). - Page 30 Whilst the router is running (ACT LED blinking), press the Factory Reset button and hold it for more than 5 seconds. When you see the ACT LED blinking rapidly, release the button. Then, the router will restart with the default configuration. After restoring the factory default settings, you can re-configure the settings for the router again from scratch.
-
Page 31: Getting Further Help
These are covered in the main user manual (available on the CD or the web site) and also the online knowledgebase. Now that your have your DrayTek product, you should keep up to date with product updates (firmware) and other product news, advice or offers for users.