Table of Contents
Advertisement
Advertisement
Table of Contents

Related Manuals for Baumatic BWD1212


Summary of Contents for Baumatic BWD1212
- Page 1 BWD1212 Fully integrated washer dryer...
- Page 2 USER MANUAL FOR YOUR BAUMATIC BWD1212 Fully integrated washer dryer NOTE : This User Instruction Manual contains important information, including safety & installation points, which will enable you to get the most out of your appliance. Please keep it in a safe place so that it is easily available for future reference.
-
Page 3: Table Of Contents
Contents Environmental note Important safety information 5 - 6 Specifications 7 - 8 Description of the appliance 8 - 10 Control panel 9 - 10 Detergent drawer Preparing the wash cycle Preparing your garments for washing A selection of wash care symbols Detergents and conditioners Program table 15 - 16... -
Page 4: Environmental Note
This should be undertaken by a competent person. Disable the door lock to make sure that children cannot get stuck inside the appliance. o The packaging materials that Baumatic uses are environmentally friendly and can be recycled. o Please discard all packaging material with due regard for the... -
Page 5: Important Safety Information
General Safety o Repairs to your appliance must only be carried out by a Baumatic engineer or one of its authorised service agents. Any attempt by an inexperienced person to repair the appliance, could result in injury or damage to your washer dryer. -
Page 6: Specifications 7
If you use either dyes or bleaching agents inside this machine, then you should consult with the manufacturer of these products to make sure they are suitable for use in your washer dryer. Baumatic cannot be held responsible for any damage that may result. Child Safety o Your washer dryer should only be used by adults. -
Page 7: Specifications
Specifications Product and aperture dimensions Appliance dimensions Aperture dimensions Height: 825 mm 868 mm (excluding décor strip) Width : 595 mm 600 mm Depth: 565 mm 580 mm Product specifications o 12 wash programs o 3 drying programs o 6 kg wash load o 3 kg drying load o 1200 rpm maximum spin speed o LCD display... -
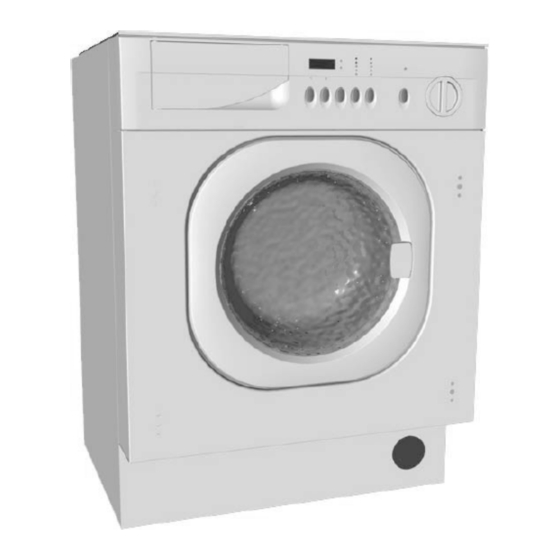
Page 8: Description Of The Appliance
Energy efficiency Energy rating (wash) Energy rating (drying) Wash performance Water extraction performance Electrical details Rated voltage: 230 Vac 50 Hz Supply connection: 13 A (double pole switched fused outlet with 3 mm contact gap) Description of the appliance... -
Page 9: Control Panel
Control panel Wash program selection knob Start/pause button Temperature selection button Spin selection button Delay start button Drying selection button Extra rinse option button Detergent drawer LCD display Timer indicator neons Spin speed indicator neons Wash temperature indicator neons Start/pause indicator neon Wash program selection knob o Turning the control knob anti-clockwise or clockwise allows you to select the wash or drying program of your choice. - Page 10 Spin selection button o Press this button to select the spin speed that you require for a particular wash program. Delay start button o Press this button to delay the start of the wash program for a maximum of 24 hours. Drying selection button o Press this button to get the appliance to complete a drying program.
-
Page 11: Detergent Drawer
Detergent drawer 1) Pre wash section This compartment should have detergent placed in, if you are going to select a wash program that has a pre wash as part of it. 2) Main wash section This compartment should have detergent placed in it (you should also put a water softening agent in this section, if you use one). -
Page 12: Preparing The Wash Cycle
Preparing the wash cycle Preparing your garments for washing o Your washing should be sorted out, according to the fabric type and the wash care symbol that is printed on the garment’s wash care label. (see separate section on wash care symbols). o Your washing should also be sorted out according to the degree of soiling. -
Page 13: A Selection Of Wash Care Symbols
A selection of wash care symbols o The wash care symbols should be used to help you to select the most suitable wash program. They will also help you to sort your laundry into different loads, depending on the fabric type and the highest temperature which the garment can be washed at. -
Page 14: Detergents And Conditioners
Detergents and conditioners The amount of detergent that you need to use in your appliance, will depend on o The degree of soiling. Lightly soiled garments in general require less detergent. o The size of the wash load. A smaller wash load will require a reduction in the amount of detergent. -
Page 15: Program Table
Program table... -
Page 16: Wash Program Guidance
- Indicates that softener can be added if required. - Indicates that detergent MUST be added. - Indicates that detergent MUST not be added. Wash program guidance o The default setting column shows the wash temperature and spin speed that the appliance will automatically select for a particular wash program. -
Page 17: Selecting A Wash Program
Selecting a wash program Load your laundry and put detergent in the relevant compartment(s) of the soap drawer. Close the porthole door firmly. Select the most appropriate wash program for the garments that you are washing, by turning the program selector knob. o The washer dryer will automatically select a spin speed and wash temperature for the wash program that you have chosen. -
Page 18: Selecting A Separate Drying Program
Selecting a separate drying program Load your laundry and then close the porthole door firmly. o IMPORTANT: The maximum amount of clothing that can be dried in a single cycle is 3kg. If you are using program 15 (“Freshen up”), then 1kg is the maximum load size. Select the most appropriate drying cycle for the garments that you are drying, by turning the program selector knob. -
Page 19: Cancelling A Wash Program
Cancelling a wash program Press the Start/pause button whilst a wash program is in progress and the appliance will go into pause status. o Turn the wash program selection knob until it is at the off position (zero). Before opening the porthole door, you MUST drain the appliance;... -
Page 20: Spin Selection Button
Spin selection button o If you press the spin selection button, then the spin speed will reduce downwards from the one selected automatically for a particular wash program. o The spin speed indicator neon will light next to the spin speed that has been selected. -
Page 21: Extra Rinse Option Button
Extra rinse option button o If you press the extra rinse option button, the indicator neon above it will light. o If you select this option, an additional rinse will be performed for the selected wash program. o IMPORTANT: This option can be utilised on cotton, synthetic, wool and silk wash programs (programs 1 –... -
Page 22: Control Panel And Washer Dryer Cabinet
Control panel and washer dryer cabinet. IMPORTANT: Do not use any abrasive cleaner or household polish on either the control panel or operating parts. Wipe over the control panel and the external surface of the machine using a brand new damp cloth with warm water. If you ever spill any liquid detergent or conditioner from the detergent drawer onto the washer dryer cabinet, then these should be cleaned up immediately as they could be corrosive. -
Page 23: The Washer Dryer Drum
Drainage error, water has not emptied within 4 minutes. Clean the drain pump filter and check that the outlet hose is not blocked or kinked. Err3 o Temperature sensor short circuit or open circuit. Contact the Baumatic Service Department. Err4 o Heating malfunction Contact the Baumatic Service Department. - Page 24 Check that the inlet hose is not kinked or blocked and that the water tap the machine is connected to is fully open. Err6 o Motor speed abnormality Contact the Baumatic Service Department. Err7 o Motor rotation/stop abnormality Contact the Baumatic Service Department.
-
Page 25: General Troubleshooting
Or any installation other than the one specified by Baumatic Ltd. has been completed. Please refer to the conditions of guarantee that appear on the warranty card that you receive with the appliance. - Page 26 o If it is unstable then follow the “Positioning and levelling the appliance” section. Poor spin results o Clean the drain pump (see “Cleaning the drain pump filter” section). Water in the detergent dispenser o Although there will be some water residue left in the detergent drawer after a wash cycle has completed.
-
Page 27: Poor Wash Results
Poor wash results My garments are looking grey and there are limescale deposits present in the drum of my washer dryer. o There is not enough detergent being added. o The incorrect detergent is being used. o Stains are not being pre-treated. o The correct wash program or wash temperature was not selected. -
Page 28: Cleaning The Drain Pump Filter
Cleaning the drain pump filter IMPORTANT: Switch off your washer dryer and disconnect the plug from your mains supply. You should clean out the filter approximately every twenty washes. If the drain pump filter is not cleaned regularly, then your appliance may find it difficult to pump out water efficiently. -
Page 29: Installation
Installation IMPORTANT: THIS INSTALLATION MUST BE COMPLETED BY A SUITABLY QUALIFIED PERSON. BAUMATIC ONLY SANCTION THE INSTALLATION GIVEN IN THIS INSTRUCTION MANUAL. YOU SHOULD KEEP THE TRANSIT PACKAGING, IN CASE YOU NEED TO TRANSPORT THE MACHINE IN THE FUTURE. - Page 30 o The location of the three transit bolts are shown in the diagram opposite. o You should use a spanner to loosen and remove the top transit bolt first. o There is also a transit bar across the top of the appliance which should be removed.
-
Page 31: Positioning And Levelling The Appliance
Positioning and levelling the appliance Place the washer dryer on a solid and level floor surface. DO NOT PLACE THE WASHER DRYER ON A CARPET. Loosen the adjustable feet that are positioned on the base of the appliance. Slacken off the lock nut on each of the washer dryer feet using a spanner. -
Page 32: Fitting The Décor Strip
o If you are fitting the optional décor strip (see below). You should take into account the height that this will add to the appliance, when adjusting the levelling feet. Fitting the décor strip o Your appliance is supplied with an optional décor strip that can be fitted to the top of the appliance. - Page 33 o When you are facing the rear of the appliance, you will see two water inlet valves next to each other. The cold water inlet valve is on the left hand side and the hot water inlet valve is on the right hand side.
-
Page 34: Water Outlet
The inlet hoses may leak if this filter is missing. This filter is supplied with the appliance, you should contact Baumatic to obtain one, if it is missing. Tighten the inlet hoses to your mains supply fully, but do not over tighten as this may distort the filter that sits in the end of the inlet hoses. -
Page 35: Fitting The Furniture Door
Fitting the furniture door o Please refer to the building in template for instructions on how to fit your integrated appliance and connect the furniture door to the product. o Mount the furniture door to the cabinet of the washer dryer, using the hinges supplied. -
Page 36: Power Supply
Power supply IMPORTANT: As your appliance is a built in product, the electrical socket must still be accessible once the appliance is installed. Consult the rating plate, located on the back of the appliance BEFORE making the electrical connections. Ensure that the voltage reaching the plug is the same as that on the rating plate. -
Page 37: Before First Use Maintenance Wash
Before first use maintenance wash o When your washer dryer has been correctly installed, we recommend that you perform a maintenance wash cycle. o This will check that all aspects of the installation are correct; it will also remove any deposits that may have been left on the drum by the manufacturing process. - Page 38 Czech Republic United Kingdom Baumatic CR spol s.r.o. Baumatic Ltd., Amperova 495 Baumatic Buildings, 46215, Librec 6 Bennet Road, Czech Republic Reading, Berkshire RG2 0QX +420 800 185 263 United Kingdom www.baumatic.cz Sales Telephone (0118) 933 6900 Slovak Republic Sales Fax Baumatic Slovakia, s.r.o.
- Page 40 40 40...