Table of Contents
Advertisement
Advertisement
Table of Contents
Troubleshooting

Related Manuals for Baumatic BWD1200SS


Summary of Contents for Baumatic BWD1200SS
- Page 1 BWD1200SS Washer dryer...
- Page 2 USER MANUAL FOR YOUR BAUMATIC BWD1200SS Washer dryer NOTE : This User Instruction Manual contains important information, including safety & installation points, which will enable you to get the most out of your appliance. Please keep it in a safe place so that it is easily available for future reference; for you or any person not familiar with the operation of the appliance.
-
Page 3: Table Of Contents
Contents Environmental note Important safety information Specifications Description of the appliance Control panel Program options Wash program indicator neons Wash program control knob Drying timer control knob Detergent drawer Preparing the wash cycle Preparing your garments for washing A selection of wash care symbols Detergents and conditioners Wash program table Selecting a wash program... -
Page 4: Environmental Note
ENVIRONMENTAL NOTE Note : Before discarding an old appliance, switch off and disconnect it from the power supply. Cut off and render any plug useless. Cut the cable off directly behind the appliance to prevent misuse. This should be undertaken by a competent person. Disable the door lock to make sure that children cannot get stuck inside the appliance. -
Page 5: Important Safety Information
General Safety o Repairs to your appliance must only be carried out by a Baumatic engineer or one of its authorized service agents. Any attempt by an inexperienced person to repair the appliance, could result in injury or damage to your washing machine. - Page 6 This appliance is only designed to wash normal domestic washloads. If you use your washing machine in any other way or it is incorrectly used, then Baumatic accepts no liability for any damage that might be caused and any guarantee will be void.
-
Page 7: Specifications
Specifications 19 wash programs 6kg wash load/kg drying load 1200 rpm maximum spin speed LED indicating programs, function and wash cycle progress. 170 Minute drying time knob Eco carbon tub Maxi porthole Automatic consumption reduction Anti foam system Overflow protection Safety door lock Electronic balance load control Adjustable feed... -
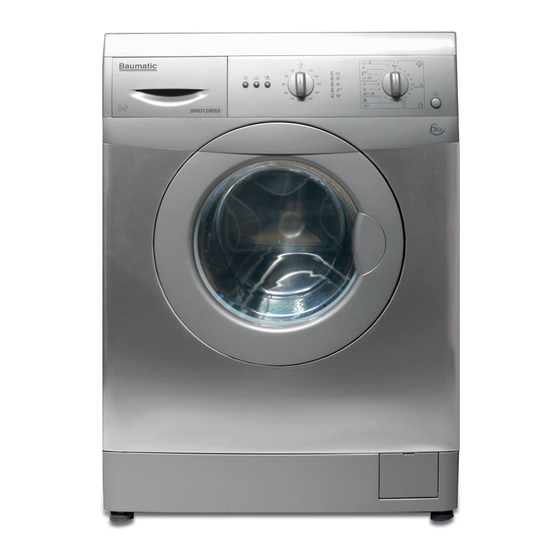
Page 8: Description Of The Appliance
Description of the appliance Glass porthole door Filter Adjustable feet Top cover Drum Control panel... -
Page 9: Control Panel
Control panel Start button Pre wash button Additional rinse button Drying timer control knob Wash program indicator neons Wash program control knob On/Off button Wash program control knob This control knob allows you to select the wash program of your choice. -
Page 10: Wash Program Indicator Neons
o During the wash cycle, the relevant wash Wash program control knob Drying timer control knob program indicator neon will light, to advise what stage of the wash program the machine has reached. o Turn this dial to select the wash or drying program that you require. -
Page 11: Detergent Drawer
Detergent drawer 1) Pre wash section This compartment should have detergent placed in it, if you are going to select a wash program that has a pre wash as part of it. 2) Main wash section This compartment should have detergent placed in it (you should also put a water softening agent in this section, if you use one). -
Page 12: Preparing The Wash Cycle
Preparing the wash cycle Preparing your garments for washing o Your washing should be sorted out, according to the fabric type and the wash care symbol that is printed on the garment’s wash care label. (see separate section on wash care symbols). o Your washing should also be sorted out according to the degree of soiling. -
Page 13: A Selection Of Wash Care Symbols
A selection of wash care symbols o The wash care symbols should be used to help you to select the most suitable wash program. They will also help you to sort your laundry into different loads, depending on the fabric type and the highest temperature which the garment can be washed at. -
Page 14: Detergents And Conditioners
Detergents and conditioners The amount of detergent that you need to use in your appliance, will depend on o The degree of soiling. Lightly soiled garments in general require less detergent. o The size of the wash load. A smaller wash load will require a reduction in the amount of detergent. -
Page 15: Wash Program Table
Wash program table (*) Program for wash and energy consumption assessment, in accordance with standard EN60456 (press intensive wash button). -
Page 16: Selecting A Wash Program
electing a wash program Load your laundry and put detergent in the relevant compartment(s) of the soap drawer. Close the porthole door firmly. Switch on the appliance using the On/Off button, the Start button will flash. Select the most appropriate wash program for the garments that you are washing, by turning the wash program control knob to the most suitable program. -
Page 17: Selecting A Separate Drying Program
MPORTANT: Do not exceed the maximum loads listed in the table below when drying. he timings in this table are approximate and refer to a wash load that has been spun at the maximum spin speed appropriate for that fabric type. -
Page 18: Selecting An Automatic Wash And Dry Program
Load your laundry and then close the porthole door firmly. Turn the drying time control knob clockwise, to select a suitable drying time for the garments that you wish to dry. Select the most appropriate wash program for the garments that you are washing, by turning the wash program control knob to the most suitable program. -
Page 19: Cancelling Or Pausing A Wash Program
To stop a wash program once a wash cycle is in progress, you should turn the wash program control knob to the STOP positio o The appliance will go onto PAUSE status and the wash program will be cancelled. At this stage you can either reselect a different wash program by turning the wash program control knob to the one that you require. -
Page 20: Maintenance And Cleaning
Maintenance and cleaning In daily use Once a wash cycle has completed, you should pull out the detergent drawer slightly, so it can dry out. Leave the porthole door ajar for a short while after a wash cycle has completed. This should help to prevent stagnant smells and to protect the door seal. -
Page 21: Detergent Drawer
o Use warm water and a brush to thoroughly o Clean the area that the detergent drawer slides into with a brush. o Replace the detergent drawer by placing it back into the slot. Then push the drawer fully back into position. The washer dryer drum The drum of your washer dryer is constructed from stainless steel. -
Page 22: Poor Wash Results
Poor wash results My garments are looking grey and there are limescale deposits present in the drum of my washer dryer. o There is not enough detergent being added. o The incorrect detergent is being used. o Stains are not being pre-treated. o The correct wash program or wash temperature was not selected. -
Page 23: Cleaning The Drain Pump Filter
Cleaning the drain pump filter IMPORTANT: Switch off your washer dryer and disconnect the plug from your mains supply. You should clean out the filter approximately every twenty washes. If the drain pump filter is not cleaned regularly, then your appliance may find it difficult to pump out water efficiently. -
Page 24: Winter Storage
o Remove any debris that is in the area of the appliance that you removed the drain pump filter from. o Screw the filter clockwise back into position, making sure that it is fully tightened. You should keep turning until you cannot turn it any further. -
Page 25: Removing Stains
Garments that are covered in stains, grease or are heavily soiled may need to be pre-washed or soaked before being placed inside of the washing machine. o Soaking helps to remove protein-type stains, like blood, milk or grass. o Pre-washing helps to loosen soil before the main wash. Stain removal rules o Use warm water for soaking or pre-washing stained laundry. -
Page 26: Stain Removal Guide
STAIN Blood Rinse immediately in COLD water. If the stain remains, soak in cold water with an enzyme pre- wash. Chewing gum Use ice in a plastic bag to harden the gum. Scrape off what you can and then sponge with white spirit. Chocolate/ Sponge with COLD water and then soak in an enzyme pre- Cocoa... -
Page 27: Installation
Installation IMPORTANT: THIS INSTALLATION MUST BE COMPLETED BY A SUITABLY QUALIFIED PERSON. BAUMATIC ONLY SANCTION THE INSTALLATION GIVEN IN THIS INSTRUCTION MANUAL. YOU SHOULD KEEP THE TRANSIT PACKAGING, IN CASE YOU NEED TO TRANSPORT THE MACHINE IN THE FUTURE. Unpacking the machine and removing the transit bolts Locate the four transit bolts that secure the drum in position, whilst the appliance is being transported. -
Page 28: Positioning And Levelling The Appliance
IMPORTANT: The transit bolts MUST be removed before your washing machine is used for the first time. Positioning and leveling the appliance Place the washing machine on a solid and level floor surface. DO NOT PLACE THE WASHING MACHINE ON A CARPET. Slacken off the lock nut on each of the washing machine feet using a spanner. -
Page 29: Connecting To The Mains Water Supply
Once leveled correctly, you should tighten the lock nut back up on each of the washing machine feet using a spanner. IMPORTANT: When the washing machine is positioned in the location where it will be used. Make sure that all four feet are resting firmly on the floor, by pressing down on each corner and checking that the appliance stands still. -
Page 30: Water Outlet
The inlet hose may leak if this filter is missing. This filter is supplied with the appliance, you should contact Baumatic to obtain one, if it is missing. Tighten the inlet hose to your mains supply fully, but do not over tighten as this may distort the filter that sits in the end of the inlet hose. -
Page 31: Power Supply
IMPORTANT: The electrical socket must still be accessible once the appliance is installed. DO NOT REMOVE THE RATING PLATE AS THE INFORMATION ON IT IS IMPORTANT. The moulded plug that is supplied with the appliance must be placed into an earthed and insulated socket. Broken or damaged power leads must only be replaced by a suitably qualified person. -
Page 32: Before First Use Maintenance Wash
o When your washer dryer has been correctly installed, we recommend that you perform a maintenance wash cycle. o This will check that all aspects of the installation are correct; it will also remove any deposits that may have been left on the drum by the manufacturing process. -
Page 33: Troubleshooting Chart
Troubleshooting chart Problem o The washer will not operate at all. o Water is not entering the drum. o The washer will not drain. o The washer will not spin. o The washer will stop during spinning. o Spinning is insufficient. - Page 34 Or any installation other than the one specified by Baumatic Ltd. has been completed. Please refer to the conditions of guarantee that appear on the...
-
Page 35: General Troubleshooting
General troubleshooting Water under the washer dryer o Tighten the drain pump filter. o Check the drain and inlet hose and make sure that they are both fully tightened. Washer dryer vibrates during the spin cycle o Check that the transport locking devices have been removed (see installation instructions). -
Page 36: Contact Details
(0118) 933 6933 E-mail: sales@baumatic.co.uk technical@baumatic.co.uk Website: www.baumatic.co.uk Republic of Ireland 01- 6266 798 Czech Republic Baumatic CR spol s.r.o. Amperova 495 46215, Librec Czech Republic +420 800 185 263 www.baumatic.cz Slovak Republic Baumatic Slovakia, s.r.o. Skultetyho 1 831 04 Bratislava 3... - Page 40 40 40...