Honda HHT25S Owner's Manual
Trimmer/brush cutter
Hide thumbs
Also See for HHT25S:
- Manual (131 pages) ,
- Owner's manual (36 pages) ,
- Owner's manual (32 pages)
Table of Contents
Advertisement
Click to Save As
QUICK FIND
Air Filter.................................................
Contact Honda .......................................
Cutting-Line Heads ...............................
Find a Dealer .........................................
CONTENTS
FOR YOUR SAFETY ..............................
PARTS AND CONTROLS ......................
INITIAL TRIMMER SETUP .....................
Install the Handlebar (U-Type) ............
Check Your Trimmer ...........................
Check Your Trimming Area .................
Equipment ...........................................
Check the Engine Oil Level .................
Add Fuel ..............................................
Safe Trimming Practices .....................
Attachments and Modifications .........
Operating the Controls ......................
Starting the Engine............................
Stopping the Engine ..........................
Maintenance Safety...........................
Maintenance Schedule......................
00X31VL3 D220
16
Fuel ..........................................................
29
Fuel System Maintenance......................
22
Maintenance Schedule..........................
29
Oil Change ............................................
Oil Change ........................................
2
Air Filter .............................................
3
Spark Plug.........................................
4
Spark Arrester ...................................
4
CUTTING ATTACHMENTS ..................
Blades ...............................................
7
Debris Shields ...................................
7
Cutting-Line Heads............................
7
8
TRANSPORTING .................................
9
Loading..............................................
9
Fuel ...................................................
11
Oil ......................................................
12
Cleaning ............................................
13
Storage Location ...............................
13
Removing From Storage ...................
15
Engine Will Not Start .........................
15
Contact your Honda dealer.
There is a dealer locator at
http://powerequipment.honda.com
© 2013 American Honda Motor Co., Inc. All Rights Reserved
OWNER'S MANUAL
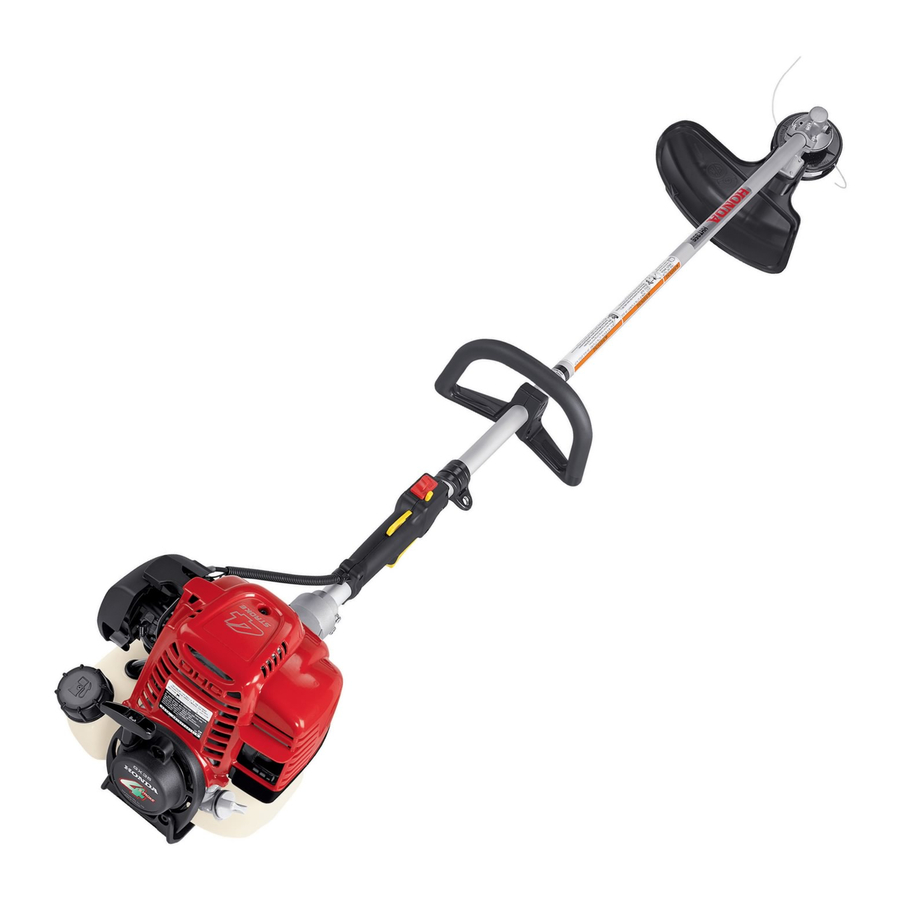
HHT25S • HHT35S
BRUSH CUTTER
Before operating the trimmer for the first time, please read this
Owner's Manual. Even if you have operated other trimmers,
take time to become familiar with how this trimmer works and
practice in a safe area until you build up your skills.
9
28
15
16
16
16
17
18
19
20
21
22
24
24
24
24
24
25
25
25
QUESTIONS?
TRIMMER/
Check.........................................8
Spark Plug .............................................
Coverage.................................30
Increase................................................
Serial Number Locations ......................
High Altitude Operation ........................
Emission Control System .....................
Air Index ...............................................
Specifications .......................................
FUEL SYSTEM MAINTENANCE.............
Dealer Locator Information...................
How to Contact Honda .........................
Honda Publications ..............................
EMISSION SYSTEM WARRANTY ..........
PRODUCT REGISTRATION ...................
17
25
25
25
25
26
26
26
27
28
29
29
29
29
30
31
35
Advertisement
Table of Contents

Related Manuals for Honda HHT25S


Summary of Contents for Honda HHT25S
-
Page 1: Table Of Contents
OWNER’S MANUAL HHT25S • HHT35S TRIMMER/ BRUSH CUTTER Before operating the trimmer for the first time, please read this Click to Save As Owner’s Manual. Even if you have operated other trimmers, take time to become familiar with how this trimmer works and practice in a safe area until you build up your skills. -
Page 2: For Your Safety
We want to help you get the best results from your new trimmer and to operate it safely. This manual The Honda HHT25S and HHT35S trimmer/brush cutters are designed contains information on how to do that; please read it carefully. -
Page 3: Parts And Controls
Safety Label Locations PARTS AND CONTROLS These labels warn you of potential hazards that can cause serious injury. Read them carefully. If a label comes off or becomes hard to read, contact an authorized Honda servicing dealer for a replacement. Loop Type Handle CUTTING-LINE HEAD GEAR CASE... -
Page 4: Fuel System Maintenance
BOLT/WASHER (4) HANDLEBAR DRAFT COPY - DO NOT DISTRIBUTE OWNER’S MANUAL HOLDER A HHT25S • HHT35S TRIMMER/ BRUSH CUTTER INTRODUCTION Congratulations on your selection of a Honda trimmer/brush cutter! We are certain you will be pleased with your purchase of one of the OWNER’S MANUAL... - Page 5 4. Tighten the four 5 x 28 mm bolt/washers. All output shafts use left-hand threads. TORQUE: 3.6 ft-lb (5 N·m) 5. Make sure the tie straps are positioned as shown. TIGHTEN CUTTING-LINE HEAD WASHER (used with Kwik COLLAR Loader head only) (left-hand thread) SPACER B...
- Page 6 4. Install cover plate/spacer A onto the output shaft as shown. 3. Turn the blade cover slowly until the post end is clear of the debris shield, then remove the blade cover from the blade. TIGHTEN COVER SPACER B BLADE 10 mm LOCK NUT Install with the white (left-hand thread)
-
Page 7: Before Each Operation
(page Equipment • BEFORE EACH OPERATION (page • OPERATION (page The Honda HHT25S and HHT35S trimmer/brush cutters are supplied • MAINTENANCE SCHEDULE (page with a shoulder harness and safety glasses. Refer to page 7 for a description of other equipment and protective clothing you will need. -
Page 8: Check The Engine Oil Level
Check Your Shoulder Harness and Check the Engine Oil Level Trimmer Adjustment Check the engine oil level before each use, or every 10 hours if operated continuously. Rest the trimmer on a level surface with the Adjusting the Harness engine stopped. Adjust the harness so the quick-release latch is at your right hip, as 1. -
Page 9: Add Fuel
Add Fuel OPERATION This engine is certified to operate on regular gasoline with a pump octane rating of 86 or higher. For your safety, avoid starting or operating the engine in an enclosed Never use stale or contaminated gasoline or an oil/gasoline mixture. area, such as a garage. - Page 10 Blades on Honda HHT25S and HHT35S trimmers rotate counterclockwise, as viewed from the operator’s position. Therefore, the left side of the blade is moving toward you. With these trimmers, sawing with the left side of a brush blade will give you better control and less risk of kickback, though it will throw the sawdust toward you.
-
Page 11: Operating Tips
OPERATING TIPS Operation on Slopes Start on the low side of a slope, and work upward. This will reduce Scything Motion your risk of slipping and falling, and it will give you a cutting angle that Swing the trimmer in will better enable you to direct debris away from you. -
Page 12: Operating The Controls
The throttle trigger controls engine speed. The location and operation of the controls are similar on both the HHT25S and HHT35S models. Pulling the throttle trigger toward the control handle grip increases engine speed. The trimmer will have the greatest cutting force at Choke Lever maximum engine speed. -
Page 13: Starting The Engine
Starting the Engine 7. If the choke lever was moved to the CLOSED position to start the engine, gradually move it to the OPEN position as the engine 1. To start a cold engine, move the choke lever to the CLOSED warms up. -
Page 14: Trimmer Operation
Harness Quick Disconnect Using a Nylon Cutting-Line Head As the ends of the line wear away, more line must be released from To quickly detach the trimmer from the harness, pull the quick-release the cutting-line head. Your trimmer is factory-equipped with either a latch tab upward. -
Page 15: Servicing Your Trimmer Maintenance Safety
Maintenance Schedule SERVICING YOUR TRIMMER Item Page Interval Proper maintenance is essential for safe, economical, and trouble-free operation. It also helps reduce air pollution. Before each Check the engine oil page 8 Check the air cleaner page 16 WARNING Check the throttle cable page 18 Inspect the cutting attachment... -
Page 16: Air Filter
4. With the engine in an upright position, fill with the recommended oil to the edge of the oil filler hole. Do not overfill. Refill amount: HHT25S, 2.7 fl oz (80 cc) FILTER HHT35S, 3.4 fl oz (100 cc) 5. -
Page 17: Spark Plug
Spark Plug Cleaning A dirty air filter will restrict air flow to the carburetor, reducing engine Check the spark plug every year or 100 hours of use. Replace the performance. If you operate the trimmer in very dusty areas, clean the spark plug every 2 years or after 300 hours of use. -
Page 18: Spark Arrester
Spark Arrester Cooling Fin Inspection Inspect the engine The spark arrester must be serviced every 100 hours to keep it cooling fins every 50 COOLING functioning as designed. FINS hours of operation. You Your trimmer engine is factory-equipped with a spark arrester. In should clean out any some areas, it is illegal to operate an engine without a spark arrester. -
Page 19: Cutting Attachments
Fuel Tube Inspection CUTTING ATTACHMENTS Check the fuel supply and return tubes, and replace any tube that is damaged, cracked, or leaking. Refer to the Honda shop manual for tube replacement instructions, or Applications take the trimmer to an authorized Honda servicing dealer. Fuel Filter and Fuel Tank Cleaning ATTACHMENTS FOR TRIMMING GRASS AND LIGHT WEEDS 1. -
Page 20: Blades
Blades A dull blade can be sharpened, but a blade that is worn out, bent, cracked, chipped, or otherwise damaged must be replaced. If installing a metal blade on a Honda trimmer equipped with a loop When a blade needs sharping or replacement, take the trimmer to a handle, also install the optional Barrier Kit that includes a full Honda trimmer servicing dealer. -
Page 21: Debris Shields
Debris Shields Changing the Debris Shield Refer to the applicable illustration for removing and installing the Always use the correct debris shield when operating the trimmer. In debris shields. Tighten the spacer bolts/washers to the specified addition to safety concerns, it can cause an overload to the clutch due torque. -
Page 22: Cutting-Line Heads
1/8 turn until the spool stops. line may result in increased noise levels. For original, factory-installed Honda cutting-line heads, use only nylon monofilament line in the line sizes shown below. HHT25S 0.095 in HHT35S (semi-matic) 0.095 or 0.105 in (Kwik Loader) 0.095 to 0.130 in x 8 in long... - Page 23 4. Hold the housing securely, then continue to rotate the spool in the spool reaches the bottom of the housing, the lines should snap out direction of the arrow an additional 1/4 inch or the width of the of the spool notches. channel to unlock the spool from the housing.
-
Page 24: Transporting
Draining the Fuel Tank and Carburetor TRANSPORTING WARNING Gasoline is highly flammable and explosive, and you can be Before Loading burned or seriously injured when refueling. If the engine has been running, allow it to cool for at least 15 minutes •... -
Page 25: Storage Location
Storage Location Cutting-Line Head Won’t Stop Turning If your trimmer will be stored with gasoline in the fuel tank and Possible Cause Correction carburetor, it is important to reduce the hazard of gasoline vapor Fault in the throttle control or Take the trimmer to an authorized ignition. -
Page 26: High Altitude Operation
High Altitude Operation Problems That May Affect Emissions If you are aware of any of the following symptoms, have your engine At high Altitudes, the standard carburetor air-fuel mixture will be too inspected and repaired by your servicing dealer. rich. Performance will decrease, and fuel consumption will increase. A very rich mixture will also foul the spark plug and cause hard starting. -
Page 27: Specifications
Requires optional Barrier Kit no shims required Clutch Size 2.18 in (55.2 mm) 3.09 in (78.4 mm) Dimensions Engagement 4,200 ± 200 rpm Handle HHT25S HHT35S Drive Square female Installed Type Centrifugal Length Loop 73.4 in (1865 mm) 73.8 in (1875 mm) -
Page 28: Fuel System Maintenance
FUEL SYSTEM MAINTENANCE When maintained properly, your Honda trimmer should provide years of trouble-free operation. This includes the fuel system. However, gasoline can quickly deteriorate, causing starting or running problems and, in some cases, damage to the fuel system. Most fuel-related problems can be avoided by following the precautions listed below. -
Page 29: Contact Honda
Contact an authorized Honda servicing dealer to purchase any of these (or other) Honda Genuine Service parts and other approved Honda Power Equipment dealership personnel are trained accessories for your trimmer. For a complete list of trimmer professionals. They should be able to answer any question you may accessories, visit us at http://powerequipment.honda.com... -
Page 30: Warranty Coverage
Exclusions: You must, at your expense, take the Honda Power Equipment part, accessory, apparel or the Honda Power Equipment on which the part or accessory is installed, 1. Any damage or deterioration resulting from the following: and proof of purchase to any Honda Power Equipment dealer in the United States, - Neglect of the periodic maintenance as specified in this manual Puerto Rico, or the U.S. -
Page 31: Emission System Warranty
TO OBTAIN WARRANTY SERVICE: CALIFORNIA You must, at your own expense, take your Honda Power Equipment engine or The California Air Resources Board and Honda are pleased to explain the the product on which it is installed, along with your sales registration card or... - Page 32 NOTES...
- Page 33 NOTES...
- Page 34 NOTES...
-
Page 35: Product Registration
PRODUCT REGISTRATION Thank you for choosing Honda. To ensure you receive important service information in the event of a product update or recall, please register your trimmer within 30 days of purchase. From time to time, American Honda conducts sales promotions that require you to register your trimmer within 30 days of purchase. - Page 36 1. Go to www.PowerEquipment.Honda.com to register your unit. 2. Click on Product Registration. 3. Complete the required information and click Submit. It’s that simple! NO POSTAGE NECESSARY Product Registration IF MAILED IN THE UNITED STATES BUSINESS REPLY MAIL FIRST-CLASS MAIL PERMIT NO.