Table of Contents
Advertisement
Quick Links
QUICK FIND
Air Filter.................................................
Contact Honda .....................................
Cutting-Line Heads ...............................
Find a Dealer .......................................
CONTENTS
FOR YOUR SAFETY ..............................
PARTS AND CONTROLS ......................
INITIAL TRIMMER SETUP .....................
Importance of Proper Assembly ..........
Tools Required ....................................
List of Loose Parts...............................
Install the Handlebar (U-Type) ............
Add Engine Oil ....................................
Before Using Your Trimmer.................
BEFORE EACH OPERATION ................
Check Your Trimmer ...........................
Check Your Trimming Area .................
Equipment ...........................................
Trimmer Adjustment ............................
Check the Engine Oil Level .................
Add Fuel ..............................................
OPERATION...........................................
Safe Trimming Practices .....................
Attachments and Modifications .........
Operating the Controls ......................
Starting the Engine............................
Stopping the Engine ..........................
Trimmer Operation ............................
00X31VL3 D256
16
Fuel ........................................................
29
Fuel System Maintenance ....................
22
Maintenance Schedule..........................
29
Oil Change ............................................
2
SERVICING YOUR TRIMMER .............
Maintenance Safety...........................
3
Maintenance Schedule......................
4
Oil Change ........................................
4
Air Filter .............................................
4
Spark Plug.........................................
4
Spark Arrester ...................................
4
Cooling Fin Inspection.......................
6
Throttle Cable Inspection ..................
7
Throttle Cable Adjustment.................
7
CUTTING ATTACHMENTS ..................
7
Blades ...............................................
7
Debris Shields ...................................
7
Cutting-Line Heads............................
8
TRANSPORTING .................................
8
Before Loading ..................................
9
Loading..............................................
9
STORAGE ............................................
9
Fuel ...................................................
11
Oil ......................................................
12
Cleaning ............................................
13
Storage Location ...............................
13
Removing From Storage ...................
14
QUESTIONS?
Contact your Honda dealer.
There is a dealer locator at
powerequipment.honda.com
© 2014-2021 American Honda Motor Co., Inc.-All Rights Reserved
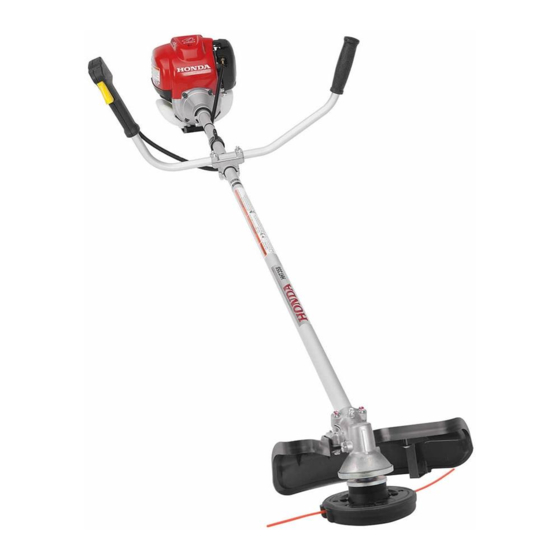
OWNER'S MANUAL
HHT25S • HHT35S
BRUSH CUTTER
Before operating the trimmer for the first time, please read this
Owner's Manual. Even if you have operated other trimmers,
take time to become familiar with how this trimmer works and
practice in a safe area until you build up your skills.
9
Oil Level Check .........................................
28
Spark Plug ...............................................
15
Warranty Coverage .................................
16
15
TROUBLESHOOTING..............................
15
Engine Will Not Start .............................
15
Increase.................................................
16
16
17
Excessive Vibration ...............................
18
18
TECHNICAL INFORMATION ...................
18
Serial Number Locations .......................
18
High Altitude Operation .........................
19
Emission Control System ......................
Air Index ................................................
20
Specifications ........................................
21
22
24
CUSTOMER INFORMATION ...................
24
Dealer Locator Information....................
24
How to Contact Honda ..........................
24
Honda Publications ...............................
24
24
24
WARRANTY .............................................
25
25
PRODUCT REGISTRATION ....................
TRIMMER/
17
30
25
25
25
25
25
25
25
25
26
26
26
27
28
29
29
29
29
29
30
31
35
8
Advertisement
Table of Contents

Related Manuals for Honda HHT35SUKA


Summary of Contents for Honda HHT35SUKA
-
Page 1: Table Of Contents
Storage Location ....... Stopping the Engine ......Removing From Storage ....PRODUCT REGISTRATION ....Trimmer Operation ......QUESTIONS? Contact your Honda dealer. There is a dealer locator at powerequipment.honda.com 00X31VL3 D256 © 2014-2021 American Honda Motor Co., Inc.—All Rights Reserved... -
Page 2: For Your Safety
Honda Power Equipment servicing dealership personnel are specially trained in servicing Honda trimmers and are supported These Honda trimmers are intended for use by gardening by the parts and service divisions of American Honda. -
Page 3: Parts And Controls
PARTS AND CONTROLS These labels warn you of potential hazards that can cause serious injury. Read them carefully. If a label comes off or becomes hard to read, contact an authorized Honda servicing dealer for a replacement. Loop Type Handle CUTTING-LINE HEAD... -
Page 4: Initial Trimmer Setup
1. Remove the four 5 x 28 mm bolt/washers and handlebar holder A. compare the loose parts against the following list. Contact the THROTTLE TRIGGER authorized Honda dealer from whom you purchased the trimmer if any of the loose parts shown are not included with your trimmer. 5 x 28 mm... - Page 5 4. Tighten the four 5 x 28 mm bolt/washers. All output shafts use left-hand threads. TORQUE: 43 in•lb (5 N•m) 5. Install the two cable ties, and position them as shown below. TIGHTEN CUTTING-LINE HEAD WASHER (used with Kwik COLLAR Loader head only) (left-hand thread)
-
Page 6: Add Engine Oil
Screw in the oil filler cap/dipstick securely. Please Register Your Trimmer BLADE Please take a few minutes and register your purchase with Honda. You can register by completing and mailing the registration card on the back cover of this book or going online to powerequipment.honda.com... -
Page 7: Before Using Your Trimmer
BEFORE EACH OPERATION Shoulder Harness A full shoulder harness must be worn by the operator of these Honda trimmers/brush cutters when equipped with a blade and debris shield. Your safety is your responsibility. A little time spent in preparation will If the trimmer is equipped with a cutting-line head and shield with significantly reduce your risk of injury. -
Page 8: Check Your Shoulder Harness And Trimmer Adjustment
Check Your Shoulder Harness and Check the Engine Oil Level Trimmer Adjustment Check the engine oil level before each use, or every 10 hours if operated continuously. Rest the trimmer on a level surface with the Adjusting the Harness engine stopped. Adjust the harness so the quick-release latch is at your right hip, as 1. -
Page 9: Add Fuel
FUEL-RELATED PROBLEMS” on page 28 for information regarding Honda trimmers are designed to give safe and dependable service if fuel deterioration. operated according to instructions and intended use. 1. To refuel, set the trimmer on level ground and remove the fuel Honda trimmers are intended to be used by an experienced, trained tank cap. - Page 10 Blade thrust is more likely to occur in areas where it is difficult to see what is being cut. Understand the reaction forces of the blade. Blades on Honda HHT25S and HHT35S trimmers rotate counterclockwise, as viewed from the operator’s position.
-
Page 11: Attachments And Modifications
Attachments DEBRIS surface. Work from an angle where Your Honda trimmer servicing dealer has cutting attachments, debris debris that strikes the shields, barrier kits, and shoulder harnesses that have been designed hard surface will and approved for your trimmer and are covered by warranty. See... -
Page 12: Operating The Controls
Operating the Controls Throttle Trigger The throttle trigger controls engine speed. The location and operation of the controls are similar on both the HHT25S and HHT35S models. Pulling the throttle trigger toward the control handle grip increases engine speed. The trimmer will have the greatest cutting force at Choke Lever maximum engine speed. -
Page 13: Starting The Engine
If there is rotation at idle, adjust the idle speed correctly necessary to press the priming bulb. before using the trimmer. For idle adjustment, consult your authorized Honda servicing dealer. 3. Set the throttle trigger in the starting position, using the throttle set button. -
Page 14: Trimmer Operation
Refer to the chart on page 19 for appropriate blade applications. attachment should coast to a stop. If using a blade on a Honda trimmer equipped with a loop handle, also install the optional Honda barrier kit (page 29) that includes a full shoulder harness, a barrier bar, and debris shields for blades. -
Page 15: Maintenance Schedule
Check the clutch shoes and drum To ensure the best quality and reliability, use only new, Honda Check the engine cooling fins Genuine parts or their equivalents for repair and replacement. -
Page 16: Air Filter
1. Place a suitable container below the engine to catch the used oil. We recommend the use of a Honda Genuine air filter to ensure it 2. Remove the oil filler cap/dipstick. -
Page 17: Spark Plug
MAINTENANCE SCHEDULE Required Spark Plug: NGK - CMR5H (page 15). Honda Air Filter Oil can be used instead of NOTICE clean engine oil and is available from your An incorrect spark plug can cause engine damage. -
Page 18: Spark Arrester
Honda servicing dealer to perform idle speed adjustment. 1. Start the engine outdoors, and allow it to warm up to normal operating temperature. 2. Turn the throttle stop screw to obtain a stable idle, below the speed at which the trimmer head begins to turn. -
Page 19: Cutting Attachments
Also check the priming bulb for cracks, discoloration or leaks. Applications Refer to the Honda shop manual for tube replacement instructions, or take the trimmer to an authorized Honda servicing dealer. Fuel Filter and Fuel Tank Cleaning ATTACHMENTS FOR TRIMMING GRASS AND LIGHT WEEDS 1. -
Page 20: Blades
A dull blade can be sharpened, but a blade that is worn out, bent, cracked, chipped, or otherwise damaged must be replaced. If installing a metal blade on a Honda trimmer equipped with a loop When a blade needs sharping or replacement, take the trimmer to a handle, also install the optional Barrier Kit that includes a full Honda trimmer servicing dealer. -
Page 21: Debris Shields
TORQUE: 30 in•lb (3.4 N•m) A variety of blades are available from your Honda trimmer servicing 5 x 28 mm dealer. Always use the debris shield designed for use with a blade BOLT/WASHER (4) when attaching a blade to your trimmer. -
Page 22: Cutting-Line Heads
Kwik Loader Cutting-Line Head Always shut the engine off before adding trimmer line to the head. To All Honda trimmers come with either a Kwik Loader or semi-matic load, push the 8-inch trimmer line into the housing so there is 1/4 inch cutting head. - Page 23 4. Hold the housing securely, then continue to rotate the spool in the If you are not sure if the lines have snapped out of the notches, direction of the arrow an additional 1/4 inch or the width of the gently pull the spool away from the housing about an 1/8 inch to channel to unlock the spool from the housing.
-
Page 24: Transporting
Draining the Fuel Tank and Carburetor TRANSPORTING WARNING Gasoline is highly flammable and explosive, and you can be Before Loading burned or seriously injured when handling fuel. If the engine has been running, allow it to cool for at least 15 minutes •... -
Page 25: Storage Location
Take the trimmer to an authorized ignition. Select a well-ventilated dry storage area away from any cable; throttle cable out of Honda dealer for repair. appliance that operates with a flame, such as a furnace, water heater, adjustment or bent. -
Page 26: High Altitude Operation
Honda carburetor modification is made. cannot deny coverage under the emission warranty solely for the use... -
Page 27: Specifications
(cold) 0.0024 ~ 0.0039 in authorized Displacement 1.5 cu in (25.0 cc) 2.2 cu in (35.8 cc) (0.060 ~ 0.100 mm) Honda Bore & stroke 1.4 x 1.0 in 1.5 x 1.2 in servicing Exhaust: (35 x 26 mm) (39 x 30 mm) dealer 0.0035 ~ 0.0051 in... -
Page 28: Fuel System Maintenance
AVOIDING FUEL-RELATED PROBLEMS When maintained properly, your Honda trimmer should provide years of trouble-free operation. This includes the fuel system. However, gasoline can quickly deteriorate, causing starting or running problems and, in some cases, damage to the fuel system. Most fuel-related problems can be avoided by following the precautions listed below. -
Page 29: Contact Honda
The information and specifications included in this publication were in 72511-VF9-E00AH 22 tooth, 9" weed/brush effect at the time of approval for printing. American Honda Motor Co., HHT35S blades 72511-VF9-B02 3 tooth, 10" grass/weed Inc. reserves the right, however, to discontinue or change... -
Page 30: Warranty Coverage
What American Honda Will Repair or Replace Under Warranty: purchased for installation on original Honda equipment or engines to be eligible American Honda will repair or replace, at its option, any part that is proven to be for warranty coverage. Installing parts and accessories on non-Honda products defective in material or workmanship under normal use during the applicable or engines voids this warranty. -
Page 31: Emission Control System Warranty
Honda Power Equipment dealer emissions regulations can be identified by a “Not for sale in California” decal. who is authorized by Honda to sell and service that Honda product during their OTHER STATES AND U.S. TERRITORIES normal business hours. - Page 32 NOTES...
- Page 33 NOTES...
- Page 34 NOTES...
-
Page 35: Product Registration
PRODUCT REGISTRATION Thank you for choosing Honda. To ensure you receive important service information in the event of a product update or recall, please register your trimmer within 30 days of purchase. From time to time, American Honda conducts sales promotions that require you to register your trimmer within 30 days of purchase. - Page 36 1. Go to powerequipment.honda.com to register your unit. 2. Click the SUPPORT link on the homepage. 3. Click on Product Registration. 4. Enter your serial number, and then click Submit. 5. Complete the required information and click Submit. It’s that simple!