
Related Manuals for NETGEAR A6200


Summary of Contents for NETGEAR A6200
- Page 1 802.11ac USB WiFi Adapter (A6200) User M anua l 350 East Plumeria Drive San Jose, CA 95134 November 2012 202-11093-01 v1.0...
-
Page 2: Revision History
NETGEAR, the NETGEAR logo, and Connect with Innovation are trademarks and/or registered trademarks of NETGEAR, Inc. and/or its subsidiaries in the United States and/or other countries. Information is subject to change without notice. Other brand and product names are registered trademarks or trademarks of their respective holders. -
Page 3: Table Of Contents
Expand Your USB Adapter Range ......7 NETGEAR genie Desktop Icon ........7 NETGEAR genie Home . -
Page 4: Chapter 1 Set Up Your Wireless Usb Adapter
Set Up Your Wireless USB Adapter This chapter describes how to set up the 802.11ac USB WiFi Adapter (A6200) and includes the following sections: • USB Adapter Placement and Performance • NETGEAR genie Desktop Icon • NETGEAR genie Home •... -
Page 5: Usb Adapter Placement And Performance
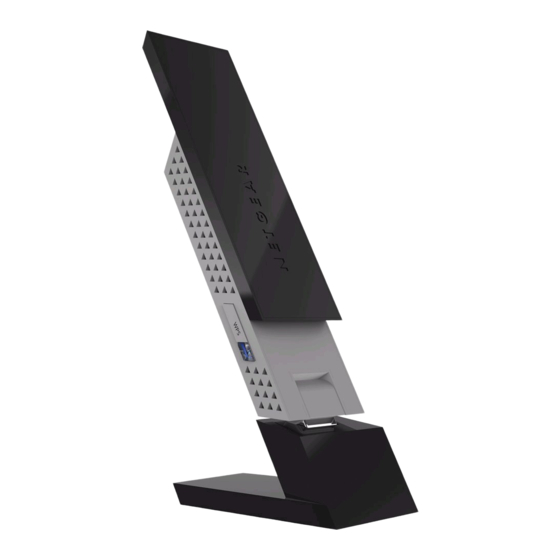
802.11ac USB WiFi Adapter (A6200) USB Adapter Placement and Performance You can position the USB adapter to best suit your own environment and to ensure maximum performance. Attach the USB Adapter to Your Computer To attach the USB adapter directly: Use the USB adapter without the desktop dock, and connect it directly into a USB port on your computer. - Page 6 802.11ac USB WiFi Adapter (A6200) To attach the USB adapter using the desktop dock: Insert the USB adapter into the desktop dock. Connect the USB cable of the desktop dock to your computer USB port. Set Up Your Wireless USB Adapter...
-
Page 7: Expand Your Usb Adapter Range
When you install your USB adapter, the NETGEAR genie icon appears in the Windows system tray and on the desktop. You can click this icon to open NETGEAR genie to make changes or connect to a different wireless network. The color of the icon indicates the strength of your wireless connection: White. -
Page 8: Netgear Genie Home
The following options are available: • Select Language. If more than one language is available, you can select a language from this drop-down list. NETGEAR genie screens are displayed in the language that you select. • Home button. The currently selected Home screen. You can click the Home button to return here from a different screen. -
Page 9: Join A Wireless Network With Netgear Genie
Signal strength. The strength of the wireless signal. Three to five bars indicate a good signal. One or two bars indicate a weak signal. Join a Wireless Network with NETGEAR genie In NETGEAR genie, click the Join a Network button to display the following screen: The following information, link, and button are displayed: •... -
Page 10: Network Details
The name (SSID) field is blank even though the rest of the information is displayed. • Channel. The channel on which the wireless network operates. NETGEAR recommends that you choose a network that uses a different channel from that of neighboring networks. -
Page 11: Join A Network Or Connect To A Different Network
Windows profile. Windows profiles can be used by genie and the Windows utility. If there is no change in the network information, the next time you launch NETGEAR genie, it automatically connects to the network you previously joined. - Page 12 To select and join a wireless network: From NETGEAR genie, click Join a Network. Look for the network you want to join in the list on this screen. If you do not see your network, you might need to scroll down to view more networks.
-
Page 13: Join A Hidden Network
Join a Hidden Network A hidden network does not broadcast its SSID. From NETGEAR genie, click Join a Network. Select the Manually Connect to a network (for hidden networks) link. You can use WPS to connect, or enter the wireless information yourself. - Page 14 In the fields provided, type the network name (SSID), select the security type, and type the passphrase (password). Note: NETGEAR genie does not let you select the WPA or WPA2 security type. Windows 8, Windows 7, and Windows Vista, use the Windows WLAN Autoconfig service to enter WPA or WPA2 credentials to join the network.
-
Page 15: Install A Standalone Driver Without Netgear Genie
For Windows 8, Windows 7, and Windows Vista, you can install the Windows driver without the NETGEAR genie and use the Windows WLAN Autoconfig service to join a network. For Windows XP, you can install the Windows driver without the NETGEAR genie and use the Wireless Zero Configuration service to join a network. -
Page 16: Chapter 2 Maintenance
Maintenance This chapter includes the following sections: • Other Screen • Remove the genie Software • Frequently Asked Questions (FAQs) -
Page 17: Other Screen
802.11ac USB WiFi Adapter (A6200) Other Screen In NETGEAR genie, click the Other button to display the following screen: Sent/Receive Activity • Sent Packets. Total number of packets sent during communication with the wireless network. • Received Packets. Total number of packets received during communication with the wireless network. -
Page 18: Support
Remove the genie Software You can remove the USB adapter software in several different ways: • Uninstall. In Windows, select Start > All Programs > NETGEAR A6200 genie > Uninstall NETGEAR A6200 Software. • Control Panel. Follow the appropriate instructions for your Windows operating system: Windows 8. -
Page 19: Frequently Asked Questions (Faqs)
NETGEAR A6200 genie. Frequently Asked Questions (FAQs) The USB adapter LED is not lit. The USB adapter is not inserted securely in the USB port (or USB cable if used) or the A6200 software is not installed. • Remove and reinsert the USB adapter. - Page 20 MAC addresses. If that is the case, on the NETGEAR genie screen, click Other to find the MAC address for your USB adapter and provide it to the network administrator.
- Page 21 14 Mbps of the older USB 1.1 standard. How can I view the IP address for the USB adapter? Click the icon to open NETGEAR genie. Then click the Other button to view the IP address. No IP address is assigned to the USB adapter.
-
Page 22: Appendix A Technical Specifications And Factory Default Settings
Technical Specifications and Factory Default Settings This appendix covers the following topics: • Technical Specifications • Factory Default Settings... -
Page 23: Technical Specifications
802.11ac USB WiFi Adapter (A6200) Technical Specifications The following table provides technical specifications for the USB adapter. Feature Description Antenna 2 LDS antennas Standards • 802.11ac draft 2.0 • 802.11n • 802.11g • 802.11b • 802.11a Radio data rate Autosensing Frequency •... -
Page 24: Factory Default Settings
802.11ac USB WiFi Adapter (A6200) Factory Default Settings The following table lists the default settings of your USB adapter. Default Settings Wireless communication Enabled Country/region United States (varies by region) Operating mode 802.11ac draft 2.0, 802.11n, 802.11a, or 802.11g Data rate •... -
Page 25: Appendix B Notification Of Compliance
The FCC has established detailed SAR requirements and has established that these requirements have been met while the 802.11ac USB WiFi Adapter (A6200) was installed in a host notebook computer. The SAR limit set by the FCC is 1.6 W/kg. -
Page 26: Industry Canada
Canadian Department of Communications Radio Interference Regulations This digital apparatus (802.11ac USB WiFi Adapter (A6200)) does not exceed the Class B limits for radio-noise emissions from digital apparatus as set out in the Radio Interference Regulations of the Canadian Department of Communications. - Page 27 Hereby, NETGEAR Inc., declares that this Radiolan is in compliance with the essential requirements and other relevant provisions of Directive 1999/5/EC. Español [Spanish] Por medio de la presente NETGEAR Inc. declara que el Radiolan cumple con los requisitos esenciales y cualesquiera otras disposiciones aplicables o exigibles de la Directiva 1999/5/CE.
- Page 28 övriga relevanta bestämmelser som framgår av direktiv 1999/5/EG. Íslenska [Icelandic] Hér með lýsir NETGEAR Inc. yfir því að Radiolan er í samræmi við grunnkröfur og aðrar kröfur, sem gerðar eru í tilskipun 1999/5/EC. Norsk [Norwegian] NETGEAR Inc. erklærer herved at utstyret Radiolan er i samsvar med de grunnleggende krav og øvrige relevante krav i direktiv 1999/5/EF.