
Related Manuals for Cisco SPA501


Summary of Contents for Cisco SPA501
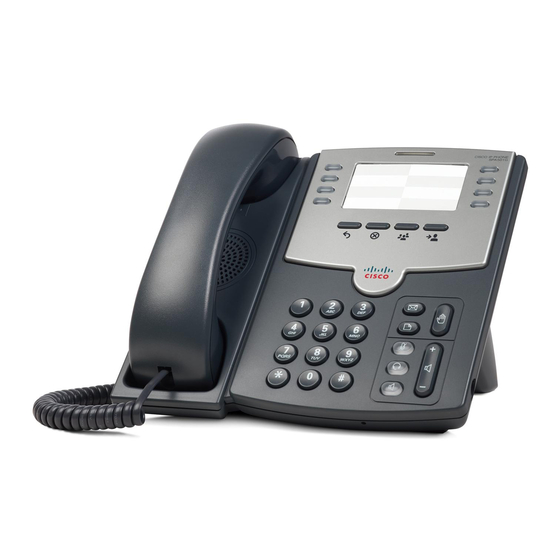
- Page 1 USER GUIDE Cisco Small Business Cisco SPA50X and SPA51X SIP IP Phones Models SPA501G, SPA502G, SPA504G, SPA508G, SPA509G, SPA512G, and SPA514G...
-
Page 2: Table Of Contents
Connecting Wired and Wireless Headsets Verifying Phone Startup Updating Your Phone Firmware Determining Your Current Firmware Version Download the Firmware from Cisco Get the Phone IP Address Update the Firmware on the Phone Cisco Small Business SPA50X and SPA51X SIP IP Phone User Guide... - Page 3 Forwarding Calls Forwarding All Calls Forwarding Calls When Your Phone is Busy Forwarding Calls (Delay) Without Answering the Phone Canceling Call Forwarding All Call Forward Deactivation by using Star Codes Cisco Small Business SPA50X and SPA51X SIP IP Phone User Guide...
- Page 4 Creating Speed Dials on Unused Line Buttons Creating Numerical Speed Dials Using Speed Dials Using the Paging Feature Paging Another Phone Paging a Group of Phones Configuring Auto Answer Monitoring and Accessing Another Phone Cisco Small Business SPA50X and SPA51X SIP IP Phone User Guide...
- Page 5 Setting Voice Phone Parameters Setting Voice User Parameters Viewing Call History Lists Using Your Personal Directory Viewing Attendant Console Status Appendix A: Where to Go From Here Product Resources Cisco Small Business SPA50X and SPA51X SIP IP Phone User Guide...
-
Page 6: Chapter 1: Getting Started
This document describes using the Cisco Small Business IP Phones with a SIP phone system, such as a Broadsoft or Asterisk system. If you are using your Cisco Small Business IP Phone with a Cisco Unified Communications 500 Series, also see the Cisco Unified Communications Manager Express Administrator Guide. - Page 7 Cisco provides a wide range of resources to help you obtain the full benefits of the Cisco SPA500 Series phones. This appendix provides links to many of these resources. Cisco Small Business SPA50X and SPA51X Series SIP IP Phone User Guide...
-
Page 8: Overview Of The Cisco Small Business Ip Phones
Calls can be made or received with a handset, headset, or a speaker. The Cisco Small Business IP phones contain Ethernet ports that link them to the computer network. They also have secondary Ethernet ports that allow another Ethernet device, such as a computer, to be connected to the network through the IP phone. -
Page 9: Understanding Your Phone Lines And Buttons
Blinks red during an incoming call. IP phone screen Displays date and time, phone station name, line extensions, and softkey options (except on the Cisco SPA501G). Cisco Small Business SPA50X and SPA51X Series SIP IP Phone User Guide... - Page 10 Cisco SPA501G). Messages button Press to access voice mail. (This feature must be set up by your phone system administrator). Hold button Press to place a call on hold. Cisco Small Business SPA50X and SPA51X Series SIP IP Phone User Guide...
-
Page 11: Softkey Buttons
The softkey buttons on your phone display might vary depending on your phone model and the phone system setup. (Softkey buttons are not available on the Cisco SPA501G.) Press the Right Arrow or Left Arrow keys on the navigation button to view additional softkey buttons. - Page 12 Puts a call on hold at a designated “park” number. The call is parked on the line until you unpark it or the caller disconnects. Must be configured by your phone system administrator. Cisco Small Business SPA50X and SPA51X Series SIP IP Phone User Guide...
-
Page 13: Using Keypad Shortcuts
IP phone screen. (Not applicable to the Cisco SPA501G.) For example, to obtain your IP address on the Cisco SPA 504G, press the Setup button and dial 9. The IP address is displayed on the Network screen. -
Page 14: Using The Cisco Attendant Console
The Cisco Attendant Console is an accessory console for the Cisco SPA500 Series IP phones, providing 32 three-color (red, green, and orange) programmable line buttons. The Cisco Attendant Console attaches to the IP phone with the attachment arm provided. It obtains power directly from the IP phone; it does not require a separate power supply. -
Page 15: Chapter 2: Installing Your Phone
Installing Your Phone This chapter describes how to install your Cisco Small Business IP Phone and connect it to your network. It contains the following sections: • Before You Begin, page 16 • Phone Connections, page 16 • Connecting the Handset, page 17 •... -
Page 16: Before You Begin
Do not plug a telephone line cord into the port marked AUX. The RJ-11 port marked CAUTION AUX is reserved for connection with the Cisco Attendant Console. It is not for use as a telephone line port or IP device connection. -
Page 17: Connecting The Handset
(Optional) Route the phone cord through the cable slot. STEP 3 Insert the other end of the phone cord into the port at the bottom of the handset STEP 4 (not shown). Cisco Small Business SPA50X and SPA51X Series SIP IP Phone User Guide... -
Page 18: Installing The Desk Stand Or Wall Mount (Optional)
Push the latch in. STEP 1 Slide the retention tab up until it detaches from the phone. STEP 2 Cisco Small Business SPA50X and SPA51X Series SIP IP Phone User Guide... -
Page 19: Connecting The Power
Connecting the Power The Cisco 500 Series IP phones do not ship with power supplies. If you are not using Power over Ethernet (PoE), you must order a Cisco PA100 power supply for each phone. -
Page 20: Connecting Your Phone To The Network
STEP 2 wireless bridge into the RJ-45 phone port marked SW, located on the back of the IP phone base station. Connect the power cable of the Cisco WNBP to the power port on the phone STEP 3 base. Connect one end of the IP phone power adapter into the power port of the STEP 4 wireless bridge. -
Page 21: Connecting A Pc To Your Phone
Connecting a PC to Your Phone Connecting a PC to Your Phone A PC can be connected to the network through the phone. Cisco does not recommend connecting a PC to the phone if the phone is connected to the network wirelessly. -
Page 22: Verifying Phone Startup
At the bottom of the IP phone screen, softkeys are displayed over their associated soft buttons. On models with no screen, such as the Cisco SPA501G, the lines glow green and you hear a dial tone when picking up the handset or pressing the speakerphone button. -
Page 23: Updating Your Phone Firmware
Download the firmware from the CCO and install it from your PC. (See the next section for instructions.) • Update by using the Cisco Voice System Setup Wizard (for example if your Voice phone is part of a Cisco Voice System network). See the Cisco... -
Page 24: Download The Firmware From Cisco
Save the firmware to your desktop. Get the Phone IP Address Before you upgrade, you’ll need the IP address of the phone you are upgrading. To get your IP address for all phones (except on the Cisco SPA501G): Press Setup. STEP 1 Scroll to Network and press Select. - Page 25 Do not disconnect your phone power until the upgrade is complete (the lights on CAUTION your phone are no longer blinking). Click OK to dismiss the status message of the upgrade. STEP 7 Cisco Small Business SPA50X and SPA51X Series SIP IP Phone User Guide...
-
Page 26: Chapter 3: Using Basic Call Management Functions
Using the Phone Directories, page 42 • Using the Call History Lists, page 44 • Setting or Changing a Phone Password, page 45 • Accessing Voicemail, page 46 Cisco Small Business SPA50X and SPA51X Series SIP IP Phone User Guide... -
Page 27: Managing The Audio Source And Volume
Headset to answer a ringing call. To use a wireless headset, lift the receiver off hook before speaking or listening through the headset. Cisco Small Business SPA50X and SPA51X Series SIP IP Phone User Guide... -
Page 28: Switching Between The Handset, Headset, Or Speakerphone During A Call
Select Preferences > Preferred Audio Device > edit. STEP 2 Press option to scroll through the choices. When the option you want is displayed, STEP 3 press ok. Cisco Small Business SPA50X and SPA51X Series SIP IP Phone User Guide... -
Page 29: Answering Or Placing A Call
It might be necessary to modify a number selected from a call history list so that the phone will dial it correctly. Cisco Small Business SPA50X and SPA51X Series SIP IP Phone User Guide... -
Page 30: Redialing A Call
Resuming a Call To resume the call that has been put on hold, press the flashing red line button for the call. (On the Cisco SPA502G or Cisco SPA512G, press the resume softkey if the default behavior is configured.) Cisco Small Business SPA50X and SPA51X Series SIP IP Phone User Guide... -
Page 31: Ending A Call
Blind—Transfer the call without speaking to the other party to whom you are transferring the call. Performing an Attended Transfer To perform an attended transfer for all phones (except the Cisco SPA501G): During an active call, press xfer. The call is placed on hold and a new line is STEP 1 opened to dial the number. -
Page 32: Performing An Unattended (Blind) Transfer
If you misdial, use the delChar, clear, or cancel key to make your changes before the call is transferred. (Not available for the Cisco SPA502G.) Press xfer after the phone begins to ring, or at any time after the phone is STEP 3 answered. -
Page 33: Managing Missed Calls
STEP 2 Choose Miss Call Shortcut and press edit. STEP 3 Press y/n to enable or disable the feature. STEP 4 Press ok. STEP 5 Press save. STEP 6 Cisco Small Business SPA50X and SPA51X Series SIP IP Phone User Guide... -
Page 34: Forwarding Calls
You can forward all calls, forward calls when the phone is busy, or forward calls to a phone when there is no answer. For the Cisco SPA501G, you can only use the IP phone Web interface or Call Forward All Star Code to set call forwarding. -
Page 35: Forwarding Calls When Your Phone Is Busy
Enter *93 to deactivate call forward delay. Call Forward Delay by using Setup Press the Setup button and select Call Forward > CFWD No Ans Number. STEP 1 Press the edit softkey. STEP 2 Cisco Small Business SPA50X and SPA51X Series SIP IP Phone User Guide... -
Page 36: Canceling Call Forwarding All
Sets a delay interval that must elapse before the call is forwarded because there is no answer at your phone. The delay timer is ignored when the Call Forward No Answer value is blank. On the Cisco SPA501G, the delay interval is set by using the web configuration utility. -
Page 37: Call Forward Deactivation By Using Star Codes
You can also set Do Not Disturb from your PC by using the web configuration utility. For the Cisco SPA501G, you can only set Do Not Disturb in the web configuration utility or set Do Not Disturb by using the Star Code. -
Page 38: Disabling Do Not Disturb
You can also turn call waiting on or off from your PC by using the IP phone Web interface. For the Cisco SPA501G, you can only configure Call Waiting in the web configuration utility or set Call Waiting by using the Star Code. -
Page 39: Picking Up A Call
Press the grPick softkey. The phone displays any stations in the group that have STEP 1 ringing calls. Press dial to see a list of calls. Choose the call you want to pick up and press dial. STEP 2 Cisco Small Business SPA50X and SPA51X Series SIP IP Phone User Guide... -
Page 40: Parking A Call
Press the unpark softkey. STEP 1 Enter the number of the park line (for example, the number that was entered in STEP 2 Step 2 of “parking a call.”) Cisco Small Business SPA50X and SPA51X Series SIP IP Phone User Guide... -
Page 41: Placing A Three-Way Conference Call
Press the Conference button during an active call. The first call is placed on hold, a STEP 1 second line is opened, and you hear a dial tone. Dial the second person’s telephone number. STEP 2 Cisco Small Business SPA50X and SPA51X Series SIP IP Phone User Guide... -
Page 42: Conferencing A Held Call With An Active Call
If you have a call on hold and an active call, you can create a conference call that includes the active call and the call on hold (except on the Cisco SPA501G). With an active call and one or more calls on hold, press the confLx softkey. -
Page 43: Using Your Personal Directory
Press the play softkey to play the selected ring tone or press the select softkey to assign that ringtone to the number you are adding to the directory. Press save to save the entry. STEP 5 Cisco Small Business SPA50X and SPA51X Series SIP IP Phone User Guide... -
Page 44: Using The Corporate Directory
You can also view the Call History Lists from your PC using the web configuration utility. See the “Viewing Call History Lists” section on page You can only view call history lists for the Cisco SPA501G using the web configuration utility. To view or call a number on the Call History lists: Press the Setup button. -
Page 45: Setting Or Changing A Phone Password
You can set or change the password for your phone to prevent unauthorized use. To set a password for your phone: Press the Setup button. STEP 1 Select Set Password. STEP 2 Cisco Small Business SPA50X and SPA51X Series SIP IP Phone User Guide... -
Page 46: Accessing Voicemail
STEP 1 Scroll to Voice Mail and press select. STEP 2 Enter the number to dial for voicemail. For a Cisco Voice System, this is normally STEP 3 vmm. For an external system, enter the phone number, including any digits that must be dialed to reach an outside line. -
Page 47: Chapter 4: Using Advanced Phone Features
You can also configure many of these features by using your PC and the web configuration utility. For the Cisco SPA501G, configure these features by using the web configuration utility or the star codes (described below). Cisco Small Business SPA50X and SPA51X Series SIP IP Phone User Guide... -
Page 48: Configuring Privacy And Security
Select Preferences. STEP 2 Choose Block Anonymous Call and press edit. STEP 3 Press y/n to choose yes (enable) or no (disable). STEP 4 Press ok. STEP 5 Cisco Small Business SPA50X and SPA51X Series SIP IP Phone User Guide... -
Page 49: Using Secure Call
*18—Activate Secure Call feature for a single call. To deactivate secure call: • *17—Deactivate Secure Call feature for all calls. • *19—Deactivate Secure Call feature for a single call. Cisco Small Business SPA50X and SPA51X Series SIP IP Phone User Guide... -
Page 50: Enabling And Using Dial Assistance
You can have up to 8 of these speed dials. Each speed dial can be a phone number, IP address or URL. Cisco Small Business SPA50X and SPA51X Series SIP IP Phone User Guide... -
Page 51: Creating Speed Dials On Unused Line Buttons
Creating Speed Dials You can create and edit speed dials using your PC and the web configuration utility. For the Cisco SPA501G, create speed dials by using the web configuration utility. NOTE “Setting Voice User Parameters,” on page Creating Speed Dials on Unused Line Buttons Press the unused line button and hold down for three seconds. -
Page 52: Using Speed Dials
Press the number on the phone keypad for the speed dial and wait a few seconds. Using the Paging Feature Your IP phone can automatically answer pages from other Cisco IP phones in the Cisco Voice System. When your phone is paged, the phone emits a series of beeps, and two-way audio is established between your phone and the phone that called you. -
Page 53: Configuring Auto Answer
(4) to speed dial Bob’s extension, or to pick up a ringing call at his extension. Not applicable to the Cisco SPA502G or Cisco SPA512G. NOTE Cisco Small Business SPA50X and SPA51X Series SIP IP Phone User Guide... -
Page 54: Customizing Your Ip Phone Screen
Choose Back Light Timer and press edit. STEP 3 Press Option to choose the desired setting: STEP 4 • 10 seconds • 20 seconds • 30 seconds • always on Cisco Small Business SPA50X and SPA51X Series SIP IP Phone User Guide... -
Page 55: Configuring The Phone Screen Saver
In Screen Saver Mode, choose Screen Saver Wait Time and press edit. STEP 1 Enter the time, in seconds, to wait before the screen saver starts. STEP 2 Press ok. STEP 3 Press save. STEP 4 Cisco Small Business SPA50X and SPA51X Series SIP IP Phone User Guide... -
Page 56: Turning On The Screen Saver
Press the Setup button. STEP 1 Scroll to Screen Saver Mode and press activ. (The screen saver must be enabled STEP 2 in order to immediately activate it.) Cisco Small Business SPA50X and SPA51X Series SIP IP Phone User Guide... -
Page 57: Using Ring Tones
If the time does not display am (a) or pm (p) correctly, adjust with Offset. To change STEP 5 from a.m. to p.m., enter *12*00*00, to change from p.m. to a.m., enter #12*00*00. Press save. STEP 6 Cisco Small Business SPA50X and SPA51X Series SIP IP Phone User Guide... -
Page 58: Using Star Codes
Activate Call Back. Causes the IP phone to repeatedly dial a busy number until the called party rings or answers. The IP phone then alerts you that the call has gone through. Block Caller ID. See Blocking Caller ID, page Cisco Small Business SPA50X and SPA51X Series SIP IP Phone User Guide... - Page 59 Perform a blind transfer. Transferring Calls, page Cisco Voice System *Requires that your IP phone be part of a Cisco Voice System **Requires that the paged extension be part of a Cisco Small Business SPA50X and SPA51X Series SIP IP Phone User Guide...
-
Page 60: Using The Interactive Voice Response Menu On The Cisco Spa501G
Using the Interactive Voice Response Menu on the Cisco SPA501G Using the Interactive Voice Response Menu on the Cisco SPA501G The Cisco SPA501G provides an interactive voice response menu. You can enter options and receive information about the phone and its operation. To access the IVR: Press the Setup button. - Page 61 IP phone). Enter the address (use * to enter the “.” value), then press #. To save, press 1. To review the value you entered, press 2. To re-enter, press 3. To exit, press *. Cisco Small Business SPA50X and SPA51X Series SIP IP Phone User Guide...
-
Page 62: Advanced Procedures For Technical Support Personnel
To access advanced menus on the Cisco SPA502G, Cisco SPA504G, Cisco SPA508G, Cisco SPA509G, Cisco SPA512G, Cisco SPA514G, follow the procedures below. For the Cisco SPA501G, many of these options can be performed in the IVR. See the “Using the Interactive Voice Response Menu on the Cisco SPA501G”... -
Page 63: Rebooting Your Phone
STEP 3 Cisco SPA501G: Press the Setup button. STEP 1 At the IVR menu, enter 732668, then press #. STEP 2 Hang up to begin the reboot. STEP 3 Cisco Small Business SPA50X and SPA51X Series SIP IP Phone User Guide... -
Page 64: Chapter 5: Using The Phone Web User Interface
Using the Phone Web User Interface Your Cisco IP Phone provides a web interface for the phone user that allows you to configure some features of your phone by using a web browser. Your phone system administrator can allow you to view the phone statistics and modify some or all of the parameters by using the web configuration utility. -
Page 65: Logging In To The Phone Web User Interface
(read only). System—Password and network settings. Phone—Screen saver. User—Call forwarding, speed dials, call waiting, privacy settings, and audio settings. • Call History—Calls received and made from your phone. Cisco Small Business SPA50X and SPA51X Series SIP IP Phone User Guide... -
Page 66: Making The Web Configuration Utility Viewable And Writable
To change the status of the Web Server Writable, press Edit. STEP 3 Press Y/N to toggle the parameter and press OK to set the parameter. STEP 4 Cisco Small Business SPA50X and SPA51X Series SIP IP Phone User Guide... -
Page 67: Saving The Configuration Profile
Subnetwork mask. Gateway Gateway IP address. HostName Hostname of the phone. Domain Network domain name. Primary DNS Primary DNS server IP address. Secondary DNS Secondary DNS server IP address. Cisco Small Business SPA50X and SPA51X Series SIP IP Phone User Guide... -
Page 68: Setting Voice Phone Parameters
“Press any key to unlock your phone.” • Phone–moving phone icon. • Date Time–station date and time displays in the middle of the IP phone screen. Cisco Small Business SPA50X and SPA51X Series SIP IP Phone User Guide... -
Page 69: Setting Voice User Parameters
Block CID Choose yes from the drop-down menu to block your caller Setting ID from displaying on another phone. Choose no to disable the feature. Cisco Small Business SPA50X and SPA51X Series SIP IP Phone User Guide... - Page 70 Text Message Choose yes from the drop-down menu to enable receiving from 3rd Party text messaging from others on the phone. Choose no to disable the feature. Cisco Small Business SPA50X and SPA51X Series SIP IP Phone User Guide...
-
Page 71: Viewing Call History Lists
• Placed—Shows the last 100 numbers dialed from your phone. • Answered—Shows the caller ID of the last 100 answered calls. • Missed—Shows the last 100 missed calls. Cisco Small Business SPA50X and SPA51X Series SIP IP Phone User Guide... -
Page 72: Using Your Personal Directory
The Cisco SPA502G, Cisco SPA504G, Cisco SPA508G, and Cisco SPA509G support up to 100 entries. The Cisco SPA512G and Cisco SPA514G support up to 150 entries. (Not available for the Cisco SPA501G.) To view and edit your personal directory: Log in to the web configuration utility. -
Page 73: Viewing Attendant Console Status
Time in seconds when the current subscription expires. Expires After the subscription expires, the Cisco SPA5000S automatically requests a new subscription. Subscribe Retry Length of time the Cisco SPA5000S waits to try again if the Interval subscription fails. HW Version Hardware version of the attendant console. -
Page 74: Appendix A: Where To Go From Here
Where to Go From Here Cisco provides a wide range of resources to help you obtain the full benefits of the Cisco Small Business IP phone. Product Resources Support Cisco Small Business www.cisco.com/go/smallbizsupport Support Community Online Technical Support www.cisco.com/support and Documentation (Login... - Page 75 Installation and initial configuration of your Cisco IP phone. • Cisco WBP54G Wireless-G Bridge for Phone Adapters User Guide — Installation and use of the WBP54G wireless bridge with your Cisco IP phone. • Cisco Small Business SPA500 Series and WIP310 IP Phone Administration Guide —Administration and advanced configuration of your Cisco IP Phone.
- Page 76 Cisco and the Cisco logo are trademarks or registered trademarks of Cisco and/or its affiliates in the U.S. and other countries. To view a list of Cisco trademarks, go to this URL: www.cisco.com/go/trademarks. Third-party trademarks mentioned are the property of their respective owners. The use of the word partner does not imply a partnership relationship between Cisco and any other company.