Table of Contents
Advertisement
Quick Links
Advertisement
Table of Contents

Related Manuals for NETGEAR arlo VMS3330-100EUS


Summary of Contents for NETGEAR arlo VMS3330-100EUS
- Page 1 NETGEAR MARQUE: VMS3330-100EUS REFERENCE: 4111060 CODIC: NOTICE...
- Page 2 User Manual October 2015 202-11380-05 NETGEAR, Inc. 350 East Plumeria Drive San Jose, CA 95134, USA...
- Page 3 For product updates and web support, visit https://www.arlo.com/support/ Trademarks © NETGEAR, Inc., NETGEAR and the NETGEAR Logo are trademarks of NETGEAR, Inc. Any non‑NETGEAR trademarks are used for reference purposes only. Compliance For the current EU Declaration of Conformity, visit http://support.netgear.com/app/answers/detail/a_id/11621/...
-
Page 4: Table Of Contents
Contents Set Up Your System Set Up Your Base Station ..........................5 Register for an Arlo Account ........................6 Set Up and Sync Your Cameras ......................7 Position Your Cameras ............................10 Position Mode ..................................12 Adjust Motion Sensitivity ..........................14 Personalize Your System Name Your Cameras ...............................16 Set Up Rules ..................................17 Set Up Modes ..................................20... - Page 5 Downgrade Your Service Plan ......................34 Cancel Your Paid Service Plan ......................36 BATTERY WARNINGS AND SAFETY Counterfeit and Inferior‑Quality Battery Warning Safe Battery Handling and Usage ....................37...
-
Page 6: Set Up Your System
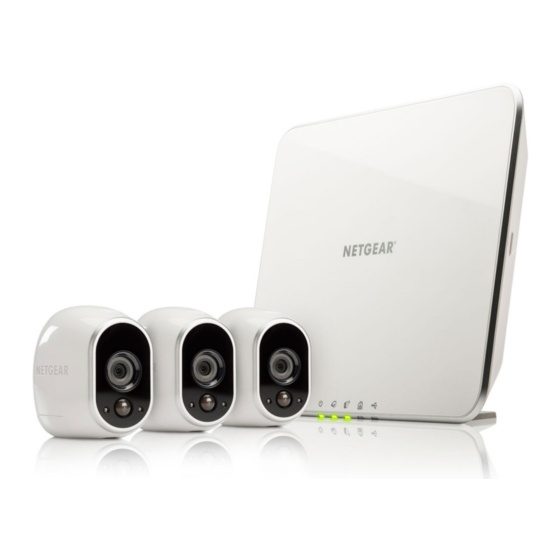
1. Set Up Your System Setting up your Arlo system involves these steps: • set up your base station • register for an Arlo account • set up and sync your cameras • position your cameras Set Up Your Base Station The base station connects to your home network and allows you to view your camera streams from anywhere. -
Page 7: Register For An Arlo Account
4. Press the On-Off button on the back of the base station. The Power LED and Internet LED light green in about two minutes. Your base station is set up. Register for an Arlo Account After you set up your base station, you must register for an Arlo account. Your Arlo account is linked to your Arlo system and allows you to view videos from any Internet‑connected computer or mobile device. -
Page 8: Set Up And Sync Your Cameras
¾ To register for an Arlo account: 1. In a browser, enter arlo.com/login the address bar. 2. Click or tap New System Setup. 3. Complete the required fields and click or tap Continue. 4. Choose your base station’s serial number from the drop‑down menu and click or tap Continue. - Page 9 3. Insert two batteries near the back of the camera. Pay careful attention to the orientation of the batteries when you insert them. 4. Insert two batteries near the compartment hinge. Pay careful attention to the orientation of the batteries when you insert them. 5.
- Page 10 ¾ To sync your cameras: 1. Bring the camera within one to three feet (30cm–100cm) of the base station. 2. Press and release the Sync button on the side of the base station. 3. Wait for the Sync Status LED on the base station to light green. 4.
-
Page 11: Position Your Cameras
Position Your Cameras Arlo’s position mode allows you to see what your camera sees. Using Position mode, you can make sure that your Arlo camera is positioned to monitor the precise area Position Mode that you want. For more information, see on page 12. - Page 12 feed on your Arlo smartphone app to make near real‑time adjustments to the camera’s position. Go to your camera’s Settings option to turn on Position mode. After the camera is in place, you can turn off Position mode, or it automatically Position Mode turns off after five minutes.
-
Page 13: Position Mode
You can use the Motion Detection Test feature to verify if motion can be detected in a camera’s current placement. The camera’s LED flashes amber when motion is detected. Go to your camera’s Settings option to turn on the Motion Detection Test feature. - Page 14 4. Click or tap Position Mode. The camera starts streaming video. Note: Position mode streams video as fast as possible, without buffering, so that you can aim the camera while watching on a smartphone and make near real-time adjustments to the camera position.
-
Page 15: Adjust Motion Sensitivity
Adjust Motion Sensitivity You can adjust the motion sensitivity of an Arlo camera after a motion rule is applied to it. ¾ To adjust the motion sensitivity of a camera: arlo.com/login. 1. Log in to your Arlo account at 2. Click or tap Settings or Rules. - Page 16 3. Click or tap a motion rule assigned to the camera that you want to adjust. 4. Under IF the following, use the slider to adjust the sensitivity of the motion sensor: • Raise the sensitivity percentage to increase the number of videos that Arlo captures.
-
Page 17: Personalize Your System
2. Personalize Your System Your Arlo system can be customized to meet your unique needs. After you create rules and modes for cameras, Arlo does the rest. You can name your cameras so that they are easier to identify and set up alerts so that you always know what’s going on. Name Your Cameras You can easily customize your Arlo cameras by renaming them. -
Page 18: Set Up Rules
4. In the Name field, delete the current name and enter a new name that reminds you of the camera’s location, such as Garage or Front Door. Camera names are limited to 32 characters. 5. Click or tap Done. Set Up Rules With rules, you can tell your Arlo system what to do in certain situations. - Page 19 ¾ To create a rule: 1. Log in to your Arlo account at arlo.com/login. 2. Click or tap Settings > Rules > Add.
- Page 20 3. Enter a name for the rule. 4. Under IF the following, select the camera to which you want Arlo to apply the rule. 5. Use the slider to adjust the sensitivity of the motion sensor: • Raise the sensitivity percentage to increase the number of videos that Arlo captures.
-
Page 21: Set Up Modes
Set Up Modes A mode is a way to set and control automated actions. With modes, Arlo can be on the lookout for you, even when you are not logged in. Modes start working when triggered by actions that you can define. You can personalize the default modes or add your own. - Page 22 ¾ To personalize an existing mode: 1. Log in to your Arlo account at arlo.com/login. 2. Click or tap Settings > Define a Mode. A list of your modes displays. 3. Click or tap a mode name. A list of available rules displays. 4.
-
Page 23: Create A New Mode
• Push notification. Notifications are pushed to your smartphone. Note: You must install the Arlo app on your smartphone to receive push notifications. • Running Icon. Motion sensors are on. Note: You can use the Motion Detection Test feature to adjust your camera’s motion detection sensitivity. -
Page 24: Manage Modes
4. Name your new mode. 5. Click or tap rules to add them to the mode. Note: Some devices cannot be used multiple times in the same mode; otherwise, they might be given contradictory instructions. Once such a device is used, other rules that use that device are unavailable. -
Page 25: Create A Schedule
4. Select a mode to activate it. If the mode is turned off, it turns on immediately. The mode stays active until you change it or turn the schedule on. If the mode is turned on, it turns off immediately. The mode stays inactive until you change it or turn the schedule on. -
Page 26: Add Friends
¾ To set a schedule: 1. Log in to your Arlo account at arlo.com/login. 2. Click or tap Mode. 3. Make sure that the Schedule switch is set to on. 4. Drag and drop modes to the weekly schedule to add them. 5. - Page 27 ¾ To add a friend to your Arlo Account: 1. Log in to your Arlo account at arlo.com/login. 2. Click or tap Settings. 3. Under Account Settings, click or tap Friends. 4. Click or tap Add. 5. Enter the first name, last name, and email address of the person that you want to add as a friend.
- Page 28 ¾ To edit a friend’s privileges: 1. Log in to your Arlo account at arlo.com/login. 2. Click or tap Settings. 3. Under Account Settings, click or tap Friends. A list of your friends displays with the status of their accounts. 4.
-
Page 29: Change Your Preferences
Change Your Preferences Preferences allow you to control when Arlo notifies you of important events, like when your storage is full or a camera battery is low. You can also tell Arlo how to behave when your cloud storage is full. You can modify the following preferences: • Manage Storage. - Page 30 4. To change the manage storage feature, tap or drag the slider. The slider turns green when the Manage Storage feature is turned on, and turns gray when it is turned off. If you turn on the manage storage feature, choose an option for handling files when storage is full: • To delete files to make room for new recordings if your storage is full, select the delete oldest files to make room radio button.
-
Page 31: View Your Content
3. View Your Content Videos recorded by your Arlo system are stored in the library. You can view your recordings and snapshots, mark them as favorites, and search using the filter. View Recordings and Snapshots Your Arlo system stores recordings and snapshots in the library. In the library, you can view recordings and snapshots by the day or month that they were taken using the calendar. - Page 32 3. Use the arrows on either side of the month to choose a month to view. Days on which a video clip was recorded are highlighted with a green circle. Recordings from the month display to the right of the calendar. 4.
-
Page 33: Use The Filter
Use the Filter You can use the filter function to view a specific set of recordings in your library. ¾ To filter your library: 1. Log in to your Arlo account at arlo.com/login. 2. Click or tap Library > Filter. 3. -
Page 34: Manage Your Subscription
4. Manage Your Subscription Every Arlo system includes free Basic service that offers basic features and functionality. When activating your Arlo system, you can choose between the Basic, Premier, and Elite service plans. Service Levels Upgrading to a paid service level gives you the ability to expand your Arlo system to suit your specific needs. -
Page 35: Renew Your Service Plans
The charge for the new service term displays. 4. Click or tap Change Service. 5. Enter Visa or MasterCard account information by entering the credit card number, expiration date, and CVV security code. 6. Enter the billing name and address. The billing name and address that you enter must match the credit card billing address information. - Page 36 ¾ To downgrade your service plan: 1. Log in to your Arlo account at arlo.com/login. 2. Click or tap Settings > Subscription > Update Service. 3. Select a lower service plan and click or tap CHANGE SERVICE. An email message is sent to you to confirm service level update, the effective date, and any pro‑rated refund amount for any unused portion of the current term.
- Page 37 Cancel Your Paid Service Plan You can cancel your Premier or Elite (annual or monthly) service plan at any time. ¾ To cancel your paid service level: 1. Log in to your Arlo account at arlo.com/login. 2. Click or tap Settings > Subscription > Cancel Service. 3.
- Page 38 Counterfeit and inferior‑quality batteries lack built‑in fault and heat protection, which superior quality batteries contain for added safety. For these reasons, NETGEAR recommends that you use the batteries supplied by NETGEAR with your Arlo wire‑free cameras, or batteries from other high quality, established, well‑known manufacturers such as Panasonic...
- Page 39 • Only use batteries that contain built‑in fault and heat protection. • DO NOT use counterfeit or inferior‑quality batteries in Arlo wire‑free cameras. Use only the batteries supplied by NETGEAR, or those from high quality, established, well‑known manufacturers, such as Panasonic...