Table of Contents
Advertisement
Quick Links
Advertisement
Table of Contents

Related Manuals for AEG FSS64907Z


Summary of Contents for AEG FSS64907Z
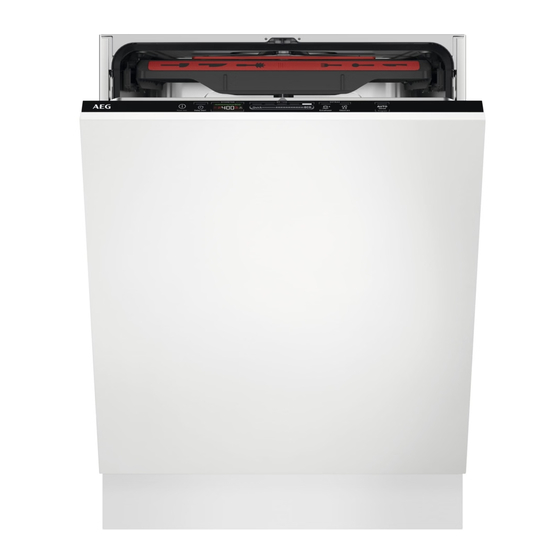
- Page 1 FSS64907Z User Manual Dishwasher USER MANUAL...
-
Page 2: Table Of Contents
13. ENVIRONMENTAL CONCERNS..............27 FOR PERFECT RESULTS Thank you for choosing this AEG product. We have created it to give you impeccable performance for many years, with innovative technologies that help make life simpler – features you might not find on ordinary appliances. Please spend a few minutes reading to get the very best from it. - Page 3 ENGLISH of incorrect installation or usage. Always keep the instructions in a safe and accessible location for future reference. 1.1 Children and vulnerable people safety This appliance can be used by children aged from 8 • years and above and persons with reduced physical, sensory or mental capabilities or lack of experience and knowledge if they have been given supervision or instruction concerning the use of the appliance in a...
-
Page 4: Safety Instructions
Only a qualified person must install this appliance. www.youtube.com/electrolux www.youtube.com/aeg • Remove all the packaging. How to install your AEG/Electrolux • Do not install or use a damaged 60 cm Sliding Door Dishwasher appliance. • Follow the installation instructions supplied with the appliance. - Page 5 ENGLISH • Make sure that the parameters on the • If the water inlet hose is damaged, rating plate are compatible with the immediately close the water tap and electrical ratings of the mains power disconnect the mains plug from the supply.
-
Page 6: Product Description
2.6 Disposal peripherals such as baskets and lids. • Concerning the lamp(s) inside this... -
Page 7: Control Panel
ENGLISH 3.1 Beam-on-Floor Beam-on-Floor is off when the appliance is deactivated. Beam-on-Floor is a light displayed on the floor below the appliance door. When AirDry is activated • When the programme starts, a red during the drying phase, the light comes on and stays on for the projection on the floor may duration of the programme. -
Page 8: Programme Selection
Indicator Description Salt indicator. It is on when the salt container needs refilling. Refer to "Be‐ fore first use". Machine Care indicator. It is on when the appliance needs internal clean‐ ing with the Machine Care programme. Refer to "Care and cleaning". - Page 9 ENGLISH 5.4 Programmes overview Programme Dishwasher Degree of soil Programme phases EXTRAS load Quick Crockery, Fresh • Dishwashing 50 °C • ExtraPower cutlery • Intermediate rinse • GlassCare • Final rinse 45 °C • AirDry Crockery, Fresh, lightly • Dishwashing 60 °C •...
-
Page 10: Basic Settings
Consumption values Water (l) Energy (kWh) Duration (min) 1)2) Programme Quick 10.3 0.610 11.6 0.900 1h 30min 11.9 1.060 2h 40min 12.3 1.240 10.5 0.746 AUTO Sense 12.0 1.230 Machine Care 0.600 1) The pressure and the temperature of the water, the variations of the mains supply, the options, the quantity of dishes and the degree of soil can change the values. - Page 11 ENGLISH Number Settings Values Description Latest pro‐ Enable or disable the automatic selection gramme selec‐ Off (default) of the most recently used programme and tion options. 1) For more details, refer to the information provided in this chapter. How to enter setting mode You can change the basic settings in setting mode.
- Page 12 6.2 The water softener The water softener should be adjusted according to the hardness of the water in The water softener removes minerals your area. Your local water authority can from the water supply, which would have advise you on the hardness of the water a negative effect on the washing results in your area.
- Page 13 ENGLISH automatically released during the final rinse. Water softener lev‐ Amount of water When the rinse aid chamber is empty, the rinse aid indicator turns on. If the drying results are satisfactory while using multi-tablets only, you can deactivate the In case of the high water softener setting, notification for refilling the rinse aid.
-
Page 14: Before First Use
6.6 Key tones CAUTION! Do not try to close the The buttons on the control panel make a appliance door within 2 click sound when you press them. You minutes after automatic can deactivate this sound. opening. This can cause damage to the appliance. -
Page 15: Daily Use
ENGLISH CAUTION! The compartment (A) is for rinse aid only. Do not fill it with detergent. CAUTION! Only use rinse aid designed specifically for dishwashers. 6. Turn the cap of the salt container 1. Press the release button (D) to open clockwise to close the salt container. - Page 16 2. Put the detergent, in powder or By default, options must be tablets, in the compartment (A). activated every time before 3. If the programme has a prewash you start a programme. phase, put a small quantity of If the latest programme...
-
Page 17: Hints And Tips
ENGLISH 8.6 How to cancel the delay programme duration. After closing the door, the appliance continues from the start while the countdown point of interruption. operates If the door is opened for more than 30 seconds Press and hold for about 3 seconds. during the drying phase, the The appliance returns to the programme running programme ends. - Page 18 – Use the recommended dosage of 2. Make sure that the salt and rinse aid the detergent and rinse aid. containers are full. – Make sure that the current level of 3. Start the Quick programme. Do not the water softener agrees with the add detergent and do not put dishes hardness of the water supply.
-
Page 19: Care And Cleaning
ENGLISH • Make sure that the spray arms can 2. First remove items from the lower move freely before you start a basket, then from the upper basket. programme. After the programme is completed, water can still 9.6 Unloading the baskets remain on the inside surfaces of the appliance. - Page 20 10.4 External cleaning • Clean the appliance with a moist soft cloth. • Only use neutral detergents. • Do not use abrasive products, abrasive cleaning pads or solvents. 10.5 Cleaning the filters 4. Wash the filters. The filter system is made of 3 parts.
- Page 21 ENGLISH CAUTION! 3. To install the spray arm back, press it An incorrect position of the downwards. filters can cause bad washing results and damage to the appliance. 10.6 Cleaning the lower spray We recommend to clean the lower spray arm regularly to prevent soil from clogging the holes.
-
Page 22: Troubleshooting
(B) counterclockwise and pull the spray arm downwards. 4. Wash the spray arm under running water. Use a thin pointed tool, e.g. a toothpick, to remove particles of soil from the holes. Run the water through the holes to wash soil particles away from the inside. - Page 23 ENGLISH Problem and alarm code Possible cause and solution You cannot activate the ap‐ • Make sure that the mains plug is connected to the mains pliance. socket. • Make sure that there is no damaged fuse in the fuse box.
- Page 24 Problem and alarm code Possible cause and solution The level of water inside the • Switch the appliance off and on. appliance is too high. • Make sure that the filters are clean. The display shows iF1. • Make sure that the outlet hose is installed at the right height above the floor.
- Page 25 ENGLISH The PNC can be found on the rating WARNING! plate on the appliance door. You can We do not recommend using also check the PNC on the control panel. the appliance until the Before checking the PNC, make sure the problem has been appliance is in the programme selection.
- Page 26 Problem Possible cause and solution Unusual foam during washing. • Use the detergent designed specifically for dishwash‐ ers. • Use a detergent from a different manufacturer. • Do not pre-rinse dishes under running water. Traces of rust on cutlery.
-
Page 27: Technical Information
ENGLISH 12. TECHNICAL INFORMATION Dimensions Width / height / depth (mm) 596 / 818 - 898 / 550 Voltage (V) 220 - 240 Electrical connection Frequency (Hz) Water supply pressure Min. / max. bar (MPa) 0.5 (0.05) / 10 (1.0) Water supply max 60 °C Cold water or hot water... - Page 28 www.aeg.com/shop...