Table of Contents
Advertisement
Quick Links
Advertisement
Table of Contents

Related Manuals for AEG FSS63400P


Summary of Contents for AEG FSS63400P
- Page 1 FSS63400P User Manual Dishwasher USER MANUAL...
-
Page 2: Table Of Contents
13. TECHNICAL INFORMATION................. 22 FOR PERFECT RESULTS Thank you for choosing this AEG product. We have created it to give you impeccable performance for many years, with innovative technologies that help make life simpler features you might not find on ordinary appliances. Please spend a few minutes reading to get the very best from it. - Page 3 ENGLISH manufacturer is not responsible for any injuries or damages that are the result of incorrect installation or usage. Always keep the instructions in a safe and accessible location for future reference. 1.1 Children and vulnerable people safety This appliance can be used by children aged from 8 •...
-
Page 4: Safety Instructions
Do not leave the appliance with the open door • unattended to avoid stepping accidentally onto it. Before any maintenance operation, deactivate the • appliance and disconnect the mains plug from the socket. Do not use high pressure water sprays and/or steam •... - Page 5 ENGLISH • Ensure that there are no visible water instructions on the detergent leaks during and after the first use of packaging. the appliance. • Do not drink and play with the water • The water inlet hose has a safety valve in the appliance.
-
Page 6: Product Description
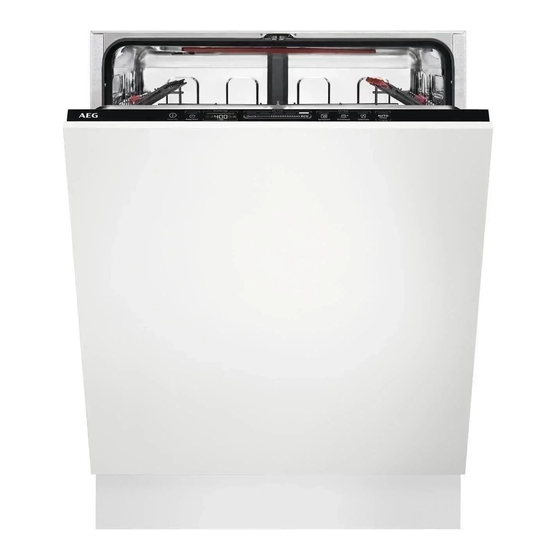
3. PRODUCT DESCRIPTION Upper spray arm Rinse aid dispenser Lower spray arm Detergent dispenser Filters Cutlery basket Rating plate Lower basket Salt container Upper basket Air vent 3.1 TimeBeam The TimeBeam is a display that is shown on the floor below the appliance door. -
Page 7: Control Panel
ENGLISH When AirDry is activated during the drying phase, the projection on the floor may not be completely visible. To check the remaining time of the running programme, look at the control panel display. 4. CONTROL PANEL On/off button TimeSaver button XtraDry button Display Delay button... - Page 8 Programme Degree of soil Programme phases Options Type of load • All • Prewash • ExtraHygiene • Crockery, cut- • Wash from 45 °C to 70 • XtraDry lery, pots and °C pans • Rinses • Dry • Mixed soil •...
-
Page 9: Settings
ENGLISH Water Energy Duration Programme (kWh) (min) 6 - 12 0.5 - 1.2 40 - 150 11 - 13 1.0 - 1.2 130 - 150 11 - 13 1.0 - 1.2 130 - 150 0.6 - 0.8 9 - 11 0.9 - 1.1 220 - 230 10 - 12... - Page 10 The water softener should be adjusted indicators flash according to the hardness of the water in and the display is blank. your area. Your local water authority can advise you on the hardness of the water 6.2 The water softener in your area.
- Page 11 ENGLISH The rinse aid is automatically released • The indicators during the hot rinse phase. are off. When rinse aid chamber is empty, the • The indicator still flashes. rinse aid indicator is turned on notifying • The display shows the current to refill rinse aid.
-
Page 12: Options
How to deactivate AirDry During the drying phase, the door opens automatically Make sure the appliance is in user mode. and remains ajar. 1. Press CAUTION! • The indicators Do not try to close the are off. appliance door within 2 minutes after automatic •... -
Page 13: Before First Use
ENGLISH How to activate XtraDry The washing results are the same as with the normal programme duration. The drying results can decrease. Press . The related indicator comes How to activate TimeSaver 7.3 TimeSaver Press . The related indicator is on. This option increases the pressure and If the option is not applicable to the the temperature of the water. -
Page 14: Daily Use
8.2 How to fill the rinse aid CAUTION! dispenser Only use rinse aid specifically designed for dishwashers. 1. Press the release button (D) to open the lid (C). 2. Pour the rinse aid in the dispenser (A) until the liquid reaches the fill level 'max'. - Page 15 ENGLISH Starting a programme with delay start 1. Set a programme. 2. Press again and again until the display shows the delay time you want to set (from 1 to 24 hours). The delay indicator comes on. 3. Close the appliance door to start the countdown.
-
Page 16: Hints And Tips
Cancelling the programme All buttons are inactive except for the on/off button. Press and hold RESET until the appliance 1. Press the on/off button or wait for is in programme selection mode. the Auto Off function to Make sure that there is detergent in the... -
Page 17: Care And Cleaning
ENGLISH 10.4 Loading the baskets • The filters are clean and correctly installed. • Only use the appliance to wash items • The cap of the salt container is tight. that are dishwasher-safe. • The spray arms are not clogged. •... - Page 18 7. Reassemble the filters (B) and (C). 8. Put back the filter (B) in the flat filter (A). Turn it clockwise until it locks. 2. Remove the filter (C) out of filter (B). 3. Remove the flat filter (A).
-
Page 19: Troubleshooting
ENGLISH • If you regularly use short duration • To maintain the performance of your programmes, these can leave appliance at its best, we recommend deposits of grease and limescale to use monthly a specific cleaning inside the appliance. To prevent this, product for dishwashers. - Page 20 Problem and alarm code Possible cause and solution The appliance stops and • It is normal. It provides optimal cleaning results and en- starts more times during op- ergy savings. eration. The program lasts too long. • Select the TimeSaver option to shorten the program time.
- Page 21 ENGLISH Problem Possible cause and solution Poor drying results. • Tableware has been left for too long inside a closed appliance. • There is no rinse aid or the dosage of rinse aid is not enough. Set the rinse aid dispenser to a higher level. •...
-
Page 22: Technical Information
Problem Possible cause and solution Limescale deposits on the ta- • The level of salt is low, check the refill indicator. bleware, on the tub and on • The cap of the salt container is loose. • Your tap water is hard. Refer to "The water softener". - Page 23 ENGLISH product to your local recycling facility or contact your municipal office.
- Page 24 www.aeg.com/shop...