Table of Contents
Advertisement
Quick Links
Advertisement
Table of Contents

Related Manuals for GE LOGIQ C Series


Summary of Contents for GE LOGIQ C Series
- Page 1 LOGIQ C Series Basic Service Manual Part Number: 5273008-100 Revision: 9...
- Page 3 • VERSUCHEN SIE NICHT, DAS GERä T ZU REPARIEREN, BEVOR DIESES WARNUNG KUNDENDIENST-HANDBUCH NICHT ZU RATE GEZOGEN UND VERSTANDEN (DE) WURDE. • WIRD DIESE WARNUNG NICHT BEACHTET, SO KANN ES ZU VERLETZUNGEN DES KUNDENDIENSTTECHNIKERS, DES BEDIENERS ODER DES PATIENTEN DURCH ELEKTRISCHE SCHLä GE, MECHANISCHE ODER SONSTIGE GEFAHREN KOMMEN.
- Page 4 5273008-100, R LOGIQ C S IRECTION EVISION ERIES ASIC ERVICE ANUAL ESTE MANUAL DE SERVICIO Só LO EXISTE EN INGLé S. • SI ALGú N PROVEEDOR DE SERVICIOS AJENO A GEHC SOLICITA UN IDIOMA QUE NO SEA EL INGLé S, ES RESPONSABILIDAD DEL CLIENTE OFRECER UN SERVICIO DE TRADUCCIó...
- Page 5 ΣΤΟΝ ΑΣΘΕΝΗ ΑΠΟ ΗΛΕΚΤΡΟΠΛΗΞΙΑ, ΜΗΧΑΝΙΚΟΥΣ Ή ΑΛΛΟΥΣ ΚΙΝ∆ΥΝΟΥΣ. EZEN KARBANTARTÁSI KÉZIKÖNYV KIZÁRÓLAG ANGOL NYELVEN ÉRHETŐ EL. • HA A VEVŐ SZOLGÁLTATÓJA ANGOLTÓL ELTÉRŐ NYELVRE TART IGÉNYT, AKKOR A VEVŐ FELELŐSSÉGE A FORDÍTÁS ELKÉSZÍTTETÉSE. • NE PRÓBÁLJA ELKEZDENI HASZNÁLNI A BERENDEZÉST, AMÍG A FIGYELMEZTETÉS KARBANTARTÁSI KÉZIKÖNYVBEN LEÍRTAKAT NEM ÉRTELMEZTÉK.
- Page 6 5273008-100, R LOGIQ C S IRECTION EVISION ERIES ASIC ERVICE ANUAL ÞESSI ÞJÓNUSTUHANDBÓK ER EINGÖNGU FÁANLEG Á ENSKU. • EF ÞJÓNUSTUAÐILI VIÐSKIPTAMANNS ÞARFNAST ANNARS TUNGUMÁLS EN ENSKU, ER ÞAÐ Á ÁBYRGÐ VIÐSKIPTAMANNS AÐ ÚTVEGA ÞÝÐINGU. • REYNIÐ EKKI AÐ ÞJÓNUSTA TÆKIÐ NEMA EFTIR AÐ HAFA SKOÐAÐ OG VIÐVÖRUN SKILIÐ...
- Page 7 5273008-100, R LOGIQ C S IRECTION EVISION ERIES ASIC ERVICE ANUAL šĪ APKALPES ROKASGRĀMATA IR PIEEJAMA TIKAI ANGĻU VALODĀ. • JA KLIENTA APKALPES SNIEDZĒJAM NEPIECIEŠAMA INFORMĀCIJA CITĀ VALODĀ, NEVIS ANGĻU, KLIENTA PIENĀKUMS IR NODROŠINĀT TULKOŠANU. • NEVEICIET APRĪKOJUMA APKALPI BEZ APKALPES ROKASGRĀMATAS BRĪDINĀJUMS IZLASĪŠANAS UN SAPRAŠANAS.
- Page 8 5273008-100, R LOGIQ C S IRECTION EVISION ERIES ASIC ERVICE ANUAL ACEST MANUAL DE SERVICE ESTE DISPONIBIL NUMAI ÎN LIMBA ENGLEZĂ. • DACĂ UN FURNIZOR DE SERVICII PENTRU CLIENŢI NECESITĂ O ALTĂ LIMBĂ DECÂT CEA ENGLEZĂ, ESTE DE DATORIA CLIENTULUI SĂ FURNIZEZE O TRADUCERE.
- Page 9 5273008-100, R LOGIQ C S IRECTION EVISION ERIES ASIC ERVICE ANUAL TA SERVISNI PRIROČNIK JE NA VOLJO SAMO V ANGLEŠČINI. • ČE PONUDNIK SERVISNIH STORITEV ZA STRANKO POTREBUJE NAVODILA V DRUGEM JEZIKU, JE ZA PREVOD ODGOVORNA STRANKA SAMA. • NE POSKUŠAJTE SERVISIRATI OPREME, NE DA BI PREJ PREBRALI IN OPOZORILO RAZUMELI SERVISNI PRIROČNIK.
- Page 10 5273008-100, R LOGIQ C S IRECTION EVISION ERIES ASIC ERVICE ANUAL BU SERVİS KILAVUZU YALNIZCA İNGİLİZCE OLARAK SAĞLANMIŞTIR. • EĞER MÜŞTERİ TEKNİSYENİ KILAVUZUN İNGİLİZCE DIŞINDAKİ BİR DİLDE OLMASINI İSTERSE, KILAVUZU TERCÜME ETTİRMEK MÜŞTERİNİN SORUMLULUĞUNDADIR. DİKKAT • SERVİS KILAVUZUNU OKUYUP ANLAMADAN EKİPMANLARA MÜDAHALE (TR) ETMEYİNİZ.
- Page 11 5273008-100, R LOGIQ C S IRECTION EVISION ERIES ASIC ERVICE ANUAL (ZH-CN) (KO)
- Page 12 GE personnel. In performing all electrical work on these products, GE will use its own specially trained field engineers. All of GE’s electrical work on these products will comply with the requirements of the applicable electrical codes.
- Page 13 If you are a GE employee or a customer who has entered into such a license agreement with GE to use this proprietary software, you are authorized to use this Material according to the conditions stated in your license agreement.
- Page 14 5273008-100, R LOGIQ C S IRECTION EVISION ERIES ASIC ERVICE ANUAL Revision History Revision Date Reason for change June 10,2008 Initial Release October 20,2008 Add new spare parts in Chapter 9 January 21,2009 Add CKD information February 02,2010 Update Korean Rating Plate May 22,2010 Update the procedure for unpacking the equipment in Chapter 3 July 13,2010...
-
Page 15: Table Of Contents
5273008-100, R LOGIQ C S IRECTION EVISION ERIES ASIC ERVICE ANUAL Table of Contents CHAPTER 1 Introduction Overview ............1 - 1 Purpose of Chapter 1 . - Page 16 5273008-100, R LOGIQ C S IRECTION EVISION ERIES ASIC ERVICE ANUAL CHAPTER 2 Site Preparations Overview ............2 - 1 Purpose of chapter 2 .
- Page 17 5273008-100, R LOGIQ C S IRECTION EVISION ERIES ASIC ERVICE ANUAL CHAPTER 3 System Setup Overview............3 - 1 Purpose of Chapter 3 .
- Page 18 5273008-100, R LOGIQ C S IRECTION EVISION ERIES ASIC ERVICE ANUAL CHAPTER 4 Functional Checks Overview ............4 - 1 Purpose for Chapter 4 .
- Page 19 5273008-100, R LOGIQ C S IRECTION EVISION ERIES ASIC ERVICE ANUAL CHAPTER 5 Components and Functions (Theory) Overview............5 - 1 Purpose of Chapter 5 .
- Page 20 5273008-100, R LOGIQ C S IRECTION EVISION ERIES ASIC ERVICE ANUAL CHAPTER 6 Service Adjustments Overview ............6 - 1 Purpose of this chapter 6 .
- Page 21 PC Diagnostics (Interactive Tests) ....... 7 - 11 Restart LOGIQ C Series After Diagnostics ......7 - 11 Network Configuration .
- Page 22 5273008-100, R LOGIQ C S IRECTION EVISION ERIES ASIC ERVICE ANUAL CHAPTER 8 Replacement Procedures Overview ............8 - 1 Purpose of Chapter 8 .
- Page 23 5273008-100, R LOGIQ C S IRECTION EVISION ERIES ASIC ERVICE ANUAL CHAPTER 9 Renewal Parts Overview............9 - 1 Purpose of Chapter 9 .
- Page 24 Standard GE Tool Kit ........
-
Page 25: Overview
8.) - Replacement Procedures: Provides disassembly procedures and reassembly procedures for all changeable Field Replaceable Units (FRU). 9.) - Renewal Parts: Contains a complete list of field replaceable parts for the LOGIQ C Series. 10.) - Care & Maintenance: Provides periodic maintenance procedures for the LOGIQ C Series. -
Page 26: Typical Users Of The Basic Service Manual
Contractors (Some parts of Chapter 2 - Site Preparation) 1-1-4 Purpose of Operator Manual(s) The Operator Manual(s) should be fully read and understood before operating the LOGIQ C Series and also kept near the unit for quick reference. NOTE: Probe information displayed on screen does not necessarily reflect the probes available on your ultrasound system. - Page 27 5273008-100, R LOGIQ C S IRECTION EVISION ERIES ASIC ERVICE ANUAL 1-1-5 LOGIQ C2/C3/C5 Models covered by this manual (cont’d) Table 1-4 LOGIQ C3 Model Designations Part Number Description 52711114 LOGIQ C5 Console for Europe 5310390 LOGIQ C5 Console for China 5310391 LOGIQ C5 Pro Console for China 5269046...
-
Page 28: Important Conventions
5273008-100, R LOGIQ C S IRECTION EVISION ERIES ASIC ERVICE ANUAL Section 1-2 Important Conventions 1-2-1 Conventions Used in Book Icons Pictures, or icons, are used wherever they reinforce the printed message. The icons, labels and conventions used on the product and in the service information are described in this chapter. Safety Precaution Messages Various levels of safety precaution messages may be found on the equipment and in the service information. -
Page 29: Standard Hazard Icons
5273008-100, R LOGIQ C S IRECTION EVISION ERIES ASIC ERVICE ANUAL 1-2-2 Standard Hazard Icons Important information will always be preceded by the exclamation point contained within a triangle, as seen throughout this chapter. In addition to text, several different graphical icons (symbols) may be used to make you aware of specific types of hazards that could cause harm. -
Page 30: Safety Considerations
1-3-2 Human Safety Servicing should be performed by authorized personnel only. Only personnel who have participated in a LOGIQ C Series Training are authorized to service the equipment. 1-3-3 Mechanical Safety... -
Page 31: Electrical Safety
5273008-100, R LOGIQ C S IRECTION EVISION ERIES ASIC ERVICE ANUAL 1-3-3 Mechanical Safety (cont’d) NOTE: Special care should be taken when transporting the unit in a vehicle: • Secure the unit in an upright position. • Lock the wheels (brake) 1-3-4 Electrical Safety To minimize shock hazard, the equipment chassis must be connected to an electrical ground. -
Page 32: Dangerous Procedure Warnings
5273008-100, R LOGIQ C S IRECTION EVISION ERIES ASIC ERVICE ANUAL 1-3-6 Dangerous Procedure Warnings Warnings, such as the examples below, precede potentially dangerous procedures throughout this manual. Instructions contained in the warnings must be followed. DANGEROUS VOLTAGES, CAPABLE OF CAUSING DEATH, ARE PRESENT DANGER IN THIS EQUIPMENT. -
Page 33: Emc, Emi, And Esd
1-4-2 CE Compliance The LOGIQ C Series unit conforms to all applicable conducted and radiated emission limits and to immunity from electrostatic discharge, radiated and conducted RF fields, magnetic fields and power line transient requirements. -
Page 34: Customer Assistance
Service 1-800-321-7937 Latin America Application Support 1-262-524-5698 Europe (OLC- EMEA) OLC - EMEA GE Ultraschall Deutschland GmbH Phone: +49 (0)212 2802 - 652 Beethovenstraße 239 +33 1 3083 1300 Postfach 11 05 60, D-42655 Solingen Fax: +49 (0) 212 2802 - 431... -
Page 35: System Manufacturer
ANUAL 1-5-2 System Manufacturer Table 1-8 System Manufacturer Manufacturer FAX Number GE Medical Systems (China) Co., Ltd. TEL: +86 510-85225888 No.19, Changjiang Road, Wuxi National Hi-Tech Development Zone, FAX: +86 510-85226688 Jiangsu, P.R. China 214028 1-5-3 Factory Site Table 1-9... - Page 36 5273008-100, R LOGIQ C S IRECTION EVISION ERIES ASIC ERVICE ANUAL This page was intentionally left blank. 1-12 Section 1-5 - Customer Assistance...
-
Page 37: Site Preparations
5273008-100, R LOGIQ C S IRECTION EVISION ERIES ASIC ERVICE ANUAL Chapter 2 Site Preparations Section 2-1 Overview 2-1-1 Purpose of chapter 2 This chapter provides the information required to plan and prepare for the installation of LOGIQ C Series.Included are descriptions of the facility and electrical needs to be met by the purchaser of the unit. -
Page 38: General Console Requirements
Electrical Requirements NOTE: GE Healthcare requires a dedicated power and ground for the proper operation of its Ultrasound equipment. This dedicated power shall originate at the last distribution panel before the system. Sites with a mains power system with defined Neutral and Live: The dedicated line shall consist of one phase, a neutral (not shared with any other circuit), and a full size ground wire from the distribution panel to the Ultrasound outlet. - Page 39 2-2-2-5 Unit Power Plug If the unit arrives without the power plug, or with the wrong plug, you must contact your GE dealer or the installation engineer must supply what is locally required. 2-2-2-6 Power Stability Requirements Voltage drop-out Max 10 ms.
-
Page 40: Emi Limitations
Ultrasound machines are susceptible to Electromagnetic Interference (EMI) from radio frequencies, magnetic fields, and transient in the air wiring. They also generate EMI. The LOGIQ C Series complies with limits as stated on the EMC label. However there is no guarantee that interface will not occur in a particular installation. -
Page 41: Scan Probe Environmental Requirements
5273008-100, R LOGIQ C S IRECTION EVISION ERIES ASIC ERVICE ANUAL 2-2-4 Scan Probe Environmental Requirements Operation:10° to 40° C Storage:-10° to 50° C NOTE: Temperature in degrees C. Conversion to Degrees F = (Degrees C * (9/5) + 32). SYSTEMS AND ELECTRONIC PROBES ARE DESIGNED FOR STORAGE TEMPERATURES OF NOTICE -10 TO + 60 degrees C. -
Page 42: Facility Needs
All electrical work on these product must comply with the requirements of applicable electrical codes. The purchaser of GE equipment must only utilize qualified personnel to perform electrical servicing on the equipment. -
Page 43: Required Features
2-3-2 Required Features NOTE: GE Medical Systems requires a dedicated power and ground for the proper operation of its Ultrasound equipment. This dedicated power shall originate at the last distribution panel before the system. Sites with a mains power system with defined Neutral and Live: The dedicated line shall consist of one phase, a neutral (not shared with any other circuit), and a full size ground wire from the distribution panel to the Ultrasound outlet. -
Page 44: Recommended And Alternate Ultrasound Room Layout
EXTERNAL PERIPHERALS DEDICATED POWER OUTLETS FOOT LOGIQ 5 CONSOLE DEDICATED ANALOG TELEPHONE STOOL LINE FOR CONNECTION TO INSITE EXAMINARION GE CABINET TABLE 24 IN. FOT SOFTWARE 76 IN. (61 CM) AND MANUALS (193 CM) DOOR 30 IN. (76 CM) An 8 by 10 foot Minimal Floor Plan... -
Page 45: Networking Pre-Installation Requirements
Information must include: • A host name, local port number, AE Title, IP address and Net Mask for the LOGIQ C Series. • The IP addresses for the default gateway and other routers at the site for ROUTING INFORMATION. - Page 46 5273008-100, R LOGIQ C S IRECTION EVISION ERIES ASIC ERVICE ANUAL 2-3-4-4 DICOM Option Pre-installation Requirements (cont’d) LOGIQ C IP Address Local Port Host Name AE Title Net Mask ROUTING INFORMATION GATEWAY IP Addresses Destination IP Addresses Default ROUTER1 ROUTER2 ROUTER3 DICOM APPLICATION INFORMATION NAME...
-
Page 47: System Setup
How to prepare the facility and unit of the actual installation, and how to check and test the unit and external peripherals for electrical safety are included in this procedure. Also included LOGIQ C Series in this section are guidelines for transporting the unit to a new site. -
Page 48: Setup Reminders
DICOM Option Dependant on the amount of configuration The LOGIQ C Series has been designed to be installed and checked out by an experienced service technician in approximately 1 hour. LOGIQ C Series consoles with optional equipment may take slightly longer. -
Page 49: Installation Warnings
3-2-2 Installation Warnings 1.) Since the LOGIQ C Series weighs approximately 75 kg without options, preferably two people should unpack it. Two people are also preferable for installing any additional bulky items. 2.) There are no operator serviceable components. To prevent shock, do not remove any covers or panels. -
Page 50: Safety Reminders
5273008-100, R LOGIQ C B IRECTION EVISION ASIC ERIES ERVICE ANUAL 3-2-3 Safety Reminders WHEN USING ANY TEST INSTRUMENT THAT IS CAPABLE OF OPENING THE DANGER AC GROUND LINE (I.E., METER’S GROUND SWITCH IS OPEN), DON’T TOUCH THE UNIT! Two people should unpack the unit because of its weight. Two people are required whenever CAUTION a part weighing 19kg (35 lb.) or more must be lifted. -
Page 51: Receiving And Unpacking The Equipment
Do not lift the unit by the Keyboard. Equipment damage may result. CAUTION The crate with the LOGIQ C Series weighs approximately 75kg. Be prepared for a sudden shift CAUTION of weight as the unit is removed from its base (pallet) Unpacking the the equipment 1.) Remove all the strapping tapes from the packing box. -
Page 52: Moving Into Position
To avoid injury by tipping over. Set the monitor to the lowest position before moving. In general, a single adult can move the LOGIQ C Series along an even surface with no steep grades. At least two people should move the machine when large humps, grooves, or grades will be encountered. -
Page 53: Preparing For Installation
System Voltage Settings Verify that Docking Cart is set to the correct voltage. The Voltage settings for the LOGIQ C Series is found on a label to the right of the Power switch and External I/O, on the rear of the system. -
Page 54: Completing The Installation
5273008-100, R LOGIQ C B IRECTION EVISION ASIC ERIES ERVICE ANUAL Section 3-5 Completing the Installation 3-5-1 Power On / Boot Up NOTE: After turning off a system, wait at least ten seconds before turning it on again. The system may not be able to boot if power is recycled too quickly. -
Page 55: Transducer Connection
5273008-100, R LOGIQ C B IRECTION EVISION ASIC ERIES ERVICE ANUAL 3-5-2-1 Back-end Processor Power Down (cont’d) 2.) The System-Exit window is displayed. Figure 3-5 System Exit Window 3.) Using the Trackball or Select key, select Shutdown. 4.) The shutdown process takes a few seconds and is complete when the power status LED is turned amber. -
Page 56: System Configuration
System Configuration 3-6-1 System Specifications 3-6-1-1 Physical Dimensions The physical dimensions of the LOGIQ C Series unit are summarized in Table 3-4 on page 3-10 The Size of LOGIQ C Series. Table 3-4 Physical Dimensions of LOGIQ C Series Height... -
Page 57: On-Board Optional Peripherals
5273008-100, R LOGIQ C B IRECTION EVISION ASIC ERIES ERVICE ANUAL 3-6-3 On-Board Optional Peripherals Table 3-7 List of Optional Peripherals Device Manufacturer Model Video Signal B/W Printer SONY UP-D897MD B/W Printer SONY UP-D257MD HP Printer HP 470b Officejet USB Memory SanDisk SanDisk 2G USB Memory... -
Page 58: Connecting Cables
5122305 For USB Printer 3-6-5 Peripherals/Accessories Connector Panel LOGIQ C Series peripherals and accessories can be properly connected using the side connector panel. 3-6-5-1 Rear Panel Connector Located on the rear panel are Network port, 2 USB port, S-Video Out, VGA, Audio Out, Composite Out. - Page 59 5273008-100, R LOGIQ C B IRECTION EVISION ASIC ERIES ERVICE ANUAL 3-6-5-2 Left Panel Connector 1 USB port is Located on the left panel. Figure 3-7 Left Connector Panel 1.) 1 USB Ports (Printers, Footswitch, etc) 3-6-5-3 Printer Box Rear Panel connector Figure 3-8 Printer Box Rear Connector Panel 1.) 1 USB Ports only for B/W Printer NOTE:...
- Page 60 5273008-100, R LOGIQ C B IRECTION EVISION ASIC ERIES ERVICE ANUAL 3-6-5-4 Pin assignment for each connector Table 3-9 Pin Assignments of External VGA Pin No. Signal Pin No. Signal GREEN BLUE Table 3-10 Pin Assignments of USB Pin No. Signal Pin No.
- Page 61 5273008-100, R LOGIQ C B IRECTION EVISION ASIC ERIES ERVICE ANUAL 3-6-5-5 Connect Peripherals A.) Connect B/W printer to the system. B/W Printer can be properly connected using USB Ports. Figure 3-9 Connect B/W printer to the system B.) Connect UP-D23 color printer to the system. (Only supported by LOGIQ C5/C5 PRO) UP-D23 Color Printer can be properly connected using USB Ports.
- Page 62 5273008-100, R LOGIQ C B IRECTION EVISION ASIC ERIES ERVICE ANUAL 3-6-5-5 Connect Peripherals (cont’d) C.) Connect Foot Switch to the system. Foot Switch can be properly connected using USB Ports. Figure 3-11 Connect Foot Switch to the system D.) Connect the USB Memory to the system. The USB Memory can be properly connected using USB ports.
- Page 63 5273008-100, R LOGIQ C B IRECTION EVISION ASIC ERIES ERVICE ANUAL 3-6-5-5 Connect Peripherals (cont’d) F.) Connect the USB HDD to the system. The USB Harddisk can be properly connected using USB ports. Figure 3-14 USB Hard Disk Connection G.) Connect HP 470b Officejet printer to the system. HP 470b Officejet Printer can be properly connected using USB Ports Figure 3-15 HP 470b Officejet printer Connection Chapter 3 System Setup...
-
Page 64: Available Probes
ASIC ERIES ERVICE ANUAL 3-6-6 Available Probes See in specification in the LOGIQ C Series User Reference Manual for Probes and intended use. Table 3-14 List of Probes on LOGIQ C Series Probe Name Material of Headshell Area of Using... -
Page 65: Connectivity Installation Worksheet
5273008-100, R LOGIQ C B IRECTION EVISION ASIC ERIES ERVICE ANUAL Section 3-8 Connectivity Installation Worksheet Site System Information Comments: Floor: Site: Dept: Room: LOGIQ SN: Type: REV: CONTACT INFORMATION Name Title Phone E-Mail Address TCP/IP Settings Name - AE Title: IP Settings Remote Archive Setup IP Address:... -
Page 66: Loading Base Image Software
5273008-100, R LOGIQ C B IRECTION EVISION ASIC ERIES ERVICE ANUAL Section 3-9 Loading Base Image Software Refer to Section 8-3 "Loading Base Image Software" on page 8-3. 3 - 20 Section 3-9 - Loading Base Image Software... -
Page 67: Software Version Check Out
Section 3-10Software Version check out 3-10-1 Functional Check-out 1.) Power on LOGIQ C Series scanner and wait until system booting to main screen. 2.) Press UTILITY key on control panel. 3.) Choose the About button on the right. Figure 3-16 About and Software version 4.) Check whether “Software version”... -
Page 68: Paperwork
User Manual(s) User Check that the correct User Manual(s) for the system and software revision, is included with the installation. Specific language versions of the User Manual may also be available. Check with your GE Sales Representative for availability. 3 - 22... -
Page 69: Overview
Section 4-1 Overview 4-1-1 Purpose for Chapter 4 This chapter provides procedures for quickly checking major functions of the LOGIQ C Series console, diagnostics by using the built-in service software, and power supply. Table 4-1 Contents in Chapter 4 Section... -
Page 70: General Procedure
5273008-100, R LOGIQ C S IRECTION EVISION ERIES ASIC ERVICE ANUAL Section 4-3 General Procedure SYSTEM REQUIRES ALL COVERS CAUTION Operate this unit only when all board covers and frame panels are securely in place. The covers are required for safe operation, good system performance and cooling purposes. 4-3-1 Power On/Boot Up After connect the system to the electrical supply, the power is applied to the scanner. - Page 71 5273008-100, R LOGIQ C S IRECTION EVISION ERIES ASIC ERVICE ANUAL 4-3-2-1 Back-end Processor Power Down (cont’d) 2.) The System-Exit window is displayed. Figure 4-2 System Exit Window 3.) Using the Trackball or Select key, select Shutdown. 4.) The shutdown process takes a few seconds and the power off sequence is complete when the power status LED is turned amber.
-
Page 72: Archiving And Loading Presets
5273008-100, R LOGIQ C S IRECTION EVISION ERIES ASIC ERVICE ANUAL 4-3-3 Archiving and Loading Presets NOTE: Always save presets before any software reload. This ensures the presets loaded after the software reload are as up–to–date as possible. NOTE: The system may crash if use a DVD for Archive/Backup/EZBackup/Restore, so always use a CD-R or USB HDD for Archive/Backup/EZBackup/Restore. -
Page 73: Adjusting The Display Monitor
5273008-100, R LOGIQ C S IRECTION EVISION ERIES ASIC ERVICE ANUAL 4-3-3-2 Loading Presets from an CD-R disk (or USB memory device) 1.) Insert the CD-R disk with the archived Presets into the DVD-RW. 2.) Access to the Utility Menu, and select System. The Restore sheet will be shown on the LCD display. 3.) Select the item to restore either from Resource Files. -
Page 74: System Features
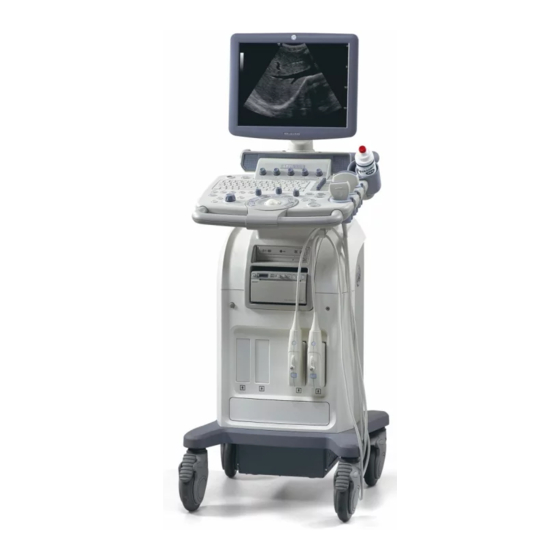
5273008-100, R LOGIQ C S IRECTION EVISION ERIES ASIC ERVICE ANUAL 4-3-5 System Features 4-3-5-1 Control Panel Figure 4-4 Control Panel Tour 1.) Power On/Off Switch 2.) Probe Key 3.) Top Menu Controls 4.) Keyboard 5.) Preset, Comment, Harmonics keys 6.) Patient key 7.) Mode keys: B-Mode, M-Mode, PW-Mode, CF Mode. - Page 75 ASIC ERVICE ANUAL 4-3-5-2 LOGIQ C Series SoftMenu Key Tour 1.) Top Menu Controls op Menu Controls Figure 4-5 SoftMenu Key Tour 2.) Sub menu Controls: Activates Sub Menu for Modes and toggles/changes functions A.) Press F5 on the keyboard to activate Sub Menu, B.) Use the Direction keys to toggle/change functions...
- Page 76 13. Imaging Parameters by Mode (current mode highlighted). 3. Acoustic Output Readout, 14. Focal Zone. 4. GE Symbol: Probe Orientation Marker. Coincides with a 15. Trackball Functionality Status: Scroll, M&A (Measurement probe orientation marking on the probe. and Analysis), Position, Size, Scan Area Width and Tilt.
-
Page 77: B Mode Checks
5273008-100, R LOGIQ C S IRECTION EVISION ERIES ASIC ERVICE ANUAL 4-3-6 B Mode Checks 4-3-6-1 Preparations 1.) Connect one of the probes listed in 3-6-6 "Available Probes" on page 3-18, in Chapter 3 Installation to the System probe connector. 2.) Turn ON the scanner (if it isn’t turned on already). - Page 78 5273008-100, R LOGIQ C S IRECTION EVISION ERIES ASIC ERVICE ANUAL 4-3-6-2 B Mode OP Panel Controls Table 4-3 B Mode Control Panel Controls Step Task Expected Result(s) Press B Mode key B Mode Starts Adjust the field of view. Increasing the depth may view larger/deeper structures rates, and decreasing the depth may view near the skin Adjust Depth...
- Page 79 5273008-100, R LOGIQ C S IRECTION EVISION ERIES ASIC ERVICE ANUAL 4-3-6-3 B Mode Softmenu Table 4-4 B Mode Softmenu Step Task Expected Result(s) Enables gray scale image colorization. To Activate Colorize deactivate, reselect a Gray Map. Edge Enhance brings out subtle tissue differences and boundaries by enhancing the Adjust Edge Enhance gray scale differences corresponding to the...
-
Page 80: M Mode Controls
5273008-100, R LOGIQ C S IRECTION EVISION ERIES ASIC ERVICE ANUAL 4-3-7 M Mode Controls 4-3-7-1 Preparations 1.) Connect one of the probes listed in 3-6-6 "Available Probes" on page 3-18, in Chapter 3 Installation to the System probe connector. 2.) Turn ON the scanner (if it isn’t turned on already). - Page 81 5273008-100, R LOGIQ C S IRECTION EVISION ERIES ASIC ERVICE ANUAL 4-3-7-2 M Mode OP Panel Controls Table 4-5 M Mode OP Panel Controls Step Task Expected Result(s) Press M Mode key M Mode Starts Controls the amount of echo information displayed in an image.
- Page 82 5273008-100, R LOGIQ C S IRECTION EVISION ERIES ASIC ERVICE ANUAL 4-3-7-3 M Mode Softmenu Table 4-6 M Mode Softmenu Step Task Expected Result(s) Changes the speed at which the time line is Adjust Sweep Speed swept. The following speed values are available, 1, 2, 3, 4, 6, 8, 12, 16.
-
Page 83: Doppler Mode Checks
5273008-100, R LOGIQ C S IRECTION EVISION ERIES ASIC ERVICE ANUAL 4-3-8 Doppler Mode Checks NOTE: Doppler Mode is not supported by LOGIQ C2/C2 PRO. 4-3-8-1 Preparations 1.) Connect one of the probes listed in 3-6-6 "Available Probes" on page 3-18, in Chapter 3 Installation to the System probe connector. - Page 84 5273008-100, R LOGIQ C S IRECTION EVISION ERIES ASIC ERVICE ANUAL 4-3-8-2 Doppler Mode OP Panel Controls Table 4-7 Doppler Mode OP Panel Controls Step Task Expected Result(s) Press PW Mode key PW Mode Starts Amplifies the overall strength of the echoes processed in the Color Flow window.
- Page 85 5273008-100, R LOGIQ C S IRECTION EVISION ERIES ASIC ERVICE ANUAL 4-3-8-3 Doppler Mode OP Panel Controls Table 4-8 Doppler Mode Touch Panel Controls Step Task Expected Result(s) Selects a level below which echoes will not be amplified (an echo must have a certain Adjust Rejection minimum amplitude before it will be processed).
- Page 86 5273008-100, R LOGIQ C S IRECTION EVISION ERIES ASIC ERVICE ANUAL Table 4-8 Doppler Mode Touch Panel Controls Step Task Expected Result(s) Velocity scale determines pulse repetition frequency. If the sample volume gate range Change PRF (Pulse Repetition Frequencies) exceeds single gate PRF capability, the - (Wall Filter) system automatically switches to high PRF mode.
-
Page 87: Color Flow Mode Checks
5273008-100, R LOGIQ C S IRECTION EVISION ERIES ASIC ERVICE ANUAL 4-3-9 Color Flow Mode Checks NOTE: Color Flow Mode only support by LOGIQ C5/C5 PRO 4-3-9-1 Preparations 1.) Connect one of the probes listed in 3-6-6 "Available Probes" on page 3-18, in Chapter 3 Installation to the System probe connector. - Page 88 5273008-100, R LOGIQ C S IRECTION EVISION ERIES ASIC ERVICE ANUAL 4-3-9-2 Color Flow Mode OP Panel Controls Table 4-9 Color Flow Mode OP Panel Controls Step Task Expected Result(s) Press CFM-Mode key CFM Mode Starts Amplifies the overall strength of the echoes processed in the Color Flow window.
- Page 89 5273008-100, R LOGIQ C S IRECTION EVISION ERIES ASIC ERVICE ANUAL 4-3-9-3 Color Flow Mode Softmenu Key Table 4-10 Color Flow Mode Softmenu Key Step Task Expected Result(s) Threshold assigns the gray scale level at Threshold which color information stops. Controls the number of samples gathered for Packet Size a single color flow vector.
- Page 90 5273008-100, R LOGIQ C S IRECTION EVISION ERIES ASIC ERVICE ANUAL Table 4-10 Color Flow Mode Softmenu Key Step Task Expected Result(s) Optimizes image quality and allows user to reduce beam intensity. 10% increments Power output between 0-100%. Values greater than 0.1 are displayed.
-
Page 91: Basic Measurements
5273008-100, R LOGIQ C S IRECTION EVISION ERIES ASIC ERVICE ANUAL 4-3-10 Basic Measurements NOTE: The following instructions assume that you first scan the patient and then press Freeze. 4-3-10-1 Distance and Tissue Depth Measurements 1.) Press MEASURE once; an active caliper displays. 2.) To position the active caliper at the start point (distance) or the most anterior point (tissue depth), move the TRACKBALL. -
Page 92: Probe/Connectors Usage
5273008-100, R LOGIQ C S IRECTION EVISION ERIES ASIC ERVICE ANUAL 4-3-10-3 Worksheets Measurement/Calculation worksheets are available to display and edit measurements and calculations. There are generic worksheets as well as Application specific worksheets. The worksheets are selected from the Measurement Touch Panel. 4-3-10-4 Report Pages Measurements/Calculations that are included on the worksheet can also be displayed on Report Pages. -
Page 93: Image Management (Qg)
Adjust the Frame by Frame up/down Two-Button Softkey to move through CINE memory one frame at a time. 4-3-13 Image Management (QG) For Image Management functionality refer to the LOGIQ C Series Quick Guide. It talks about several topics: • Clipboard* •... -
Page 94: Backup And Restore Database, Preset Configurations And Images
5273008-100, R LOGIQ C S IRECTION EVISION ERIES ASIC ERVICE ANUAL 4-3-14 Backup and Restore Database, Preset Configurations and Images 4-3-14-1 Formatting Media NOTE: The system may crash if use a DVD for Archive/Backup/EZBackup/Restore, so always use a CD-R or USB HDD for Archive/Backup/EZBackup/Restore. DVD only can be used for upgrade. 1.) To format the backup media, select the UTILITY button on the Keyboard. - Page 95 4.) On the LCD display, select BACKUP/RESTORE. NOTE: If you are not logged in as GE Service or with administrator privileges, the Operator Login window is displayed. Log on with administrator privileges. 5.) In the Backup list, select Patient Archive, Report Archive and User Defined Configuration.
- Page 96 5273008-100, R LOGIQ C S IRECTION EVISION ERIES ASIC ERVICE ANUAL 4-3-14-3 Restore System Presets and Configurations The restore procedure overwrites the existing database on the local hard drive. Make sure to insert CAUTION the correct CD (or USB memory device). 1.) Insert the Backup/Restore CD (or USB memory device) into the drive.
- Page 97 5273008-100, R LOGIQ C S IRECTION EVISION ERIES ASIC ERVICE ANUAL 4-3-14-4 Archiving Images 1.) Insert the archive media. To format the archive media, select the Utility button on the Keyboard. 2.) Select Connectivity, then Removable Media. 3.) Format the CD. Verify the format if desired. 4.) Images will be moved from the hard drive by date.
- Page 98 5273008-100, R LOGIQ C S IRECTION EVISION ERIES ASIC ERVICE ANUAL 4-3-14-4 Archiving Images (cont’d) 7.) Press PATIENT and set the Dataflow to store images directly to CD-ROM. 8.) From the image screen, press EZBACKUP/MOVE. The Move Images pop-up appears. Figure 4-22 Image Archive Move Pop-up Menu 9.) Press Next on pop-up message.
- Page 99 5273008-100, R LOGIQ C S IRECTION EVISION ERIES ASIC ERVICE ANUAL 4-3-14-4 Archiving Images (cont’d) 11.)Press Finish after Backup/Move complete. Figure 4-24 EZBackup/Move complete All databases, presets and images should now be saved to removable media. 4-3-14-5 Full Backup 1.) Connect the USB HDD to system. 2.) Select Backup/Restore, then Emergency Repair Disk.
- Page 100 5273008-100, R LOGIQ C S IRECTION EVISION ERIES ASIC ERVICE ANUAL 4-3-14-5 Full Backup (cont’d) 4.) Return to scan mode. Press Ctrl + B, the Emergency Disk Making window pop-up appears. Figure 4-26 Emergency Disk Making Pop-up Menu 5.) Press Next on pop-up message. 6.) A storage information message appears.
- Page 101 5273008-100, R LOGIQ C S IRECTION EVISION ERIES ASIC ERVICE ANUAL 4-3-14-5 Full Backup (cont’d) 7.) Press Finish after Emergency Disk Making complete. Figure 4-28 Emergency Disk Making Complete All databases, presets and images should now be saved to Emergency Disk. 8.) Press Ctrl + R, Emergency Disk Recovery window pop-up appear.
- Page 102 5273008-100, R LOGIQ C S IRECTION EVISION ERIES ASIC ERVICE ANUAL 4-3-14-5 Full Backup (cont’d) 10.)A recovery information message appears. Press Next to continue. Figure 4-30 Recovery Information message 11.)Press Finish after Emergency Disk Recovery complete. Figure 4-31 Emergency Disk Recovery Complete 4 - 34 Section 4-3 - General Procedure...
-
Page 103: Software Configuration Checks
5273008-100, R LOGIQ C S IRECTION EVISION ERIES ASIC ERVICE ANUAL Section 4-4 Software Configuration Checks Table 4-11 Software Configuration Checks Step Task to do Expected Result(s) Check Date and Time setting Date and Time are correct Check that Location (Hospital Name) is correct Location Name is correct Check Language settings Desired Language is displayed... - Page 104 5273008-100, R LOGIQ C S IRECTION EVISION ERIES ASIC ERVICE ANUAL This page was intentionally left blank. 4 - 36 Section 4-5 - Peripheral Checks...
-
Page 105: Components And Functions (Theory)
ERVICE ANUAL Chapter 5 Components and Functions (Theory) Section 5-1 Overview 5-1-1 Purpose of Chapter 5 This chapter explains LOGIQ C Series' system concepts, component arrangement, and subsystem function. Table 5-1 Contents in Chapter 5 Section Description Page Number "Overview"... -
Page 106: System Diagram
5273008-100, R LOGIQ C S IRECTION EVISION ERIES ASIC ERVICE ANUAL Section 5-2Block Diagram 5-2-1 System Diagram Figure 5-1 LOGIQ C Series System Diagram 5 - 2 Chapter 5 Components and Functions (Theory) -
Page 107: Software Diagram
5273008-100, R LOGIQ C S IRECTION EVISION ERIES ASIC ERVICE ANUAL 5-2-2 Software Diagram Figure 5-2 LOGIQ C Series Software Diagram Chapter 5 Components and Functions (Theory) 5 - 3... -
Page 108: Common Service Platform
5273008-100, R LOGIQ C S IRECTION EVISION ERIES ASIC ERVICE ANUAL Section 5-3 Common Service Platform 5-3-1 Introduction The Service Platform contains a set of software modules that are common to all PC backend ultrasound and cardiology systems. The Common Service Platform will increase service productivity and reduce training and service costs. - Page 109 5273008-100, R LOGIQ C S IRECTION EVISION ERIES ASIC ERVICE ANUAL Chapter 6 Service Adjustments Section 6-1 Overview 6-1-1 Purpose of this chapter 6 This section describes how to test and adjust the scanner. These tests are optional. You may use them to check the system for errors.
- Page 110 GE H EALTHCARE 5273008-100, R LOGIQ C S IRECTION EVISION ERIES ASIC ERVICE ANUAL Section 6-2 Monitor Adjustments 6-2-1 Adjustments Procedures To adjust the brightness: For LOGIQ C2/C2 PRO: Adjust the LCD monitor’s button, located the right side of the LCD Monitor.
-
Page 111: Diagnostics/Troubleshooting
5273008-100, R LOGIQ C S IRECTION EVISION ERIES ASIC ERVICE ANUAL Chapter 7 Diagnostics/Troubleshooting Section 7-1 Overview 7-1-1 Purpose of Chapter 7 This section describes how to setup and run the tools and software that help maintain image quality and system operation. -
Page 112: Gathering Trouble Data
Collect Vital System Information The following information is necessary in order to properly analyze data or images being reported as a malfunction or being returned to the manufacturer: Product Name = LOGIQ C Series From the Utility>System>General>About screen: Applications Software... -
Page 113: Collect A Trouble Image With Logs
Power Supply Temperature NOTE: Power Supply and Temperature logs are not currently being updated by the LOGIQ C Series. This Alt-D function is available at all times. Figure 7-1 ALT-D Dialog Box When Alt-D is pressed, a menu box appears that allows for:... -
Page 114: Usb Quick Save
5273008-100, R LOGIQ C S IRECTION EVISION ERIES ASIC ERVICE ANUAL Section 7-3 USB Quick Save NOTE: USB Quick Save function not support by LOGIQ C2/C2 PRO. 7-3-1 Overview There may be times when the customer or field engineer will want to directly save images into USB memory. -
Page 115: Setting The Print Or Store Key To Usb Quick Save
5273008-100, R LOGIQ C S IRECTION EVISION ERIES ASIC ERVICE ANUAL 7-3-3 Setting the Print or Store Key to USB Quick Save If the Print or Store Key is not set to screen capture: 1.) While on the Connect screen, with the Buttons tab displayed, go to the Destinations list. 2.) From the list select USB Quick Save. -
Page 116: Screen Captures
5273008-100, R LOGIQ C S IRECTION EVISION ERIES ASIC ERVICE ANUAL Section 7-4 Screen Captures NOTE: Screen Capture not support by LOGIQ C2 PRO/C3 PRO/C5 PRO. There may be times when the customer or field engineer will want to capture a presentation on the screen. - Page 117 5273008-100, R LOGIQ C S IRECTION EVISION ERIES ASIC ERVICE ANUAL 7-4-3 Capturing a Screen (cont’d) Clipboard Thumbnai Menu Figure 7-3 Select Image to Capture 3.) Click FREEZE to unfreeze the image to view the image screen and the snapshots displayed on the bottom.
-
Page 118: Reset The Store Key To Customer's Functionality
5273008-100, R LOGIQ C S IRECTION EVISION ERIES ASIC ERVICE ANUAL 7-4-3 Capturing a Screen (cont’d) Figure 7-5 Save Dialog Box 6.) A Save dialog box will be opened. Choose d:\export folder as the archive location to save the image on the hard disk or CD-R. After capture the snapshot of the screen to the “clipboard”... -
Page 119: Common Diagnostics
5273008-100, R LOGIQ C S IRECTION EVISION ERIES ASIC ERVICE ANUAL Section 7-5 Common Diagnostics 7-5-1 Utilities Provides two selections: 7-5-1-1 Disruptive Mode Allows you to enable or disable disruptive mode troubleshooting. 7-5-1-2 System Shutdown Allows for system shutdown from the diagnostic menu. Select to Restart System or Shutdown System. Also, select to retain Disruptive Mode or Not. -
Page 120: Pc Diagnostics (Non-Interactive Tests)
5273008-100, R LOGIQ C S IRECTION EVISION ERIES ASIC ERVICE ANUAL 7-5-2 PC Diagnostics (Non-Interactive Tests) 7-5-2-1 Essential Tests 7-5-2-2 System Board 7-5-2-3 Hard Disk Surface Scan 7-5-2-4 Hard Disk Quick Test 7-5-2-5 PCIBus 7-5-2-6 Video Card 7-5-2-7 Network Interface 7-5-2-8 CMOS 7-5-2-9... -
Page 121: Pc Diagnostics (Interactive Tests)
ERIES ASIC ERVICE ANUAL 7-5-3 PC Diagnostics (Interactive Tests) 7-5-3-1 Keyboard Test 7-5-3-2 Mouse Test 7-5-4 Restart LOGIQ C Series After Diagnostics Always shutdown the system and reboot after a diagnostics session. Section 7-5 - Common Diagnostics 7 - 11... -
Page 122: Network Configuration
5273008-100, R LOGIQ C S IRECTION EVISION ERIES ASIC ERVICE ANUAL Section 7-6 Network Configuration 7-6-1 Network Configuration 7-6-1-1 Wire-LAN Network 1.) Connect system with network. 2.) Press Utility -> Connectivity -> TCPIP, in IP Settings window check the Enable DHCP box. In Network Speed box, choose the proper speed available. - Page 123 5273008-100, R LOGIQ C S IRECTION EVISION ERIES ASIC ERVICE ANUAL 7-6-1-1 Wire-LAN Network (cont’d) NOTE: If user want to setup static IP address, uncheck Enable DHCP option, input static address in IP- Address box, Subnet Mask and Default Gateway box. In Network Speed box, choose the proper speed available.
- Page 124 5273008-100, R LOGIQ C S IRECTION EVISION ERIES ASIC ERVICE ANUAL This page was intentionally left blank. 7 - 14 Section 7-6 - Network Configuration...
-
Page 125: Replacement Procedures
5273008-100, R LOGIQ C S IRECTION EVISION ERIES ASIC ERVICE ANUAL Chapter 8 Replacement Procedures Section 8-1 Overview 8-1-1 Purpose of Chapter 8 This chapter describes replacement procedures for the following modules and subsystems. Table 8-1 Contents in Chapter 8 Section Description Page Number... -
Page 126: Disassembly/Re-Assembly
5273008-100, R LOGIQ C S IRECTION EVISION ERIES ASIC ERVICE ANUAL Section 8-2 DISASSEMBLY/RE-ASSEMBLY 8-2-1 Warning and Caution ONLY QUALIFIED SERVICE PERSONNEL SHOULD REMOVE ANY COVERS OR WARNING WARNING PANELS. ELECTRICAL HAZARDS EXISTS AT SEVERAL POINTS INSIDE. BECOME THOROUGHLY FAMILIAR WITH ALL HAZARDOUS VOLTAGES AND HIGH CURRENT LEVELS TO AVOID ACCIDENTAL CONTACT Do not wear the ESD wrist strap when you remove a part of power supply unit. - Page 127 5273008-100, R LOGIQ C S IRECTION EVISION ERIES ASIC ERVICE ANUAL Section 8-3Loading Base Image Software NOTE:While it is believed to be unnecessary, It would not hurt to disconnect the system from the network and remove all transducers. NOTE:Please ensure power cable is connected during system upgrade! 1.) Insert the disk labeled “System &...
-
Page 128: Loading Base Image Software
5273008-100, R LOGIQ C S IRECTION EVISION ERIES ASIC ERVICE ANUAL Section 8-3 Loading Base Image Software (cont’d) 6.) Select one of the options for loading the system. Select choice 1] to load the complete disk. Figure 8-3 Selection for loading the system While the software install procedure is designed to preserve data, you should select WARNING WARNING... - Page 129 5273008-100, R LOGIQ C S IRECTION EVISION ERIES ASIC ERVICE ANUAL Section 8-3 Loading Base Image Software (cont’d) 8.) System CD will be loaded as shown in the screen below. Figure 8-5 Upgrading message 9.) System updating finished, refer to Figure 8-6 on page 8-5 Figure 8-6 System upgrade complete 10.)Press power key to reboot system, then remove the CDROM from the drive immediately.
- Page 130 5273008-100, R LOGIQ C S IRECTION EVISION ERIES ASIC ERVICE ANUAL This page was intentionally left blank. Section 8-3 - Loading Base Image Software...
-
Page 131: Renewal Parts
ANUAL Chapter 9 Renewal Parts Section 9-1 Overview 9-1-1 Purpose of Chapter 9 This chapter gives you an overview of Renewal Parts for LOGIQ C Series. Table 9-1 Contents in Chapter 9 Section Description Page Number "Overview" "List of Abbreviations"... -
Page 132: Equipment Models Covered In This Chapter
5273008-100, R LOGIQ C S IRECTION EVISION ERIES ASIC ERVICE ANUAL Section 9-3Renewal Parts Lists 9-3-1 Equipment Models Covered in this Chapter Table 9-2 ACDC Power Pack & ACDC Power Cable list Item Part Name Part Number Replaced By Description Quantity AC Power Cord 5177123... -
Page 133: Operator Console Assy
5273008-100, R LOGIQ C S IRECTION EVISION ERIES ASIC ERVICE ANUAL Section 9-4Operator Console Assy LCD Assy Keyboard Assy Body Assy Base Assy LOGIQ C2/C2 PRO LOGIQ C3/C3 PRO LOGIQ C5/C5 PRO Figure 9-1 Operator Console Assy Section 9-5 Keyboard Assy Table 9-3 Keyboard Assy Item... -
Page 134: Accessories And Kits
Cable Kits_LOGIQ C2 for non-one Box unit 5363641 7010 5315707 Collector UPD897 kits 7021 5315282-3 LOGIQ C Series system and application DVD R112 7021A 5315282-4 LOGIQ C Series system and application DVD R113 7021B 5315282-5 LOGIQ C Series system and application DVD R114... - Page 135 Table 9-4 Accessories and Kits Item Part Number Description 7024A 5391552-3 LOGIQ C Series system and application DVD R132 7024B 5391552-4 LOGIQ C Series system and application DVD R133 7024C 5391552-5 LOGIQ C Series system and application DVD R134 LOGIQ C PRO Series system and application DVD...
-
Page 136: Manuals
ERVICE ANUAL Section 9-7Manuals Item Part Number Description 5273008-100 LOGIQ C Series Service Manual System User Manuals 5265060 -100 User Manual, LOGIQ C2/C2 PRO, English 5265060 -101 User Manual, LOGIQ C2/C2 PRO, French 5265060 -106 User Manual, LOGIQ C2/C2 PRO, Spanish... - Page 137 5273008-100, R LOGIQ C S IRECTION EVISION ERIES ASIC ERVICE ANUAL Section 9-8Probes Table 9-5 Probes on LOGIQ C Series Item Part Name Part Number Replaced By Description Quantity 8801 4C-RC 5315581 Probe (Center Frequency: 3.75MHz) 8802 3.8C-RC 5315682 Probe (Center Frequency: 3.75MHz)
-
Page 138: Probes
5273008-100, R LOGIQ C S IRECTION EVISION ERIES ASIC ERVICE ANUAL This page was intentionally left blank. Section 9-8 - Probes... -
Page 139: Care & Maintenance
5273008-100, R LOGIQ C S IRECTION EVISION ERIES ASIC ERVICE ANUAL Chapter 10 Care & Maintenance Section 10-1 Overview 10-1-1 Periodic Maintenance Inspections It has been determined by engineering that your system does not have any high wear components that fail with use, therefore no Periodic Maintenance Inspections are mandatory. -
Page 140: Why Do Maintenance
The service procedures and recommended intervals shown in the Care & Maintenance Task Schedule assumes that you use your LOGIQ C Series for an average patient load (10-12 per day) and not use it as a primary mobile unit which is transported between diagnostic facilities. - Page 141 5273008-100, R LOGIQ C S IRECTION EVISION ERIES ASIC ERVICE ANUAL Section 10-3 Maintenance Task Schedule (cont’d) Table 10-2 Customer Care Schedule Per Facilities Service at Indicated Time Daily Weekly Monthly QA Program Notes • Clean Probe Holders • more frequently depending on Clean Air Filter your environment •...
-
Page 142: Tools Required
Section 10-4 Tools Required 10-4-1 Standard GE Tool Kit The following is a description of the “Standard” GE tool kit in the USA. Not all tools are required for PMs. Table 10-3 Overview of GE-1 Tool Kit Contents Tool ID... - Page 143 LOGIQ C S IRECTION EVISION ERIES ASIC ERVICE ANUAL Table 10-3 Overview of GE-1 Tool Kit Contents (Continued) Tool ID Description Tool ID Description 9-65283 Case 8.5 in. x 4.5 in. x 2 in. Deep 9-45072 Pliers 6 inch Diagonal...
-
Page 144: Special Tools, Supplies And Equipment
QIQ Phantom E8370RB RMI Grayscale Target Model 403GS CD-RW Media For LOGIQ C Series B/W Printer Cleaning Sheet See printer user manual for requirements Color Printer Cleaning Sheet See printer user manual for requirements Disposable Gloves... -
Page 145: Input Power
Physical Checks Step Item Description Verify that all system labeling is present and in readable condition. refer to the LOGIQ C Series User Labeling Manual for details. Scratches & Dents Inspect the console for dents, scratches or cracks. Check all wheels and casters for wear and verify operation of foot brake, to stop the unit from moving, Wheels &... -
Page 146: Outlet Test - Wiring Arrangement - Usa & Canada
5273008-100, R LOGIQ C S IRECTION EVISION ERIES ASIC ERVICE ANUAL 10-4-6 Outlet Test - Wiring Arrangement - USA & Canada Test all outlets in the area for proper grounding and wiring arrangement by plugging in the neon outlet tester and noting the combination of lights that are illuminated. Any problems found should be reported to the hospital immediately and the receptacle should not be used. -
Page 147: Grounding Continuity
2.) Plug the unit into the meter, and the meter into the tested AC wall outlet. 3.) Plug the black chassis cable into the meter's “CHASSIS” connector and attach the black chassis cable clamp to an exposed metal part of the LOGIQ C Series unit. 4.) Set the meter's “FUNCTION” switch to the RESISTANCE position. - Page 148 5273008-100, R LOGIQ C S IRECTION EVISION ERIES ASIC ERVICE ANUAL 10-4-7-2 Dale 600 - Ground Continuity The Dale 600 measures line cord resistance from the third pin of the attachment plug to the meter’s Chassis Cable clamp. Test the grounding continuity of the system to all exposed metal parts in accordance with the IEC 601-1.1 procedure as above.
-
Page 149: Chassis Leakage Current Test
5273008-100, R LOGIQ C S IRECTION EVISION ERIES ASIC ERVICE ANUAL 10-4-8 Chassis Leakage Current Test 10-4-8-1 Definition This test measures the current that would flow in a grounded person who touched accessible metal parts of the bedside station if the ground wire should break. The test verifies the isolation of the power line from the chassis. - Page 150 3.) Plug the black chassis cable into the meter's “CHASSIS” connector and attach the black chassis cable clamp to an exposed metal part of the LOGIQ C Series unit. 4.) Connect the patient leads to the corresponding snaps located at the upper front of the Dale 600/ 600E.
- Page 151 5273008-100, R LOGIQ C S IRECTION EVISION ERIES ASIC ERVICE ANUAL 10-4-8-4 Dale 600 Meter Procedure (cont’d) 5.) Set the meter's “FUNCTION” switch to LEAD TO GROUND position to measure the patient lead to ground leakage current. 6.) Select and test each ECG lead positions (except ALL) of the LEAD selector, testing each to the power condition combinations.
-
Page 152: Isolated Patient Lead (Source) Leakage-Lead To Lead
5273008-100, R LOGIQ C S IRECTION EVISION ERIES ASIC ERVICE ANUAL 10-4-8-4 Dale 600 Meter Procedure (cont’d) 7.) Record the patient lead to ground leakage current measured on the data sheet. 8.) Set the meter's “FUNCTION” switch to LEAD TO LEAD position to measure the lead to lead leakage current. - Page 153 5273008-100, R LOGIQ C S IRECTION EVISION ERIES ASIC ERVICE ANUAL 10-4-10-1 Data Sheet for ECG Leakage Current The test passes when all readings measure less than the value shown in the table below. Record all data on the PM Inspection Certificate. Table 10-11 Maximum Allowance Limit for ECG Leakage Current Maximum Allowance Limit...
-
Page 154: Probe Leakage Current Test
ISO TEST switch is depressed. Follow these steps to test each transducer for leakage current. 1.) Turn the LOGIQ C Series unit OFF. 2.) Plug the unit into the test meter, and the meter into the tested AC wall outlet. - Page 155 5273008-100, R LOGIQ C S IRECTION EVISION ERIES ASIC ERVICE ANUAL 10-4-11-3 Meter Procedure Using Probe Adapter (cont’d) Figure 10-6 Transducer Source Leakage Current Test 6.) Set the meter's “FUNCTION” switch to EXTERNAL position. 7.) Add the saline probe and the imaging area of the probe into the saline bath. 8.) Have unit power ON for the first part;...
- Page 156 Figure 10-7 Check Without Probe Adapter Follow these steps to test each transducer for leakage current. 1.) Turn the LOGIQ C Series unit OFF. 2.) Plug the unit into the test meter, and the meter into the tested AC wall outlet.
- Page 157 5273008-100, R LOGIQ C S IRECTION EVISION ERIES ASIC ERVICE ANUAL 10-4-11-5 Data Sheet for Transducer Source Leakage Current The test passes when all readings measure less than the values. Record all data on the PM Inspection Certificate. Equipment damage possibility. Never switch the Polarity and the status of Neutral when the unit CAUTION is powered ON.
-
Page 158: When There's Too Much Leakage Current
5273008-100, R LOGIQ C S IRECTION EVISION ERIES ASIC ERVICE ANUAL Section 10-5 When There's Too Much Leakage Current... CHASSIS FAILS Check the ground on the power cord and plug for continuity. Ensure the ground is not broken, frayed, or intermittent. Replace any defective part. Tighten all grounds. - Page 159 Air Filter Applicable Software Options Probe Holders Applicable Hardware Options External I/O Control Panel Wheels, Brakes & Swivel Locks Monitor Cables and Connectors GE Approved Peripherals (VCR, CD-RW, MOD, Touch Panel Printers) Measurement Accuracy GE Approved Peripherals COMMENTS: ______________________________________________________________________________ ______________________________________________________________________________ ______________________________________________________________________________ ______________________________________________________________________________ Chapter 10 Care &...
- Page 160 5273008-100, R LOGIQ C S IRECTION EVISION ERIES ASIC ERVICE ANUAL ELECTRICAL SAFETY Max Value Value Electrical Test Performed Allowed Measured Comments Outlet (correct ground &wiring config.) System Ground Continuity Chassis Source Leakage Current - Probe Chassis Source Leakage Current - Caster Chassis Source Leakage Current - CRT Patient Lead Source Leakage (Lead to Ground)
- Page 161 5273008-100, R LOGIQ C S IRECTION EVISION ERIES ASIC ERVICE ANUAL INDEX Functional Checks, 4-1 Basic Measurements, 4-23 Abbreviations, 9-1 Control Panel, 4-6 Archiving Images Image Management, 4-25 Move, 4-29 Monitor Display, 4-8 Backup Peripherals, 4-35 Patient Database, 4-26 Probes/Connector Usage, 4-24 Preset Configurations, 4-26 Basic Measurements Functional Checks, 4-23...
- Page 162 GE V PROPRIETARY TO GE INGMED LTRASOUND 5273008-100, R LOGIQ™ 9 P IRECTION EVISION ROPRIETARY ANUAL Operator identification Vital System Information, 7-2 display location, 4-8 Ultrasound Room Layout, 2-8 P4 Key Function, 7-4, , 7-6 Patient identification display location, 4-8...
- Page 164 2008 - 2010, General Electric Company. © GE Healthcare-GEMedical Systems Ultrasound. 9900 Innovation Drive Wawautosa, Wisconsin 53226...