Table of Contents
Advertisement
Available languages
Available languages
Quick Links
Advertisement
Table of Contents

Related Manuals for Makita ML010G


Summary of Contents for Makita ML010G
- Page 1 INSTRUCTION MANUAL MANUEL D'INSTRUCTION MANUAL DE INSTRUCCIONES Cordless Area Worklight Lampe de Zone Chantier Linterna para Área de Trabajo ML010G IMPORTANT: Read Before Using. IMPORTANT : Lire avant usage. IMPORTANTE: Lea antes de usar.
-
Page 2: Specifications
ENGLISH (Original instructions) SPECIFICATIONS Model: ML010G Rated voltage A.C. Refer to the indication on the nameplate. D.C. 14.4 V / 18 V / 36 V - 40 V max Luminous flux 5,500lm / 3,000lm / 1,500lm (All LEDs light up) Operating time approximately 15.0 hours (5,500lm) - Page 3 Do not cover the lamp, or clog the vent of the 18. Do not handle the appliance roughly. When the appliance with cloth or carton, etc. Otherwise it appliance return to the upright position from the tilt position, the appliance may hit a person and may cause a flame.
- Page 4 GROUNDING INSTRUCTIONS Do not use a battery pack or appliance that is damaged or modified. Damaged or modified This product must be grounded. In the event of mal- batteries may exhibit unpredictable behaviour function or breakdown, grounding provides a path resulting in fire, explosion or risk of injury.
-
Page 5: Fcc Caution
It will also one or more of the following measures: void the Makita warranty for the Makita appliance and — Reorient or relocate the receiving antenna. -
Page 6: Parts Description
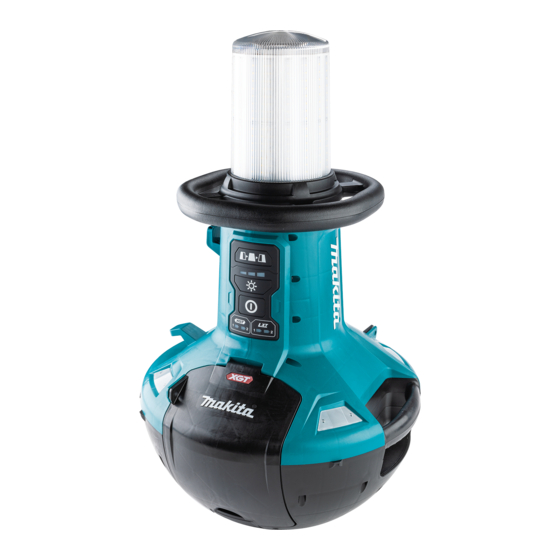
PARTS DESCRIPTION Fig.1 Lighting area change button Brightness indicator Brightness change button Power switch button Battery indicator Carrying handle Hole for padlock Battery cover (XGT battery) Cover lock Battery cover (LXT battery) Breaker restart button AC inlet AC outlet Hook for power cord Reflector Socket cover Power cord (optional accessory) -
Page 7: Functional Description
To remove the battery cartridge, slide it from the FUNCTIONAL DESCRIPTION appliance while sliding the button on the front of the cartridge. CAUTION: Always be sure that the appli- CAUTION: Always install the battery cartridge ance is switched off and the battery cartridge is fully. -
Page 8: Battery Indicator
Battery indicator Appliance / battery protection system This indicators show the battery in use or the remaining battery capacity. The appliance is equipped with the protection system. The indicators correspond to each battery as shown in This system automatically cuts off power to extend the figure. -
Page 9: Operation
Self-righting design OPERATION The appliance can recover from the tilted position if the angle is 80 degrees or smaller from the perpendicular CAUTION: This appliance is intended for position. The standing angle of the appliance varies commercial use. Do not use the appliance for depending on the conditions of the ground and the household purpose. - Page 10 Changing lighting area Using with AC power Press the lighting area change button while the appli- Optional accessory ance is operating. WARNING: Never use the appliance when the cord or plug is damaged. WARNING: Do not handle the plug with wet or greasy hand.
-
Page 11: Maintenance
Makita Authorized or Factory Service Insert the plug into the AC inlet of the appliance to be Centers, always using Makita replacement parts. -
Page 12: Spécifications
FRANÇAIS (Mode d’emploi original) SPÉCIFICATIONS Modèle : ML010G Tension nominale C.A. Consultez l’indication sur la plaque signalétique. C.C. 14,4 V / 18 V / 36 V - 40 V max. Flux lumineux 5 500 lm / 3 000 lm / 1 500 lm (Toutes les DEL s’allument) -
Page 13: Importantes Consignes De Sécurité
14. La source de lumière de cette lampe n’est pas CONSIGNES DE remplaçable; lorsque la source de lumière atteint sa fin de vie, il faut remplacer la lampe SÉCURITÉ en entier. 15. Ne laissez pas le cordon d’alimentation décon- necté de l’appareil lorsqu’il est alimenté par IMPORTANTES CONSIGNES DE une prise de courant. - Page 14 29. La réparation d’un produit nécessite un soin 30. Rangez le produit à l’intérieur lorsque vous ne extrême et une connaissance approfondie l’utilisez pas. du système, et elle ne devrait être effectuée 31. Gardez-le hors de la portée des enfants. que par un réparateur qualifié.
- Page 15 Makita. Les batteries autres des brûlures et même une panne. que celles fabriquées par Makita ou les batteries Ne rangez pas et n’utilisez pas l’appareil ou la modifiées peuvent exploser et causer un incendie, batterie dans des endroits où...
- Page 16 RÉPARATION La réparation de cet appareil ne doit être effec- tuée que par le personnel de réparation qualifié. L’exécution des réparations ou de l’entretien par un personnel non qualifié peut entraîner un risque de blessure. Pour réparer cet appareil, utilisez uniquement des pièces de rechange identiques aux pièces originales.
-
Page 17: Description Des Pièces
DESCRIPTION DES PIÈCES Fig.1 Bouton de changement de zone Voyant de luminosité Bouton de changement de d’éclairage luminosité Bouton d’alimentation Voyant de batterie Poignée de transport Trou pour cadenas Couvercle de batterie (batterie Verrou du couvercle XGT) Couvercle de batterie (batterie LXT) Bouton de redémarrage du Entrée C.A. -
Page 18: Description Du Fonctionnement
Pour retirer la batterie, faites-la glisser de l’appareil tout en DESCRIPTION DU faisant glisser le bouton qui se trouve à l’avant de la batterie. FONCTIONNEMENT ATTENTION : Insérez toujours la batterie à fond. Autrement, elle risque de tomber accidentelle- ment de l’appareil et d’entraîner des blessures. ATTENTION : Assurez-vous toujours que l’ap- ATTENTION :... -
Page 19: Voyant De Batterie
Voyant de batterie Dispositif de protection de l’appareil et de la batterie Ces voyants montrent la batterie en cours d’utilisation ou ce qui reste de la charge de la batterie. L’appareil est équipé d’un dispositif de protection. Ce Les voyants correspondent à chaque batterie, comme dispositif coupe automatiquement l’alimentation pour illustré... -
Page 20: Mise Sous/Hors Tension De L'appareil
Design à redressement automatique UTILISATION L’appareil peut récupérer d’une position inclinée si l’angle est de 80 degrés ou moins par rapport à une ATTENTION : Cet appareil est conçu pour un position perpendiculaire. L’angle debout de l’appareil usage commercial. N’utilisez pas l’appareil pour varie selon les conditions sur le sol et l’alimentation à... - Page 21 Modification de la zone d’éclairage Utilisation avec l’alimentation C.A. Appuyez sur le bouton de changement de zone d’éclai- Accessoire en option rage pendant que l’appareil fonctionne. MISE EN GARDE : N’utilisez jamais l’appareil si le cordon ou la fiche est endommagé. MISE EN GARDE : Ne manipulez pas la fiche avec une main mouillée ou graisseuse.
-
Page 22: Entretien
Assurez-vous toujours que ATTENTION : Ne branchez aucun autre appareil l’appareil est éteint et débranché, et que la batte- que le ML010G dans la prise C.A. rie est retirée avant d’y effectuer tout travail d’ins- pection ou d’entretien. ATTENTION : Utilisez toujours le cordon d’ali-... -
Page 23: Especificaciones
ESPAÑOL (Instrucciones originales) ESPECIFICACIONES Modelo: ML010G Tensión nominal C.A. 120 V 12 A 50/60 Hz Especificaciones eléctricas en México D.C. 14,4 V / 18 V / 36 V - 40 V máx. Flujo luminoso 5 500lm / 3 000lm / 1 500lm (Todos los LED se iluminan) Tiempo de operación... -
Page 24: Advertencias De Seguridad
13. Coloque siempre el aparato en una posición ADVERTENCIAS DE vertical. SEGURIDAD 14. La fuente de luz de esta luminaria no es reemplazable; cuando la fuente de luz llegue al final de su vida útil, se reemplazará toda la luminaria. INSTRUCCIONES IMPORTANTES 15. - Page 25 29. Dar mantenimiento a un producto requiere un 30. Guarde el producto en interiores cuando no lo cuidado extremo y conocimiento del sistema, vaya a utilizar. y debe realizarlo únicamente personal de ser- 31. Manténgalo fuera del alcance de los niños. vicio calificado.
- Page 26 El cartucho de batería incendio, lesiones personales y daños. Asimismo, puede explotar si se tira al fuego. esto invalidará la garantía de Makita para el aparato y el cargador Makita. 26 ESPAÑOL...
-
Page 27: Precaución De La Fcc
Consejos para alargar al máximo — Reorientar o reubicar la antena receptora. — Aumentar la separación entre el equipo y el la vida útil de la batería receptor. Cargue el cartucho de batería antes de que se — Conectar el equipo a una toma de corriente en un descargue completamente. -
Page 28: Descripción De Las Piezas
DESCRIPCIÓN DE LAS PIEZAS Fig.1 Botón para cambio de área de Indicador de brillo Botón para cambio de brillo iluminación Botón de interruptor de Indicador de batería Mango portador alimentación Orificio para el candado Cubierta de la batería (batería Seguro de la cubierta XGT) Cubierta de la batería (batería LXT) Botón para reinicio del disyuntor... -
Page 29: Descripción Del Funcionamiento
Para instalar el cartucho de batería, alinee la lengüeta DESCRIPCIÓN DEL sobre el cartucho de batería con la ranura en la carcasa y deslícela hasta su lugar. Insértelo por completo hasta FUNCIONAMIENTO que se fije en su lugar con un pequeño clic. Luego cierre la cubierta de la batería. -
Page 30: Indicador De Batería
Indicación de la batería en uso Luces indicadoras Capacidad restante Al encender el aparato, se encienden los indicadores de las baterías instaladas. Iluminadas Apagadas Parpadeando Unos segundos más tarde, se iluminará el indicador de 75% a 100% batería actualmente en uso. Color del indicador Capacidad de la batería 50% a 75%... -
Page 31: Operación
Protección en caso de sobredescarga OPERACIÓN Cuando la capacidad de la batería se reduzca, las luces LED se apagarán salvo una parte de las luces LED, según se ilustra. PRECAUCIÓN: Este aparato está diseñado Luego, aproximadamente cinco a diez minutos más tarde, el para uso comercial. - Page 32 Cambio del área de iluminación Uso con energía de C.A. Oprima el botón para cambio de área de iluminación Accesorio opcional mientras el aparato está en operación. ADVERTENCIA: Nunca utilice el aparato cuando el cable o la clavija están dañados. ADVERTENCIA: No manipule la clavija con las manos húmedas o manchadas de grasa.
-
Page 33: Mantenimiento
No conecte ningún otro aparato que el aparato haya sido apagado y desconectado, no sea el modelo ML010G en la toma de corriente de C.A. y que el cartucho de batería haya sido extraído antes de intentar realizar una inspección o tarea PRECAUCIÓN:... - Page 36 Makita Corporation 3-11-8, Sumiyoshi-cho, ML010G-NA3-2210 Anjo, Aichi 446-8502 Japan ML010G-1 EN, FRCA, ESMX 20220907 www.makita.com...