
Related Manuals for PARKZONE Ultra Micro Mini Vapor


Summary of Contents for PARKZONE Ultra Micro Mini Vapor
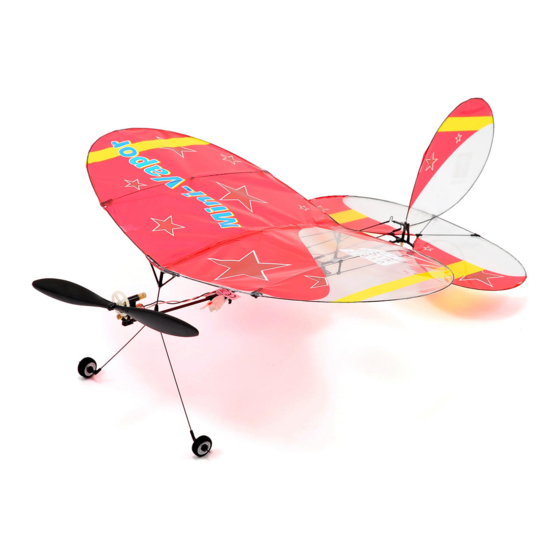
- Page 1 Ultra Micro ® Mini Vapor Instruction Manual / Bedienungsanleitung Manuel d’utilisation / Manuale di Istruzioni...
- Page 2 NOTICE All instructions, warranties and other collateral documents are subject to change at the sole discretion of Horizon Hobby, Inc. For up-to-date product literature, visit www.horizonhobby.com and click on the support tab for this product. Meaning of Special Language: The following terms are used throughout the product literature to indicate various levels of potential harm when operating this product: NOTICE: Procedures, which if not properly followed, create a possibility of physical property damage AND little or no possibility of injury.
-
Page 3: Table Of Contents
Super Lite DSMX® Installed Installed RX/ESC/Servos (PKZU1252) Battery: 30mAh 3.7 Included Included 25C Li-Po Charger: 1S 3.7V Li-Po Included Included Battery Charger Needed to DSM2/DSMX 4-Channel Included Transmitter Complete .31 oz (8.7 g) To register your product online, go to www.parkzone.com... -
Page 4: Charging The Battery
Charging the Battery Your aircraft comes with a 1S 3.7V DC Li-Po battery charger and 1S 3.7V 30mAh 25C Li-Po battery. Refer to the charging warnings. It is recommended to charge the battery pack while you are inspecting the aircraft. The fl ight battery will be required to confi... -
Page 5: Charging Warnings
Charging Warnings The Battery Charger (EFLC1002) included with your • Always inspect the battery before charging. aircraft has been designed to safely charge the • Always disconnect the battery after charging, Li-Po battery. and let the charger cool between charges. •... -
Page 6: Installing Transmitter Batteries
Installing Transmitter Batteries Your ParkZone® 4-channel DSM2/ DSMX RTF transmitter comes pre- bound to the aircraft. Remove the cover, install four of the included batteries (noting proper polarity) and reinstall the cover. Transmitter and Receiver Binding Binding is the process of programming the receiver of the control unit to recognize the GUID (Globally Unique Identifi... -
Page 7: Installing The Flight Battery And Arming The Esc
Installing the Flight Battery and Arming the ESC Arming the ESC also occurs after binding as previously described, but subsequent connection of a fl ight battery requires the Lower throttle following steps. and throttle trim to lowest settings. CAUTION: Always keep hands away Power ON from propeller. -
Page 8: Digital Trims
Elevator Trim Throttle Trim Digital Trims The ParkZone 4-channel DSM2/DSMX transmitter features digital trim buttons on all controls to make ® fi ne adjustments. The digital trims are used to fi ne-tune the model’s fl ight path when in fl ight. -
Page 9: Control Direction Test
Control Direction Test Bind your aircraft and transmitter before doing these tests. Move the controls on the transmitter to make sure aircraft control surfaces move correctly. Always keep throttle at the low position during testing. Down Elevator Elevator Left Rudder Right Rudder... -
Page 10: Reverse Controls
Elevator Normal The transmitter included with the Mini Vapor is the 4. Hold the digital trim buttons down for same transmitter included in other ParkZone Ultra approximately 5 seconds until you hear a Micro RTF models. tone confi rming the selection. -
Page 11: Control Rates
Control Rates We recommend using a DSM2/DSMX aircraft High Rate Low Rate transmitter capable of dual rates. Adjust according to individual preferences after initial fl ight. Elevator 100% It is normal for linear servos to make noise. Noise is Rudder 100% not an indication of a faulty servo. -
Page 12: Motor Service
Motor Service CAUTION: DO NOT handle propeller parts Remove while the fl ight battery is connected. Personal injury could result. Disassembly 1. Disconnect the battery from the ESC/receiver. Install 2. Hold the spur gear and turn the propeller counterclockwise (looking from the front of the model) to remove. -
Page 13: Flying Tips And Repairs
Flying Tips and Repairs We recommend fl ying your Mini Vapor in an indoor Landing location with a fl oor area of 15 ft x 15 ft and a Fly the aircraft to approximately 6 inches (15cm) or minimum ceiling height of 8 ft; a living room or less above the landing surface. -
Page 14: Additional Safety Precautions And Warnings
Additional Safety Precautions and Warnings As the user of this product, you are solely • Never place any portion of the model in your responsible for operating it in a manner that does mouth as it could cause serious injury or even not endanger yourself and others or result in death. -
Page 15: Troubleshooting Guide
Troubleshooting Guide Possible Cause Solution Problem Aircraft will Throttle stick and/or throttle trim is too Reset controls with throttle stick and not respond to high throttle trim at lowest setting throttle but re- Throttle channel is reversed Reverse throttle channel on transmitter sponds to other controls Extra propeller... -
Page 16: Limited Warranty
Troubleshooting Guide (continued) Possible Cause Solution Problem Controls Transmitter settings reversed Do the Control Direction Test and adjust reversed controls on transmitter appropriately Motor loses Damage to motor or power components Do a check of motor and power compo- power nents for damage (replace as needed) Nut on prop shaft is too tight Loosen prop shaft nut until propeller... - Page 17 WARRANTY SERVICES RMA number are clearly written on the outside of the shipping carton. Questions, Assistance, and Services NOTICE: Do not ship LiPo batteries to Horizon. Your local hobby store and/or place of purchase If you have any issue with a LiPo battery, cannot provide warranty support or service.
-
Page 18: Warranty And Service Information
Warranty and Service Information Country of Horizon Hobby Address Phone Number/Email Address Purchase Horizon Service 4105 Fieldstone Rd 877-504-0233 Center (Electronics Champaign, Illinois Online Repair Request visit: and engines) 61822 USA www.horizonhobby.com/service United States of America Horizon Product 4105 Fieldstone Rd 877-504-0233 Support (All other Champaign, Illinois... -
Page 19: Fcc Information
FCC Information This device complies with part 15 of the FCC rules. Operation is subject to the following two conditions: (1)This device may not cause harmful interference, and (2) this device must accept any interference received, including interference that may cause undesired operation. CAUTION: Changes or modifi... -
Page 20: Replacement Parts
Replacement Parts • Ersatzteile • Pièces de rechange • Pezzi di ricambio Part # • Nummer Description Beschreibung Description Descrizione Numéro • Codice Prop: 125 x 39 Propeller: 125 x 39 Hélice indoor : Elica: Elica per PKZU1202 indoor propeller Indoor Propeller 125 x 39 interni 125 x 39... - Page 21 Optional Parts and Accessories • Optionale Bauteile und Zubehör • Pièces et accessoires optionnels • Componenti e accessori opzionali Part # | Nummer Description Beschreibung Description Descrizione Numéro | Codice AC to 6V DC AC zu 6V DC 1,5 Alimentation CA Alimentatore da CA 1.5 amp Power Ampere Netz-...
- Page 22 © 2012 Horizon Hobby, Inc. ParkZone, E-flite, Vapor, DSM, DSM2, Bind–N–Fly and ModelMatch are trademarks or registered trademarks of Horizon Hobby, Inc. DSMX is a trademark of Horizon Hobby, Inc., registered in the U.S. The Spektrum trademark is used with permission of Bachmann Industries, Inc.