PARKZONE Ultra-Micro J-3 Cub RTF Instruction Manual
Hide thumbs
Also See for Ultra-Micro J-3 Cub RTF:
- Instruction manual (11 pages) ,
- Instruction manual (7 pages)
Table of Contents
Advertisement
PKZ3900 RTF
PKZ3980 BNF
© 2010 Horizon Hobby, Inc.
4105 Fieldstone Road
Champaign, IL 61822
Horizon Hobby UK
Units 1-4, Ployters Road
Harlow, Essex
United Kingdom
Horizon Hobby Deutschland GmbH
Hamburger Strasse 10
25335 Elmshorn
ParkZone
®
products are distributed exclusively by Horizon Hobby, Inc.
Multiple patents pending
US patent 7,391,320
US patent D578,146
PRC patent number ZL 2007 2 0069025.2
DSM and DSM2 are trademarks or registered trademarks of Horizon Hobby, Inc.
The Spektrum trademark is used with permission of Bachmann Industries, Inc.
Futaba is a registered trademark of Futaba Denshi Kogyo Kabushiki Kaisha Corporation of Japan.
www.parkzone.com
16438 Printed 11/09
USA
Staple Tye
CM18 7NS
Germany
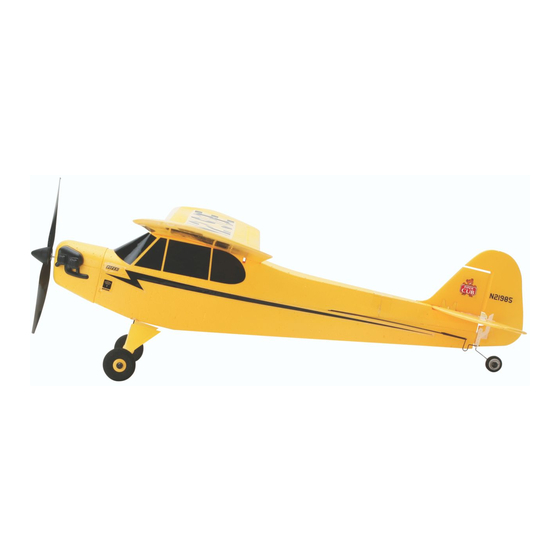
Ultra-Micro J-3 Cub RTF & BNF
Instruction Manual
Specifications
Length: 12.2 in (310mm)
Wingspan: 18.1 in (460mm)
Weight: 0.85 oz (24.0 g)
Battery: 3.7V 120mAh Lithium Polymer
Advertisement
Table of Contents

Related Manuals for PARKZONE Ultra-Micro J-3 Cub RTF


Summary of Contents for PARKZONE Ultra-Micro J-3 Cub RTF
-
Page 1: Instruction Manual
US patent D578,146 PRC patent number ZL 2007 2 0069025.2 DSM and DSM2 are trademarks or registered trademarks of Horizon Hobby, Inc. The Spektrum trademark is used with permission of Bachmann Industries, Inc. Futaba is a registered trademark of Futaba Denshi Kogyo Kabushiki Kaisha Corporation of Japan. -
Page 2: Table Of Contents
Table of Contents J-3 Cub Introduction Specifications ..........1 J-3 Cub Introduction . -
Page 3: Battery Warnings And Guidelines
• If at any time during the charge or discharge process Battery Warnings and Guidelines the battery begins to balloon or swell, discontinue While the 1S 3.7V DC Lithium Polymer Battery Charger charging or discharging immediately. Quickly and (PKZ3240) included with your J-3 Cub has been safely disconnect the battery, then place it in a safe, open area away from flammable materials to specifically designed to safely charge the included 1S... -
Page 4: Battery Charging
Horizon Support Team at 877-504-0233, • Slide the battery into the slot on the charger. The end cap Horizon Hobby UK at +44 (0) 1279 641 097 or Horizon of the battery has been specifically designed to allow the Technischer Service, Germany at +49 4121 46199 66. -
Page 5: Additional Safety Precautions And Warnings
• It takes approximately 30–40 minutes to charge a fully dis- Additional Safety Precautions charged (not over-discharged) battery. As the battery nears and Warnings full charge, the LED light will begin to blink. When the battery is fully charged, the LED light will blink This model is controlled by a radio signal that is subject to approximately every 20 seconds or will go out entirely. -
Page 6: Cub Rtf Contents
J-3 Cub RTF Contents J-3 Cub BNF Contents • J-3 Cub RTF airplane • J-3 Cub BNF airplane • 2.4GHz DSM2 transmitter • 120mAh 1S 3.7V 14C Li-Po battery • 120mAh 1S 3.7V 14C Li-Po battery • 1S 3.7V Li-Po battery charger, 0.3A charge rate •... -
Page 7: First Flight Preparation
First Flight Preparation Installing the Flight Battery Please note this checklist is not intended to be a replacement Once the Li-Po battery has been fully charged, it’s ready to be for the content included in this manual. Although it can be used installed in the airplane. -
Page 8: Transmitter And Receiver Binding
Transmitter and Receiver Binding Transmitter Specific Binding Instructions Your J-3 Cub RTF comes pre-bound to the included MLP4DSM transmitter. If you should need to re-bind your airplane follow the MLP4DSM, Vapor, Ember2, P-51 Transmitter: simple directions below. 1. When you see the LED on the receiver begin to flash while Setting the Airplane for Binding: looking through the opening at the back of the battery cavity of the J-3 Cub, push the left stick of the transmitter... -
Page 9: Transmitter Control Identification
Horizon Support Team at 877-504-0233, Horizon Hobby UK at +44 (0) 1279 641 097 or Horizon Technischer Service, Germany at +49 4121 46199 66. Note: Before each flight you should ALWAYS turn the transmitter on before connecting the flight battery to the receiver unit. -
Page 10: Additional Binding Information
Additional Binding Information Control Test Prior to each flight, power on your transmitter and wait about You must test the controls prior to the first flight to ensure five seconds before you plug the flight battery into the receiver. none of the servos, linkages or parts were damaged during shipping and handling and that the controls function in the Doing this allows time for the transmitter to scan and secure two correct directions. - Page 11 J-3 Cub responding properly to the transmitter, do not fly. Call the Horizon Support Team at 1-877-504-0233, Horizon Hobby UK at +44 (0) 1279 641 097 or Horizon Technischer Service, Germany at +49 4121 46199 66.
-
Page 12: Receiver Control Unit Description, Arming And Motor Control Test
Digital Trims Receiver Control Unit Description, The ParkZone 4-channel 2.4GHz DSM2 transmitter features Arming and Motor Control Test digital trims on all controls to make fine adjustments. Center the control surfaces using the trims. If there is not enough electronic The receiver installed on your J-3 Cub is a lightweight trim available, it may be necessary to adjust the loops in the combination of main motor electronic speed control, servos and... -
Page 13: Reversing Flight Controls
Horizon Support and the transmitter is turned off. Team at 1-877-504-0233, Horizon Hobby UK at +44 2. Push down on the digital trim button for the surface you (0) 1279 641 097 or Horizon Technischer Service, would like to reverse. -
Page 14: Stock Control Throw
Stock Control Throw Choosing a Flying Area Out of the box, your J-3 should have the approximate control When you are ready for your first flight, you will want to select throws. In production, this can vary by approximately 2mm a relatively open area, the size of a basketball court or larger, without any effect on flight performance. -
Page 15: Replacing The Propeller
Replacing the Propeller Replacing the Prop Shaft The propeller is threaded onto the shaft of the gearbox. You may find that you need to replace the prop shaft in the gearbox should it become damaged. To replace the prop shaft: 1. -
Page 16: Replacement Parts
4. Gently pull on the spur gear and the prop shaft will slide Replacement Parts out of the gearbox. You may need to cut away a small PKZ1035 120mAh 1S 3.7V Li-Po Battery portion of foam to allow the spur gear to slide forward out PKZ3901 Prop with Spinner: 100 x 60mm of the gearbox. -
Page 17: Troubleshooting Guide
Troubleshooting Guide Problem Possible Cause Solution Problem Possible Cause Solution RTF/BNF RTF/BNF LED on Aircraft • User did not wait at least • Unplug, then reconnect flight Aircraft will not • User did not lower throttle • Lower throttle stick and throttle remains flashing and 5 seconds after powering battery. -
Page 18: Warranty Information
Warranty Period the act of use, setup or assembly, the user accepts all resulting liability. Exclusive Warranty- Horizon Hobby, Inc., (Horizon) warranties that the Products purchased (the “Product”) will be free from defects in materials and If you as the Purchaser or user are not prepared to accept the liability workmanship at the date of purchase by the Purchaser. - Page 19 Provided warranty conditions have been Champaign, Illinois 61822 met, your Product will be repaired or replaced free of charge. Repair or replacement decisions are at the sole discretion of Horizon Hobby. All other Products requiring warranty inspection or repair should be shipped Non-Warranty Repairs...
-
Page 20: Compliance Information For The European Union
Signed for and on behalf of: Declaration of Conformity Horizon Hobby, Inc. (in accordance with ISO/IEC 17050-1) Champaign, IL USA Steven A. Hall Vice President Dec 10, 2009 No.