Table of Contents
Advertisement
Quick Links
Advertisement
Table of Contents

Related Manuals for AEG BCE556060M


Summary of Contents for AEG BCE556060M
- Page 1 BCE556060M User Manual Oven BCK556260M USER MANUAL...
-
Page 2: Table Of Contents
FOR PERFECT RESULTS Thank you for choosing this AEG product. We have created it to give you impeccable performance for many years, with innovative technologies that help make life simpler – features you might not find on ordinary appliances. Please spend a few minutes reading to get the very best from it. -
Page 3: Safety Information
SAFETY INFORMATION 8. HOW TO USE: ACCESSORIES....22 11.3 How to remove: Shelf supports ...30 11.4 How to use: Catalytic cleaning ..30 8.1 Inserting accessories..... 22 11.5 How to remove and install: Door..31 8.2 Using Trivet and Grill- / 11.6 How to replace: Lamp....32 Roasting pan........23 8.3 Food Sensor........ -
Page 4: General Safety
SAFETY INFORMATION Children should be supervised to ensure that they do not • play with the appliance. Keep all packaging away from children and dispose of it • appropriately. WARNING: The appliance and its accessible parts become • hot during use. Keep children and pets away from the appliance when in use and when cooling down. -
Page 5: Safety Instructions
SAFETY INSTRUCTIONS WARNING: The appliance and its accessible parts become • hot during use. Care should be taken to avoid touching heating elements. Always use oven gloves to remove or insert accessories or • ovenware. Use only the food sensor (core temperature sensor) •... -
Page 6: Electrical Connection
SAFETY INSTRUCTIONS Height of the front of the appliance 594 mm Height of the back of the appliance 576 mm Width of the front of the appliance 595 mm Width of the back of the appliance 559 mm Depth of the appliance 567 mm Built in depth of the appliance 546 mm... -
Page 7: Use
SAFETY INSTRUCTIONS 2.3 Use WARNING! Risk of injury, burns and electric shock or explosion. • Do not change the specification of this appliance. • Make sure that the ventilation openings are not blocked. • Do not let the appliance stay unattended during operation. •... -
Page 8: Internal Lighting
SAFETY INSTRUCTIONS • Clean the appliance with a moist soft cloth. Use only neutral detergents. Do not use abrasive products, abrasive cleaning pads, solvents or metal objects. • If you use an oven spray, follow the safety instructions on its packaging. •... -
Page 9: Product Description
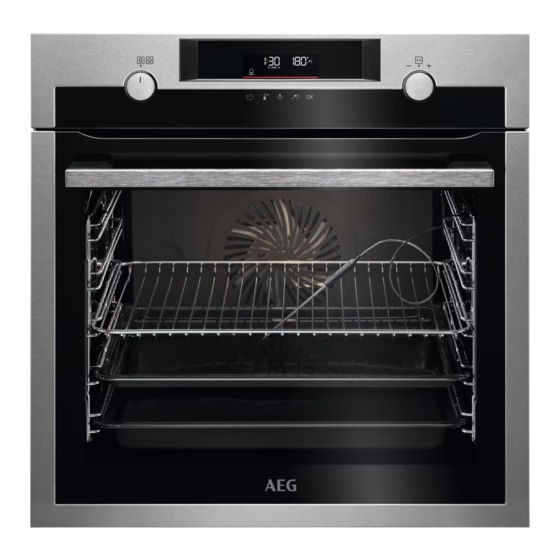
PRODUCT DESCRIPTION 3. PRODUCT DESCRIPTION 3.1 General overview Control panel Knob for the heating functions Display Control knob Socket for the food sensor Heating element Lamp Shelf support, removable Cavity embossment Shelf positions 3.2 Accessories Wire shelf For cookware, cake tins, roasts. Grill- / Roasting pan To bake and roast or as a pan to collect fat. -
Page 10: How To Turn Oven On And Off
HOW TO TURN OVEN ON AND OFF Food sensor To measure the temperature inside food. 4. HOW TO TURN OVEN ON AND OFF 4.1 Control panel Control panel sensor fields Press Turn the knob Fast Food Sen‐ Confirm Timer Light Heat Up setting Select a heating function to turn on the oven. -
Page 11: Before First Use
BEFORE FIRST USE Lock Assisted Cook‐ Cleaning Settings Fast Heat Up Timer indi‐ cators: Progress bar - for temperature or time. The bar is fully red when the oven reaches the set tempera‐ ture. Steam cooking indicator Food sensor indicator 5. -
Page 12: Daily Use
DAILY USE Preheat the empty oven before the first use. Step 3 Set the maximum temperature for the function: Let the oven operate for 15 min. The oven can emit an odour and smoke during preheating. Make sure that the room is ventila‐ ted. -
Page 13: Heating Functions
DAILY USE Steam cooking Preheat the empty oven for 10 min to create humidity. Put food in the oven. Set the tem‐ Select the Fill the cavity embossment with tap perature. steam heating water. function. Press The maximum capacity of the cavity embossment is 250 ml. Do not refill the cavity emboss‐ ment during cooking or when the oven is hot. -
Page 14: Notes On: Moist Fan Baking
DAILY USE Heating function Application To add humidity during the cooking. To get the right colour and crispy crust during baking. To give more juiciness during reheating. To preserve fruit or vegetables. SteamBake To bake pizza. To make intensive browning and a crispy bottom. Pizza Function To bake cakes with crispy bottom and to preserve food. -
Page 15: How To Set: Assisted Cooking
DAILY USE 6.4 How to set: Assisted Cooking Every dish in this submenu has a recommended function and temperature. You can adjust the time and the temperature during cooking. For some of the dishes you can also cook with: The degree to which a dish is cooked: •... - Page 16 DAILY USE Dish Weight Shelf level / Accessory Duration time Roast Beef, ~ 40 min rare 1 - 1,5 kg; 4 2; baking tray Roast Beef, - 5 cm thick ~ 50 min Fry the meat for a few minutes on a hot medium pieces pan.
- Page 17 DAILY USE Dish Weight Shelf level / Accessory Duration time Veal roast 0,8 - 1,5 kg; ~ 80 min 2; roasting dish on wire shelf (e.g. shoulder) 4 cm thick Use your favourite spices. Add liquid. pieces Roast covered. Pork Pork roast 1,5 - 2 kg ~ 120 min...
- Page 18 DAILY USE Dish Weight Shelf level / Accessory Duration time Chicken 180 - 200 g ~ 25 min 2; casserole dish on wire breast per piece shelf Use your favourite spices. Fry the meat for a few minutes on a hot pan. Chicken legs, ~ 30 min 3;...
- Page 19 DAILY USE Dish Weight Shelf level / Accessory Duration time Apple tart 40 min 2; pie form on wire shelf Apple pie 60 min 100 - 150 ml; 22 cm pie form on wire shelf Brownies 2 kg 30 min 3;...
-
Page 20: Clock Functions
CLOCK FUNCTIONS Dish Weight Shelf level / Accessory Duration time Potato gratin 1 - 1,5 kg 50 min 1; casserole dish on wire shelf (raw potatoes) Rotate the dish after half of the cooking time. Pizza fresh, 100 ml; baking tray lined 15 min thin with baking paper... -
Page 21: How To Set: Clock Functions
CLOCK FUNCTIONS 7.2 How to set: Clock functions How to set: Time of day Step 1 Step 2 Step 3 To change the time of day enter the menu Set the clock. Press: and select Settings, Time of day. How to set: Minute minder Step 1 Step 2 Step 3... -
Page 22: How To Use: Accessories
HOW TO USE: ACCESSORIES How to set: Time Delay Step 1 Step 2 Step 3 Step 4 Step 5 Step 6 The dis‐ The dis‐ play play shows: shows: the time --:-- of day Select Press re‐ Set the Set the STOP Press: Press:... -
Page 23: Using Trivet And Grill- / Roasting Pan
HOW TO USE: ACCESSORIES Wire shelf, Deep pan: Push the tray between the guide bars of the shelf support and the wire shelf on the guide bars above. 8.2 Using Trivet and Grill- / Roasting pan WARNING! Be careful when you remove the accessories from a hot oven. There is a risk of burns. -
Page 24: Food Sensor
HOW TO USE: ACCESSORIES 8.3 Food Sensor Food Sensor- measures the temperature inside the food. There are two temperatures to be set: The oven temperature. The core temperature. For the best cooking results: Ingredients should be at Do not use it for liquid During cooking it must remain in room temperature. -
Page 25: Additional Functions
ADDITIONAL FUNCTIONS Step 4 Plug Food Sensor into the socket at the front of the oven. The display shows the current temperature of: Food Sensor. Step 5 - press to set the core temperature of the sensor. Step 6 - press to confirm. When food reaches the set temperature, the signal sounds. -
Page 26: Cooling Fan
HINTS AND TIPS (°C) 200 - 245 250 - maximum The Automatic switch-off does not work with the functions: Light, Food sensor, Time Delay. 9.3 Cooling fan When the oven operates, the cooling fan turns on automatically to keep the surfaces of the oven cool. -
Page 27: Moist Fan Baking - Recommended Accessories
HINTS AND TIPS 10.2 Moist Fan Baking - recommended accessories Use the dark and non-reflective tins and containers. They have better heat absorption than the light colour and reflective dishes. Ramekins Pizza pan Baking dish Flan base tin Ceramic Dark, non-reflective Dark, non-reflective Dark, non-reflective 8 cm diameter,... - Page 28 HINTS AND TIPS BAKING ON ONE LEVEL. Biscuits Use the third shelf position. (°C) (min) Short bread / Pastry strips True Fan Cooking 25 - 40 Short bread / Pastry strips, Conventional Cooking 20 - 30 preheat the empty oven Small cakes, 20 per tray, True Fan Cooking 20 - 35...
-
Page 29: Care And Cleaning
CARE AND CLEANING GRILL Preheat the empty oven for 5 minutes. Grill with the maximum temperature setting. (min) Toast Grill 1 - 3 Beef steak, turn halfway Grill 24 - 30 through 11. CARE AND CLEANING WARNING! Refer to Safety chapters. 11.1 Notes on cleaning Clean the front of the oven with a soft cloth with warm water and a mild deter‐... -
Page 30: How To Clean: Cavity Embossment
CARE AND CLEANING Clean all accessories after each use and let them dry. Use a soft cloth with warm water and a mild detergent. Do not clean the accessories in a dishwash‐ Do not clean the non-stick accessories using abrasive cleaner or sharp-edged Accessories objects. -
Page 31: How To Remove And Install: Door
CARE AND CLEANING Clean the oven with catalytic cleaning Before the catalytic cleaning remove all accessories. Step 1 Step 2 Step 3 When the cleaning ends the When the oven is cold, Select Menu / Cleaning signal sounds. The oven turns clean the cavity with a wet and press three times. -
Page 32: How To Replace: Lamp
CARE AND CLEANING Step 4 Hold the door trim (B) on the top edge of the door at the two sides and push inwards to release the clip seal. Step 5 Pull the door trim to the front to remove it. Step 6 Hold the door glass panels on their top edge one by one and... -
Page 33: Troubleshooting
TROUBLESHOOTING Top lamp Step 1 Turn the glass cover to remove it. Step 2 Clean the glass cover. Step 3 Replace the lamp with a suitable 300 °C heat-resistant lamp. Step 4 Install the glass cover. 12. TROUBLESHOOTING WARNING! Refer to Safety chapters. 12.1 What to do if... -
Page 34: Service Data
TROUBLESHOOTING Components The lamp does not work. The lamp is burnt out. The Food sensor does not operate. The plug of the Food sensor is fully inserted in‐ to the socket. Error codes The display shows... Check if... Err C2 You removed the Food sensor plug from the socket. -
Page 35: Energy Efficiency
ENERGY EFFICIENCY 13. ENERGY EFFICIENCY 13.1 Product Information Sheet according to UK Ecodesign and Energy Labelling Regulations Supplier's name BCE556060M 944188710 Model identification BCK556260M 944188731 Energy Efficiency Index 81.2 Energy efficiency class Energy consumption with a standard load, conventional 1.09 kWh/cycle... -
Page 36: Menu Structure
MENU STRUCTURE Residual heat The fan and lamp continue to operate. When you turn off the oven, the display shows the residual heat. You can use that heat to keep the food warm. When the cooking duration is longer than 30 min, reduce the oven temperature to minimum 3 - 10 min before the end of cooking. -
Page 37: Environmental Concerns
ENVIRONMENTAL CONCERNS Settings Key tones 1 - Beep Buzzer volume 1 - 4 2 - Click 3 - Sound off Food Sensor Action 1 - Alarm Uptimer On / Off and stop 2 - Alarm Light On / Off Fast Heat Up On / Off Demo mode Activation... - Page 38 38/40...
- Page 39 39/40...
- Page 40 www.aeg.com/shop...