Table of Contents
Advertisement
Quick Links
Advertisement
Table of Contents

Related Manuals for Makita DHR182ZJ


Summary of Contents for Makita DHR182ZJ
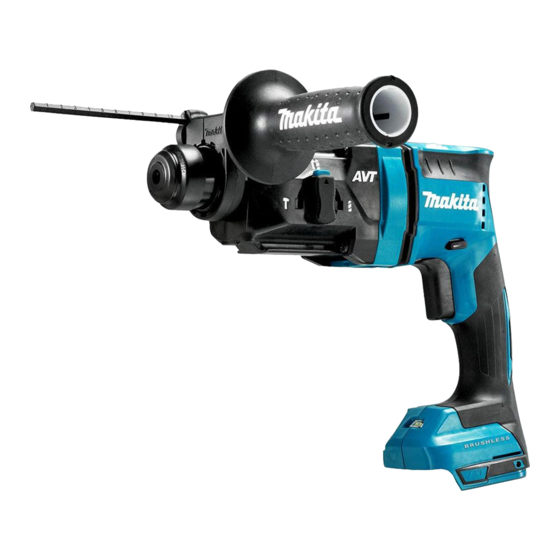
- Page 1 INSTRUCTION MANUAL Cordless Combination Hammer DHR182 Read before use.
-
Page 2: Specifications
SPECIFICATIONS Model: DHR182 Capacities Concrete 18 mm Core bit 35 mm Diamond core bit (dry type) 32 mm Steel 13 mm Wood 24 mm No load speed 0 - 1,350 min Blows per minute 0 - 5,000 min Overall length 301 mm Rated voltage D.C. -
Page 3: Ec Declaration Of Conformity
WARNING: Wear ear protection. WARNING: The noise emission during actual use of the power tool can differ from the declared value(s) depending on the ways in which the tool is used especially what kind of workpiece is processed. WARNING: Be sure to identify safety mea- sures to protect the operator that are based on an estimation of exposure in the actual conditions of use (taking account of all parts of the operating... - Page 4 If operating a power tool in a damp location is unavoid- Power tool use and care able, use a residual current device (RCD) protected Do not force the power tool. Use the correct supply. Use of an RCD reduces the risk of electric shock. power tool for your application.
- Page 5 Do not use a battery pack or tool that is dam- 13. Do not touch the bit, parts close to the bit, or aged or modified. Damaged or modified batteries workpiece immediately after operation; they may be extremely hot and could burn your may exhibit unpredictable behaviour resulting in skin.
- Page 6 17. Do not remove the wireless unit from the slot causing fires, personal injury and damage. It will while the power is being supplied to the tool. also void the Makita warranty for the Makita tool and Doing so may cause a malfunction of the wireless charger.
-
Page 7: Functional Description
Indicating the remaining battery FUNCTIONAL capacity DESCRIPTION Only for battery cartridges with the indicator CAUTION: Always be sure that the tool is switched off and the battery cartridge is removed before adjusting or checking function on the tool. Installing or removing battery cartridge CAUTION: Always switch off the tool before... -
Page 8: Overheat Protection
Overheat protection Reversing switch action When the tool or battery is overheated, the tool stops automatically. In this case, let the tool and battery cool before turning the tool on again. NOTE: When the tool is overheated, the lamp blinks. Overdischarge protection When the battery capacity is not enough, the tool stops automatically. - Page 9 Rotation only Adjusting the nozzle position of the dust collection system For drilling in wood, metal or plastic materials, rotate the action mode changing knob to the symbol. Use a twist drill bit or wood drill bit. Optional accessory Push in the guide while pushing up the guide adjust- ment button, and then release the button at the desired position.
-
Page 10: Electronic Function
Torque limiter Grease Coat the shank end of the drill bit beforehand with a NOTICE: As soon as the torque limiter actuates, small amount of grease (about 0.5 - 1 g). switch off the tool immediately. This will help pre- This chuck lubrication assures smooth action and longer service life. -
Page 11: Depth Gauge
Chisel angle (when chipping, Installing or removing dust scaling or demolishing) collection system The chisel can be secured at the desired angle. To Optional accessory change the chisel angle, rotate the action mode chang- To remove the dust collection system, pull the tool while ing knob to the O symbol. - Page 12 Before installing the dust cup set, remove the bit from Dust cup set the tool if installed. Install the spacer so that the grooves on the Optional accessory spacer fit in the protrusions on the tool barrel while wid- Installing the dust cup set ening it. Be careful for the spring not to come off from the slit of spacer. NOTICE: If you purchase the dust cup set as optional accessory, the standard side grip cannot be used with the dust cup set being installed on...
- Page 13 Removing the dust cup set Install the dust cup set so that the claws of the dust cup fit in in the slits on the spacer. To remove the dust cup set, follow the steps below. Loosen the side grip. ► 1 . Side grip ► 1 . Dust cup 2. Claws Hold the root of dust cup and pull it out.
- Page 14 The tool hanger is intended for connecting the lanyard (tether strap). To install the tool hanger to the tool, follow the steps below. Remove the battery cartridge from the tool. Attach the tool hanger from the bottom of the tool as shown in the figure.
-
Page 15: Operation
Tighten the screw firmly. Hammer drilling operation ► 1 . Screw CAUTION: There is tremendous and sudden twisting force exerted on the tool/drill bit at the time of OPERATION hole break-through, when the hole becomes clogged with chips and particles, or when striking reinforcing rods embedded in the concrete. - Page 16 By beating the dust on the filter inside the dust case, Drilling in wood or metal you can keep the vacuum efficiency and also reduce the number of times to dispose of the dust. CAUTION: Hold the tool firmly and exert care Turn the dial on the dust case three times after col- lecting every 50,000 mm of dust or when you feel the when the drill bit begins to break through the vacuum performance declined.
- Page 17 Open the cover of the dust case. Using dust cup set Optional accessory Fit the dust cup set against the ceiling when operating the tool. ► 1 . Cover Dispose of the dust, and then clean the filter. NOTICE: Do not use the dust cup set when drilling in metal or similar.
- Page 18 16. In the event the tool is dropped, it must be CAUTION: tagged and removed from service, and should Place the tool on a flat and stable be inspected by a Makita Factory or Authorized surface when installing the wireless unit. Service Center. NOTICE: Clean the dust and dirt on the tool before installing the wireless unit.
- Page 19 Tool registration for the vacuum cleaner NOTE: A Makita vacuum cleaner supporting the wireless activation function is required for the tool registration. NOTE: Finish installing the wireless unit to the tool before starting the tool registration.
- Page 20 Push the wireless activation button on the tool NOTE: The wireless activation lamps finish blinking briefly. The wireless activation lamp will blink in blue. in green after 20 seconds elapsed. Press the wireless activation button on the tool while the wireless acti- vation lamp on the cleaner is blinking. If the wireless activation lamp does not blink in green, push the wire- less activation button briefly and hold it down again.
- Page 21 Description of the wireless activation lamp status ► 1 . Wireless activation lamp The wireless activation lamp shows the status of the wireless activation function. Refer to the table below for the meaning of the lamp status. Status Wireless activation lamp Description Color Duration...
- Page 22 If the cancellation is performed successfully, the wire- Cancelling tool registration for the less activation lamps will light up in red for 2 seconds vacuum cleaner and start blinking in blue. NOTE: The wireless activation lamps finish blinking in Perform the following procedure when cancelling the red after 20 seconds elapsed. Press the wireless acti- tool registration for the vacuum cleaner.
- Page 23 Troubleshooting for wireless activation function Before asking for repairs, conduct your own inspection first. If you find a problem that is not explained in the manual, do not attempt to dismantle the tool. Instead, ask Makita Authorized Service Centers, always using Makita replace- ment parts for repairs. State of abnormality Probable cause (malfunction) Remedy The wireless activation lamp does The wireless unit is not installed into the tool.
-
Page 24: Maintenance
Discoloration, deformation or cracks may result. To maintain product SAFETY and RELIABILITY, repairs, any other maintenance or adjustment should be performed by Makita Authorized or Factory Service Centers, always using Makita replacement parts. ► 1 . Filter 2. Filter case Replacing filter of dust case Attach a new filter to the filter case, and then attach the filter cover. -
Page 25: Optional Accessories
OPTIONAL ACCESSORIES CAUTION: These accessories or attachments are recommended for use with your Makita tool specified in this manual. The use of any other accessories or attachments might present a risk of injury to persons. Only use accessory or attachment for its stated purpose. If you need any assistance for more details regard- ing these accessories, ask your local Makita Service Center. - Page 28 Makita Europe N.V. Jan-Baptist Vinkstraat 2, 3070 Kortenberg, Belgium Makita Corporation 3-11-8, Sumiyoshi-cho, Anjo, Aichi 446-8502 Japan 885674C222 www.makita.com 20191218...