Table of Contents
Advertisement
Available languages
Available languages
PDUMH15NET/PDUMH20NET
PDUMH15HVNET/PDUMH20HVNET
• 208/230V, 50/60Hz AC Input and Output
Important Safety Instructions
Installation
Features
Configuration and Operation
Technical Support
Warranty and Warranty Registration
Español
Français
201110149-93-2718.indd 1
Owner's Manual
Switched Rack PDU
• 120V, 60Hz AC Input and Output
Switched Rack PDU
1111 W. 35th Street, Chicago, IL 60609 USA
www.tripplite.com/support
Copyright © 2011 Tripp Lite. All rights reserved.
1
2
2
9
11
12
12
13
25
11/9/2011 11:17:25 AM
Advertisement
Table of Contents

Related Manuals for Tripp Lite SLT


Summary of Contents for Tripp Lite SLT
- Page 1 Features Configuration and Operation Technical Support Warranty and Warranty Registration Español Français 201110149-93-2718.indd 1 Switched Rack PDU Switched Rack PDU 1111 W. 35th Street, Chicago, IL 60609 USA www.tripplite.com/support Copyright © 2011 Tripp Lite. All rights reserved. 11/9/2011 11:17:25 AM...
-
Page 2: Important Safety Instructions
Important Safety Instructions SAVE THESE INSTRUCTIONS This manual contains instructions and warnings that should be followed during the installation, operation, and storage of this product. Failure to heed these instructions and warnings may affect the product warranty. • The PDU provides convenient multiple outlets, but it DOES NOT provide surge or line noise protection for connected equipment. - Page 3 Installation continued 0U Rack Mounting: Use 3 screws attach each of the 2 shorter mounting brackets to the PDU as shown. Mount the PDU vertically by inserting 2 or more user-supplied screws through the mounting brackets into mounting points in the rack or rack enclosure.
-
Page 4: Connecting The Pdu
Installation continued Connecting the PDU NEMA Adapter Connection (Optional - PDUMH20HVNET Only): The PDUMH20HVNET includes a plug adapter that adds a NEMA L6-20P plug to the input power cord. Use this adapter only if you will be connecting the PDUMH20HVNET to a NEMA L6-20R outlet. - Page 5 Installation continued Equipment Power Cord Connection: Insert the IEC 60320 C14 connectors equipment power cords into the IEC 60320 C13 output receptacles of the PDU (PDUMH15HVNET and PDUMH20HVNET). Insert power cords into the NEMA 5-15R output receptacles (PDUMH15NET) or NEMA 5-15/20R output receptacles (PDUMH20NET).
-
Page 6: Networking The Pdu
Installation continued Networking the PDU Note: The MAC address of the PDU (a 12-digit string in this format: 000667xxxxxx) is printed on a label attached to the PDU enclosure. The MAC address is also printed on a label attached to the internal network card. If your network's DHCP server will assign a dynamic IP address to the PDU automatically, go to Step . - Page 7 Gateway address IP address [192.168.1.1]? 192.168.0.1 Gateway address IP address is 192.168.0.1 You can also change the root password, real-time clock and other settings. (Tripp Lite recommends against changing the default settings unless you are an advanced user with a specific purpose.) After you have finished entering settings, the PDU will save changes to memory and reboot (this may take several minutes).
- Page 8 Installation continued Networking the PDU Testing Network Connection Access PDU with Web Browser: After an IP address has been assigned to the PDU, attempt to access it with a Web browser that supports frames, forms and Java ™ . Open a Web browser on a computer connected to the LAN and enter the IP address assigned to the PDU.
-
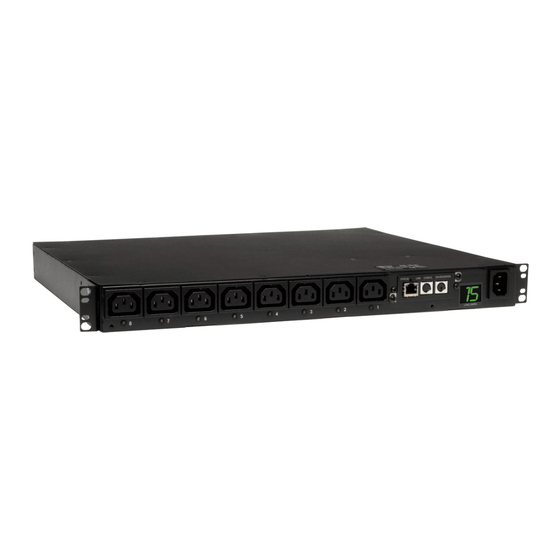
Page 9: Features
Features 201110149-93-2718.indd 9 AC Input Power Inlet (Model PDUMH15HVNET): The IEC 60320 C14 inlet connects to the detachable AC Input Power Cord. AC Input Power Inlet (Model PDUMH20HVNET): The IEC 60320 C20 inlet connects to the detachable AC Input Power Cord. AC Input Power Cord (Model PDUMH15HVNET): The detachable cord has an IEC 60320 C13 connector 60320 C14 connector... - Page 10 Features continued NEMA 5-15R Output Receptacles (PDUMH15NET): During normal operation, the output receptacles distribute AC power to connected equipment. When an outlet is live, the associated LED illuminates. NEMA 5-15/20R Output Receptacles (PDUMH20NET): During normal operation, the output receptacles distribute AC power to connected equipment.
-
Page 11: Configuration And Operation
SNMPWEBCARD User's Guide, included on the CD-ROM bundled with the PDU. 201110149-93-2718.indd 11 PS/2 Port: Use this port to connect a Tripp Lite ENVIROSENSE environmental sensor to provide remote temperature/humidity monitoring and a dry contact interface to control and monitor alarm, security and telecom devices. -
Page 12: Technical Support
Seller will repair or replace the product, in its sole discretion. Service under this Warranty can only be obtained by your delivering or shipping the product (with all shipping or delivery charges prepaid) to: Tripp Lite, 1111 W. -
Page 13: Manual Del Propietario
• 208/230V, 50/60Hz AC Input y Output Instrucciones de seguridad importantes Instalación Características Configuración y operación Soporte técnico Garantía English Français 201110149-93-2718.indd 13 1111 W. 35th Street, Chicago, IL 60609 USA www.tripplite.com/support © 2011 Tripp Lite. Todos los derechos reservados. 11/9/2011 11:17:37 AM... -
Page 14: Instrucciones De Seguridad Importantes
Instrucciones de seguridad importantes GUARDE ESTAS INSTRUCCIONES Este manual contiene instrucciones y advertencias que deben seguirse durante la instalación, operación y almacenamiento de este producto. De no seguirlas, se afectar la garantía del producto. • El PDU proporciona cómodas salidas múltiples, pero NO proporciona protección contra sobretensión o ruido en la línea al equipo conectado. - Page 15 Instalación continuación Montaje en Bastidor 0U (Vertical): Use 3 tornillos para fijar cada uno de los 2 soportes de montajes más largos al PDU como se muestra. Monte el PDU verticalmente insertando 2 o más tornillos, suministrados por el usuario a través de los soportes de montaje hoyos de montaje en los rieles del bastidor o el estante para bastidor.
-
Page 16: Conexión Del Pdu
Instalación continuación Conexión del PDU Conexión del Adaptador NEMA (Opcional - PDUMH20HVNET únicamente): El PDUMH20HVNET incluye un adaptador de clavija que añade la clavija NEMA L6-20P al cable de alimentación de entrada. Use este adaptador solamente si va a conectar el PDUMH20HVNET a una toma corriente NEMA L6-20R. - Page 17 Instalación continuación Conexión del Cable de Alimentación del Equipo: Inserte los conectores IEC 60320 C14 del cable de alimentación del equipo en las tomas de corriente IEC 60320 C13 (PDUMH15HVNET y PDUMH20HVNET). Inserte los cables de energía dentro de los receptáculos de salida del NEMA 5-15R (PDUMH15NET) o los receptáculos de salida del NEMA 5-15/20R...
-
Page 18: Conectando Su Pdu A La Red
Instalación continuación Conectando Su PDU a la Red Nota: La dirección MAC (Media Access Control / Control de Acceso de Medios) del PDU (una serie de 12-dígitos en este formato: 000667xxxxxx) está impresa en una etiqueta adherida al gabinete del PDU. La dirección MAC también está impresa en una etiqueta adherida a la tarjeta de red interna. - Page 19 Gateway address IP address [192.168.1.1]? 192.168.0.1 Gateway address IP address is 192.168.0.1 También puede cambiar la contraseña de la Raíz, el reloj-de-tiempo-real, y otros valores. (Tripp Lite no recomienda cambiar la configuración de fábrica a menos que sea un usuario avanzado y con objetivos específicos) Después que haya terminado de efectuar los ajustes, el PDU guardará...
- Page 20 Instalación continuación Conectando Su PDU a la Red Probando la Conexión de Red Acceda al PDU con el Navegador de Red: Después que una dirección IP ha sido asignada al PDU, trate de acceder con navegador de Web que soporte frames [marcos], forms [formas] y Java™.
- Page 21 Características 201110149-93-2718.indd 21 Toma de la Energía de Entrada CA (Modelo PDUMH15HVNET): La toma IEC 60320 C14 conecta el cable de alimentación CA desprendible. Toma de la Energía de Entrada CA (Modelo PDUMH20HVNET): La toma IEC 60320 C20 conecta el cable de alimentación CA desprendible.
- Page 22 Características continuación Receptáculos de salida NEMA 5-15R (PDUMH13NET): Durante la operación normal, los receptáculos de salida distribuyen la energía de CA al equipo conectado. Cuando una salida está viva se ilumina el LED asociado. Receptáculos de salida NEMA 5-15/20R (PDUMH20NET): Durante la operación normal, los receptáculos de salida distribuyen la energía de CA al equipo conectado.
-
Page 23: Configuración Y Operación
Puerto PS/2: Use este puerto para conectar el sensor ambiental ENVIROSENSE de Tripp Lite para monitorear la temperatura y humedad en forma remota y una interfaz de contacto seco para controlar y monitorear los dispositivos de alarma, seguridad y telecomunicaciones. -
Page 24: Soporte Técnico
Sólo puede obtenerse servicio bajo esta garantía, entregando o despachando el producto (con todos los cargos de despacho o entrega pagados por adelantado) a: Tripp Lite, 1111 W. 35th Street, Chicago, IL 60609 USA. El vendedor pagará los cargos de despacho del retorno. Visite www.tripplite.com/support antes de enviar algún equipo para reparación. -
Page 25: Manuel Du Propriétaire
• 208/230V, 50/60Hz AC Input et Output Importantes consignes de sécurité Installation Caractéristiques Configuration et fonctionnement Assistance technique Garantie English Español 201110149-93-2718.indd 25 1111 W. 35th Street, Chicago, IL 60609 USA www.tripplite.com/support Copyright 2011 Tripp Lite. Tous droits réservés. 11/9/2011 11:17:40 AM... -
Page 26: Importantes Consignes De Sécurité
Importantes consignes de sécurité CONSERVER CES DIRECTIVES Ce manuel contient des instructions et des mises en garde que vous devez respecter durant l’installation, l’utilisation et l’entreposage de ce produit. Le non-respect de ces instructions et mises en garde affecter la garantie du produit. •... - Page 27 Installation suite Montage en bâti 0U (vertical) : Utilisez 3 pour fixer chacun des deux supports de fixation courts à l'unité, comme illustré. Montez l'unité de distribution verticalement en insérant 2 vis (ou plus, fournies par vous) dans les supports de fixation sur les rails du bâti ou dans le coffret.
-
Page 28: Connexion De L'unité De Distribution D'alimentation (Pdu)
Installation suite Connexion de l'unité de distribution d'alimentation (PDU) Connexion des adaptateurs NEMA (en option - PDUMH20HVNET seulement) : PDUMH20HVNET comprend un adaptateur de fiche qui ajoute une fiche NEMA L6-20P au cordon d'alimentation. N'utilisez cet adaptateur que si vous désirez brancher PDUMH20HVNET à... - Page 29 Installation suite Connexion du cordon d'alimentation de l'équipement : Insérez les connecteurs IEC 60320 C14 de l'adaptateur dans les prises de sortie IEC 60320 C13 de l'unité de distribution (PDUMH15HVNET et PDUMH20HVNET). Insérer les cordons d'alimentation dans les prises de sortie NEMA 5-15R (PDUMH15NET) ou les prises de sorties NEMA 5-15/20R...
-
Page 30: Mise En Réseau De L'unité De Distribution
Installation suite Mise en réseau de l'unité de distribution Note : L'adresse MAC de la PDU (une chaîne de 12 chiffres de ce format : 000667xxxxxx) est imprimée sur l'étiquette fixée à l'enceinte de la PDU. Cette adresse est aussi imprimée sur l'étiquette fixée sur la carte réseau interne. Si votre serveur de réseau DHCP assigne automatiquement une adresse dynamique IP à... - Page 31 Installation suite Mise en réseau de l'unité de distribution Connecter la PDU à l'ordinateur : Utiliser le câble série mini-DIN à DB9 (pièce no 73-1025) joint à la PDU pour connecter celle-ci à l'ordinateur. Le connecteur circulaire des extrémités du câble se fixe au port série mini- DIN 8 broches sur la PDU.
- Page 32 Installation suite Mise en réseau de l'unité de distribution Test de la connexion réseau Accès à la PDU à l'aide d'un navigateur Web : Une fois une adresse IP affectée à la carte, essayer d'y accéder à l'aide d'un navigateur Web qui supporte les cadres, les masques de saisie et Java™.
-
Page 33: Caractéristiques
Caractéristiques 201110149-93-2718.indd 33 Entrée de courant alternatif (modèle PDUMH15HVNET) : L'entrée IEC 60320 C14 se connecte à un cordon d'alimentation en courant alternatif détachable. Entrée de courant alternatif (modèle PDUMH20HVNET) : L'entrée IEC 60320 C20 se connecte à un cordon d'alimentation en courant alternatif détachable. - Page 34 Caractéristiques suite Prises de courant de sortie NEMA 5-15R (PDUMH15NET) : durant le fonctionnement normal, les prises de courant de sortie distribue du courant CA à l’équipement connecté. Lorsqu’une prise est sous tension, la DEL lui étant associée s’allume. Prises de courant de sortie NEMA 5-15/20R (PDUMH20NET) : durant le fonctionnement normal, les prises de courant de sortie distribue du courant CA à...
-
Page 35: Configuration Et Fonctionnement
à contact sec pour commander et surveiller les dispositifs d'alarme, de sécurité et de télécommunications. Appeler l'assistance à la clientèle de Tripp Lite au (773) 869-1234 pour des renseignements sur les commandes. Note : Ne pas connecter de clavier ni de souris à... -
Page 36: Assistance Technique
(avec les frais d'expédition et de livraison prépayés) à : Tripp Lite, 1111 W. 35th Street, Chicago, IL 60609 USA. Le vendeur paierai les frais d'expédition de retour. Visitez www.tripplite.com/support avant d'envoyer un équipement pour réparations.