Tripp Lite PDUMH15NET Owner's Manual
Switched rack pdu
Hide thumbs
Also See for PDUMH15NET:
- Owner's manual (37 pages) ,
- Owner's manual (24 pages) ,
- Owner's manual (32 pages)
Table of Contents
Advertisement
Available languages
Available languages
Quick Links
Owner's Manual
PDUMH15NET/PDUMH20NET
PDUMH15HVNET/PDUMH20HVNET
• 208/230V, 50/60 Hz AC Input and Output
PROTECT YOUR INVESTMENT!
Register your product for quicker service
and ultimate peace of mind.
You could also win an
ISOBAR6ULTRA surge protector-
www.tripplite.com/warranty
1111 W. 35th Street, Chicago, IL 60609 USA • www.tripplite.com/support
21-03-425-93368A.indb 1
21-03-425-93368A.indb 1
Switched Rack PDU
• 120V, 60 Hz AC Input and Output
Switched Rack PDU
a $100 value!
Copyright © 2019 Tripp Lite. All rights reserved.
1
2
3
6
8
8
9
17
25
4/5/2021 2:41:42 PM
4/5/2021 2:41:42 PM
Advertisement
Chapters
Table of Contents

Related Manuals for Tripp Lite PDUMH15NET


Summary of Contents for Tripp Lite PDUMH15NET
-
Page 1: Table Of Contents
You could also win an ISOBAR6ULTRA surge protector— a $100 value! www.tripplite.com/warranty 1111 W. 35th Street, Chicago, IL 60609 USA • www.tripplite.com/support Copyright © 2019 Tripp Lite. All rights reserved. 21-03-425-93368A.indb 1 21-03-425-93368A.indb 1 4/5/2021 2:41:42 PM 4/5/2021 2:41:42 PM... -
Page 2: Important Safety Instructions
Important Safety Instructions SAVE THESE INSTRUCTIONS This manual contains instructions and warnings that should be followed during the installation, operation, and storage of this product. Failure to heed these instructions and warnings may affect the product warranty. CAUTION Only those who are properly trained or qualified to use this device should do so. -
Page 3: Installation
Installation Mounting the PDU The PDU supports five primary mounting configurations: 1U Rack, 0U Rack (Vertical), Wall, Under- Counter and Reduced-Depth. Note: Regardless of configuration, the user must determine the fitness of hardware and procedures before mounting. The PDU and included hardware are designed for common rack and rack enclosure types and may not be appropriate for all applications. - Page 4 Installation Under-Counter Mounting: Use 3 screws to attach each of the 2 shorter mounting brackets to the PDU as shown. Mount the PDU under the counter by inserting 2 or more user- supplied screws through the mounting brackets and into secure mounting points.
- Page 5 AC power, such as a UPS system, PDU or utility outlet. The PDU should be provided with over- current protection: PDUMH15NET with a maximum 15A branch-rated protection PDUMH15NET/PDUMH20NET device. PDUMH20NET with a maximum 20A branch-rated protection device.
-
Page 6: Features
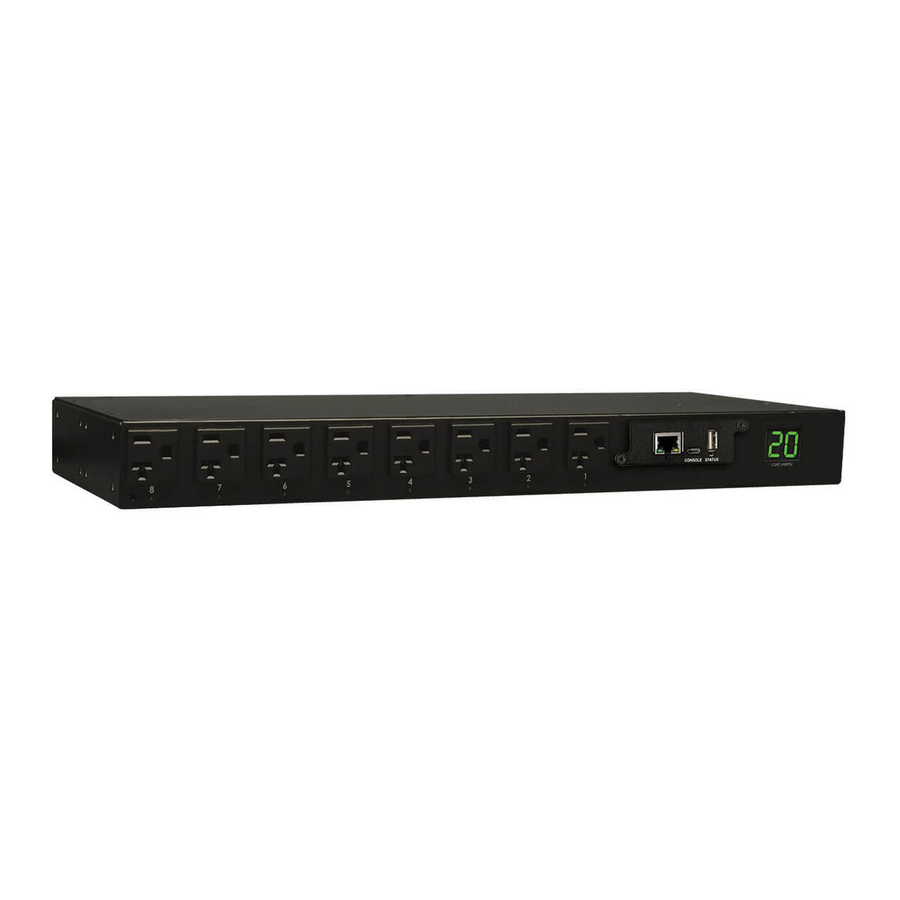
IEC 60320 C19 connector and an IEC 60320 C20 connector AC Input Power Cord (Model PDUMH15NET): The cord is permanently attached to the PDU and has a NEMA 5-15P plug. AC Input Power Cord (Model PDUMH20NET): The cord is permanently attached to the PDU and has a NEMA L5-20P plug. - Page 7 Features NEMA 5-15/20R Output Receptacles (PDUMH20NET): During normal operation, the output receptacles distribute AC power to connected equipment. When an outlet is live, the associated LED illuminates. IEC 60320 C13 Output Receptacles (PDUMH15HVNET & PDUMH20HVNET): During normal operation, the output receptacles distribute AC power to connected equipment.
-
Page 8: Technical Support
Service under this Warranty can only be obtained by your delivering or shipping the product (with all shipping or delivery charges prepaid) to: Tripp Lite, 1111 W. 35th Street, Chicago, IL 60609 USA. Seller will pay return shipping charges. Visit www.tripplite.com/support before sending any equipment back for repair. -
Page 9: Español
Instrucciones de Seguridad Importantes 10 Instalación Características Soporte Técnico Garantía English Français Русский 1111 W. 35th Street, Chicago, IL 60609 EE. UU. • www.tripplite.com/support Copyright © 2019 Tripp Lite. Todos los derechos reservados. 21-03-425-93368A.indb 9 21-03-425-93368A.indb 9 4/5/2021 2:41:48 PM 4/5/2021 2:41:48 PM... -
Page 10: Instrucciones De Seguridad Importantes
Instrucciones de Seguridad Importantes CONSERVE ESTAS INSTRUCCIONES Este manual contiene instrucciones y advertencias que deben seguirse durante la instalación, operación y almacenamiento de este producto. La omisión en la observancia de estas instrucciones y advertencias puede afectar la garantía del producto. PRECAUCION Este aparato no se destina para utilizarse por personas (incluyendo niños), cuyas capacidades fisicas, sensoriales o mentales sean diferentes o estén... -
Page 11: Instalación
Instalación Instalación del PDU El PDU soporta cinco configuraciones primarias de instalación: Rack de 1U, Rack 0U (vertical), en la Pared, Bajo el Mostrador y Profundidad Reducida Nota: Sin importar la configuración, antes de la instalación, el usuario debe determinar la adecuación de los accesorios y procedimientos. - Page 12 Instalación Instalación Bajo el Mostrador: Use 3 tornillos para fijar cada uno de los 2 soportes pequeños de instalación PDU como se muestra. Instale el PDU bajo el mostrador insertando 2 o más tornillos suministrados por el usuario a través de los soportes de instalación y en puntos seguros de instalación.
- Page 13 Nota: La fuente de energía de CA no debe compartir un circuito con una carga eléctrica pesada (como un aire acondicionado o refrigerador). Conecte el Cable de Alimentación (PDUMH15NET y PDUMH20NET): Conecte la clavija de entrada a una fuente compatible de energía de CA, como un sistema UPS, PDU o tomacorriente de energía de la red pública.
-
Page 14: Características
IEC 60320 C19 y un conector IEC 60320 C20 Cable de Alimentación de CA (Modelo PDUMH15NET): El cable está conectado de forma permanente al PDU y tiene una clavija NEMA 5-15P . Cable de Alimentación de CA (Modelo PDUMH20NET): El cable está... - Page 15 Características Tomacorrientes NEMA 5-15/20R (PDUMH20NET): Durante la operación normal, los tomacorrientes distribuyen energía de CA al equipo conectado. Cuando un tomacorrientes está encendido, el LED asociado se ilumina. Tomacorrientes IEC 60320 C13 (PDUMH15HVNET y PDUMH20HVNET): Durante la operación normal, los tomacorrientes distribuyen energía de CA al equipo conectado.
-
Page 16: Soporte Técnico
El servicio bajo esta garantía sólo puede obtenerse enviando o embarcando el producto (con todos los cargos de envío o embarque prepagados) a: Tripp Lite, 1111 W. 35th Street, Chicago, IL 60609 EE UU. El vendedor reembolsará los cargos de embarque. Antes de devolver cualquier equipo para reparación, visite www. -
Page 17: Français
Consignes de sécurité importantes Installation Caractéristiques Soutien technique Garantie English Español Русский 1111 W. 35th Street, Chicago, IL 60609 USA • www.tripplite.com/support Droits d'auteur © 2019 Tripp Lite. Tous droits réservés. 21-03-425-93368A.indb 17 21-03-425-93368A.indb 17 4/5/2021 2:41:52 PM 4/5/2021 2:41:52 PM... -
Page 18: Consignes De Sécurité Importantes
Consignes de sécurité importantes CONSERVEZ CES INSTRUCTIONS Ce manuel contient des instructions et des avertissements qui doivent être respectés pendant l'installation, l'utilisation et l'entreposage de ce produit. Le non-respect de ces instructions et de ces avertissements pourrait avoir une incidence sur la garantie du produit. •... -
Page 19: Installation
Installation Montage de la PDU La PDU peut accueillir cinq principales configurations de montage : 1U en bâti, 0U en bâti (vertical), murale, sous le comptoir et à profondeur réduite. Remarque : Quelle que soit la configuration, l'utilisateur doit déterminer l'aptitude du matériel et des procédures avant de procéder au montage. - Page 20 Installation Montage sous le comptoir : Utiliser 3 pour fixer chacun des 2 supports de montage plus courts à la PDU comme illustré. Monter la PDU sous le comptoir en insérant au moins deux vis fournies par l'utilisateur à travers les supports de montage et dans les points de montage solides.
- Page 21 à une source d'alimentation CA compatible, comme un onduleur, une PDU ou une prise électrique. La PDU devrait recevoir une protection contre les surcharges : PDUMH15NET avec un PDUMH15NET/PDUMH20NET dispositif de protection d'une section nominale de 15 A maximum. PDUMH20NET avec un dispositif de protection d'une section nominale de 20 A maximum.
-
Page 22: Caractéristiques
IEC 60320 C19 et un connecteur IEC 60320 C20 Cordon d'alimentation de l'entrée CA (modèle PDUMH15NET) : Le cordon est attaché en permanence à la PDU et comporte une fiche d'entrée NEMA 5-15P . Cordon d'alimentation de l'entrée CA (modèle PDUMH20NET) : Le cordon est attaché... - Page 23 Caractéristiques Prises de sortie NEMA 5-15/20R (PDUMH20NET) : Lors du fonctionnement normal, les prises de sortie distribuent une alimentation CA à l'équipement branché. Lorsqu'une sortie est sous tension, le témoin à DEL lui étant associé s'allume. Prises de sortie IEC 60320 C13 (PDUMH15HVNET et PDUMH20HVNET) : Lors du fonctionnement normal, les prises de sortie distribuent une alimentation CA à...
-
Page 24: Soutien Technique
à sa seule discrétion. Le service sous cette garantie ne peut être obtenue qu'en livrant ou en expédiant le produit (avec tous les frais d'expédition ou de livraison prépayés) à : Tripp Lite, 1111 W. 35th Street, Chicago, IL 60609 États-Unis. -
Page 25: Русский
Важные указания по технике безопасности Установка Функциональные возможности Техническая поддержка Гарантийные обязательства English Español Français 1111 W. 35th Street, Chicago, IL 60609 USA • www.tripplite.com/support Охраняется авторским правом © 2019 Tripp Lite. Перепечатка запрещается. 21-03-425-93368A.indb 25 21-03-425-93368A.indb 25 4/5/2021 2:41:56 PM 4/5/2021 2:41:56 PM... - Page 26 Важные указания по технике безопасности СОХРАНИТЕ НАСТОЯЩИЕ УКАЗАНИЯ В настоящем руководстве содержатся указания и предупреждения, которые необходимо соблюдать в процессе установки, эксплуатации и хранения данного изделия. Игнорирование этих указаний и предупреждений может привести к потере гарантии на изделие. • Блок распределения питания (PDU) удобно оснащен несколькими розетками, но НЕ обеспечивает защиту подключенного оборудования...
- Page 27 Установка (продолжение) Вертикальный монтаж в стойку (высота 0U): с помощью 3 винтов прикрепите оба укороченных монтажных кронштейна к корпусу PDU, как показано на рисунке. Прикрепите PDU вертикально путем ввертывания двух или более винтов (не входящих в комплект поставки) через монтажные кронштейны в...
- Page 28 к совместимому источнику питания переменного тока (например, ИБП, PDU или сетевой розетке). PDU должен быть оснащен защитой от перегрузок по току: модель PDUMH15NET должна оснащаться устройством защитного отключения номиналом не более 15 A. Модель PDUMH20NET ― устройством защитного отключения номиналом не более 20 А.
- Page 29 оборудования в выходные розетки IEC 60320 C13 ( ) PDU (мод. PDUMH15HVNET и PDUMH20HVNET). Вставьте шнуры питания в выходные розетки типа NEMA 5-15R ( ) (для мод. PDUMH15NET) или NEMA 5-15/20R ( ) (для мод. PDUMH20NET). Свечение находящегося рядом с каждой PDUMH15NET выходной розеткой светодиодного индикатора...
- Page 30 отсоединяемый шнур имеет разъем типа IEC 60320 C19 ( ) и разъем типа IEC 60320 C20 ( Вход питания переменного тока (мод. PDUMH15NET): шнур жестко прикреплен к PDU и имеет разъем типа NEMA 5-15P. Шнур питания переменного тока (мод. PDUMH20NET): шнур жестко прикреплен...
- Page 31 Функциональные возможности (продолжение) Выходные розетки NEMA 5-15R (для мод. PDUMH15NET): в штатном режиме работы эти выходные розетки распределяют мощность переменного тока между подключенными к ним элементами оборудования. Во время нахождения той или иной розетки под напряжением горит связанный с ней светодиодный индикатор.
- Page 32 периода Продавец осуществляет ремонт или замену данного изделия исключительно по своему усмотрению. Обслуживание по настоящей Гарантии производится только при условии доставки или отправки вами бракованного изделия (с предварительной оплатой всех расходов по его транспортировке или доставке) по адресу: Tripp Lite, 1111 W.