Makita DLM465 Instruction Manual
Hide thumbs
Also See for DLM465:
- Instruction manual (145 pages) ,
- Instruction manual (145 pages) ,
- Instruction manual (113 pages)
Table of Contents
Advertisement
Quick Links
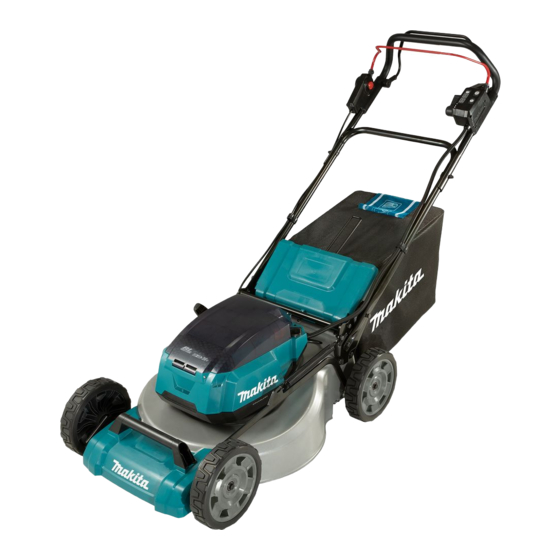
Cordless Lawn Mower
EN
Tondeuse Sans Fil
FR
Akku Rasenmäher
DE
Tosaerba a batteria
IT
Accugrasmaaier
NL
Cortadora de Cesped
ES
Cortadora de Grama a Bateria MANUAL DE INSTRUÇÕES
PT
Akku-plæneklipper
DA
Μηχανή γκαζόν με μπαταρία
EL
Akülü Çim Biçme Makinasi
TR
DLM465
DLM536
INSTRUCTION MANUAL
MANUEL D'INSTRUCTIONS
BETRIEBSANLEITUNG
ISTRUZIONI PER L'USO
GEBRUIKSAANWIJZING
MANUAL DE
INSTRUCCIONES
BRUGSANVISNING
ΕΓΧΕΙΡΙΔΙΟ ΟΔΗΓΙΩΝ
KULLANMA KILAVUZU
9
21
35
49
63
76
89
102
115
129
Advertisement
Table of Contents

Related Manuals for Makita DLM465


Summary of Contents for Makita DLM465
- Page 1 Akku Rasenmäher BETRIEBSANLEITUNG Tosaerba a batteria ISTRUZIONI PER L’USO Accugrasmaaier GEBRUIKSAANWIJZING MANUAL DE Cortadora de Cesped INSTRUCCIONES Cortadora de Grama a Bateria MANUAL DE INSTRUÇÕES Akku-plæneklipper BRUGSANVISNING Μηχανή γκαζόν με μπαταρία ΕΓΧΕΙΡΙΔΙΟ ΟΔΗΓΙΩΝ Akülü Çim Biçme Makinasi KULLANMA KILAVUZU DLM465 DLM536...
- Page 2 Fig.3 Fig.1 Fig.4 Fig.2 Fig.5...
- Page 3 Fig.6 Fig.10 Fig.7 Fig.11 Fig.8 Fig.12 Fig.9 Fig.13...
- Page 4 Fig.14 Fig.18 Fig.15 Fig.19 Fig.16 Fig.20 Fig.17 Fig.21...
- Page 5 Fig.22 Fig.25 Fig.23 Fig.26 Fig.27 Fig.24 Fig.28...
- Page 6 Fig.29 Fig.32 Fig.30 Fig.33 Fig.34 Fig.31 Fig.35...
- Page 7 Fig.36 Fig.40 Fig.37 Fig.41 Fig.38 Fig.39 Fig.42...
- Page 8 Fig.43...
-
Page 9: Specifications
ENGLISH (Original instructions) SPECIFICATIONS Model: DLM465 DLM536 Mowing width (blade diameter) 460 mm 534 mm No load speed Normal mode 3,300 min 2,800 min Noise reduction mode 2,500 min 2,300 min Part number of replacement Straight mower blade 191D51-9 / 191W86-4... -
Page 10: Safety Warnings
In accordance with the European Directive on waste electrical and electronic equipment Model DLM465 and on accumulators and batteries and Vibration emission (a ) : 2.5 m/s or less waste accumulators and batteries, as well as Uncertainty (K) : 1.5 m/s... - Page 11 Keep in mind that the operator or user is Use personal protective equipment. Always responsible for accidents or hazards occurring wear eye protection. Protective equipment such as a dust mask, non-skid safety shoes, hard hat or to other people or their property. hearing protection used for appropriate conditions Children should be supervised to ensure that will reduce personal injuries.
- Page 12 17. Always keep a firm hold on the handle. 34. Do not use the machine in the snow. 35. If the cut-off grass is wet, it is likely to be 18. Don't grasp the exposed cutting blades or cutting edges when picking up or holding the clogged inside of the machine.
- Page 13 Use power tools only with specifically desig- Never service damaged battery packs. Service of battery packs should only be performed by the nated battery packs. Use of any other battery packs may create a risk of injury and fire. manufacturer or authorized service providers. When battery pack is not in use, keep it away SAVE THESE INSTRUCTIONS. from other metal objects, like paper clips, coins, keys, nails, screws or other small metal WARNING: DO NOT let comfort or familiarity...
-
Page 14: Installing The Handle
CAUTION: Only use genuine Makita batteries. then tighten the nut from outside with box wrench 13. Use of non-genuine Makita batteries, or batteries that have been altered, may result in the battery bursting Perform the same procedure on the other side. ► Fig.3: 1. Bolt 2. Lower handle 3. Nut 4. Hole causing fires, personal injury and damage. It will... -
Page 15: Functional Description
NOTICE: FUNCTIONAL Do not insert the handle into the grass basket. Be sure to insert the frame along the stitch of DESCRIPTION the grass basket. Make sure that there is no sagging on the corners of the grass basket. Installing or removing battery ► Fig.9 cartridge Open the upper clip, and attach it to the frame. - Page 16 Switching the battery cartridges Indicating the remaining battery capacity ► Fig.22: 1. Battery selection switch The machine uses 2 battery cartridges for operation Only for battery cartridges with the indicator at a time. Up to 4 battery cartridges can be installed to ► Fig.23: 1. Indicator lamps 2. Check button the machine. Before operating the machine, select the Press the check button on the battery cartridge to indi- battery port 1 or battery port 2 by turning the battery cate the remaining battery capacity. The indicator lamps selection switch. light up for a few seconds.
-
Page 17: Adjusting The Mowing Height
Hold the front grip or the lower handle with one hand, NOTE: Mower may not start due to the overload and then move the mowing height adjusting lever with when you try to mow long or dense grass at a time. the other hand. Increase the mowing height in this case. ► Fig.28: 1. Mowing height adjusting lever 2. Lower handle 3. Front grip This mower is equipped with the lock key and handle switch. If you notice anything unusual with either of the lock key NOTE: The mowing height figures should be used or switch, stop the operation immediately and have them just as a guideline. Depending on the conditions of checked by your nearest Makita Authorized Service Center. the lawn or the ground, the actual lawn height may become slightly different from the set height. Install the battery cartridges. Insert the lock key, and then close the battery cover. NOTE: Try a test mowing of grass in a less conspicu- Select the battery cartridges used for operation by ous place to get your desired height. turning the battery selection switch. 17 ENGLISH... -
Page 18: Operation
NOTE: This indicator is a rough guide. Depending on the mower blades after releasing the switch lever, the conditions of inside of the basket, this indicator may not work properly. have the machine serviced at Makita Authorized Service Center. Adjusting the handle height OPERATION... -
Page 19: Maintenance
To lock the blade, insert the pin supplied with the machine into a hole on the mower body. To maintain product SAFETY and RELIABILITY, repairs, any other maintenance or adjustment should Turn the bolt counterclockwise with box wrench be performed by Makita Authorized or Factory Service ► Fig.42: 1. Mower blade 2. Pin 3. Box wrench Centers, always using Makita replacement parts. Remove the bolt, and then mower blade. Maintenance ► Fig.43: 1. -
Page 20: Troubleshooting
Mower blade • Makita genuine battery and charger CAUTION: These accessories or attachments NOTE: Some items in the list may be included in the product package as standard accessories. They may are recommended for use with your Makita machine specified in this manual. The use of any differ from country to country. other accessories or attachments might present a risk of injury to persons. Only use accessory or attach- ment for its stated purpose. 20 ENGLISH...