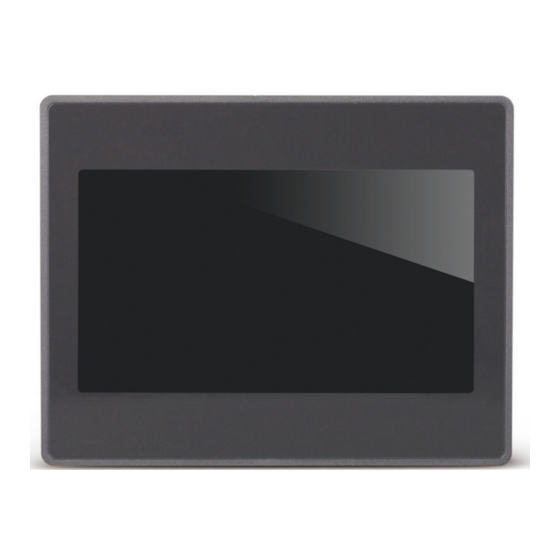
Summary of Contents for Honeywell CENTRA LINE WEB-HMI4/C
- Page 1 WEB-HMI4/C, WEB-HMI7/C, WEB-HMI7/CF, WEB-HMI10/CF, WEB-HMI16/CF and WEB-HMI21/CF User’s Manual (SW) Copyright © 2021 Honeywell GmbH. • All Rights Reserved EN2Z-1077GE51 R0621...
- Page 2 WEB-HMI4/C, WEB-HMI7/C, WEB-HMI7/CF, WEB-HMI10/CF, WEB-HMI16/CF AND WEB-HMI21/CF - USER'S MANUAL (SW) This page intentionally left blank. EN2Z-1077GE51 R0621...
-
Page 3: Table Of Contents
WEB-HMI4/C, WEB-HMI7/C, WEB-HMI7/CF, WEB-HMI10/CF, WEB-HMI16/CF AND WEB-HMI21/CF - USER'S MANUAL (SW) CONTENTS DOCUMENT PROCESS ................................. 4 TRADEMARKS ..................................4 Software License Advisory ................. 4 Trademark Information ..................4 FIRST AND QUICK START OF DEVICE..........................5 First start of the device ..................5 Configuration of the web client ................ -
Page 4: Document Process
This document supports software that is proprietary to Honeywell GmbH, Honeywell Control Systems Ltd. and/or to third party software vendors. Before software delivery, the end user must execute a software license agreement that governs software use. -
Page 5: First And Quick Start Of Device
WEB-HMI4/C, WEB-HMI7/C, WEB-HMI7/CF, WEB-HMI10/CF, WEB-HMI16/CF AND WEB-HMI21/CF - USER'S MANUAL (SW) FIRST AND QUICK START OF DEVICE First start of the device After starting up the device for the first time, you are located on the settings page. Therefore, user need to login to the Setup menu to configure the device. By default, the username and password are admin. -
Page 6: Configuration Of The Web Client
WEB-HMI4/C, WEB-HMI7/C, WEB-HMI7/CF, WEB-HMI10/CF, WEB-HMI16/CF AND WEB-HMI21/CF - USER'S MANUAL (SW) Configuration of the web client The Settings Page The settings page is the default start page. Enter your credentials to open the configuration menu or press Load Homepage on the write top to access the configuration done in the web browser setup. -
Page 7: The Web Browser Settings
WEB-HMI4/C, WEB-HMI7/C, WEB-HMI7/CF, WEB-HMI10/CF, WEB-HMI16/CF AND WEB-HMI21/CF - USER'S MANUAL (SW) The Web Browser Settings After entering the configuration menu, you are forwarded to the Web Browser configuration. To change the web Browser configuration, press the EDIT button on the right top on the page. Change the “on start”... -
Page 8: Finish Quick Start
WEB-HMI4/C, WEB-HMI7/C, WEB-HMI7/CF, WEB-HMI10/CF, WEB-HMI16/CF AND WEB-HMI21/CF - USER'S MANUAL (SW) Disabling the DHCP switch will allow you to enter the IP-Address manually. After you press Save, the manually entered IP address will be used for the device. NOTE: The device has an internal firewall which blocks all incoming network traffic, including ICMP ping requests. -
Page 9: Open The System Settings Menu
WEB-HMI4/C, WEB-HMI7/C, WEB-HMI7/CF, WEB-HMI10/CF, WEB-HMI16/CF AND WEB-HMI21/CF - USER'S MANUAL (SW) OPEN THE SYSTEM SETTINGS MENU The system settings menu is entered after powering on the device and entering valid credentials “Username” and “Password” into the login mask. The main topics of configuration are listed on the left side of the system settings screen. -
Page 10: System
WEB-HMI4/C, WEB-HMI7/C, WEB-HMI7/CF, WEB-HMI10/CF, WEB-HMI16/CF AND WEB-HMI21/CF - USER'S MANUAL (SW) System Parameter Description Info Provide ‘Device information’ like: Name Kernal version Build date Hardware code Total available RAM Status Provides device ‘Status’ like: Free RAM ... -
Page 11: Date & Time
WEB-HMI4/C, WEB-HMI7/C, WEB-HMI7/CF, WEB-HMI10/CF, WEB-HMI16/CF AND WEB-HMI21/CF - USER'S MANUAL (SW) Date & Time Provides access to the HMI panel date and time and to setup NTP operation if required. Currently, HMI panel only makes use of date and time settings to provide an accurate timestamp to entries in the log files. -
Page 12: Management
WEB-HMI4/C, WEB-HMI7/C, WEB-HMI7/CF, WEB-HMI10/CF, WEB-HMI16/CF AND WEB-HMI21/CF - USER'S MANUAL (SW) Management It is possible to update system components of the HMI device. This is done from the management area. NOTE: Working in the Management area is a critical operation and, if not performed correctly, may cause product damages requiring service of the product. -
Page 13: To Remove A Custom Font
WEB-HMI4/C, WEB-HMI7/C, WEB-HMI7/CF, WEB-HMI10/CF, WEB-HMI16/CF AND WEB-HMI21/CF - USER'S MANUAL (SW) Locate the required font file and select it. Select Ok. The following screen will be displayed: Select PROCEED. The selected font will now be installed on HMI panel. Note: Each style of a font (e.g. regular, bold, italic, bold italic, etc.) requires a separate font file. -
Page 14: Exit
WEB-HMI4/C, WEB-HMI7/C, WEB-HMI7/CF, WEB-HMI10/CF, WEB-HMI16/CF AND WEB-HMI21/CF - USER'S MANUAL (SW) Parameter Description If enabled, this displays a toolbar along the top edge of the Enable toolbar display, providing access to the login screen or allowing a different web page to be entered. The following options are also available when the toolbar is enabled: Show toolbar only on error: If enabled, the toolbar will ... -
Page 15: Factory Reset
WEB-HMI4/C, WEB-HMI7/C, WEB-HMI7/CF, WEB-HMI10/CF, WEB-HMI16/CF AND WEB-HMI21/CF - USER'S MANUAL (SW) FACTORY RESET The factory reset sets back the device properties and settings to factory default. What you need: A USB Flash Drive The chromium runtime for the device un6x-chromium-xx-x.x.zip Create the recovery USB device Format the device with a FAT32 filesystem and copy the complete file “un6x-chromium-xx-x.x.zip”... - Page 16 WEB-HMI4/C, WEB-HMI7/C, WEB-HMI7/CF, WEB-HMI10/CF, WEB-HMI16/CF AND WEB-HMI21/CF - USER'S MANUAL (SW) Open the Startup sequence On the Installed Apps on the left, select the Chromium version and press Uninstall. EN2Z-1077GE51 R0621...
- Page 17 WEB-HMI4/C, WEB-HMI7/C, WEB-HMI7/CF, WEB-HMI10/CF, WEB-HMI16/CF AND WEB-HMI21/CF - USER'S MANUAL (SW) After both fields are empty, press Install and browse to the file “un6x-chromium-xx- x.x.zip” located on mnt/usbmemory. Select the file “un6x-chromium-xx-x.x.zip” and press Install. Wait or press Done to execute the restart sequence. EN2Z-1077GE51 R0621...
- Page 18 WEB-HMI4/C, WEB-HMI7/C, WEB-HMI7/CF, WEB-HMI10/CF, WEB-HMI16/CF AND WEB-HMI21/CF - USER'S MANUAL (SW) Manufactured for and on behalf of the Connected Building Division of Honeywell Products and Solutions Sàrl, Z.A. La Pièce 16, 1180 Rolle, Switzerland by its Authorized Representative: CentraLine Honeywell GmbH Böblinger Strasse 17...


Need help?
Do you have a question about the CENTRA LINE WEB-HMI4/C and is the answer not in the manual?
Questions and answers