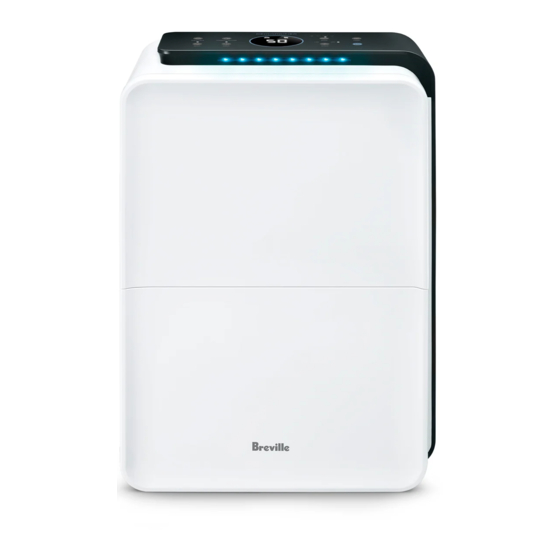
Summary of Contents for Breville Smart Dry Ultimate LAD500
- Page 1 Smart Dry Ultimate Dehumidifier ™ Instruction Book - LAD500 LAD500_ANZ_IB_C19.indd 1 8/4/19 1:38 pm...
-
Page 2: Table Of Contents
RECOMMENDS list before discarding the SAFETY FIRST packaging. At Breville we are very safety • The dehumidifier is intended conscious. We design and for household use only manufacture consumer and not for commercial or products with the safety of you, industrial use. - Page 3 Breville service centre for examination, electrical • Do not route the power cord or mechanical adjustment under furniture or appliances. or repair. • To protect against electrical •...
- Page 4 • Any maintenance other than • Do not let the power cord cleaning should be performed hang over the edge of a at an authorised Breville bench or table, touch hot Service Centre. surfaces or become knotted. • This appliance is for •...
- Page 5 moving vehicles or boats. • Before cleaning, always turn the appliance to the off Do not use outdoors. Misuse may cause injury. position, switch off at the power outlet, unplug at the • The installation of a residual power outlet and remove the current device (safety switch) power cord, if detachable, is recommended to provide...
-
Page 6: Components
Components Front Back A. Control Panel Not Pictured B. Carry Handle Air Filter C. Air Outlet Dust Filter D. Water Tank Handle Carbon Filter E. Water Tank Cover Pump Drainage Hose (8m) F. Water Tank Pump Outlet Clip G. Wheels Pump Suction Hose (20cm) H. -
Page 7: Control Panel
Control Panel CHILD LOCK HUMIDITY SETTING MODE PUMP HIGH NIGHT TIMER SPEED A. Humidity Setting Display Screen Icons & Lights B. Child Lock Auto Dehumidification C. Night Mode Continuous Dehumidification D. Timer Laundry E. Pump On/Off Ventilation F. Mode Pump G. -
Page 8: Features
BEFORE FIRST USE WHAT IS A DEHUMIDIFIER? 1. Before using your dehumidifier for the Your Breville dehumidifier is designed to first time, remove and safely discard any reduce and maintain the level of humidity in packaging material or promotional labels the air as well as to prevent condensation and attached to your air dehumidifier and air... -
Page 9: Functions
SENSAIR™ LIVE HUMIDITY CONTROL mode can be selected if desired. 3. If in Auto mode, adjust the humidity level if • Your Breville Smart Dry Ultimate™ desired (see Humidity Setting). Dehumidifier has a built-in sensor to detect changes in the humidity level in the air. - Page 10 NIGHT MODE CHILD LOCK The Night mode will automatically turn off all When the Child Lock is engaged, the buttons lights on the control panel (except the Night on the control panel are locked from use. button light) and operate in the last setting. 1.
- Page 11 1. Locate the continuous drainage outlet PUMP DRAINAGE on the back, right hand side of the Pump drainage allows the dehumidifier dehumidifier, underneath the air inlet grille. to empty the water tank using the hose to Remove the plug and insert one end of the pump the water out of the tank when full.
- Page 12 5. Locate and remove the blue pump outlet 9. Remove the drainage hose from the rear of clip from the drainage outlet on the the unit. opposite side of the dehumidifier, and set 10. Replace the blue pump outlet clip, placing aside for later use.
-
Page 13: Care, Cleaning & Storage
WATER LEVEL SENSOR Care, Cleaning The water level sensor is situated in a chamber & Storage found in the corner of the water tank and is held in place by the water tank cover (see illustration below). The sensor rises and falls with the level of the water, and should not be removed as it WARNING will prevent the dehumidifier from operating. - Page 14 1. Remove the air inlet grille from the back of WARNING the unit using the grooves on either side of the holder and pulling outwards. Water in the water tank is not suitable for 2. Separate the dust filter from the grille. drinking.
- Page 15 REPLACEMENT FILTERS Air Filter Dust Filter Replacement filters can be purchased from the Breville website^ or at participating retail Carbon Filter outlets. Air Inlet See the table below for the replacement Grille product code to suit this Breville Dehumidifier.
-
Page 16: Troubleshooting
Troubleshooting TROUBLESHOOTING GUIDE Before carrying out any of the following service checks, unplug the unit from the power outlet. PROBLEM POSSIBLE CAUSES WHAT TO DO • • Dehumidifier not Power plug is disconnected. Plug the power cord into the power socket. •... - Page 17 ERROR CODES ERROR CODE POSSIBLE CAUSES WHAT TO DO E2 is on the display The humidity sensor is not Contact Breville customer service. screen. working. E3 is on the display There is damage to the automatic Contact Breville customer service.
- Page 18 Notes LAD500_ANZ_IB_C19.indd 18 8/4/19 1:38 pm...
- Page 19 Notes LAD500_ANZ_IB_C19.indd 19 8/4/19 1:38 pm...
- Page 20 Web: www.breville.com Breville, the Breville logo, Master Every Moment, Smart Dry Ultimate and SenSair are trademarks of Breville Pty. Ltd. A.B.N. 98 000 092 928. Copyright Breville Pty. Ltd. 2019. Due to continued product improvement, the products illustrated/photographed in this booklet may vary slightly from the actual product.


