
Related Manuals for GE Vivid E9 Series


Summary of Contents for GE Vivid E9 Series
-
Page 1: Vivid E9 Features Used During Percutaneous Mitral Valve Repair
01/2013 GE Healthcare Vivid*E9 Features used during Percutaneous Mitral Valve Repair NOTE For more information please refer to the user manual and/or reference manual. * Trademark of General Electric Company... -
Page 2: Table Of Contents
GE Healthcare Content Contents VIVID E9 FEATURES USED DURING PERCUTANEOUS MITRAL VALVE REPAIR ......1 Content ....................................1 Basic operation Vivid E9 ..............................4 VIVID E9 FEATURES USED DURING PERCUTANEOUS MITRAL VALVE REPAIR ......5 Overview ....................................5 Div. Modalities ..................................5 Touch panel ................................... - Page 3 GE Healthcare FLEXI SLICE ............................28 How to work with Flexi Slice ............................29 How to operate ................................. 30 Movements to be done ..............................30 Tools to navigate the volume dataset ........................30 Rotation of the entire dataset............................30 Rotate your cut plane ..............................30 Flexi Slice on rendered image ............................
-
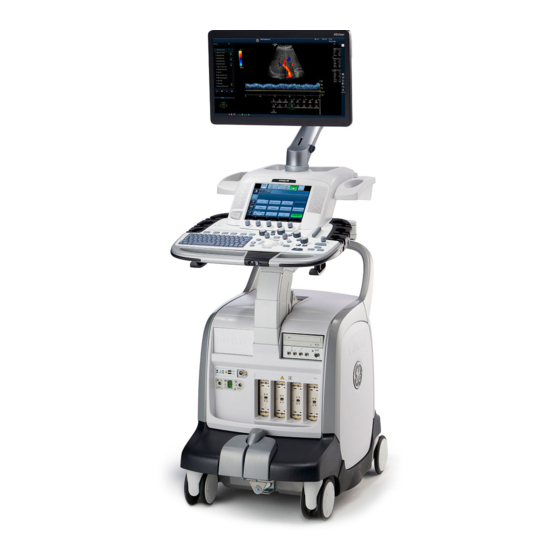
Page 4: Basic Operation Vivid E9
GE Healthcare Basic operation Vivid E9 1. On / Off 2. Archive 3. Probe selection 4. Div. Modalities 5. Cursor 6. Depth 7. 2D Gain 8. Active Mode Gain 9. Touchpanel 10. Rotation knobs 11. Freeze 12. Caliper 13. Measurement 14. -
Page 5: Vivid E9 Features Used During Percutaneous Mitral Valve Repair
GE Healthcare Vivid E9 Features used during Percutaneous Mitral Valve Repair Overview 1. On / Off 2. Archive 3. Probe selection 4. Div. Modalities 5. Cursor 6. Depth 7. 2D Gain 8. Active Mode Gain 9. Touchpanel 10. Rotation knobs 11. -
Page 6: Touch Panel
GE Healthcare Touch panel The Touch panel enables the access of modality driven controls. The mode / function controls are organized in tabbed folders. Several pages may be accessed within each folder. At the button of the Touch panel, there are five rotary / push buttons. The functionality of these button changes, based on the active mode / function. -
Page 7: Generic: Rotation, Clear Button, Angle Button
GE Healthcare Generic 1 2 3 Rotation / Image Store 2D life: Rotation scan plane counter clock wise 2D life: Image store Freeze: Image store 2D life: Rotation scan plane clock wise Quick rotate Rotates all scan planes to predefined angles (30°... -
Page 8: Multi D
GE Healthcare Multi D Multi - Dimensional Bi – Plane V- Plane Tri – Plane (Default) Bi - Plane / Tri - Plane Scan plane rotation The angle increment of scan plane 2 or 3 relative to the scan plane 1 (fixed) can be adjusted with the trackball. -
Page 9: General Information
GE Healthcare 4D General Information Screen Layout Azimuth Plane shows the image according to the probe position Rendered Image Elevation Plane Shows an image in a 90° angle to the azimuth plane Image optimization Overall Gain Same rotational knob as 2D gain... -
Page 10: Navigation
GE Healthcare 4D Navigation Absolute or Relative Absolute navigation Trackball up/down: Tilt the dataset up/down Trackball left/right: Rotate counter clockwise/clockwise Translation can be done, by using the rotational knob or by pressing the Set button to change the Trackball function from... -
Page 11: Zoom
GE Healthcare 4 D Zoom / MV acquisition with Vivid E9 4D TOE Anterior MV leaflet Posterior MV leaflet - 11 -... -
Page 12: Zoom / Mv Acquisition On Vivid E9 4D Toe
GE Healthcare 4D Zoom / MV acquisition on Vivid E9 4D TOE General remarks While scanning with VE9 BT12 and 4D TEE there is an easy way to get a quick acquisition of the Mitral valve in a surgical view. -
Page 13: Adjust Zoom Region Of Interest
GE Healthcare A biplane image appears on the screen. The Zoom region of interest appears with a standard width in the middle of the planes. Adjust Zoom region of interest Note When adjusting the Zoom ROI, it’s recommended to adjust the size not too tight. Adjusting the ROI very tight, landmarks for orientation can get cut i.e. - Page 14 GE Healthcare Press the Set button to change from Position to ROI Size and adjust accordingly. Use the Set button to change between Position and Size and optimize until satisfied. To further adjust in Elevation plane, press the Trackball button or use the Ref Plane button on the touch panel.
-
Page 15: Mv Button
GE Healthcare MV button The intention of the MV button is to get instantaneous access to the surgical view (Aortic valve at 12o’clock position) with one push of a button. Once the Zoom ROI is set properly press the Mitral valve button on the touch panel Rendered image A rendered zoomed image of the MV is displayed in the rendered mode. - Page 16 GE Healthcare Translation of the viewing plane closer to MV: Before After Press Image Store once satisfied with the image. Temporal resolution If higher temporal resolution is needed a multi-beat acquisition might be necessary. By splitting the entire volume into several sub volumes (by keeping the selected...
-
Page 17: Click Crop
GE Healthcare 2 Click Crop - 17 -... -
Page 18: Click Crop
GE Healthcare 2 Click Crop General 2 Click Crop can be used in Live or in Post processing. Just with 2 clicks the image will be cropped and the viewing direction is getting adjusted to the position where you wanted to look from. - Page 19 GE Healthcare Where to go While moving the cursor the system immediately shows you the result in the rendered image. As long as the end point is not set, the cursor can be adjusted in all directions and the rendered image will visualize the cropped area.
- Page 20 GE Healthcare The 2 click Move the cursor to the final position, and then set the second point. Now the cropping is set fixed. Note Once the second point is set you cannot adjust the cropping further more. Simply click on a new position to start the cropping from a different position.
- Page 21 GE Healthcare 2 Click crop on Render You may also use the rendered image to set the two points in your 4D dataset Be aware depth is not taken into account Selection Result - 21 -...
-
Page 22: Exit 2 Click Crop
GE Healthcare Other Layouts While pressing the Layout button another screen Layout can be chosen. You may use one of these other Layouts and apply 2 Click Crop there. Example: Use the Quad view with the triplane image plus the rendered image. Here you have the standard apical views to make your 2 Click Crop selection. -
Page 23: Color Flow
GE Healthcare 4D Color Flow 4D Color flow prepare While in 2D with CFM pressing the 4D button you are heading to the 4D CFM prepare mode. The small-medium-large will now only affect the size of the tissue, while the user can adjust the color ROI to his need. -
Page 24: Laser Lines
GE Healthcare Laser Lines - 24 -... -
Page 25: Where To Access
GE Healthcare Laser Lines General The intention of Laser Lines is to give a correlation between the 2D slice images and the rendered images. So that the exact position of the 2D slice can be seen on the rendered image. In addition they can help improve the depth perception. - Page 26 GE Healthcare Either all Lines can be visualized in red; this will have the look alike similar to a Laser Pointer. Appreciate the depth perception when following the lines over the surfaces. - 26 -...
- Page 27 GE Healthcare Color By using the colored Laser Lines, the lines will get the color according to the color coding of the 2D slice. This has the positive effect that the user can immediately correlate the 2D slice with the according Laser Line.
-
Page 28: Flexi Slice
GE Healthcare Flexi Slice - 28 -... -
Page 29: How To Work With Flexi Slice
GE Healthcare How to work with Flexi Slice General Flexi-Slice is available in Live scanning as well as in Post processing. In Flexi Slice a rendered image and three 2D slices are displayed. The user has the full flexibility to adjust the data in each one of the 2D slices in order to achieve a specific view of interest. -
Page 30: How To Operate
GE Healthcare How to operate Movements to be done Every line in each of the slices can be moved and tilted in order to adjust the according 2D slice. Depending on the placement of the cursor along the line, the cursor function will change :... -
Page 31: Flexi Slice On Rendered Image
GE Healthcare The rendered image While manipulating the 2D slices the rendered image in the upper left corner will change as well. Depending on the 2D slice where the frame is solid, the according rendered image will immediately be updated according to the adjustments By default the green frame (lower right) is the reference image. -
Page 32: Cfm Dataset With Flexi Slice
GE Healthcare 4D CFM Dataset with Flexi Slice 4D Color flow: first orientation without Color, then add Color Visualization of any position inside the sliced Dataset possible: - Localize Jets - Vena Contracta Leaving Flexi slice When leaving the Flexi slice mode, the system will keep the last view on the render image and shows this image in the regular Layout. -
Page 33: Render Depth Mode
GE Healthcare Render Depth mode Vivid E9 touch panel EchoPAC In order to get views within a specific depth of the object, the Depth mode can be used. The principle is the same as described before, but this time the system takes the depth inside the heart into account. -
Page 34: Measurements
GE Healthcare Measurements If needed measurements can be performed either in the 2D slice images or in the rendered image. Open the measurement package. For 2D slice use the regular 2D measurements. In order to measure on the rendered image open the... -
Page 35: Stereo Vision
GE Healthcare Stereo Vision 4D Stereo Vision is a display technique that enhances the perception of depth in 3D rendered images. The feature requires the use of stereo glasses (delivered with the Vivid E 9). Normally you should be able to see the stereoscopic effect after a few seconds. If you already wearing glasses or lenses you should not take them off, since the stereo effect then may be greatly reduced.