Makita HS004G Instruction Manual
Hide thumbs
Also See for HS004G:
- Instruction manual (160 pages) ,
- Instruction manual (132 pages) ,
- Instruction manual (156 pages)
Table of Contents
Advertisement
Quick Links
Advertisement
Table of Contents

Related Manuals for Makita HS004G


Summary of Contents for Makita HS004G
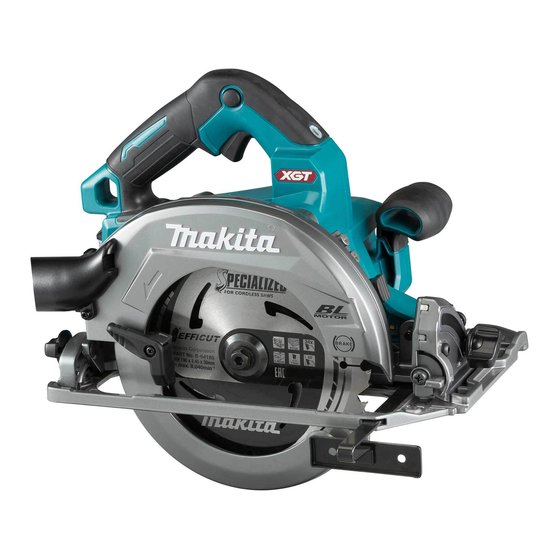
- Page 1 INSTRUCTION MANUAL Cordless Circular Saw HS004G Read before use.
-
Page 2: Specifications
Only use the battery cartridges and chargers listed above. Use of any other battery cartridges and chargers may cause injury and/or fire. Symbols Intended use The followings show the symbols which may be used The tool is intended for performing lengthways and crossways for the equipment. Be sure that you understand their straight cuts and miter cuts with angles in wood while in firm meaning before use. contact with the workpiece. With appropriate Makita genuine saw blades, other materials can also be sawed. Read instruction manual. Noise Wear safety glasses. The typical A-weighted noise level determined accord- ing to EN62841-2-5: Sound pressure level (L ) : 93 dB(A) -
Page 3: Ec Declaration Of Conformity
Electrical safety Vibration Power tool plugs must match the outlet. Never modify the plug in any way. Do not use any The vibration total value (tri-axial vector sum) deter- adapter plugs with earthed (grounded) power mined according to EN62841-2-5: tools. Unmodified plugs and matching outlets will Work mode: cutting wood reduce risk of electric shock. Vibration emission (a ) : 2.5 m/s or less... - Page 4 Do not let familiarity gained from frequent use Keep handles and grasping surfaces dry, clean of tools allow you to become complacent and and free from oil and grease. Slippery handles and ignore tool safety principles. A careless action can grasping surfaces do not allow for safe handling and cause severe injury within a fraction of a second.
- Page 5 Never hold the workpiece in your hands or When blade is binding, or when interrupting a across your leg while cutting. Secure the cut for any reason, release the trigger and hold workpiece to a stable platform. It is important to the saw motionless in the material until the support the work properly to minimise body expo- blade comes to a complete stop.
- Page 6 Never force the saw. Push the saw forward at a speed so that the blade cuts without slowing. Forcing the saw can cause uneven cuts, loss of accuracy, and possible kickback. Lower guard function Check the lower guard for proper closing before each use. Do not operate the saw if the lower guard does not move freely and close instantly.
- Page 7 It may result in loss of your eyesight. CAUTION: Only use genuine Makita batteries. Do not short the battery cartridge: Use of non-genuine Makita batteries, or batteries that (1) Do not touch the terminals with any con- have been altered, may result in the battery bursting causing fires, personal injury and damage. It will ductive material.
-
Page 8: Functional Description
Important safety instructions for supplied case or a static-free container. wireless unit 26. Do not insert any devices other than Makita wireless unit into the slot on the tool. Do not disassemble or tamper with the wire- 27. Do not use the tool with the lid of the slot dam- less unit. - Page 9 A switch in need of repair when the switches are operated, remove the batteries may result in unintentional operation and serious from the tool and charge the batteries. personal injury. Return tool to a Makita service center Indicating the remaining battery for proper repairs BEFORE further usage. capacity To prevent the switch trigger from being accidentally pulled, a lock-off button is provided. To start the tool,...
-
Page 10: Adjusting Depth Of Cut
Adjusting depth of cut NOTICE: Do not pull the switch trigger hard without pressing in the lock-off button. This can cause switch breakage. CAUTION: After adjusting the depth of cut, always tighten the lever securely. CAUTION: The tool starts to brake the cir- cular saw blade rotation immediately after you Loosen the lever on the depth guide and move the base release the switch trigger. - Page 11 Use the stopper when you do precise 45° angle cutting. Lighting the lamp Fully turn the stopper as illustrated depending on 0° - 45° bevel cut or 0° - 48° bevel cut. CAUTION: Do not look in the light or see the source of light directly. 0° - 45° To turn on the lamp without running the tool, pull the switch trigger without pressing the lock-off button.
-
Page 12: Electric Brake
Be sure the circular saw blade is installed with teeth pointing up at the front of the tool. CAUTION: Use only the Makita wrench to install or remove the circular saw blade. To remove the circular saw blade, press the shaft lock fully so that the circular saw blade cannot revolve and use the hex wrench to loosen the hex bolt. - Page 13 For tool with the inner flange for other For tool without the ring than 15.88 mm hole-diameter saw blade The inner flange has a certain diameter protrusion on one side of it and a different diameter protrusion on the other side. Choose a correct side on which protrusion fits into the saw blade hole perfectly. Mount the inner flange onto the mounting shaft so that the correct side of protrusion on the inner flange faces outward and then place saw blade and outer flange. ► 1 . Hex bolt 2. Outer flange 3. Circular saw blade ► 1 .
-
Page 14: Operation
This tool is intended to cut wood products. With appro- not to tighten the bolt forcibly. Slipping your hand priate Makita genuine circular saw blades, following from the hex wrench can cause a personal injury. materials can also be sawed:... -
Page 15: Cutting Operation
Cutting operation Rip fence (Guide rule) CAUTION: CAUTION: Wear dust mask when performing Make sure that the rip fence is cutting operation. securely installed in the correct position before use. Improper attachment may cause dangerous CAUTION: Be sure to move the tool forward kickback. in a straight line gently. Forcing or twisting the tool will result in overheating the motor and dangerous kickback, possibly causing severe injury. - Page 16 Do not use single action spring clip carabineers. 16. In the event the tool is dropped, it must be tagged and removed from service, and should be inspected by a Makita Factory or Authorized Service Center. ► 1 . Slide lever Lanyard (tether strap) connection Safety warnings specific for use at height Read all safety warnings and instructions.
- Page 17 Tool registration for the vacuum cleaner NOTE: A Makita vacuum cleaner supporting the wireless activation function is required for the tool registration. ► 1 . Lid NOTE: Finish installing the wireless unit to the tool before starting the tool registration.
- Page 18 If you wish to activate the vacuum cleaner along with NOTE: The wireless activation lamps finish blinking the switch operation of the tool, finish the tool registra- in green after 20 seconds elapsed. Press the wireless tion beforehand. activation button on the tool while the wireless acti- Install the batteries to the vacuum cleaner and the vation lamp on the cleaner is blinking. If the wireless tool.
- Page 19 Push the wireless activation button on the tool Pull the switch trigger of the tool. Check if the briefly. The wireless activation lamp will blink in blue. vacuum cleaner runs while the switch trigger is being pulled. To stop the wireless activation of the vacuum cleaner, push the wireless activation button on the tool. NOTE: The wireless activation lamp on the tool will stop blinking in blue when there is no operation for 2 hours. In this case, set the stand-by switch on the...
- Page 20 If the cancellation is performed successfully, the wire- Cancelling tool registration for the less activation lamps will light up in red for 2 seconds vacuum cleaner and start blinking in blue. NOTE: The wireless activation lamps finish blinking in Perform the following procedure when cancelling the red after 20 seconds elapsed. Press the wireless acti- tool registration for the vacuum cleaner.
- Page 21 Troubleshooting for wireless activation function Before asking for repairs, conduct your own inspection first. If you find a problem that is not explained in the manual, do not attempt to dismantle the tool. Instead, ask Makita Authorized Service Centers, always using Makita replace- ment parts for repairs. State of abnormality Probable cause (malfunction) Remedy Install the wireless unit correctly. The wireless activation lamp does The wireless unit is not installed into not light/blink. the tool. The wireless unit is improperly installed into the tool. Gently wipe off dust and dirt on the terminal of the The terminal of the wireless unit and/or the slot is dirty.
-
Page 22: Maintenance
CAUTION: dust on the tool. Fine saw dust may come inside the tool and cause malfunction or a fire. NOTICE: Never use gasoline, benzine, thinner, alcohol or the like. Discoloration, deformation or ► 1 . Clamping screw 2. Stopper cracks may result. To maintain product SAFETY and RELIABILITY, repairs, any other maintenance or adjustment should be performed by Makita Authorized or Factory Service Centers, always using Makita replacement parts. 22 ENGLISH... -
Page 23: Optional Accessories
► 1 . Triangular rule the parallelism. OPTIONAL ACCESSORIES CAUTION: These accessories or attachments are recommended for use with your Makita tool specified in this manual. The use of any other accessories or attachments might present a risk of injury to persons. Only use accessory or attachment for its stated purpose. If you need any assistance for more details regard- ► 1 . Adjusting screw for 0° angle 2. Adjusting screw... - Page 24 Jan-Baptist Vinkstraat 2, Makita Europe N.V. 3070 Kortenberg, Belgium 3-11-8, Sumiyoshi-cho, Makita Corporation Anjo, Aichi 446-8502 Japan 885789A225 www.makita.com 20210316...