AEG BPK842720M User Manual
Hide thumbs
Also See for BPK842720M:
- User manual (44 pages) ,
- User manual (44 pages) ,
- User manual (48 pages)
Table of Contents
Advertisement
Quick Links
Advertisement
Table of Contents

Related Manuals for AEG BPK842720M


Summary of Contents for AEG BPK842720M
- Page 1 BPK842720M User Manual Oven USER MANUAL...
-
Page 2: Table Of Contents
13. ENERGY EFFICIENCY..................41 FOR PERFECT RESULTS Thank you for choosing this AEG product. We have created it to give you impeccable performance for many years, with innovative technologies that help make life simpler – features you might not find on ordinary appliances. Please spend a few minutes reading to get the very best from it. - Page 3 ENGLISH responsible for any injuries or damage that are the result of incorrect installation or usage. Always keep the instructions in a safe and accessible location for future reference. 1.1 Children and vulnerable people safety This appliance can be used by children aged from 8 •...
-
Page 4: Safety Instructions
WARNING: Ensure that the appliance is switched off • before replacing the lamp to avoid the possibility of electric shock. Do not use the appliance before installing it in the • built-in structure. Do not use a steam cleaner to clean the appliance. - Page 5 ENGLISH • If the mains socket is loose, do not connect the mains plug. Depth of the appli‐ 567 mm • Do not pull the mains cable to ance disconnect the appliance. Always pull the mains plug. Built in depth of the 546 mm •...
- Page 6 • Do not put flammable products or Contact the Authorised Service items that are wet with flammable Centre. products in, near or on the appliance. • Be careful when you remove the door from the appliance. The door is...
-
Page 7: Product Description
ENGLISH – Remove any pets (especially to withstand extreme physical birds) from the vicinity of the conditions in household appliances, appliance location during and such as temperature, vibration, after the Pyrolytic cleaning and humidity, or are intended to signal first use maximum temperature information about the operational operation to a well ventilated status of the appliance. -
Page 8: Operating The Appliance
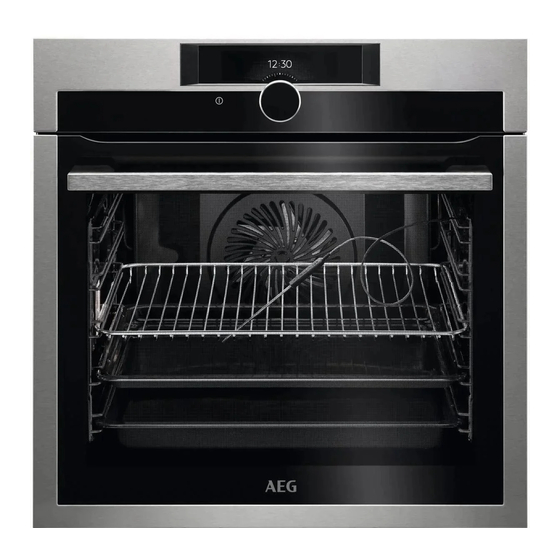
3.2 Accessories To bake and roast or as a pan to collect fat. Wire shelf Food Sensor For cookware, cake tins, roasts. To measure the temperature inside food. Baking tray Telescopic runners For cakes and biscuits. To insert and remove trays and wireshelf Grill- / Roasting pan more easily. -
Page 9: Before First Use
ENGLISH Function Comment Display Shows the current settings of the appliance. To adjust the settings and navigate through the menu. Press to turn the appliance on. Hold the rotary knob to turn on the setting screen. Hold and turn the rotary knob to navigate through the menu. Rotary knob Hold and press the rotary knob to confirm a setting or enter the selected submenu. -
Page 10: Daily Use
Clean the oven and the ac‐ Remove all accessories ex‐ cessories with a soft cloth, Place the accessories in the cept for the shelf supports warm water and a mild de‐ oven. and the telescopic runners. tergent. 5.2 First Connection 5.3 Initial preheating... - Page 11 ENGLISH Heating function Application To keep food warm. Keep Warm To preheat plates for serving. Plate Warming To preserve vegetables (e.g., pickles). Preserving To dry sliced fruit, vegetables and mushrooms. Drying To rise the yeast dough before baking. Dough Proving To defrost food (vegetables and fruit).
- Page 12 Heating function Application To make convenience food (e.g., french fries, po‐ tato wedges or spring rolls) crispy. Bottom + Grill + Fan To grill thin pieces of food and to toast bread. Grill To roast large meat joints or poultry with bones on one shelf position.
- Page 13 ENGLISH Submenu Description Normal Pyrolytic cleaning. 1 h 30 min for a usual degree of dirt. Intense Pyrolytic cleaning. 3 h for a high degree of dirt. Submenu for: Basic Settings Submenu Description Child Lock When the Child Lock is on, the oven cannot be activa‐ ted accidentally.
- Page 14 Submenu for: Service Submenu Description DEMO Activation / deactivation code: 2468 Show Licenses Information about licenses. Show Software Version Information about software version. Factory Settings Reset to factory settings. Submenu for: Assisted Cooking Meat Lamb Roast Every dish in this submenu has a proposed function and temperature.
- Page 15 ENGLISH Food Category: Side / Oven dishes Dish Dish Fresh Baguette Side dishes French fries Ciabatta Croquettes White bread Wedges Dark bread Hash browns Rye bread Oven dishes Lasagne Whole grain Potato gratin Bread bread Pasta bake Unleavened Vegetables au gra‐ bread Yeast plait Casserole, savoury...
- Page 16 Dish Dish Cake in tray Apple stru‐ Small pastry Small cakes del, frozen Cream puffs Brownies Eclairs Cheesecake Macaroons Christmas Muffins stollen Pastry strips Fruit flan Short pastry Puff pastry Sponge dough Short pastry biscuits Yeast dough Casserole, Sponge...
-
Page 17: Clock Functions
ENGLISH 7. CLOCK FUNCTIONS 7.1 Timer Settings Clock function Application Monitors how long the function operates.Up Timer - you can turn it on and off. Up Timer To set the length of an operation. The maxi‐ mum time 23 h 59 min. Duration To set the switch-off time for a heating function (max. - Page 18 Food Sensor. The tip of the Food Sensor should not touch the bottom of a baking dish. 4. Cover the Food Sensor with the remaining ingredients. 5. Put the plug of the Food Sensor into the socket at the front of the oven.
- Page 19 ENGLISH Changing the core 3. Press to confirm. temperature 8.2 Inserting accessories You can change the core temperature A small indentation at the top increases and the oven temperature at any time safety. The indentations are also anti-tip during cooking. devices.
-
Page 20: Additional Functions
Wire shelf: Put the wire shelf on the telescopic run‐ ners. Deep pan: Put the deep pan on the telescopic run‐ ners. Wire shelf and deep pan together: Place the wire shelf and the deep pan to‐ gether on the telescopic runner. -
Page 21: Hints And Tips
ENGLISH 10. HINTS AND TIPS Refer to Safety chapters. 10.1 Cooking recommendations The temperature and cooking times in the tables are guidelines only. They depend on the recipes and the quality and quantity of the ingredients used. Your oven may bake or roast differently to the oven you had before. The tables below show recommended settings for temperature, cooking time and shelf position for specific types of the food. - Page 22 Baking results Possible cause Remedy The cake sinks and be‐ The oven temperature is too Next time set slightly lower oven comes soggy or streaky. high. temperature. The oven temperature is too Next time set a longer baking time high and the baking time is and lower oven temperature.
- Page 23 ENGLISH CAKES / PASTRIES / BREADS ON BAKING TRAYS Preheat the empty oven unless specified otherwise. (°C) (min) Plaited bread / Conventional 170 - 190 30 - 40 Bread crown, pre‐ Cooking heating is not nee‐ Christstollen Conventional 160 - 180 50 - 70 Cooking Rye bread:...
- Page 24 BISCUITS Use the third shelf position. (°C) (min) Short pastry / Sponge True Fan Cooking 150 - 160 10 - 20 cake mixture Meringues True Fan Cooking 80 - 100 120 - 150 Macaroons True Fan Cooking 100 - 120...
- Page 25 ENGLISH CAKES / PASTRIES / BREADS BISCUITS ON BAKING TRAYS (°C) (min) (°C) (min) Puff pastries, preheat 170 - 30 - 50 Cream puffs / Eclairs, 160 - 25 - 45 the empty oven preheat the empty oven Rolls 20 - 30 Dry streusel cake 150 - 30 - 45...
- Page 26 BEEF (°C) (min) Roast beef or fillet, 1 cm thick Grill + Fan 180 - 190 6 - 8 medium, preheat the empty oven Roast beef or fillet, 1 cm thick Grill + Fan 170 - 180 8 - 10...
- Page 27 ENGLISH LAMB Use the function: Grill + Fan. (kg) (°C) (min) Lamb leg / Roast 1 - 1.5 150 - 170 100 - 120 lamb Lamb saddle 1 - 1.5 160 - 180 40 - 60 GAME (kg) (°C) (min) Saddle / Hare Conventional 30 - 40...
- Page 28 POULTRY Use the function: Grill + Fan. (kg) (°C) (min) Turkey 2.5 - 3.5 160 - 180 120 - 150 Turkey 4 - 6 140 - 160 150 - 240 FISH (kg) (°C) (min) Whole fish 1 - 1.5...
- Page 29 ENGLISH 10.12 Crispy baking with True Fan + Bottom PIZZA Use the first shelf position. (°C) (min) Tarts 180 - 200 40 - 55 Spinach flan 160 - 180 45 - 60 Quiche lorraine / Swiss flan 170 - 190 45 - 55 Apple pie, covered 150 - 170...
- Page 30 GRILL (°C) (min) (min) 1st side 2nd side Beef fillet 20 - 30 20 - 30 Pork loin 210 - 230 30 - 40 30 - 40 Lamb saddle 210 - 230 25 - 35 20 - 25 Use the fourth shelf position.
- Page 31 ENGLISH Set the temperature to 120 °C. (kg) (min) Fillet of beef 1 - 1.5 90 - 150 Roast beef 1 - 1.5 120 - 150 Roast veal 1 - 1.5 120 - 150 10.15 Bottom + Grill + Fan (°C) (min) Pizza, frozen...
- Page 32 (kg) (min) (min) Defrosting Further de‐ time frosting time Chicken 100 - 140 20 - 30 Put the chicken on an upturned saucer in a big plate. Turn halfway through. Meat 100 - 140 20 - 30 Turn halfway through.
- Page 33 ENGLISH VEGETA‐ VEGETA‐ (min) (min) BLES (°C) BLES Cooking Continue to Beans 60 - 70 6 - 8 time until cook at simmering 100 °C Peppers 60 - 70 5 - 6 Carrots 50 - 60 5 - 10 Vegetables for soup 60 - 70 5 - 6 Cucumbers 50 - 60...
- Page 34 PORK Food core temperature (°C) Less Medium More Ham / Roast Saddle chop / Pork loin, smoked / Pork loin, poached VEAL Food core temperature (°C) Less Medium More Roast veal Veal knuckle MUTTON / LAMB Food core temperature (°C)
-
Page 35: Care And Cleaning
ENGLISH FISH (SALMON, TROUT, Food core temperature (°C) ZANDER) Less Medium More Fish, whole / large / steamed / Fish, whole / large / roasted CASSEROLES - PRE‐ Food core temperature (°C) COOKED VEGETABLES Less Medium More Zucchini casserole / Broccoli cas‐ serole / Fennel casserole CASSEROLES - SAVOU‐... - Page 36 Clean the cavity after each use. Fat accumulation or other residue may cause fire. Do not store the food in the oven for longer than 20 minutes. Dry the cavi‐ ty with a soft cloth after each use. Everyday Use Clean all accessories after each use and let them dry.
- Page 37 ENGLISH Before the pyrolytic cleaning: Turn off the oven and Remove all accessories ex‐ Clean the oven floor and the in‐ wait until it is cold. cept for shelf supports and ner door glass with warm water, telescopic runners. a soft cloth and a mild deter‐ gent.
- Page 38 Step 1 Fully open the door. Step 2 Lift and press the clamping levers (A) on the two door hinges. Step 3 Close the oven door to the first opening position (approximately 70° angle). Hold the door at both sides and pull it away from the oven at an upwards an‐...
-
Page 39: Troubleshooting
ENGLISH Top lamp Step 1 Turn the glass cover to remove Step 2 Clean the glass cover. Step 3 Replace the lamp with a suitable 300 °C heat-resistant lamp. Step 4 Install the glass cover. Side lamp Step 1 Remove the left shelf support to get access to the lamp. - Page 40 Problem Possible cause Remedy The oven does not heat up. The necessary settings are Make sure that the settings not set. are correct. The oven does not heat up. The automatic switch-off is Refer to "Automatic switch- activated. off".
-
Page 41: Energy Efficiency
ENGLISH We recommend that you write the data here: Model (MOD.) ......... Product number (PNC) ......... Serial number (S.N.) ......... 13. ENERGY EFFICIENCY 13.1 Energy saving shows the residual heat. You can use that heat to keep the food warm. The oven has features which When the cooking duration is longer than help you save energy during... - Page 44 www.aeg.com/shop...