Honeywell AQ250 Series Quick Installation Manual
Hydronic control panels
Hide thumbs
Also See for AQ250 Series:
- Product data (20 pages) ,
- Technical reference booklet (304 pages)
Table of Contents
Advertisement
Quick Links
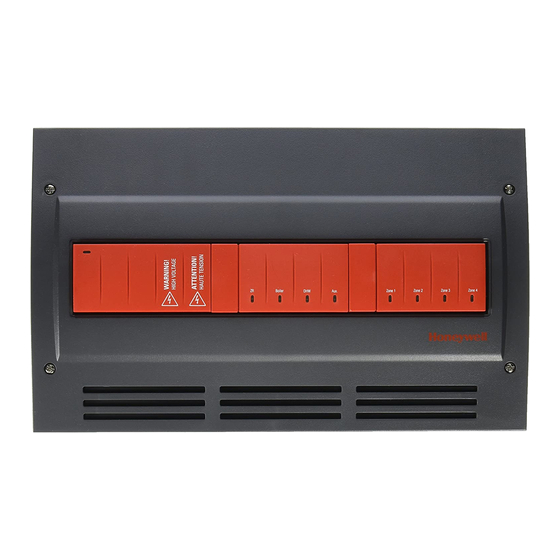
AQ250 Series Hydronic Control Panels
10 QUICK INSTALLATION STEPS TO
SETTING UP AN AQ250 SERIES
CONTROL PANEL
1. Check you have all the necessary equipment for
a successful installation
2. Read all instructions carefully before
proceeding
3. Familiarize yourself with the AQ250 Control
Panel
4. Mount Control Panel on the wall, along with any
Expansion Zoning Panels
5. Mount thermostats in the zones
6. Wire all system components to the Control
Panel
7. Configure the Control Panel's DIP switches
8. Test and Check Out the Installation
9. Purge the air from all zone piping using the
AQ250 built-in Purge Routine feature
10. Document and keep a record of all system
settings
CONTENTS
1 Check You Have All the Necessary Equipment .............
3 Familiarize Yourself With the Control Panel ..................
4 Mount Control Panel On The Wall,.................................
5 Mount Thermostats In The Zones .................................
7 Configure The Control Panel's DIP Switches ................ 10
8 Test and Check Out the Installation ............................... 12
9 Purge Air using the built-in Purge Routine feature ........ 18
Appendix ......................................................................... 15
Troubleshooting ............................................................... 15
NOTE
Throughout these instructions, the following terminology
conventions are used:
• The term "AQ250" is used when the information
applies to both the AQ2504B2 and AQ2504B4 Con-
trol Panels. Where there are specific instructions or
details relating to the "-4B2" or "-4B4" Control Pan-
els, the full model number (i.e. AQ2504B4) is used;
• The term "Control Panel" refers to an assembled
product, consisting of a transformer, Control Module
and Zoning Module, all contained within an AQ2000
panel enclosure;
• The term "AQ255" refers to all of the AQ2554P2X,
AQ2558P2X and AQ2554V2 Expansion Zoning Pan-
els and "AQ257" refers to the AQ2574V4 Expansion
Zoning Panel. Where there are specific instructions
or details relating to the "-4P2X", "-8P2X", "-4V2", or
"-4V4" Expansion Zoning Panels, the full model num-
ber (i.e. AQ2574V4) is used;
• The term "Expansion Zoning Panel" refers to an
assembled product, consisting of a Zoning Module
and-if applicable-a transformer, contained within
an AQ2000 panel enclosure; Zoning Modules are
available in either 4-zone or 8-zone configurations.
Refer to Honeywell literature Form No. 69-1981 for
more information on these products.
• The term "AQ1500" refers to the AQ1500B0 Control
Module;
• The term "Control Module" refers to the component
within an AQ2000 Series Control Panel that performs
the "master control operations". See Table 1 for spe-
cific models.
2
• The term "Zoning Module" refers to the component
2
within an AQ2000 Series Control Panel or Zoning
2
Expansion Panel.
3
• The term "AQ155" refers to the AQ1554P2 Zoning
4
Module and "AQ157" refers to the AQ1574V4 Zoning
4
Module.
Corresponding
Control Panel
Control Module
AQ2504B2
AQ1500B0
AQ2504B4
AQ1500B0
QUICK INSTALLATION GUIDE
Table 1.
Corresponding
Zoning Module
AQ1554P2
AQ1574V4
69-1982
Advertisement
Table of Contents

Related Manuals for Honeywell AQ250 Series


Summary of Contents for Honeywell AQ250 Series
-
Page 1: Table Of Contents
9. Purge the air from all zone piping using the available in either 4-zone or 8-zone configurations. AQ250 built-in Purge Routine feature Refer to Honeywell literature Form No. 69-1981 for 10. Document and keep a record of all system more information on these products. -
Page 2: Check You Have All The Necessary Equipment
AQ250 SERIES HYDRONIC CONTROL PANELS 1 Check You Have All the Necessary • the AQ1500B0 boiler / DHW Control Module, which controls the boiler and domestic hot water (DHW) functions Equipment For a Successful as well as coordinating the overall operation of the... -
Page 3: Mount Control Panel On The Wall
AQ250 SERIES HYDRONIC CONTROL PANELS CONTACTS SYMBOL Boiler Zone 1 Zone 2 Zone 3 Zone 4 M13896 Fig. 2 Internal wiring for AQ2000 Series components line voltage relays 4 Mount Control Panel On The Wall, 1. Use template supplied with the AQ250 Control Panel to mark the four mounting holes for the panel. -
Page 4: Mount Thermostats In The Zones
AQ250 SERIES HYDRONIC CONTROL PANELS 5 Mount Thermostats In The Zones AQ250 Control Panels are pre-wired at the factory (as described below), making for faster installation: • The low voltage output terminals located at the top of the Referring to the installation instructions (form # 69-2005) - Page 5 “ZC” terminals. See Figures 14a and 14b for line voltage netic shielding will be ineffective. If shielded cable is connection to boiler Aquastats. used, Honeywell recommends the use of shielded cable with a continuous ground plane, such as foil, D) Communication Bus Wiring with an integral “drain wire”...
- Page 6 AQ250 SERIES HYDRONIC CONTROL PANELS voltage thermostat wiring from the R and C terminals on the Zoning Module to the R and C terminals on the Expansion Zoning Panel. M13779 Fig. 9c Wiring an AQ1574V4 Zoning Module for use with low voltage Zone Valves WITH end switches.
- Page 7 Zoning Module to power the has enough power to operate 4 motorized zone valves. See Figure 11 for recommended wiring of valves (such as Honeywell V8043E valves or 4 additional low voltage VA capacity to AQ2000 Series valves using low-amperage draw “heat motor” actua- Zoning Modules.
- Page 8 AQ250 SERIES HYDRONIC CONTROL PANELS TO BOILER TERMINALS 11-12 ON TOP OF AQ1500B0 CONTROL MODULE L8124, L7224 JUMPERED AT FACTORY TO AUXILIARY DEVICE (INSTALLER-DEFINED) FROM LINE VOLTAGE 120V TERMINALS (N AND L) ON BOTTOM OF TRANSFORMER (HOT) BOILER PUMP R8184...
- Page 9 AQ250 SERIES HYDRONIC CONTROL PANELS Boiler Pump Connect the N and L wires of the boiler loop pump to the N and switched “hot” terminals of the line voltage “Boiler” output shown in Figure 13. The ground wire of the pump can be connected to any of the 6 ground screw terminals located on the back surface of the Control Panel enclosure.
-
Page 10: Configure The Control Panel's Dip Switches
Although for many installations, these factory default values for the Control Module and the Zoning Module(s) will be suitable, Honeywell recommends that they be reviewed – and changed, as necessary – to get optimal performance of the hydronic system controlled by the AQ2000 Series products. - Page 11 AQ250 SERIES HYDRONIC CONTROL PANELS a. For the first Zoning Module - which is included as lowing the DIP switch settings charts part of the AQ250 Control Panel, make sure that attached to the backs of the covers. To help...
-
Page 12: Test And Check Out The Installation
AQ250 SERIES HYDRONIC CONTROL PANELS Table 3. AQ1554P2 Zoning Module (Pump Zoning Module) DIP switch arrangement DIP # Switch Description Label and Factory Settings Diagnostic Diagnostic Test Test Zone Address For each group of 4 zones, there can be only one DIP switch in the right hand position. The first Zoning Module connected to each Control Module must have the first of these DIP switches (“1-4”) set to the right hand position with the other 3 switches set to the left. - Page 13 AQ250 SERIES HYDRONIC CONTROL PANELS DIAGNOSTIC LED ZONING MODULE DIAGNOSTIC LED This light is used by the AQ250 to communicate diagnostic The LED labeled “DIAGNOSTIC”—located above the DIP data to the user: switches on the AQ155 / AQ157 Zoning Modules - is used for •...
-
Page 14: Document And Keep A Record Of All System Settings
AQ250 SERIES HYDRONIC CONTROL PANELS 9 Purge Air From All System and Zone NOTE: When a setpoint is changed on an AQ1000 thermostat, the AQ250’s boiler short cycle pro- Piping using the built-in Purge tection is disabled in favor of a faster reaction... -
Page 15: Appendix
AQ250 SERIES HYDRONIC CONTROL PANELS APPENDIX Troubleshooting ZONING MODULE REACTION When a Zoning Module loses communication with the Control Module, the Zoning Module operates its pumps or valves in a Communications Loss “conventional, non-synchronized” zoning fashion i.e. A possible failure mode of the AQ250 would be loss of... - Page 16 AQ250 SERIES HYDRONIC CONTROL PANELS Automation and Control Solutions Honeywell International Inc. Honeywell Limited-Honeywell Limitée 1985 Douglas Drive North 35 Dynamic Drive Golden Valley, MN 55422 Toronto, Ontario M1V 4Z9 customer.honeywell.com ® U.S. Registered Trademark © 2007 Honeywell International Inc.