Table of Contents
Advertisement
Quick Links
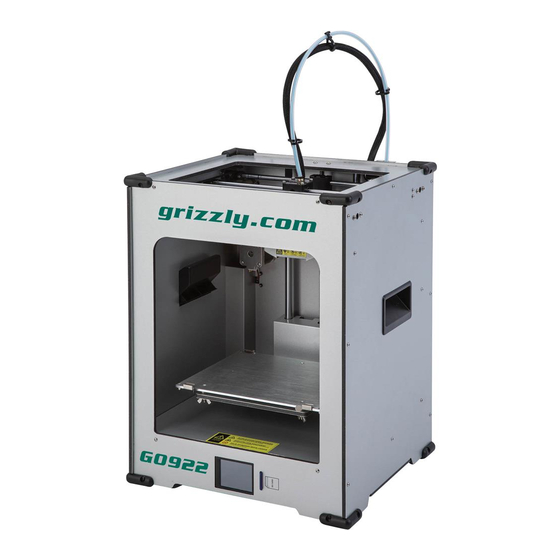
MODEL G0922
ENCLOSED 3D PRINTER
OWNER'S MANUAL
(For models manufactured since 07/20)
COPYRIGHT © AUGUST, 2020 BY GRIZZLY INDUSTRIAL, INC.
WARNING: NO PORTION OF THIS MANUAL MAY BE REPRODUCED IN ANY SHAPE
OR FORM WITHOUT THE WRITTEN APPROVAL OF GRIZZLY INDUSTRIAL, INC.
#AI20900 PRINTED IN CHINA
V1.08.20
Advertisement
Table of Contents

Related Manuals for Grizzly G0922

Summary of Contents for Grizzly G0922
- Page 1 (For models manufactured since 07/20) COPYRIGHT © AUGUST, 2020 BY GRIZZLY INDUSTRIAL, INC. WARNING: NO PORTION OF THIS MANUAL MAY BE REPRODUCED IN ANY SHAPE OR FORM WITHOUT THE WRITTEN APPROVAL OF GRIZZLY INDUSTRIAL, INC. #AI20900 PRINTED IN CHINA V1.08.20...
- Page 2 This manual provides critical safety instructions on the proper setup, operation, maintenance, and service of this machine/tool. Save this document, refer to it often, and use it to instruct other operators. Failure to read, understand and follow the instructions in this manual may result in fire or serious personal injury—including amputation, electrocution, or death.
-
Page 3: Table Of Contents
Table of Contents INTRODUCTION ..........2 SECTION 5: ACCESSORIES ......31 Contact Info............ 2 SECTION 6: MAINTENANCE ......32 Manual Accuracy ........... 2 Schedule ............32 Identification ........... 3 Cleaning & Protecting ........32 Controls & Components ......... 4 Lubrication ........... 32 Main Menu ............. -
Page 4: Introduction
ID label (see below). This information is required for us to provide proper tech support, and it helps us determine if updated documenta- tion is available for your machine. Manufacture Date Serial Number Model G0922 (Mfd. Since 07/20) -
Page 5: Identification
Become familiar with the names and locations of the controls and features shown below to better understand the instructions in this manual. Feeder Print Power Head Button Nozzle Build Plate Touch Screen SD Card Slot To reduce risk of machine damage and injury, read this entire manual BEFORE using machine. Model G0922 (Mfd. Since 07/20) -
Page 6: Controls & Components
Touch icons on screen to firmware. navigate. Refer to Main Menu on next page for more information. N. Spool Holder: Holds filament spool during printing. E. SD Card Slot: Printer reads G-code from SD card to print objects. Model G0922 (Mfd. Since 07/20) -
Page 7: Main Menu
Menu on next page. Page 29. More: Opens menu with functions to turn printer Printing: Opens menu to choose file from SD LED ON/OFF. card and start printing. For more information, refer to Printing on Page 26. Model G0922 (Mfd. Since 07/20) -
Page 8: Settings Menu
Settings Menu Figure 4. Touch screen settings menu. Filament: Opens menu to load or unload fila- WiFi: The Model G0922 does not support WiFi. ment. For more information, refer to Changing Filament on Page 28. Fan: Opens menu with settings to turn cooling fan ON/OFF and change cooling fan speed. -
Page 9: Glossary Of Terms
G-code by "slicing" the model into many layers Hot End: The heated portion of the extruder of movement commands. including heat sinks, heating block, and nozzle. STL: A common file type used to create and store 3D models. Model G0922 (Mfd. Since 07/20) -
Page 10: Machine Data Sheet
Frame Size ................................ NEMA 17 Amps ..................................1.5A Speed ................................0 - 600 RPM Type ........................Stepper (Brushless, Permanent Magnet) Power Transfer ................................Belt Step Resolution ............................ 1.8 deg. Per Step Model G0922 (Mfd. Since 07/20) Model G0922 Page 1 of 2... - Page 11 Durable Aluminum Cabinet with Handles for Transport Easy-Adjust Aluminum Build Platform w/Glass Build Plate Build Volume of 173-1/2 sq. in. Digital Display Prints from PC via USB Cable or SD Card Model G0922 (Mfd. Since 07/20) Page 2 of 2 Model G0922...
-
Page 12: Section 1: Safety
Never operate under the influence of drugs or injury or blindness from flying particles. Everyday alcohol, when tired, or when distracted. eyeglasses are NOT approved safety glasses. -10- Model G0922 (Mfd. Since 07/20) - Page 13 EXPERIENCING DIFFICULTIES. If at any time debris. Make sure they are properly installed, you experience difficulties performing the intend- undamaged, and working correctly BEFORE ed operation, stop using the machine! Contact our operating machine. Technical Support at (570) 546-9663. -11- Model G0922 (Mfd. Since 07/20)
-
Page 14: Additional Safety For 3D Printers
If normal safety pre- Failure to do so could result in serious per- cautions are overlooked or ignored, serious sonal injury, damage to equipment, or poor personal injury may occur. work results. -12- Model G0922 (Mfd. Since 07/20) -
Page 15: Section 2: Power Supply
-13- Model G0922 (Mfd. Since 07/20) - Page 16 Two-prong outlets do not meet the grounding requirements for this machine. Do not modify or use an adapter on the plug provided—if it will not fit the outlet, have a qualified electrician install the proper outlet with a verified ground. -14- Model G0922 (Mfd. Since 07/20)
-
Page 17: Section 3: Setup
M. SD-USB Adapter ........1 you are completely satisfied with the machine and N. SD Card ............1 have resolved any issues between Grizzly or the O. Bowden Tube 4mm ........1 shipping agent. You MUST have the original pack- Guide Tube 6.5mm ........ -
Page 18: Site Considerations
Figure 8. Minimum working clearances. Figure 7. Parts and tools bag. Note: Parts used during assembly include (1) M3-.5 x 12 button head cap screw and (3) cord clips. Other components from parts bag are spare parts. -16- Model G0922 (Mfd. Since 07/20) -
Page 19: Assembly & Test Run
Then place build plate on build platform and secure it with pre-installed clips (see Figure 9). The Model G0922 is nearly ready to print right out of the box! Assembly includes installing the Bowden tube and the spool holder. In addition,... -
Page 20: Installing Software
Guide Tube files by copying them from the included SD card to a location on your computer. If installation files are lost, they can also be downloaded from the G0922 product page at www.grizzly.com. Bowden Tube To install slicer software:... -
Page 21: Section 4: Operations
Ensures build plate is clean and level. Applies adhesive to build plate. Preheats nozzle. Loads filament into machine. Starts print. Removes model from build plate when print is Figure 12. Grizzly bear model created in complete. TinkerCAD. -19- Model G0922 (Mfd. Since 07/20) -
Page 22: Navigating Slicer Software
Slicer software converts 3D models from their inherent format (typically .STL) into G-code that can be inter- preted by the Model G0922. This conversion is mostly automated, but users have the ability to manipulate the model and change print settings in order to customize the print and maximize quality. - Page 23 Adjusting Print Settings on Page 23 for more detailed information. Select the "Prepare" button (see Figure 15). It will take a few seconds to prepare the file. Prepare Figure 15. Location of prepare button. -21- Model G0922 (Mfd. Since 07/20)
- Page 24 Reset panned by alt-clicking the mouse (usually the Model middle-mouse button) and dragging it. Scrolling the mouse wheel zooms the view in and out. Figure 19. Scale model mode. -22- Model G0922 (Mfd. Since 07/20)
- Page 25 Layer Height/Print Speed: This slider can change the layer height between 0.1, 0.15, and 0.2mm. A smaller layer height results in more layers overall, which increases overall resolution of the printed object but drastically increases the print time. -23- Model G0922 (Mfd. Since 07/20)
-
Page 26: Leveling Build Plate
3D printers and slicer software. As you learn about 3D printing from other sourc- es, you will find that the custom print setup has the options you need to make successful prints. -24- Model G0922 (Mfd. Since 07/20) -
Page 27: Preparing Build Plate
— If distance between nozzle and build plate Figure 28. Build plate with glue applied and in is NOT equal across all three points, repeat position on build platform. leveling process until build plate is level. -25- Model G0922 (Mfd. Since 07/20) -
Page 28: Preheating Nozzle
Preheating Nozzle Printing The nozzle must be preheated before changing Typically, the Model G0922 prints from a .GCODE filament or starting a print. 200°-205°C is the typi- file stored on an SD card. Print settings such as cal print temperature for PLA filament. Always use... - Page 29 Print settings menu will open (see Figure 33). Press "Confirm" to stop print. A file called Press "Pause" icon (see Figure 33). Printing "GRIZZLY.G" will be saved to the SD card. will stop and "Pause" icon will change to "Resume."...
-
Page 30: Changing Filament
Temp: Changes temperature of nozzle. See Preheating on Page 26. Filament: Pauses print and loads or unloads filament. Refer to Changing Filament. More: Opens menu with options to adjust air flow fan and print speed. Figure 36. Filament menu. -28- Model G0922 (Mfd. Since 07/20) -
Page 31: Cleaning Build Plate
"Confirm." Feeder will begin to push filament from Bowden tube. Press "Confirm" icon when unloading is complete. Press tensioner on feeder and remove fila- ment from feeder and sensor. Figure 38. Move axis menu. -29- Model G0922 (Mfd. Since 07/20) - Page 32 1, 5, and 10mm (see Figure 29). Press "In" or "Out" icon (see Figure 29). Filament will extrude or retract the distance selected by the extrusion increment icon. Extrusion Increment Icon Figure 41. Extrusion menu. -30- Model G0922 (Mfd. Since 07/20)
-
Page 33: Section 5: Accessories
T31838—White Filament for 3D Printers To reduce this risk, only install accessories T31839—Black Filament for 3D Printers recommended for this machine by Grizzly. 1.75mm diameter PLA filament for use with Grizzly 3D printers. NOTICE Refer to our website or latest catalog for additional recommended accessories. -
Page 34: Section 6: Maintenance
(see Figure 45). Move build platform up and down to distribute grease evenly (refer to Moving Axes Cleaning the Model G0922 is relatively easy. on Page 29). Remove excess filament that has built up on the machine and wipe away dust or residue with a dry cloth. -
Page 35: Section 7: Service
4. Incorrect temperature for type of filament. 4. Adjust temperature and restart preheating process (Page 26). Lower temperature may require slower print speed. 5. Travel speed too fast for type of filament. 5. In slicer software, reduce travel speed. -33- Model G0922 (Mfd. Since 07/20) - Page 36 2. Cooling fans at fault. 2. Test/repair/replace. and gaps across its 3. Temperature too hot for type of filament. 3. Lower temperature and restart preheating process surface. (Page 26). Lower temperature may require slower print speed. -34- Model G0922 (Mfd. Since 07/20)
- Page 37 1. Feeder clogged. 1. Remove filament from feeder, then clean ground or skips. filament from hobbed gear and Bowden tube (Page 41). 2. Nozzle clogged. 2. Clean (Page 36) or replace (Page 40) nozzle. -35- Model G0922 (Mfd. Since 07/20)
-
Page 38: Cleaning Nozzle
A clogged nozzle can lead to significant printing needle or guitar high E-string are ideal tools for issues. Regularly performing brush and needle this process. cleaning will help keep the Model G0922 printing smoothly for many hours. Tools Needed "E-String" or Acupuncture Needle ..... 1 Performing a "cold pull"... - Page 39 Bowden tube (see Figure 48). — If removed end has carbonization and residue on it, repeat Steps 3–6. — If removed end is clean, cold pull process is complete. Figure 48. Example of removing Bowden tube. -37- Model G0922 (Mfd. Since 07/20)
- Page 40 (refer to Preheating Nozzle on Page 26). Before proceeding with the next step, put on leather gloves to protect your hands while handling the hot nozzle and heating block. Bracket Figure 52. Fan bracket and cap screws. -38- Model G0922 (Mfd. Since 07/20)
- Page 41 (refer to Step 5). Figure 57. Example of heat sink screw location. -39- Model G0922 (Mfd. Since 07/20)
-
Page 42: Replacing Nozzle
21. Hold heating block in place using crescent wrench and install nozzle with 10mm open- end wrench (see Figure 51 on Page 38). Figure 59. Air flow case. -40- Model G0922 (Mfd. Since 07/20) -
Page 43: Cleaning Feeder & Bowden Tube
Heating block and nozzle threads may be damaged if threaded while cold. DO NOT overtighten. Install air flow case to print head with (2) but- ton head cap screws. Load filament (refer to Changing Filament on Page 28). -41- Model G0922 (Mfd. Since 07/20) -
Page 44: Aligning Axis Sprockets
Repeat Steps 4–5 until material leaves Bowden tube clean. Blow compressed air into feeder to remove collected filament residue. Connect Bowden tube to print head and feeder by pressing down on tube coupler and inserting Bowden tube. -42- Model G0922 (Mfd. Since 07/20) -
Page 45: Updating Firmware
Highlight correct printer, then select Upgrade Firmware (see Figure 66). Upgrade Firmware window will open. If essential operating updates are made to the G0922 firmware, the updated firmware will be available at www.grizzly.com on the G0922 prod- uct page. Tools Needed Windows Computer with Grizzly Winware .. -
Page 46: Section 8: Wiring
Technical Support at (570) 546-9663. The photos and diagrams included in this section are best viewed in color. You can view these pages in color at www.grizzly.com. -44- Model G0922 (Mfd. Since 07/20) -
Page 47: Internal Wiring Diagram
Z-Axis Motor Motor Touch Screen Display Makerbase MKS TFT24 V1.1 Motherboard WB_Version 6.0.0 24V Power Receptacle FAN2 FAN1 HEATER2 HEATER1 HOT BED Fan2 Fan1 ON/OFF Switch Front Right READ ELECTRICAL SAFETY -45- Model G0922 (Mfd. Since 07/20) ON PAGE 44! -
Page 48: Print Enclosure Wiring Diagram
Fan2 X-Axis Limit Fan1 OMRON Switch SS-5GL Z-Axis Limit Switch DC BRUSHLESS FAN Print MODEL: DF40B24H DC 24V 0.08A Head X motor Heater Block Interior Rear Enclosure Panel READ ELECTRICAL SAFETY -46- Model G0922 (Mfd. Since 07/20) ON PAGE 44! -
Page 49: Additional Components Wiring Diagram
Additional Components Wiring Diagram Exterior Rear Enclosure Panel Interior Front Enclosure Panel Feeder LED Lights 12V 35W (E-Axis) Filament Sensor Wiring Images Figure 69. Enclosure wiring. Figure 68. Internal wiring. READ ELECTRICAL SAFETY -47- Model G0922 (Mfd. Since 07/20) ON PAGE 44! - Page 50 Wiring Images (Cont.) Figure 70. Print head. Figure 73. Filament sensor and feeder. Figure 71. Touch screen display board. Figure 74. Motherboard. Figure 72. LED light strip. READ ELECTRICAL SAFETY -48- Model G0922 (Mfd. Since 07/20) ON PAGE 44!
-
Page 51: Section 9: Parts
SECTION 9: PARTS We do our best to stock replacement parts when possible, but we cannot guarantee that all parts shown are available for purchase. Call (800) 523-4777 or visit www.grizzly.com/parts to check for availability. Main 83 84 95 96 BUY PARTS ONLINE AT GRIZZLY.COM! - Page 52 P0922054 STANDOFF-HEX FF M3-.5 X 15, M3-.5 NYLON P0922109 HEX STANDOFF M2.5-.45 X 20, M2.5-.45 P0922055 STEPPER MOTOR NEMA 17 W/LEADSCREW P0922110 GUIDE TUBE 6.5MM BUY PARTS ONLINE AT GRIZZLY.COM! -50- Model G0922 (Mfd. Since 07/20) Scan QR code to visit our Parts Store.
-
Page 53: Accessories
USB CABLE TYPE-A TO TYPE-B P0922204 HEX WRENCH 3MM P0922211 NOZZLE CLEANING KIT P0922205 WRENCH 10MM OPEN-END P0922212 SCRAPER P0922206 SOCKET WRENCH 6MM BUY PARTS ONLINE AT GRIZZLY.COM! -51- Model G0922 (Mfd. Since 07/20) Scan QR code to visit our Parts Store. -
Page 54: Labels & Cosmetics
Safety labels help reduce the risk of serious injury caused by machine hazards. If any label comes off or becomes unreadable, the owner of this machine MUST replace it in the original location before resuming operations. For replacements, contact (800) 523-4777 or www.grizzly.com. BUY PARTS ONLINE AT GRIZZLY.COM! -52- Model G0922 (Mfd. -
Page 55: Warranty & Returns
WARRANTY & RETURNS Grizzly Industrial, Inc. warrants every product it sells for a period of 1 year to the original purchaser from the date of purchase. This warranty does not apply to defects due directly or indirectly to misuse, abuse, negligence, accidents, repairs or alterations or lack of maintenance.