
Related Manuals for Honeywell TC-RPCXX1


Summary of Contents for Honeywell TC-RPCXX1
- Page 1 XPERION ELEASE Redundant Power Supply Installation Guide EPDOC-X117-en-516A August 2020...
- Page 2 Honeywell International Sàrl. While this information is presented in good faith and believed to be accurate, Honeywell disclaims the implied warranties of merchantability and fitness for a purpose and makes no express warranties except as may be stated in its written agreement with and for its customer.
-
Page 3: Table Of Contents
Contents Chapter 1 - About This Document Chapter 2 - Installation 2.1 Preparing for Installation 2.1.1 Before you begin 2.1.2 Installation declaration 2.1.3 Check Components 2.1.4 Verify mounting space requirements 2.1.5 Component layout recommendations 2.1.6 Tools needed 2.2 Installing Components 2.2.1 Installing redundant power supply 2.2.2 Installing redundant power supply chassis adapter 2.3 Connecting Components... -
Page 4: Chapter 1 - About This Document
CHAPTER BOUT OCUMENT This document provides information for installing a redundant power supply for your C200 Controller and/or I/O chassis. Revision history Revision Date Description August 2020 Initial release of the document. - 4 -... -
Page 5: Chapter 2 - Installation
For applicable power output rating specifications, refer to the Experion specifications. The Experion specifications can be found on the Honeywell website: (http://www.honeywellprocess.com). Just follow the Experion product links. -
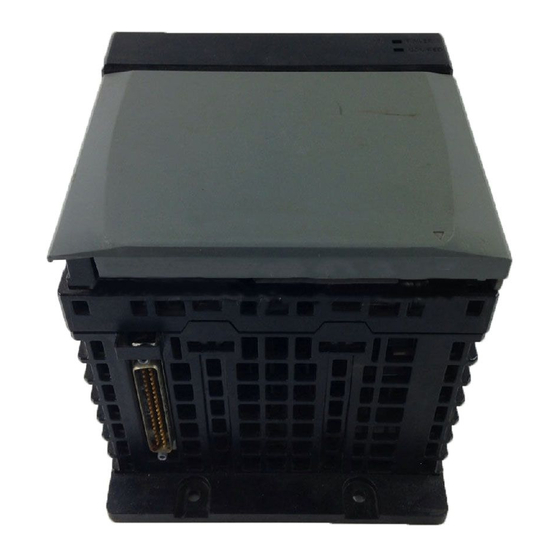
Page 6: Check Components
Optional user-supplied annunciator wiring can be connected to a solid-state relay for status and troubleshooting purposes. ATTENTION If you have a Series A chassis with any of the following model numbers, contact your Honeywell Service representative for redundant power supply options. TC-FXXnn1 TK-FXXnn1 Note: nn = the number of slots available in the chassis, (04, 07, 10, 13, 17). -
Page 7: Verify Mounting Space Requirements
Chapter 2 - Installation Figure 2.1 Typical Redundant Power Supply Application The redundant power supplies (TC-RPCxx1 or TC-RPDxx1) are surface mounted within 3 feet of the controller or I/O chassis. A redundant power supply adapter, (TC-RPSCA2) is installed on one end of the chassis. - Page 8 Chapter 2 - Installation Refer to the dimensions for the appropriate chassis model in the following table to plan the panel layout for your particular installation. See the Control Hardware Installation Guide for more chassis mounting information. Chassis Model Dimensions All models - Right-Side View - 8 -...
-
Page 9: Component Layout Recommendations
Chapter 2 - Installation Chassis Model Dimensions TC-FXX042 (With Adapter installed) TC-FXX072 (With Adapter installed) TC-FXX102 TK-FXX102 (With Adapter installed) TC-FXX132 TK-FXX132 (With Adapter installed) TC-FXX172 (With Adapter installed) 2.1.5 Component layout recommendations We recommend that you use one of the following recommended layouts for installing redundant power supply components with one or two chassis. -
Page 10: Tools Needed
Chapter 2 - Installation Recommended Layouts With One Chassis Recommended Layouts With Two Chassis 2.1.6 Tools needed 1/8-inch flat-blade screwdriver 1/4-inch flat-blade (#2) or Phillips screwdriver Needle-nose pliers Wire stripper Electric drill - 10 -... -
Page 11: Installing Components
Chapter 2 - Installation Installing Components Installing redundant power supply Installing redundant power supply chassis adapter 2.2.1 Installing redundant power supply Use the following procedure to install a redundant power supply on the back panel of an enclosure. CAUTION Do not drill holes for a redundant power supply above an already installed chassis. Metal chips from drilling can damage the backplane and cause intermittent operation. - Page 12 Chapter 2 - Installation 3. Put a split lock-washer and flat washer on a #10 (M4) or #12 (M5) screw and screw it into a top mounting hole so it is secure, but not tight against the panel. Repeat for the other top mounting hole.
-
Page 13: Installing Redundant Power Supply Chassis Adapter
Chapter 2 - Installation 6. Observing spacing and layout recommendations, repeat this procedure to install the other redundant power supply (ies). ATTENTION Be sure the power supply is mounted and all panel fabrication is completed before you remove the protective label. The label protects the power supply from metal shavings falling inside it. -
Page 14: Connecting Components
Chapter 2 - Installation 2. Push the module onto the chassis until the locking tabs click. 3. Go to the next section Connecting Components. Connecting Components General wiring guidelines Connecting adapter cable Connecting optional annunciator cable Connecting power 2.3.1 General wiring guidelines Never run all three lines together in any application. -
Page 15: Connecting Adapter Cable
Chapter 2 - Installation If the redundant power supply and the annunciator cable use different input power sources, you must route the power line and annunciator cable separately. For example, if your application uses a Vac redundant power supply and the annunciator is connected to a Vdc input module, you must route the power source line and annunciator cable separately. -
Page 16: Connecting Optional Annunciator Cable
Chapter 2 - Installation 1. Connect a plug on one end of the adapter cable to one of the ports on the left side of the chassis adapter. Be sure the plug is fully seated and tighten the plug screws to secure it. 2. -
Page 17: Connecting Power
Chapter 2 - Installation 3. Connect the input point lead to the other terminal on the solid state relay; connector. 4. Connect the other end of the cable to the appropriate terminals on the input module. Be sure the length of the annunciator cable does not exceed 10m (32.8ft). 5. - Page 18 Chapter 2 - Installation 5. Connect the PE ground (green with yellow stripe) to the ground terminal. Please refer to the Protective Earth (PE) ground guidelines and Ground bus connection guidelines in the Control Hardware Installation Guide for general grounding recommendations. 6.
-
Page 19: Chapter 3 - Operation
CHAPTER PERATION Activate Redundant Power Supply System Activate Redundant Power Supply System Turn on power Interpreting LED indications 3.1.1 Turn on power Open the door on the front of each redundant power supply and flip the power switch to the ON position. - Page 20 Chapter 3 - Operation Use the following table to interpret the meaning of some typical status indications. If LED indications And, the possible corrective are. . . Then, it means . . . action is . . . Power - Both supplies are operating properly.
- Page 21 Chapter 3 - Operation If LED indications And, the possible corrective are. . . Then, it means . . . action is . . . Non-red - The supply is turned Off. condition. Line voltage is not within the Turn the supply ON. specified range.
- Page 22 Documentation feedback You can find the most up-to-date documents on the Honeywell Process Solutions support website at: http://www.honeywellprocess.com/support If you have comments about Honeywell Process Solutions documentation, send your feedback to: hpsdocs@honeywell.com...
- Page 23 For support, contact your local Honeywell Process Solutions Customer Contact Center (CCC). To find your local CCC visit the website, https://www.honeywellprocess.com/en-US/contact-us/customer- support-contacts/Pages/default.aspx. Training classes Honeywell holds technical training classes that are taught by process control systems experts. For more information about these classes, contact your Honeywell representative, or see http://www.automationcollege.com. - 23 -...