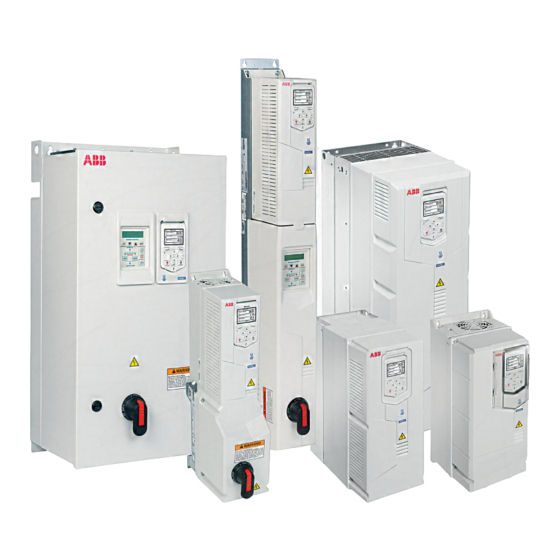
ABB ACH580-01 Installation, Operation And Maintenance Manual
Hide thumbs
Also See for ACH580-01:
- Quick installation and start-up manual (412 pages) ,
- Hardware manual (398 pages) ,
- Manual (76 pages)
Advertisement
Quick Links
—
ABB DRIVES FOR HVAC
ACH580-01 drives
Installation, Operation and Maintenance
Manual (I, O & M)
ACH580-01 HVAC Drives (1...350 HP, 0.75...250 kW)
ACH580-BCR/BDR (1...350 HP, 0.75...250 kW)
ACH580-PCR/PDR (1...350 HP, 0.75...250 kW)
ACH580-VCR/VDR (1...60 HP, 0.75...45 kW)
Advertisement

Related Manuals for ABB ACH580-01


Summary of Contents for ABB ACH580-01
- Page 1 — ABB DRIVES FOR HVAC ACH580-01 drives Installation, Operation and Maintenance Manual (I, O & M) ACH580-01 HVAC Drives (1...350 HP, 0.75...250 kW) ACH580-BCR/BDR (1...350 HP, 0.75...250 kW) ACH580-PCR/PDR (1...350 HP, 0.75...250 kW) ACH580-VCR/VDR (1...60 HP, 0.75...45 kW)
- Page 2 ACH580 Installation, Operation and Maintenance Manual Safety instructions These are the safety instructions which you • Handle the drive carefully. must obey when you install and operate the • Frames R5…R9: Lift the drive with a drive and do maintenance on the drive. If you lifting device.
- Page 3 ACH580 Installation, Operation and Maintenance Manual • Before you connect voltage to the drive, • Frames R1…R5: Do not attempt to repair a make sure that the drive covers are on. malfunctioning drive; contact your local Keep the covers on during the operation. representative for replacement or repair by authorized persons.
- Page 4 ACH580 Installation, Operation and Maintenance Manual • Make sure that the voltage between the screws in these systems can cause danger drive input power terminals (L1, L2, L3) or damage. See section Drive compatibility and the grounding terminal (PE) is close on page for various electrical power systems to 0 V.
- Page 5 ACH580 Installation, Operation and Maintenance Manual Additional instructions for WARNING! Obey these instructions. If you ignore them, injury or death, or permanent magnet motor drives equipment malfunction can occur, and electromagnetic interference can increase. Safety in installation, start-up and • If you are not a qualified electrical maintenance professional, do not do grounding work.
- Page 6 General safety in operation information. ABB and its affiliates are not liable These instructions are for all personnel that for damages and/or losses related to such operate the drive.
- Page 7 ACH580 Installation, Operation and Maintenance Manual Contents This manual is the Installation, Operation and Maintenance Manual for the ACH580 Drives. Complete technical details are available in the ACH580 Hardware manual, publication number Complete programming information is 3AXD50000044839. available in the ACH580 HVAC control program firmware manual, publication number...
- Page 8 ACH580 Installation, Operation and Maintenance Manual ACH580-01 Installation Installation Study these installation instructions carefully before proceeding. Failure to observe the warnings and instructions may cause a malfunction or personal hazard. WARNING! Before you begin read on page 2. Safety instructions 1.
- Page 9 1. Unpack the drive. 2. Check for any damage and notify the shipper immediately if damaged components are found. 3. Check the contents against the order and the shipping label to verify that all parts have been received. ACH580-01 Installation...
- Page 10 If that is not practical, cover nearby electrical components to protect them from all shavings or debris. Flange Mounting Frame size 3AXD50000105311 3AXD50000105328 3AXD50000105335 3AXD50000031460 3AXD50000031461 3AXD50000018852 3AXD50000018853 3AXD50000018854 3AXD50000018855 Further information is in Supplement: Flange mounting kit installation, 3AXD50000201877. ACH580-01 Installation...
- Page 11 5. Tighten the bolts in the wall securely. ×4 Install the cable box, frames R1…R2 6. Remove the screw (6a) and lift the cover off (6b) from the separate cable box. 7. Attach the cable box cover to the front cover. ACH580-01 Installation...
- Page 12 R5 IP55 (UL (NEMA) ×2 24.09 24.09 22.87 22.87 6.30 6.30 d > 7.87 7.87 e > 3.94 3.94 ×2 R5 IP21 (UL (NEMA) R5 IP55 (UL (NEMA) ×2 62.4 28.3 64.0 29.0 R5: M6 (1/4 in) ×2 ×6 ×2 ACH580-01 Installation...
- Page 13 Tighten the bolts in the wall securely. 10. Tighten the two remaining bolts securely. ×2 ×2 Note: Install the hood on UL (NEMA) Type 12 drives after you have installed the drive electrically and reinstalled covers. ACH580-01 Installation...
- Page 14 4. Position the drive onto the bolts on the wall. Lift the drive with a lifting device with another person as it is heavy. 5. Tighten the top two bolts in the wall securely. R6…R9: M8 (5/16 in) × 2 × 2 ACH580-01 Installation...
- Page 15 Installing the drive vertically side by side Install the drive following the steps in the appropriate section Installing the drive vertically, frames R1…R4 (page 11), or Installing the drive vertically, frame R5 (page 12) or Installing the drive vertically, frames R6…R9 (page 14). ACH580-01 Installation...
- Page 16 4. Install wiring WARNING! Ensure the motor is compatible for use with the ACH580. The ACH580 must be installed by a competent person. If in doubt, contact your local ABB sales or service office. WARNING! If the drive will be connected on an IT (ungrounded) system, make sure neither the EMC filter nor the ground-to-phase varistor are connected.
- Page 17 Earth is either ungrounded or high-resistive (>30 ohms) non-symmetrical earth path. TT = Tera Tera Earth at source and Earth a Destination (no earth conductor between source and consumer, the soil is used as the earth return path. ACH580-01 Installation...
- Page 18 The following describes the purpose of the EMC filter and the varistor (VAR) and how to configure based on the electrical power systems the drive will be connected. WARNING! Disconnect EMC filter and VAR circuits when power network is unknown. ACH580-01 Installation...
- Page 19 EMC (AC)/VAR Hand Tighten Screw, M5x35, COMBI, Torx, T20 Steel EMC (DC) 3.0 Nm Screw, M6x35, PZ1, Nylon EMC (DC) Hand Tighten ACH580-01 North America TN system or Corner-grounded delta Corner-grounded (B) and Mid-point- IT system TT system system Delta system...
- Page 20 3) Frames R4 and R5 are evaluated for use on corner-grounded delta networks by UL standards. R4 and R5 frames may not be used on IEC installations with corner grounded networks. ACH580-01 except North America TN system IT system TT system...
- Page 21 1) Screwdrivers: R1 - Slot 4 mm and PH1; R2 - 4.5 mm and PH2; R3, R4 - PH2 Note: Minimum wire size does not necessarily have enough current capability for full load. Make sure the installation complies with local laws and regulations. ACH580-01 Installation...
- Page 22 2) Longer motor cables cause a motor voltage decrease which limits the available motor power. The decrease depends on the motor cable length and characteristics. Contact ABB for more information. ACH580-01 Installation...
- Page 23 N·m N·m 0.2…2.5 0.5…0.6 0.14…1.5 0.5…0.6 0.2…2.5 0.5…0.6 0.14…1.5 0.5…0.6 0.2…2.5 0.5…0.6 0.14…1.5 0.5…0.6 0.2…2.5 0.5…0.6 0.14…1.5 0.5…0.6 0.2…2.5 0.5…0.6 0.14…1.5 0.5…0.6 0.14…2.5 0.5…0.6 0.14…2.5 0.5…0.6 0.14…2.5 0.5…0.6 0.14…2.5 0.5…0.6 0.14…2.5 0.5…0.6 0.14…2.5 0.5…0.6 0.14…2.5 0.5…0.6 0.14…2.5 0.5…0.6 ACH580-01 Installation...
- Page 24 UL (NEC) ratings at U = 460 V Heat Output ratings Frame dissipation flow Type size /min ACH580-01-02A1-4 ACH580-01-03A0-4 ACH580-01-03A5-4 ACH580-01-04A8-4 ACH580-01-07A6-4 ACH580-01-012A-4 ACH580-01-014A-4 ACH580-01-023A-4 ACH580-01-027A-4 ACH580-01-034A-4 ACH580-01-044A-4 ACH580-01-052A-4 ACH580-01-065A-4 1024 ACH580-01-077A-4 1024 ACH580-01-096A-4 1510 ACH580-01-124A-4 1476 ACH580-01-156A-4 1976 ACH580-01 Installation...
- Page 25 ACH580-01-062A-6 1240 ACH580-01-077A-6 1510 ACH580-01-099A-6 2061 ACH580-01-125A-6 2466 ACH580-01-144A-6 3006 ACH580-01-192A-6 4086 ACH580-01-242A-6 4896 ACH580-01-271A-6 4896 Definitions Output voltage of the drive. Continuous rms output current, allowing 110% overload for 1 minute every 10 minutes. Typical motor power ACH580-01 Installation...
- Page 26 114A-2 JJS-150 144A-2 JJS-200 169A-2 JJS-250 211A-2 JJS-300 273A-2 JJS-400 1) ABB does not require Bussmann brand fuses. Fuses which meet the appropriate UL class type, current rating, and are rated at 600V, 200 kA may be used. ACH580-01 Installation...
- Page 27 180A-4 JJS-300 240A-4 JJS-350 302A-4 JJS-500 361A-4 JJS-500 414A-4 JJS-500 1) ABB does not require Bussmann brand fuses. Fuses which meet the appropriate UL class type, current rating, and are rated at 600V, 200 kA may be used. ACH580-01 Installation...
- Page 28 125A-6 JJS-200 144A-6 JJS-250 180A-6 JJS-300 242A-6 JJS-400 271A-6 JJS-400 1) ABB does not require Bussmann brand fuses. Fuses which meet the appropriate UL class type, current rating, and are rated at 600V, 200 kA may be used. ACH580-01 Installation...
- Page 29 Option slot 2 (I/O extension modules) Termination switch (S4), bias S4, S5 resistor switch (S5), see section on page Switches Panel port (control panel connection) Cold configuration connection. This connector is used with the CCA-01 configuration adapter. Power OK and Fault LEDs ACH580-01 Installation...
- Page 30 CCA-01 S4, S5 configuration adapter. Power OK and Fault LEDs WARNING! If installing modules, the +24 V AC cable to the control board ground when the control board is powered using an external 24 V AC supply. ACH580-01 Installation...
- Page 31 10. Strip the control cable sheathing and twist the copper screen into a pig-tail. 11. Refer to pages 41, and 43. Connect the ground screen pig-tail for digital and analog I/O cables. (Ground only at drive end.) ACH580-01 Installation...
- Page 32 Drive compatibility for various electrical power systems on page 16. R1...R2 Analog Inputs and Outputs Option Mounting Digital Inputs Relay Outputs Typical Type 1 Power wiring torque table Frame size lb-ft lb-ft T1/U, T2/V, T3/W L1, L2, L3 R+, R- PE Ground ACH580-01 Installation...
- Page 33 11. Connect the ground screen pig-tail for Embedded fieldbus, EFB (EIA-485) cables at X5. (Ground only at drive end.) 12. Strip and connect the individual control wires to the drive terminals. Tighten the screws to 0.4 lb-ft (0.5…0.6 Nm). ACH580-01 Installation...
- Page 34 Power (Green) and Fault (Red) LEDs Option Mounting Digital Inputs Typical Type 1 INPUT BREAKERS MOTOR INPUT BREAKERS MOTOR UDC+ UDC+ Power wiring torque table Frame size lb-ft T1/U, T2/V, T3/W L1, L2, L3 R+, R- PE Ground ACH580-01 Installation...
- Page 35 10. Connect the ground screen pig-tail for Embedded fieldbus, EFB (EIA-485) cables at X5. (Ground only at drive end.) 11. Strip and connect the individual control wires to the drive terminals. Tighten the screws to 0.4 lb-ft (0.5…0.6 Nm). ACH580-01 Installation...
- Page 36 Option Mounting Digital Inputs Relay Outputs Typical Type 1 Note: UDC+ and UDC- terminals are used for external brake chopper units. Power wiring torque table Frame size lb-ft T1/U, T2/V, T3/W L1, L2, L3 UDC+ and UDC- PE Ground ACH580-01 Installation...
- Page 37 10. Refer to pages 41, and 43. Connect the ground screen pig-tail for digital and analog I/O cables. (Ground only at drive end.) 11. Connect the ground screen pig-tail for Embedded fieldbus, EFB (EIA-485) cables at X5. (Ground only at drive end.) ACH580-01 Installation...
- Page 38 Power (Green) and Fault (Red) LEDs Relay Outputs Digital Inputs Option Mounting Typical Type 1 Shroud Note: UDC+ and UDC- terminals are used for external brake chopper units. Power wiring torque table Frame size lb-ft T1/U, T2/V, T3/W ACH580-01 Installation...
- Page 39 12. Connect the ground screen pig-tail for Embedded fieldbus, EFB (EIA-485) cables at X5. (Ground only at drive end.) 13. Strip and connect the individual control wires to the drive terminals. Tighten the screws to 0.4 lb-ft (0.5…0.6 Nm). ACH580-01 Installation...
- Page 40 Note: UDC+ and UDC- terminals are used for external brake chopper units. Power wiring torque table Frame size lb-ft lb-ft lb-ft lb-ft T1/U, T2/V, T3/W 22.1 29.5 29.6 51.6 L1, L2, L3 22.1 29.5 29.6 51.6 UDC+ and UDC- 22.1 29.5 29.5 51.6 PE Ground ACH580-01 Installation...
- Page 41 Analog output AO1: Output frequency • Start/stop selection (DI1) • Analog output AO2: Motor current • Constant speed/frequency selection (DI3) • Relay output 1: Damper control • Start interlock 1 (DI4) • Relay output 2: Running • Relay output 3: Fault (-1) ACH580-01 Installation...
- Page 42 PID feedback (AI2) • Analog output AO2: Motor current • Start/stop selection (DI1) • Relay output 1: Damper control • Constant speed/frequency selection (DI3) • Relay output 2: Running • Start interlock 1 (DI4) • Relay output 3: Fault (-1) ACH580-01 Installation...
- Page 43 Bus terminated TERM Bias off (default) Switches on the biasing voltages to the bus. One BIAS (and only one) device, preferably at the end of the (BIAS) bus must have the bias on. Bias on BIAS ACH580-01 Installation...
- Page 44 The control cables (if any) have been connected to the control board. There are no tools, foreign objects or dust from drilling inside the drive. Drive and motor connection box covers are in place. The motor and the driven equipment are ready for start-up. ACH580-01 Installation...
- Page 45 2. Install the cover, press it at the bottom (2a) and tighten the retaining screws (2b). 7. Install hood, if applicable IP 55/UL (NEMA) Type 12, Frame R1...R9 Install the hood by following the instructions provided with the hood kit. Hood ACH580-01 Installation...
- Page 46 • In the Hand/Off mode, the speed reference and start command come from the control panel. • In the Hand mode, the speed reference is the direct speed reference and a PID setpoint value. • See the Default control connections for the PID control, single motor on page ACH580-01 Installation...
- Page 47 The help page is context-sensitive, in other words, the content of the page is relevant to the menu or view in question. Hand, Off and Auto The ACH580 can be in local or external control. The local control has two modes: Hand and Off. ACH580-01 Installation...
- Page 48 1. Control location and related icons 2. Status icon 3. Drive name 4. Reference value 5. Content area 6. Softkey selections 7. Clock Note: Complete programming information is available in the ACH580 HVAC control program firmware manual, publication number 3AXD50000027537. ACH580-01 Installation...
- Page 49 (OK). Note: After you have selected the language, it takes a few minutes to download the language file to the control panel. Select Commission the ACH580 and press (Next). ACH580-01 Installation...
- Page 50 Go to the edit view of a selected row by pressing Scroll the view with Go to the next view by pressing (Next). Note: Enter the following values exactly as shown on the motor nameplate. Example of a nameplate of an induction (asynchronous) motor. ACH580-01 Installation...
- Page 51 (Next) to continue. If the direction is not forward, select No, fix direction and press (Next) to continue. The first start is now complete and the drive is ready for use. Press (Done) to enter the Home view. ACH580-01 Installation...
- Page 52 For HVAC, press Direct control via I/O. For PID Control, press PID control, single motor. Note: You can adjust Process PI(D) in the PID control submenu of the Primary Settings menu after you have commissioned the drive to use PID control. ACH580-01 Installation...
- Page 53 Complete the Go through the items two assistants. on the menu Set the motor data Ramps, limits, interlock, run permissive Set the ramps Start/stop, reference and scaling Set the limits Continue with further adjustments on the Primary settings menu. ACH580-01 Installation...
- Page 54 (View). To adjust the value of a parameter, press (Edit), adjust the value using keys and press (Save). Note that the actual wiring must match the new value. Go back to the Main menu by pressing (Back) repeatedly. ACH580-01 Installation...
- Page 55 Diagnostics menu to make sure that the setup is functioning correctly. In the Main menu, select Diagnostics and press (Select) Select the diagnostics item you want to view and press (Select). Return to the Diagnostics menu by pressing (Back). ACH580-01 Installation...
- Page 56 AI1. Stopping the motor 1. Switch digital input DI1 off. The arrow stops rotating. Go to the Main menu by pressing (Menu) in the Home view. Select Primary settings and press (Select) (or ACH580-01 Installation...
- Page 57 Check the motor speed limits. The following must be true: Minimum speed < 0 rpm Maximum speed = motor rated speed. Check the motor current as well as torque limits. The following must be true: Maximum current > I Maximum torque > 50%. ACH580-01 Installation...
- Page 58 After the ID run is completed, text ID run done is shown. The LED stops blinking. If the ID run fails, fault FF61 ID run is shown. After the ID run is completed, text Done is shown on row ID run. ACH580-01 Installation...
- Page 59 See Checking the insulation of the assembly on 16. If an earth fault is found, fix page or change the motor cable and/or motor. If no earth fault can be detected, contact your local ABB representative. ACH580-01 Installation...
- Page 60 Check the supply voltage. A3AA DC not charged The voltage of the If the problem persists, contact your intermediate DC circuit local ABB representative. has not yet risen to operating level. A490 Incorrect temperature Temperature cannot be Check the settings of temperature...
- Page 61 (none) Temperature above Check ambient conditions. warning limit Check air flow and fan operation. Check heatsink fins for dust pick-up. Thermistor broken Contact an ABB service representative for control board replacement. A4A1 IGBT overtemperature Estimated drive IGBT Check ambient conditions.
- Page 62 31.22 STO indication run/ stop in the Firmware manual. Check the value of parameter 95.04 Control board supply. A5EA Measurement circuit Problem with internal Contact your local ABB temperature temperature representative. measurement of the drive. A5EB PU board powerfail...
- Page 63 User lock in the Firmware manual 96.101. A6D1 FBA A parameter conflict The drive does not Check PLC programming. have a functionality Check settings of parameter groups requested by a PLC, or 50 Fieldbus adapter (FBA). requested functionality has not been activated. ACH580-01 Installation...
- Page 64 One or more of the resistor data not been given. settings (parameters 43.08…43.10) is incorrect. The parameter is specified by the auxiliary code. 0000 0001 Resistance value too Check value of 43.10. low. 0000 0002 Thermal time constant Check value of 43.08. not given. ACH580-01 Installation...
- Page 65 Check mounting platform if being communicating. used. Disconnect and reconnect the control panel. A88F Cooling fan Maintenance timer limit Consider changing the cooling fan. exceeded. Parameter 05.04 Fan on-time counter shows the running time of the cooling fan. ACH580-01 Installation...
- Page 66 10.27 RO2 source. 0003 Relay output 3 Select a different signal with parameter 10.30 RO3 source. A8B0 ABB Signal supervision 1 Warning generated by Check the source of the warning the signal supervision (parameter 32.07 Supervision 1 (Editable message text) function 1.
- Page 67 ACH580 Installation, Operation and Maintenance Manual Code Warning / Aux. code Cause What to do (hex) A8B5 ABB Signal supervision 6 Warning generated by Check the source of the warning the signal supervision (parameter 32.57 Supervision 6 (Editable message text) function 6.
- Page 68 Check the setting of (and source keeping the drive from selected by) parameter 20.40 Run running the motor. permissive. AFEE Start interlock 1 Start interlock 1 is Check the signal source selected for keeping the drive from parameter 20.41 Start interlock 1. starting. ACH580-01 Installation...
- Page 69 VSD controlled PFC motor The motor connected Motor connected to the drive is interlocked to the drive is interlocked and thus cannot be interlocked started. (unavailable). Remove the corresponding interlock to start the drive controlled PFC motor. See parameters 76.81…76.84. ACH580-01 Installation...
- Page 70 ID. rating ID of the drive. If the fault reappears, cycle the power to the drive. You may have to be repeat this. If the fault persists, contact your local ABB representative. 2310 Overcurrent Output current has Check motor load.
- Page 71 3381 Output phase loss Motor circuit fault due Connect motor cable. to missing motor Programmable fault: 31.19 connection (all three Motor phase loss phases are not connected). ACH580-01 Installation...
- Page 72 Check the value of parameter 35.03 2 has exceeded fault Measured temperature 2. (Editable message text) limit. Check the cooling of the motor (or other equipment whose temperature is being measured). 5080 Cooling fan feedback A581 Fan (page 61). missing. ACH580-01 Installation...
- Page 73 0001 Auxiliary fan 1 broken. 0002 Auxiliary fan 2 broken. 5090 STO hardware failure STO hardware Contact your local ABB representative diagnostics has for hardware replacement. detected hardware failure. 5091 Safe torque off Safe torque off function Check safety circuit connections.
- Page 74 Reboot the control unit (using incompatible versions are parameter 96.08 Control board boot) incompatible. or by cycling power. If the problem persists, contact your local ABB representative. 6306 FBA A mapping file Fieldbus adapter A Contact your local ABB mapping file read error.
- Page 75 Internal SSW fault Internal fault. Reboot the control unit (using parameter 96.08 Control board boot) or by cycling power. If the problem persists, contact your local ABB representative. 64B2 User set fault Loading of user Ensure that a valid user parameter set parameter set failed exists.
- Page 76 EFB protocol protocol. application. 6882 Text 32-bit table overflow Internal fault. Reset the fault. Contact your local ABB representative if the fault persists. 6885 Text file overflow Internal fault. Reset the fault. Contact your local ABB representative if the fault persists.
- Page 77 Check applicability of torque control. braking torque or Check need for brake chopper and changes in load when resistor(s). using torque reference. 73F0 Overfrequency Maximum allowed Contact your local ABB output frequency representative. exceeded. ACH580-01 Installation...
- Page 78 User load curve: Signal See parameter 37.04 ULC underload has been too long actions. under the underload curve. 8002 ULC overload fault User load curve: Signal See parameter 37.03 ULC overload has been too long over actions. the overload curve. ACH580-01 Installation...
- Page 79 31.02 External event 1 type 9082 External fault 2 Fault in external device Check the external device. (Editable message text) Check setting of parameter 31.03 External event 2 source. Programmable fault: 31.03 External event 2 source 31.04 External event 2 type ACH580-01 Installation...
- Page 80 (see actions for each code below). 0001 Maximum current limit Check settings of parameters 99.06 too low. Motor nominal current and 30.17 Maximum current. Make sure that 30.17 > 99.06. Check that the drive is dimensioned correctly according to the motor. ACH580-01 Installation...
- Page 81 Motor nominal torque, and the torque limits in group 30 Limits. Make sure that the maximum torque limit in force is greater than 100%. 0004 Current measurement Contact your local ABB calibration did not finish representative. within reasonable time 0005…0008 Internal error.
- Page 82 0012 Motor too large for Check that the motor and drive sizes advanced standstill ID are compatible. run. Contact your local ABB representative. 0013 (Asynchronous motors Check that the motor nominal value only) settings in the drive are the same as in the motor nameplate.
- Page 83 Maintenance schedule Recommended maintenance intervals and component replacements are based on specified operational and environmental conditions. ABB recommends annual drive inspections to ensure the highest reliability and optimum performance. Note: Long term operation near the maximum specified ratings or environmental conditions may require shorter maintenance intervals for certain components.
- Page 84 Main cooling fans are speed-controlled, and the speed of the fan matches the cooling needs. When the drive is stopped, the main fan is kept running at a low speed to cool the control board. Replacement fans are available from ABB. Do not use other than ABB specified spare parts.
- Page 85 3. Pull the mounting plate down from the side edge. 4. Disconnect the fan cable. 5. Lift the mounting plate off. 6. Remove the fan from the mounting plate. 7. Install the fan in reverse order. 8. Restore power. ACH580-01 Installation...
- Page 86 Auxiliary cooling fan replacement Auxiliary cooling fans are not speed-controlled and run all the time that the control board is powered. Replacement fans are available from ABB. Do not use other than ABB specified spare parts. IP21/UL (NEMA) Type 1 and IP55/UL (NEMA) Type 12 Frame Sizes R5…R9 To replace the fan: 1.
- Page 87 7. Install the new fan assembly in reverse order. Route the wires round the pins. Note: Make sure that the arrow on the fan points to the same direction as the arrow on the drive frame. 8. Restore power. ACH580-01 Installation...
- Page 88 7. Pull off the fan. 8. Install the new fan and housing in reverse order. Note: Make sure that the arrow on the fan points to the same direction as the arrow on the plastic housing (down). 9. Restore power. ACH580-01 Installation...
- Page 89 5. Remove the retaining screws (5a) and pull off the fan (5b). 6. Install the fan in reverse order. Note: Make sure that the arrow on the fan points up. 7. Restore power. ACH580-01 Installation...
- Page 90 The expected life for the battery is greater than ten years. To remove the battery, use a coin to rotate the battery holder on the back of the control panel. Replace the battery with type CR2032. Note: The battery is NOT required for any control panel or drive function, except the real-time clock. ACH580-01 Installation...