Makita DUR369A Instruction Manual
Cordless grass trimmer
Hide thumbs
Also See for DUR369A:
- Instruction manual (156 pages) ,
- Instruction manual (29 pages) ,
- Instruction manual (129 pages)
Table of Contents
Advertisement
Advertisement
Table of Contents

Related Manuals for Makita DUR369A


Summary of Contents for Makita DUR369A
- Page 1 INSTRUCTION MANUAL Cordless Grass Trimmer DUR369A DUR369L Read before use.
-
Page 2: Specifications
Some of the battery cartridges, battery adapters and chargers listed above may not be available depending on your region of residence. WARNING: Only use the battery cartridges, battery adapters and chargers listed above. Use of any other battery cartridges,battery adapters and chargers may cause injury and/or fire. Noise Model DUR369A Cutting tool Sound pressure level (L Sound power level (L Applicable dB(A) - Page 3 (taking account of all parts of the operating cycle such as the times when the tool is switched off and when it is running idle in addition to the trigger time). Vibration Applicable standard : ISO22867(ISO11806-1) Model DUR369A Cutting tool Left hand Right hand...
-
Page 4: Ec Declaration Of Conformity
Save all warnings and instruc- Symbols tions for future reference. The followings show the symbols used for the equipment. The term "power tool" in the warnings refers to your Be sure that you understand their meaning before use. mains-operated (corded) power tool or battery-operated (cordless) power tool. - Page 5 Remove any adjusting key or wrench before Maintain power tools and accessories. Check for turning the power tool on. A wrench or a key left misalignment or binding of moving parts, break- age of parts and any other condition that may attached to a rotating part of the power tool may affect the power tool’s operation.
-
Page 6: General Instructions
Wear proper clothing and shoes for safe Important safety instructions for the operation, such as a work overall and sturdy, tool non-slip shoes. Do not wear loose clothing or jewelry. Loose clothes, jewelry or long hair can be caught in moving parts. WARNING: Read all safety warnings and When touching the cutting blade, wear protec- all instructions. -
Page 7: Putting Into Operation
Putting into operation Take a rest to prevent loss of control caused by fatigue. We recommend taking a 10 to 20-min- Before assembling or adjusting the tool, ute rest every hour. remove the battery cartridge. 12. When you leave the tool, even if it is a short Before handling the cutter blade, wear protec- time, always remove the battery cartridge. - Page 8 — Never use other blades including metal multi-piece pivoting chains and flail blades. It may result in serious injury. Only use the cutting tool that are marked with a speed equal or higher than the speed marked on the tool. Always keep your hands, face, and clothes away from the cutting tool when it is rotating. Failure to do so may cause personal injury.
-
Page 9: First Aid
Your name have been altered, may result in the battery bursting Important safety instructions for causing fires, personal injury and damage. It will also void the Makita warranty for the Makita tool and battery cartridge charger. Before using battery cartridge, read all instruc- Tips for maintaining maximum... -
Page 10: Parts Description
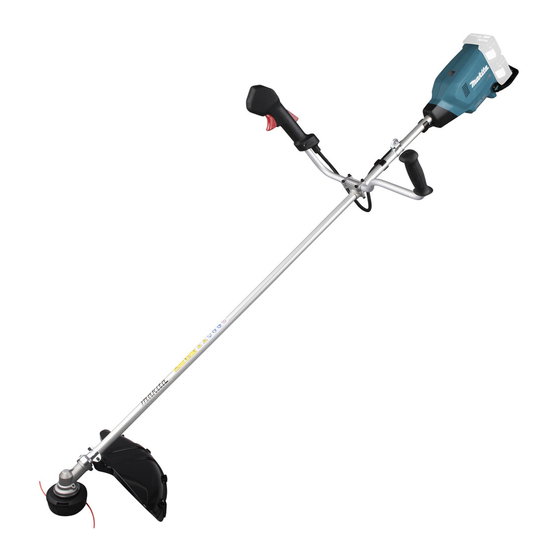
PARTS DESCRIPTION DUR369L DUR369A Speed indicator ADT indicator Caution lamp Main power button (ADT = Automatic Torque Drive Technology) Reverse button Battery cartridge Lock-off lever Switch trigger Hanger Handle Barrier (country specific) Protector Protector extension (for Shoulder harness nylon cutting head / plastic blade) -
Page 11: Functional Description
FUNCTIONAL Caution lamp Status Color Blinking DESCRIPTION Green Overload Overheat (tool) / (battery) WARNING: Always be sure that the tool is switched off and the battery cartridge is removed Over discharge before adjusting or checking function on the tool. Failure to switch off and remove the battery cartridge Overload protection may result in serious personal injury from accidental start-up. -
Page 12: Main Power Switch
The tool speed increases by increasing pressure on the The battery switch trigger. Release the switch trigger to stop. may have malfunctioned. DUR369A NOTE: Depending on the conditions of use and the ambient temperature, the indication may differ slightly from the actual capacity. Main power switch Tap the main power button to turn on the tool. - Page 13 Speed adjusting You can select the tool speed by tapping the main power button. Each time you tap the main power button, the level of speed will change. The tool automatically adjusts the rotation speed according to the cutting tool attached to the tool. ► 1 . ADT indicator 2. Reverse button Indicator Mode Cutting tool...
-
Page 14: Electric Brake
► 1 . Hex socket head bolt 2. Handle 3. Upper clamp 4. Damper 5. Lower clamp For DUR369A Insert the shaft of the handle into the grip. Align the screw hole in the grip with the one in the shaft. - Page 15 For the loop handle model, the hex wrench can also be Attaching the barrier stored on the handle as illustrated. For the loop handle model only (country specific) If the barrier is included in your model, attach it to the handle using the screw on the barrier.
-
Page 16: Cutter Blade
For cutter blade Installing the cutting tool Attach the protector to the clamp using bolts. CAUTION: Always use the supplied wrenches to remove or to install the cutting tool. CAUTION: Be sure to remove the hex wrench inserted into the tool head after installing the cutting tool. -
Page 17: Nylon Cutting Head
NOTICE: pointing in the same direction. Be sure to use genuine Makita nylon cutting head. There are two types of nylon cutting head; the bump & feed type and the manual feed type. -
Page 18: Operation
To remove the nylon cutting head, follow the installation procedures in reverse. Plastic blade NOTICE: Be sure to use genuine Makita plastic blade. Clasp the hook on the shoulder harness to tool's hanger. ► 1 . Plastic blade 2. Spindle 3. Hex wrench 4. Loosen 5. - Page 19 ► 1 . Strip Adjusting the hanger position Clasp the hook on the shoulder harness to tool's hanger. For DUR369A only For more comfortable handling of the tool, you can change the hanger position. Loosen the hex socket head bolt on the hanger and slide it to a comfortable working position.
- Page 20 Adjust the hanger position as shown in the figure DUR369A and then tighten the hex socket head bolt. 750 mm 100-300 mm 750 mm DUR369L The hanger position from the ground The cutting tool position from the ground The horizontal distance between the hanger and the unguarded part of the cutting tool...
-
Page 21: Maintenance
Discoloration, deformation or cracks may result. To maintain product SAFETY and RELIABILITY, repairs, any other maintenance or adjustment should be performed by Makita Authorized or Factory Service Centers, always using Makita replacement parts. Cleaning the tool Clean the tool by wiping off dust, dirt, or cut off grass with a dry cloth or one dipped in soapy water and wrung out. - Page 22 95-M10L 100 mm 80 mm 22 ENGLISH...
- Page 23 B&F ECO 4L 100 mm 80 mm 23 ENGLISH...
- Page 24 UN-74L, UN-72L 4.5 m 100 mm 24 ENGLISH...
- Page 25 Manual feed type Replacing the plastic blade When the nylon cord gets short, pull it out from the Replace the plastic blade if it is worn out or broken. eyelet and feed it from the another eyelet. 0.75 m When installing the plastic blade, align the direction of the arrow on the blade with that of the protector.
-
Page 26: Troubleshooting
TROUBLESHOOTING Before asking for repairs, conduct your own inspection first. If you find a problem that is not explained in the manual, do not attempt to dismantle the tool. Instead, ask Makita Authorized Service Centers, always using Makita replace- ment parts for repairs. State of abnormality Probable cause (malfunction) Remedy Motor does not run. Battery cartridge is not installed. Install the battery cartridge. - Page 28 Makita Europe N.V. Jan-Baptist Vinkstraat 2, 3070 Kortenberg, Belgium Makita Corporation 3-11-8, Sumiyoshi-cho, Anjo, Aichi 446-8502 Japan 885742A221 www.makita.com 20191004...