Cisco 8000 Series Installation Manual
Ip phones with multiplatform firmware
Hide thumbs
Also See for 8000 Series:
- Prepare for installation (10 pages) ,
- Hardware installation manual (142 pages)
Table of Contents
Advertisement
Advertisement
Chapters
Table of Contents

Related Manuals for Cisco 8000 Series


Summary of Contents for Cisco 8000 Series
- Page 1 Installation Guide for Cisco IP Phones with Multiplatform Firmware First Published: 2020-08-13 Americas Headquarters Cisco Systems, Inc. 170 West Tasman Drive San Jose, CA 95134-1706 http://www.cisco.com Tel: 408 526-4000 800 553-NETS (6387) Fax: 408 527-0883...
- Page 2 Cisco has more than 200 offices worldwide. Addresses and phone numbers are listed on the Cisco website at www.cisco.com/go/offices. Cisco and the Cisco logo are trademarks or registered trademarks of Cisco and/or its affiliatesin the U.S. and other countries. To view a list of Cisco trademarks, go to this URL: www.cisco.com go...
-
Page 3: Table Of Contents
Remove 7811 Phone from the Wall Mount 19 Wall Mount Your 7821 or 7841 Phone 20 Remove 7821 or 7841 Phone from the Wall Mount 22 Installation Guide for Cisco IP Phone with Multiplatform Firmware Installation Guide for Cisco IP Phone with Multiplatform Firmware... - Page 4 Technical Details 29 C H A P T E R 5 Physical and Operating Environment Specifications 30 Phone Power Requirements 32 Power Outage 35 Power Reduction 35 Power Negotiation Over LLDP 35 Installation Guide for Cisco IP Phone with Multiplatform Firmware...
-
Page 5: Basic Installation
CHAPTER Basic Installation Connect Your Cisco IP Phone 2 Connect Your Conference Phone 7832 3 Connect Your Conference Phone 8832 4 Installation Guide for Cisco IP Phone with Multiplatform Firmware... -
Page 6: Connect Your Cisco Ip Phone
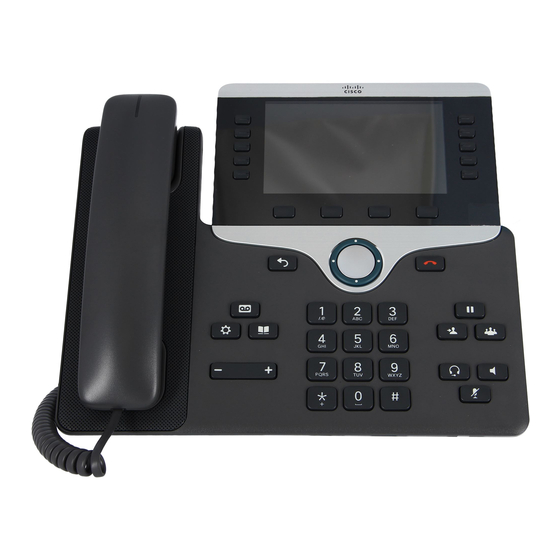
Connect and Power Up a Cisco IP Phone Connect and Power Up a Cisco IP Phone The ports on the rear panel of the phone are different on Cisco IP Phone 6800, 7800, and 8800 Series. Example: 8800 series phones Plug in the Ethernet cable if you don’t want to... -
Page 7: Connect Your Conference Phone 7832
• Power over Ethernet (PoE), which your network supplies. • Cisco IP Phone Power Injector. Connect a conference phone with Power over Connect a conference phone with Power Injector. Ethernet (PoE). Installation Guide for Cisco IP Phone with Multiplatform Firmware... -
Page 8: Connect Your Conference Phone 8832
Injector or the Power over Ethernet (PoE) Injector. For Non-PoE Models Use one of the following power sources: Connect a conference phone with the Connect a conference phone with the Non- Ethernet Injector. PoE Ethernet Injector. Installation Guide for Cisco IP Phone with Multiplatform Firmware... -
Page 9: Key Expansion Module Installation
CHAPTER Key Expansion Module Installation Install a Key Expansion Module on Your 6851 Phone 6 Install a Key Expansion Module on 8851, 8861, and 8865 Phones 7 Installation Guide for Cisco IP Phone with Multiplatform Firmware... -
Page 10: Install A Key Expansion Module On Your 6851 Phone
Plug the LAN cable into the phone and into Plug the powder adapter (if used). the LAN port. The power adapter is optional. 6851 phones support Power over Ethernet (PoE). Installation Guide for Cisco IP Phone with Multiplatform Firmware... -
Page 11: Install A Key Expansion Module On 8851, 8861, And 8865 Phones
Spine connector Remove the accessory connector covers. Firmly press the spine connector to the phone. Firmly press the key expansion module Fasten the screws into the phone. into the spine connector. Installation Guide for Cisco IP Phone with Multiplatform Firmware... -
Page 12: Connect Headsets
CHAPTER Connect Headsets Connect Cisco Headsets 521 and 522 9 Connect Cisco Headsets 561 and 562 10 Connect Cisco Headset 730 12 Installation Guide for Cisco IP Phone with Multiplatform Firmware... -
Page 13: Connect Cisco Headsets 521 And 522
Connect Headsets Connect Cisco Headsets 521 and 522 Connect Cisco Headsets 521 and 522 Cisco Headsets 521 and 522 connect to the USB port on the phone. Headset 521 Headset 522 Installation Guide for Cisco IP Phone with Multiplatform Firmware... -
Page 14: Connect Cisco Headsets 561 And 562
Connect Cisco Headsets 561 and 562 Cisco Headsets 561 and 562 Headset 562 with Standard Base Station Headset 561 with Standard Base Station Headset 561 with Multibase Station Headset 562 with Multibase Station Installation Guide for Cisco IP Phone with Multiplatform Firmware... - Page 15 Connect Headsets Connect Cisco Headsets 561 and 562 Connect the Headset by Y-cable (RJ-9 and AUX connector) Cisco IP Phones 8811, 8841, 8845, 8851, 8861, 8865, and 6871 support the connection type. 560 Series Standard Base 560 Series Multibase Connect the Headset by USB Connector Cisco IP Phones 8851, 8861, 8865, and 6871 support the connection type.
-
Page 16: Connect Cisco Headset 730
Plug the USB-C cable into the port at the bottom of the left ear cup. Connect the other end of the cable to Slide up the Power/Bluetooth switch to your phone. turn on the headset. Installation Guide for Cisco IP Phone with Multiplatform Firmware... - Page 17 Plug in the USB Adapter to your phone. Slide up the Power/Bluetooth switch to turn on the headset. Press on your phone, and select Cisco HS USB Adapter from the Bluetooth device list. Installation Guide for Cisco IP Phone with Multiplatform Firmware...
-
Page 18: Wall Mount Your Phone
Remove an 8800 Series Phone from the Wall Mount 25 Wall Mount Your 8851 or 8861 Phone with a KEM Attached 26 Remove an 8800 Phone from the Wall Mount 27 Adjust the Handset Rest 28 Installation Guide for Cisco IP Phone with Multiplatform Firmware... -
Page 19: Wall Mount Your 6800 Series Phones
2. Plug the other end of the LAN cable into the wall mount phone jack. 3. Slip the mounting holes on the phone over the wall mount pins. 4. Firmly slide the phone down into place. Installation Guide for Cisco IP Phone with Multiplatform Firmware... -
Page 20: Wall Mount Your 6841/6851/6861/6871 Phone
1. One wall bracket 2. Two M3-7L screws 3. Four M4-25L screws 4. Four drywall anchors Mount the wall bracket in the desired location. Connect the handset and push the cable into the notch. Installation Guide for Cisco IP Phone with Multiplatform Firmware... - Page 21 Attach the phone and wall bracket attach it to the rear panel of the phone. assembly to the wall. Connect the Ethernet cable and the power adapter, and then push the cables into the notches. Installation Guide for Cisco IP Phone with Multiplatform Firmware...
-
Page 22: Wall Mount Your 7800 Series Phones
5. One phone bracket 6. One 200-mm Ethernet cable Mount the wall bracket in the desired location. Plug in the handset cable, then attach the phone bracket to the rear panel of the phone. Installation Guide for Cisco IP Phone with Multiplatform Firmware... -
Page 23: Remove 7811 Phone From The Wall Mount
Remove a 7811 Phone from the Wall Mount Use a screw driver or other device to disengage the tabs. Lift the phone to release it from the wall bracket. Pull the phone toward you. Installation Guide for Cisco IP Phone with Multiplatform Firmware... -
Page 24: Wall Mount Your 7821 Or 7841 Phone
5. One wall bracket 6. One 6-inch Ethernet cable Mount the wall bracket in the desired location. Plug in the handset cable, then attach the phone bracket to the rear panel of the phone. Installation Guide for Cisco IP Phone with Multiplatform Firmware... -
Page 25: Remove 7821 Or 7841 Phone From The Wall Mount
Remove a 7821 or 7841 Phone from the Wall Mount Use a screw driver or other device to disengage the tabs. Lift the phone to release it from the wall bracket. Pull the phone toward you. Installation Guide for Cisco IP Phone with Multiplatform Firmware... -
Page 26: Wall Mount Your 7861 Phone
5. One phone bracket 6. One 200-mm Ethernet cable Mount the wall bracket in the desired location. Plug in the handset cable, then attach the phone bracket to the rear panel of the phone. Installation Guide for Cisco IP Phone with Multiplatform Firmware... -
Page 27: Remove 7861 Phone From The Wall Mount
Remove a 7861 Phone from the Wall Mount Use a screw driver or other device to disengage the tabs. Lift the phone to release it from the wall bracket. Pull the phone toward you. Installation Guide for Cisco IP Phone with Multiplatform Firmware... -
Page 28: Wall Mount Your 8800 Series Phones
8800 Series. This wall kit applies to Cisco IP Phone 8811, 8841, 8851, and 8861. The PID is CP-8800-WMK=. • Cisco IP Phone 8800 Series Wall Mount Kit with Single KEM: The kit is installed on the Cisco IP Phone 8851 and 8861 with one attached Cisco IP Phone 8800 Key Expansion Module. -
Page 29: Remove An 8800 Series Phone From The Wall Mount
Remove an 8800 Series Phone from the Wall Mount Use a screw driver or other device to disengage the tabs. Lift the phone to release it from the wall bracket. Pull the phone toward you. Installation Guide for Cisco IP Phone with Multiplatform Firmware... -
Page 30: Wall Mount Your 8851 Or 8861 Phone With A Kem Attached
6. One 6-inch Ethernet cable Plug in the handset cable, then attach the phone Mount the wall bracket in the desired location. bracket to the rear panel of the phone and KEM assembly. Installation Guide for Cisco IP Phone with Multiplatform Firmware... -
Page 31: Remove 8800 Phone From The Wall Mount
Remove an 8800 Phone from the Wall Mount Use a screw driver or other device to disengage the tabs. Lift the phone to release it from the wall bracket. Pull the phone toward you. Installation Guide for Cisco IP Phone with Multiplatform Firmware... -
Page 32: Adjust The Handset Rest
Adjust the Handset Rest Adjust the Handset Rest If your phone is wall-mounted or if the handset slips out of the cradle too easily, you may need to adjust the handset rest. 180° Installation Guide for Cisco IP Phone with Multiplatform Firmware... -
Page 33: Technical Details
CHAPTER Technical Details Physical and Operating Environment Specifications 30 Phone Power Requirements 32 Power Outage 35 Power Reduction 35 Power Negotiation Over LLDP 35 Installation Guide for Cisco IP Phone with Multiplatform Firmware... -
Page 34: Physical And Operating Environment Specifications
Technical Details Physical and Operating Environment Specifications Physical and Operating Environment Specifications The following table shows the physical and operating environment specifications for the Cisco IP Phone with Multiplatform Firmware. Table 1: Physical and Operating Specifications Specification Value and Range Operating temperature 32°... - Page 35 Note: Cables have 4 pairs of wires for a total of 8 conductors Distance requirements As supported by the Ethernet Specification, the maximum cable length between each Cisco IP Phone and the switch is assumed to be 330 feet (100 meters). Installation Guide for Cisco IP Phone with Multiplatform Firmware...
-
Page 36: Phone Power Requirements
Phone Power Requirements You can power the Cisco IP Phone with external power or with Power over Ethernet (PoE). A separate power supply provides external power. The switch can provide PoE through the phone Ethernet cable. For more information on your phone’s power requirements, consult your phone’s data sheet. - Page 37 Ethernet cable attached to the phone. accessory use. For more information, consult your phone’s data sheet. Cisco IP Phones 8861 and 8865 are PoE Class 4 devices and require a switch or line card with Class 4 capabilities to support extra features.
- Page 38 8832 Ethernet Injector and a Cisco IP Conference Phone 8832 Power Adapter See the following documents for more information about the products or solutions with Cisco IP Phones: • Cisco switches that work with Cisco IP Phones https://www.cisco.com/c/en/us/products/switches/index.html • Cisco IOS releases that support bidirectional power negotiation https://www.cisco.com/c/en/us/solutions/enterprise-networks/upoe/index.html...
-
Page 39: Power Outage
Power Save Mode. Power Negotiation Over LLDP The phone and the switch negotiate the power that the phone consumes. Cisco IP Phones operate at multiple power settings, which lowers power consumption when less power is available. After a phone reboots, the switch locks to one protocol (CDP or LLDP) for power negotiation. The switch locks to the first protocol (containing a power Threshold Limit Value [TLV]) that the phone transmits.