Zip HydroTap G4 Installation Instructions Manual
Hide thumbs
Also See for HydroTap G4:
- User manual (560 pages) ,
- Installation instructions manual (40 pages) ,
- Installation and operating instructions manual (28 pages)
Table of Contents
Advertisement
Zip HydroTap G4
Filtered
Filtered boiling and chilled drinking water for commercial kitchens and tea rooms.
boiling
801314 - Zip HydroTap BC, BCHA, AIO, Installation Instructions - Aug 2015 - V2.01
Installation Instructions
ng
and
a
a
nd
c
c
BC Commercial
Affix Model Number Label
Here
801314
®
Page 1 of 40
Advertisement
Table of Contents

Related Manuals for Zip HydroTap G4


Summary of Contents for Zip HydroTap G4
- Page 1 Filtered boiling and chilled drinking water for commercial kitchens and tea rooms. Filtered boiling BC Commercial Affix Model Number Label Here 801314 801314 - Zip HydroTap BC, BCHA, AIO, Installation Instructions - Aug 2015 - V2.01 Page 1 of 40...
- Page 2 The All-In-One Tap is a stand alone tap that may be used as an alternative to any of the above combinations. The A-I-O is compatible with the G4 underbench unit. Page 2 of 40 801314 - Zip HydroTap BC, BCHA, AIO, Installation Instructions - Aug 2015 - V2.01...
-
Page 3: Table Of Contents
6.6- Safety Sensor Calibration ..................37 Trouble Shooting End of life disposal ........................37 Trouble Shooting Table ........................ 38 Contact details ..........................40 801314 - Zip HydroTap BC, BCHA, AIO, Installation Instructions - Aug 2015 - V2.01 Page 3 of 40... -
Page 4: Installation Checklist
Flush the supply line before connecting. Turn on the water and check for leaks. Flush the filter(s). Where applicable, programme the unit to suit the customer’s requirements. Page 4 of 40 801314 - Zip HydroTap BC, BCHA, AIO, Installation Instructions - Aug 2015 - V2.01... -
Page 5: General Product Features
General Product Features Thank you for purchasing a Zip HydroTap. Please read and follow these instructions carefully to ensure safe and trouble free service. If service is required, please call 1800 460 222 What is the Zip HydroTap ? The Zip HydroTaps are electronically controlled, filtered, Boiling water and Chilled water drinking systems for kitchens and tea rooms. -
Page 6: Important Safety Instructions
Lifting Take care when lifting the Zip HydroTap unit. Some units may exceed safe lifting limits. If you feel this is beyond your personal capabilities, please seek assistance with the lift. The weights of the units are marked on the packaging. -
Page 7: Warnings And Regulatory Information
Zip HydroTaps are not to be exposed to the elements of nature Due to the process of continuous improvement, Zip Heaters reserves the right to change details mentioned in this manual, without notice. 801314 - Zip HydroTap BC, BCHA, AIO, Installation Instructions - Aug 2015 - V2.01 Page 7 of 40... -
Page 8: Major Components And Accessories
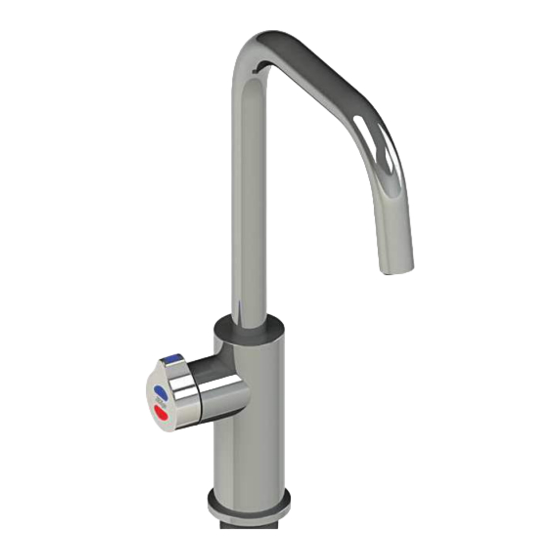
BC - 4-in-1 upgrade 1 x Quick start guide 1 x Mixer Tap for 4-In-1 and select models (with hoses) (Arc tap shown) Page 8 of 40 801314 - Zip HydroTap BC, BCHA, AIO, Installation Instructions - Aug 2015 - V2.01... -
Page 9: Technical Specification
A 160 /175 AV240/175 2x10A 450 x 470 x 335 A 240 /175 ** Add an extra 5 kg when full of water 801314 - Zip HydroTap BC, BCHA, AIO, Installation Instructions - Aug 2015 - V2.01 Page 9 of 40... -
Page 10: Before Installation, Site Requirements And Special Tools Required
/ or water softener if required. Refer to section 3 & 4, for Installation instructions. • For Zip HydroTap 160/125 &160/175 models, a 220-240Vac, 10A GPO will be required. For Zip HydroTap 240/175 models, two 220-240Vac, 10A GPOs will be required. (One GPO is for the Zip HydroTap and the other for the Booster heater). -
Page 11: Section 1 - Tap Installation Instructions 1.1 - Hydrotap Classic And Elite Tap Installation
Position the tap such that it dispenses into the sink bowl with ample clearance for a cup or tea pot. Alternative- ly, the tap could be mounted away from the sink using a Zip Font, available as an accessory. Recommended dispensing distance **... - Page 12 Apply a light smearing of silicon sealant on the underside of the spacer to ensure a watertight fit. Cut a 35mm hole in the bench / sink top. Page 12 of 40 801314 - Zip HydroTap BC, BCHA, AIO, Installation Instructions - Aug 2015 - V2.01...
-
Page 13: Installation Instructions
They must lengths supplied have a constant fall back to the unit. 801314 - Zip HydroTap BC, BCHA, AIO, Installation Instructions - Aug 2015 - V2.01 Page 13 of 40... -
Page 14: Hydrotap Arc/Cube Installation
Secure the tap in position with the metal washer and nut. Fit the tube kit, as supplied. Plastic spring Plastic spring clip clip Upper locating positions Dimples Page 14 of 40 801314 - Zip HydroTap BC, BCHA, AIO, Installation Instructions - Aug 2015 - V2.01... - Page 15 (See table on Page 11 ) O-RING BENCH TOP LOWER Ø35mm RUBBER WASHER WASHER Cut a 35mm hole in the bench / sink top. 801314 - Zip HydroTap BC, BCHA, AIO, Installation Instructions - Aug 2015 - V2.01 Page 15 of 40...
-
Page 16: Mixer Tap Installation
fi tted in the cold water supply line, from the isolation valve tee Blue band Mixer IN piece, to the mixer tap. (See Fig. 1.13) Page 16 of 40 801314 - Zip HydroTap BC, BCHA, AIO, Installation Instructions - Aug 2015 - V2.01... - Page 17 • Affix the three hoses to the tap. Match the hose colours to the coloured bands on the copper extension tubes. (See diag. 1.11) Arc Mixer Tap Mixer tap Sink top O-ring Lower seal Washer Securing nut 801314 - Zip HydroTap BC, BCHA, AIO, Installation Instructions - Aug 2015 - V2.01 Page 17 of 40...
- Page 18 COLD isolation valve Tee piece (Not supplied) (Supplied) Note: The tube lengths are matched to the pumps performance and therefore CANNOT be lengthened Page 18 of 40 801314 - Zip HydroTap BC, BCHA, AIO, Installation Instructions - Aug 2015 - V2.01...
-
Page 19: All-In-One Tap With Mains Installation
(See fig. 1.18) • Test for leaks after all the connections have been secured. 801314 - Zip HydroTap BC, BCHA, AIO, Installation Instructions - Aug 2015 - V2.01 Page 19 of 40... - Page 20 From Mixer BLUE to Chiller RED to Boiling connection connection RED to Boiling BLUE to Chiller connection connection CLEAR to vent Page 20 of 40 801314 - Zip HydroTap BC, BCHA, AIO, Installation Instructions - Aug 2015 - V2.01...
- Page 21 External HOT & COLD Tee piece isolation valves (Supplied) (Not supplied) 801314 - Zip HydroTap BC, BCHA, AIO, Installation Instructions - Aug 2015 - V2.01 Page 21 of 40...
- Page 22 Restrictaflow valve Note: The All-In-One vented taps require a Zip Restrictafl ow valve and Tee piece, as supplied, to be fi tted in the cold water supply line, from the isolation valve (Not supplied), to the mixer tap. (See diagrams) Page 22 of 40 801314 - Zip HydroTap BC, BCHA, AIO, Installation Instructions - Aug 2015 - V2.01...
-
Page 23: Section 2- Ventilation
**Note: Inlet and outlet vents should be separated by a Min 100mm, to avoid hot air recirculation. IMPORTANT: See section 5.3 for clearances. 801314 - Zip HydroTap BC, BCHA, AIO, Installation Instructions - Aug 2015 - V2.01 Page 23 of 40... - Page 24 (Option 1) or on the upper side of the cupboard (Option 2). Side outlet vent (Option 2) Front inlet vent Door outlet Warm Air OUT louvre (Option 1) Cool Air IN Page 24 of 40 801314 - Zip HydroTap BC, BCHA, AIO, Installation Instructions - Aug 2015 - V2.01...
-
Page 25: Install The Booster Heater (If Required) Section 3 - Booster Heater Installation 3.1- Booster Heater Specifications And Installation
Elect fl ex and plug (black) - 1 meter length (with 90º Aus- tralian plug) Fixed Flow Rate L/min Minimun water pressure 801314 - Zip HydroTap BC, BCHA, AIO, Installation Instructions - Aug 2015 - V2.01 Page 25 of 40... - Page 26 Note: Remove the backing plate for wall mounting Tilt Forward Lift UP Take care not to break the lower Release clips when removing or installing the Booster Installation Page 26 of 40 801314 - Zip HydroTap BC, BCHA, AIO, Installation Instructions - Aug 2015 - V2.01...
- Page 27 ‘Bypass Out’ fitting on the Zip HydroTap, to the water inlet of the booster unit (Marked Blue) and from the outlet of the booster unit (Marked Red) to the ‘Bypass IN’ fitting on the Zip HydroTap unit. Avoid exerting any mechanical pressure on the appliance. This can be achieved by applying a spanner on the flats of the inlet and outlet connections when tightening the braided hose connectors.
-
Page 28: Section 4- Filter / Softener Installation
Set the appropriate selection on the Internal Filter Bypass valve located at the rear of the unit in accordance with Sections 5.1 and 5.2. *Min. 80mm Clearance Page 28 of 40 801314 - Zip HydroTap BC, BCHA, AIO, Installation Instructions - Aug 2015 - V2.01... -
Page 29: Section 5 - Undersink Unit Installation
The diverter bypass valve allows the user to choose to have the boiling water filtered either by the internal or by an optional external filter. This diverter valve is located at the rear panel of the Zip HydroTap undersink unit on the filter door side, see the image below. -
Page 30: Model Bc 160/125 And Bc 160/175
The tube lengths are matched to the pumps performance and therefore CANNOT be lengthened : Not required for standard BC HydroTap models. Page 30 of 40 801314 - Zip HydroTap BC, BCHA, AIO, Installation Instructions - Aug 2015 - V2.01... -
Page 31: Model Bc 240/175
The tube lengths are matched to the pumps performance and therefore CANNOT be lengthened : Not required for standard BC HydroTap models 801314 - Zip HydroTap BC, BCHA, AIO, Installation Instructions - Aug 2015 - V2.01 Page 31 of 40... -
Page 32: Model Aio Mains
Note: to activate the filter, flush at least 10L of water through the filter before connecting to a softener or to a Booster heater. : Not required for AIO mains pressure HydroTap. Page 32 of 40 801314 - Zip HydroTap BC, BCHA, AIO, Installation Instructions - Aug 2015 - V2.01... -
Page 33: Model Aio Vented
The tube lengths are matched to the pumps performance and therefore CANNOT be lengthened Note: Take time to consider hose lengths when determining the mounting positions for the options 801314 - Zip HydroTap BC, BCHA, AIO, Installation Instructions - Aug 2015 - V2.01 Page 33 of 40... -
Page 34: Model 4-In-1 Vented
(supplied) External COLD isolation valve (Not Supplied) Note: The tube lengths are matched to the pumps performance and therefore CANNOT be lengthened Page 34 of 40 801314 - Zip HydroTap BC, BCHA, AIO, Installation Instructions - Aug 2015 - V2.01... -
Page 35: Section 6 - Commissioning
NOTE: For any subsequent fi lter changes or any operational procedures, please refer to the HydroTap user guide, located inside the fi lter housing access door. 801314 - Zip HydroTap BC, BCHA, AIO, Installation Instructions - Aug 2015 - V2.01 Page 35 of 40... -
Page 36: Flow Calibration
7. Dispense boiling water for 30secs and check the Booster outlet hose is warm when the boiling water HydroTap Booster Screen tank is replenishing. Page 36 of 40 801314 - Zip HydroTap BC, BCHA, AIO, Installation Instructions - Aug 2015 - V2.01... -
Page 37: Safety Sensor Calibration
In order to help preserve our environment we ask that you dispose of this product correctly. Please contact your local city council for collection centre details. 801314 - Zip HydroTap BC, BCHA, AIO, Installation Instructions - Aug 2015 - V2.01 Page 37 of 40... -
Page 38: Trouble Shooting Table
Flow Sensor Fault Internal fault Call Zip Service Call an electrician, a plumber, or Zip for a free call in Australia on 1800-638-633 for assistance, service, spare parts or enquiries. Page 38 of 40 801314 - Zip HydroTap BC, BCHA, AIO, Installation Instructions - Aug 2015 - V2.01... - Page 39 Notes 801314 - Zip HydroTap BC, BCHA, AIO, Installation Instructions - Aug 2015 - V2.01 Page 39 of 40...
-
Page 40: Contact Details
AU675601, AU637412, AU635979, GB0422305, GB2065848, US4354049, US5103859, US5099825 and SA2006/08043. Other patents are in force and patent applications are pending. Page 40 of 40 801314 - Zip HydroTap BC, BCHA, AIO, Installation Instructions - Aug 2015 - V2.01...