
Related Manuals for Breville LMC600


Summary of Contents for Breville LMC600
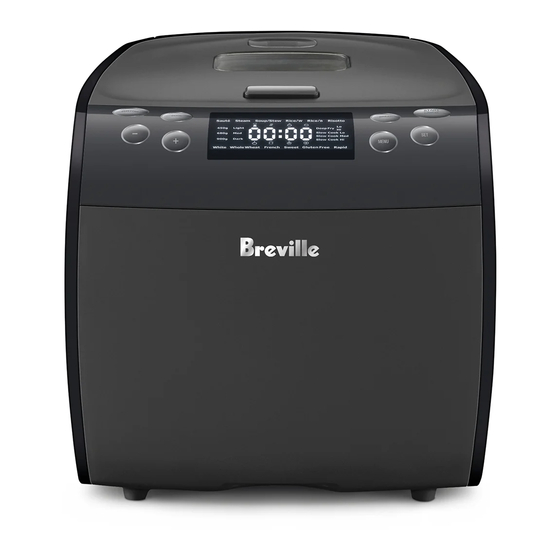
- Page 1 Multi Cooker 9 in 1 Instruction Book - LMC600 LMC600_ANZ_IB_D19.indd 1 5/9/19 4:06 pm...
-
Page 2: Table Of Contents
RECOMMENDS the power plug of this multi SAFETY FIRST cooker. • Always ensure the multi At Breville we are very safety conscious. We design and cooker removable parts and manufacture consumer accessories are cleaned, dried products with the safety of you,... - Page 3 of the power cord. Vibration during the kneading cycles may cause the multi • Take care to avoid spillage on cooker to move slightly. the connector. • Do not operate the multi • To avoid an electrical overload, cooker on a sink drain board. it is recommended that no other appliances are plugged •...
- Page 4 bread pan placed inside the and/or oil. Improper use multi cooker housing. may result in injury. When operating this multi cooker, • Ensure the removable ensure the lid is properly cooking bowl or bread pan assembled and locked into is correctly positioned in the position before use unless multi cooker base before you stated otherwise.
- Page 5 • The use of any accessory affected by heat. attachments not recommended by Breville • To prevent scratching the may cause injuries. non-stick surface of the removable cooking bowl or •...
- Page 6 cooking bowl or bread pan Special Safeguards on a gas burner or electric Information for Slow hotplate. Cooking Function • Do not use harsh abrasives, • When using a slow cooking caustic cleaners or oven function (Lo, Med or Hi), cleaners when cleaning this ensure the cooking bowl is multi cooker.
- Page 7 • Do not fill oil and foodstuffs and reduce the volume of exceeding the maximum ingredients in the basket. MAX 2 L mark found on • If oil overflows into the baking the inside of the cooking chamber, switch the multi bowl.
- Page 8 • Do not let the power cord appliance becomes damaged hang over the edge of a bench in any way. Return the entire or table, touch hot surfaces or appliance to the nearest authorized Breville service LMC600_ANZ_IB_D19.indd 8 5/9/19 4:06 pm...
- Page 9 • Any maintenance other electronic componentry. than cleaning should be performed at an authorised • Always turn the appliance Breville Service Centre to the OFF position, switch off at the power outlet and • This appliance is for unplug at the power outlet household use only.
- Page 10 Turn the unit off at the power point and contact Breville Customer Service Centre for examination and/ or repair. WARNING Steam vents are very hot during operation.
-
Page 11: Components
Components A. Multi cooker body Q. Soup ladle B. Display screen R. Rice serving spoon C. Control panel S. Deep fry basket with removable handle D. Lid opening button T. Cooking bowl E. Lid U. Bread pan F. Viewing window V. - Page 12 LMC600_ANZ_IB_D19.indd 12 5/9/19 4:06 pm...
-
Page 13: Control Panel
Control Panel A. Custom Button E. Set Button B. Cook Button F. Menu Button C. Bread Button G. - & + Buttons D. Start/Cancel Button LMC600_ANZ_IB_D19.indd 13 5/9/19 4:06 pm... -
Page 14: Display Screen
Display Screen A. 6 Cooking Functions Delayed Start B. Loaf Size & Crust Colour Pre-heat C. 7 Bread & 6 Non-Bread Functions Knead D. Slow Cook (Lo, Med, Hi) Rest E. Deep Fry (Lo & Hi) Proof Bake Keep Warm Completed LMC600_ANZ_IB_D19.indd 14 5/9/19 4:06 pm... -
Page 15: Assembly
Assembly BEFORE FIRST USE 8. The screen will light up displaying the functions. The multi cooker is in standby, Remove all promotional labels and any ready for programming. packaging materials from the multi cooker. Ensure that you have all parts and accessories listed in the components list before discarding NOTE the packaging. -
Page 16: Functions
Functions YOUR BREVILLE MULTI COOKER 5. The chosen function will continue to flash until the SET button is pressed. This multi cooker is a versatile cooker, with multiple functions that can replace up to 9 6. The display screen will dim if the control panel is not touched after one minute. - Page 17 COOKING FUNCTIONS 10. To cancel the function at any time during operation, press and hold the START/ The COOK functions on this multi cooker CANCEL button. include: Sauté, Steam, Soup/Stew, White Rice, Brown Rice, Risotto, Deep Fry (Hi & Lo) and Slow NOTE Cook (Hi, Med, Lo).
- Page 18 7. Once the keep warm time elapses, the unit NOTE will beep 4 times and the COMPLETED icon will display. • Monitor the water level and do not let the removable cooking bowl boil dry during 8. To cancel the function at any time during steaming.
- Page 19 8. To cancel the function at any time during 8. When the time has elapsed, the unit will beep operation or before keep warm commences, 4 times. The KEEP WARM icon will display press and hold the START/CANCEL button. and keep warm will operate for up to 4 hours. 9.
- Page 20 2. Close the lid for faster preheating. each use. Refer to the Care, Cleaning & Storage section in this booklet for more details. 3. Press the COOK button. 4. Press the MENU button until the required SLOW COOK DEEP FRY function flashes on the display This multi cooker has the option of using the screen.
- Page 21 cooking times. • If the food was completely cooked before the power went out, the food should remain safe for up to two hours. Temperature Level Default Time* 8 hours WARNING Medium 6 hours High humidity, altitude, liquid and food High 4 hours temperature, ingredients, ingredient size...
- Page 22 At Step 1, to select the SINGLE ELEMENT, 3. Press the SET button to confirm the program number and to move to Step 1; Element. The press the COOK button. The single element screen will display ‘d1’. operates the bottom element only and is represented on the display as the letter ‘d’.
- Page 23 HOW TO USE A SAVED RECIPE 5. Press the MENU button (the screen will display d2). 1. Press the CUSTOM button and the unit will 6. Press the COOK button to choose only the display Program 1 (P01). bottom heating element (the screen will display 2.
- Page 24 10. Add the tinned tomatoes, beef stock and 1. Place the bread pan on a dry, level surface. mixed herbs. Season with salt and pepper. 2. If the kneading blade is required, align the 11. Close the lid. semi-circle on the top of the kneading blade 12.
- Page 25 FOR WHITE, WHOLE WHEAT, 7. During bread baking, icons for the various stages will display as they operate on the FRENCH, SWEET, GLUTEN FREE display screen including: Preheating, Dough, AND RAPID BREAD FUNCTIONS Pause, Dough Proofing, Baking. 1. Press the MENU button until the preferred function flashes on the display screen.
- Page 26 HOMEMADE 4. Once programming is complete, press the SET button to confirm. The HOMEMADE bread function allows you 5. Press the START/CANCEL button to to manually change the bread baking times commence. at each step of the bread making process to 6.
- Page 27 CAKE & BAKE 5. Once the keep warm time elapses, the unit will beep 4 times and the COMPLETED icon will display. 6. To cancel the function at any time during operation or before keep warm commences, press and hold the START/CANCEL button. DOUGH, PASTA DOUGH, YOGHURT AND JAM Both the CAKE and BAKE functions are...
- Page 28 JAM FUNCTION 5. When the time has elapsed, the unit will beep 4 times to indicate that the function has finished and the COMPLETED icon NOTE will display. The JAM function is ideal for making both sweet and savoury jams from fresh fruits and NOTE vegetables.
-
Page 29: Recipes
RECIPES WHITE BREAD FRENCH BREAD INGREDIENTS 450g 680g 900g INGREDIENTS 450g 680g 900g Water 180ml 260ml 340ml Water 195ml 300ml 340ml 25ml 30ml 35ml 10ml 15ml Salt 1 tsp. 1½ tsp. 2 tsp. Salt 1 tsp. 1 ½ tsp. 2 tsp. Sugar 1 tbsp. - Page 30 NATURAL YOGHURT INGREDIENTS Full cream milk 1 litre Natural Yoghurt L cup Full cream milk powder Method 1. Sterilise all equipment used in making yoghurt. 2. Mix all ingredients together. Wipe any spills from outside of pan. 3. Insert the bread pan, without the kneading blade, into position in the baking chamber and close the lid.
-
Page 31: Cooking Guide
COOKING GUIDE COOKING Specifications Function Cooking Default Time Cooking Time Keep Warm Preheat Temperature Range Sauté 180°C 15 minutes 0:01–1:00 Steam 100°C 15 minutes 0:05–2:00 Soup/Stew 98–99°C 30 minutes 0:05–8:00 4 hours Rice/W 100°C 4 hours Rice/B 100°C 4 hours Risotto 100°C 20 minutes... - Page 32 Type Crust Baking Size Preheat Total Extras Keep Warm Delay Time Temperature French Light 120°C 450g 3:45 1 hour 15:00 680g 3:50 1 hour 15:00 900g 3:55 1 hour 15:00 Medium 130°C 450g 3:50 1 hour 15:00 680g 3:55 1 hour 15:00 900g 4:00...
- Page 33 COOKING GUIDE WHITE & BROWN RICE COOKING GUIDE Cups Uncooked Cups Cold Tap Water Cups Cooked Rice Cooking Time on White Function White Rice (Approx) (Approx) 25–35 minutes 30–35 minutes 30–40 minutes 35–40 minutes 40–45 minutes Cups Uncooked Cups Cold Tap Water Cups Cooked Rice Cooking Time on Brown Function Brown Rice...
- Page 34 THE DEEP FRY GUIDE Food Low/High Time (Minutes) Spring rolls/Samosas (frozen) High 3–5 minutes Meat balls (frozen) 4–6 minutes Fries (thick cut frozen) High 4–6 minutes Fries (thin cut frozen) High 4–6 minutes Fries (fresh) 10–12 minutes Donuts 2–4 minutes Battered fish (fresh) High 3–5 minutes...
-
Page 35: Care, Cleaning & Storage
WARNING Care, Cleaning & Storage • Do not immerse the multi cooker housing, power cord or power plug in water or any other liquid as this may cause electrocution. Take extra care when cleaning and not to allow Before cleaning, ensure the multi cooker is water or cleaning fluids to seep under the returned to standby mode by pressing and buttons or LCD screen on the control panel. - Page 36 The removable cooking bowl and deep fry 4. Remove the steam valve from the lid by pulling basket are dishwasher safe. Breville does not up and away. recommend that any other parts of your multi 5. Wash all removable parts and accessories...
-
Page 37: Troubleshooting Guide
Icon <E02> appears on the There is a problem with the circuit. Switch the unit off and contact the Breville Customer Service Centre. display screen, followed by repeated beeps. Icon <E03> appears on the There is a problem with the circuit. -
Page 38: Custom Program Table
Custom Program Table Custom Recipe Cooking d or C Temperature°C Time Program Stage (0–4 hours) Number = Bottom element; Temp : 40–160°C = Dual element; Temp: 70–160°C Example Spaghetti Bolognese 160°C 20 minutes 100°C 30 minutes 95°C 1 hour 90°C 1 hour LMC600_ANZ_IB_D19.indd 38 5/9/19 4:06 pm... - Page 39 Custom Recipe Cooking d or C Temperature°C Time Program Stage (0–4 hours) Number = Bottom element; Temp : 40–160°C = Dual element; Temp: 70–160°C LMC600_ANZ_IB_D19.indd 39 5/9/19 4:06 pm...
- Page 40 Breville, the Breville logo, Master Every Moment and the Multi cooker are registered trademarks of Breville Pty. Ltd. A.B.N. 98 000 092 928. Copyright Breville Pty. Ltd. 2019. Due to continued product improvement, the products illustrated/photographed in this booklet may vary slightly from the actual product.