Table of Contents
Advertisement
Quick Links
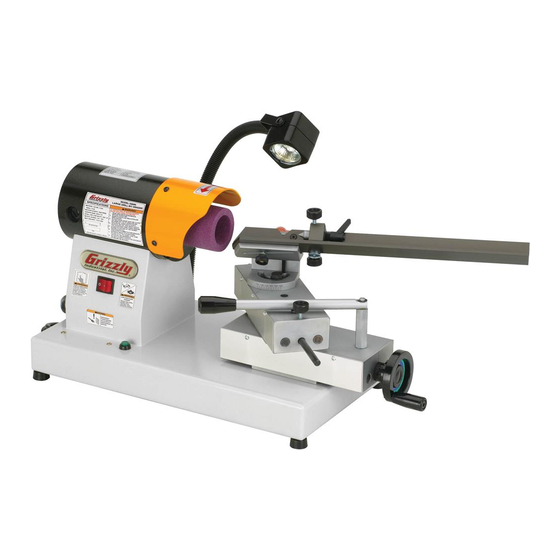
MODEL G0686
LARGE DRILL BIT GRINDER
OWNER'S MANUAL
(For models manufactured since 01/15)
COPYRIGHT © MAY, 2009 BY GRIZZLY INDUSTRIAL, INC., REVISED MARCH, 2019 (MN)
WARNING: NO PORTION OF THIS MANUAL MAY BE REPRODUCED IN ANY SHAPE
OR FORM WITHOUT THE WRITTEN APPROVAL OF GRIZZLY INDUSTRIAL, INC.
#TS11442 PRINTED IN TAIWAN
V2.03.19
Advertisement
Table of Contents

Related Manuals for Grizzly G0686


Summary of Contents for Grizzly G0686
- Page 1 OWNER'S MANUAL (For models manufactured since 01/15) COPYRIGHT © MAY, 2009 BY GRIZZLY INDUSTRIAL, INC., REVISED MARCH, 2019 (MN) WARNING: NO PORTION OF THIS MANUAL MAY BE REPRODUCED IN ANY SHAPE OR FORM WITHOUT THE WRITTEN APPROVAL OF GRIZZLY INDUSTRIAL, INC.
- Page 2 This manual provides critical safety instructions on the proper setup, operation, maintenance, and service of this machine/tool. Save this document, refer to it often, and use it to instruct other operators. Failure to read, understand and follow the instructions in this manual may result in fire or serious personal injury—including amputation, electrocution, or death.
-
Page 3: Table Of Contents
Table of Contents INTRODUCTION ..........2 SECTION 6: MAINTENANCE ......28 Contact Info............ 2 Schedule ............28 Machine Description ........2 Cleaning & Protecting ........28 Manual Accuracy ........... 2 Wheel Dressing..........28 Identification ........... 3 Wheel Storage ..........28 Controls &... -
Page 4: Introduction
Machine Description and it helps us determine if updated documenta- tion is available for your machine. The Model G0686 is designed to sharpen the cut- ting edges and point angle of 2-flute, twisted large drill bits from ⁄... -
Page 5: Identification
Pivot (1 of 2) Handle * The tailstock, bit carrier, and jig base Pivot Base are components of the jig assembly. Figure 1. Model G0686 identification. To reduce your risk of serious injury, read this entire manual BEFORE using machine. -
Page 6: Controls & Components
Tailstock: Keeps the bit from moving away from the wheel during operation. Angle Scale: Displays the combined angle of both bit point angles that will be cut. Bit Carrier: Keeps the bit steady with a V-type trough configuration. Model G0686 (Mfd. Since 01/15) -
Page 7: Machine Data Sheet
Drill Bit Capacity ..............................5/8 – 2 in. Miter Angle ..............................50 – 150 deg. Grinder Wheel Sizes ..............60mm O.D. x 35mm I.D. x 65mm W. x M14-1.5 Bore ..................... 70mm O.D. x 54mm I.D. x 65mm W. x M14-1.5 Bore Model G0686 (Mfd. Since 01/15) - Page 8 ISO 9001 Factory ................................... No Certified by a Nationally Recognized Testing Laboratory (NRTL) ..................No Features: (Title Case) Spiral Point Grinding Capability Prism Clamp for Drill Grinding Calibrated Infeed Handwheel 2-Axis Adjustable Center 16" Drill Tray LED Work Light Model G0686 (Mfd. Since 01/15)
-
Page 9: Section 1: Safety
Never operate under the influence of drugs or injury or blindness from flying particles. Everyday alcohol, when tired, or when distracted. eyeglasses are NOT approved safety glasses. Model G0686 (Mfd. Since 01/15) - Page 10 EXPERIENCING DIFFICULTIES. If at any time debris. Make sure they are properly installed, you experience difficulties performing the intend- undamaged, and working correctly BEFORE ed operation, stop using the machine! Contact our operating machine. Technical Support at (570) 546-9663. Model G0686 (Mfd. Since 01/15)
-
Page 11: Additional Safety For Drill Bit Grinders
Perform routine inspections and all necessary secured to the base, and all locks are tight before maintenance, as indicated in owner’s manual. turning the machine ON. Never operate machine with damaged or worn parts that can break during operation. Model G0686 (Mfd. Since 01/15) -
Page 12: Section 2: Power Supply
-10- Model G0686 (Mfd. Since 01/15) - Page 13 Two-prong outlets do not meet the grounding requirements for this machine. Do not modify or use an adapter on the plug provided—if it will not fit the outlet, have a qualified electrician install the proper outlet with a verified ground. -11- Model G0686 (Mfd. Since 01/15)
-
Page 14: Section 3: Setup
Needed for Setup IMPORTANT: Save all packaging materials until you are completely satisfied with the machine and have resolved any issues between Grizzly or the shipping agent. You MUST have the original pack- The following items are needed, but not included, aging to file a freight claim. -
Page 15: Hardware Recognition Chart
Hardware Recognition Chart USE THIS CHART TO MATCH UP HARDWARE DURING THE INVENTORY AND ASSEMBLY PROCESS. Flat Head Screw -13- Model G0686 (Mfd. Since 01/15) -
Page 16: Cleanup
Repeat Steps 2–3 as necessary until clean, then coat all unpainted surfaces with a quality metal protectant to prevent rust. -14- Model G0686 (Mfd. Since 01/15) -
Page 17: Site Considerations
Only install in an Shadows, glare, or strobe effects that may distract access restricted location. or impede the operator must be eliminated. 18" 33" Figure 6. Minimum working clearances. -15- Model G0686 (Mfd. Since 01/15) -
Page 18: Assembly
Positioning Pin base. Figure 10. Aligning the jig positioning pin over Pivot Base the mounting hole in the pivot base. Hex Bolt & Flat Washer Figure 8. Jig mounting hex bolt and flat washer. -16- Model G0686 (Mfd. Since 01/15) -
Page 19: Test Run
BEFORE operating the machine again. The Troubleshooting table in the SERVICE section of this manual can help. The Test Run consists of verifying the following: 1) The motor powers up and runs correctly. -17- Model G0686 (Mfd. Since 01/15) -
Page 20: Section 4: Operations
With the bit properly positioned on the jig, ects. Regardless of the content in this sec- make sure the pivot base and jig can move tion, Grizzly Industrial will not be held liable freely and easily through the full required for accidents caused by lack of training. -
Page 21: Drill Bit Terminology
Chisel Diameter Edge • Do not overtighten the nut when mounting the wheel. • Do not leave the wheel mounted when Figure 13. Typical 2-flute, twisted drill bit—front machine is not in use. view. -19- Model G0686 (Mfd. Since 01/15) -
Page 22: Wheel Inspection
“ping” sound in each of these spots. A damaged wheel will respond with a dull thud that has no clear tone. If you determine from the ring test that the wheel is damaged, DO NOT use it! -20- Model G0686 (Mfd. Since 01/15) -
Page 23: Grinding Wheels
Thread the wheel onto the motor arbor and only hand-tighten it. Note: The force of the bit against the coun- terclockwise rotation of the wheel will keep it safely on the arbor. -21- Model G0686 (Mfd. Since 01/15) -
Page 24: Grinding Cutting Edge & Point Angle
1" beyond the carrier, as shown in Height Figure 20. Lock Lever Scale Bottom of Bit Carrier Figure 18. Bit carrier height scale and height lock lever. 1" Figure 20. Correctly positioning the bit on the carrier. -22- Model G0686 (Mfd. Since 01/15) - Page 25 Figure 24. Height Lock Lever Cutting Edges Horizontal Tailstock Center Point Figure 24. Bit rotated so that the cutting edges are horizontal. Figure 22. Tailstock in the correct position against the center-drilled shank. -23- Model G0686 (Mfd. Since 01/15)
- Page 26 To reduce the risk of personal injury and property damage, ALWAYS make sure the drill bit is properly secured with the tailstock and flute pin before operation. -24- Model G0686 (Mfd. Since 01/15)
- Page 27 Step 13. ⁄ " Safe Clearance Figure 31. Bit center point touching the wheel inside edge. Figure 30. Drill bit outer edge slightly past the inside cutting edge of the wheel. -25- Model G0686 (Mfd. Since 01/15)
- Page 28 Keep a firm cutting edges and point angles of the bit. grip on the drill bit in the jig and position your hands safely away from the wheel dur- ing operation. -26- Model G0686 (Mfd. Since 01/15)
-
Page 29: Section 5: Accessories
Model H5891 ¼ Carat. serious personal injury or machine damage. Model H5892 ¾ Carat. To reduce this risk, only install accessories recommended for this machine by Grizzly. NOTICE Refer to our website or latest catalog for additional recommended accessories. Basic Eye Protection T20501—Face Shield Crown Protector 4"... -
Page 30: Section 6: Maintenance
Insert the new bulb by gently pressing it into the housing until it is fully seated. Cleaning & Protecting Cleaning the Model G0686 is relatively easy. Vacuum excess debris, and wipe off the remaining dust with a dry cloth. -28-... -
Page 31: Lubrication
Slides Rod Slot Pivot Points Leadscrew Figure 37. Leadscrew and slide lubrication. Figure 36. Pivot rod lubrication. -29- Model G0686 (Mfd. Since 01/15) -
Page 32: Section 7: Service
1. Reduce pressure and feed rate. clogs quickly, grit 2 Bad wheel dress. 2. Properly dress the wheel surfaces. falls off. 3. Wheel stored moist extreme 3. Replace wheel; store wheels in dry, moderate temperature environment. temperature environment. -30- Model G0686 (Mfd. Since 01/15) -
Page 33: Motor Brushes
Note: As you remove the brush assembly, make note of the orientation of the carbon tip so that if it is still good you can re-install it the same way. Brush Assembly Figure 38. Removing the front motor brush assembly. -31- Model G0686 (Mfd. Since 01/15) -
Page 34: Section 8: Wiring
Technical Support at (570) 546-9663. The photos and diagrams included in this section are best viewed in color. You can view these pages in color at www.grizzly.com. -32- Model G0686 (Mfd. Since 01/15) -
Page 35: Wiring Diagram
Wiring Diagram Neutral 110 VAC 5-15 Plug Ground ON/OFF Lamp Switch Switch 6A05-GW Diodes Motor Lamp Figure 39. Model G0686 wiring. READ ELECTRICAL SAFETY -33- Model G0686 (Mfd. Since 01/15) ON PAGE 32! -
Page 36: Section 9: Parts
SECTION 9: PARTS We do our best to stock replacement parts when possible, but we cannot guarantee that all parts shown are available for purchase. Call (800) 523-4777 or visit www.grizzly.com/parts to check for availability. Base REF PART # DESCRIPTION... -
Page 37: Motor & Wheel
MOTOR BRUSH HOUSING P0686019 WHEEL GUARD P0686024 MOTOR BRUSH P0686020 BUTTON HD CAP SCR M5-.8 X 12 P0686025 MOTOR BRUSH CAP BUY PARTS ONLINE AT GRIZZLY.COM! -35- Model G0686 (Mfd. Since 01/15) Scan QR code to visit our Parts Store. -
Page 38: Jig Assembly
SPECIAL SET SCREW M4-.7 X 32 P0686034 LOCK LEVER M8-1.25 X 25 P0686044 FLAT WASHER 6MM P0686035 FLAT WASHER 8MM P0686045 KNURLED KNOB M6-1 X 30 BUY PARTS ONLINE AT GRIZZLY.COM! -36- Model G0686 (Mfd. Since 01/15) Scan QR code to visit our Parts Store. -
Page 39: Pivot Base & Carriage
SPECIAL HEX NUT M10-1.5 P0686069 PIVOT BASE P0686057 PHLP HD SCR M4-.7 X 10 P0686070 CARRIAGE LEADSCREW P0686058 SLIDE AXIS SCREW M4-.7 X 10 BUY PARTS ONLINE AT GRIZZLY.COM! -37- Model G0686 (Mfd. Since 01/15) Scan QR code to visit our Parts Store. -
Page 40: Labels & Cosmetics
Safety labels help reduce the risk of serious injury caused by machine hazards. If any label comes off or becomes unreadable, the owner of this machine MUST replace it in the original location before resuming operations. For replacements, contact (800) 523-4777 or www.grizzly.com. BUY PARTS ONLINE AT GRIZZLY.COM! -38- Model G0686 (Mfd. - Page 42 FOLD ALONG DOTTED LINE Place Stamp Here GRIZZLY INDUSTRIAL, INC. P.O. BOX 2069 BELLINGHAM, WA 98227-2069 FOLD ALONG DOTTED LINE Send a Grizzly Catalog to a friend: Name_______________________________ Street_______________________________ City______________State______Zip______ TAPE ALONG EDGES--PLEASE DO NOT STAPLE...
-
Page 43: Warranty & Returns
WARRANTY & RETURNS Grizzly Industrial, Inc. warrants every product it sells for a period of 1 year to the original purchaser from the date of purchase. This warranty does not apply to defects due directly or indirectly to misuse, abuse, negligence, accidents, repairs or alterations or lack of maintenance. - Page 44 REVISED...